Table of Contents
Advertisement
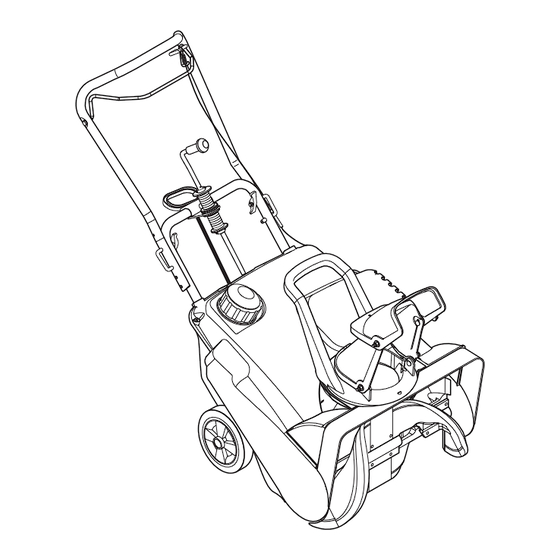
Sno-Thro
Owner/Operator Manual
Models
938017 - SS522EC
938018 - SS722EC
938019 - SS522
938300 - SS522C
Transfer
model &
serial number
label from
product
registration
here.
Coller l'autocollant du
modèle et du numéro de
série dans cet encadré.
Transferir aquí la etiqueta
del modelo y número de
serie del registro del
producto.
5758436 and 5966846
ENGLISH
FRANÇAIS
ESPAÑOL
00177400B 10/04
Supersedes 00177400, A
Printed in USA
U.S. Patents
Advertisement
Table of Contents

Related Manuals for Ariens Sno-Thro 938017


Summary of Contents for Ariens Sno-Thro 938017
- Page 1 Sno-Thro Owner/Operator Manual Models 938017 - SS522EC 938018 - SS722EC 938019 - SS522 938300 - SS522C U.S. Patents 5758436 and 5966846 ENGLISH FRANÇAIS ESPAÑOL Transfer Coller l’autocollant du model & modèle et du numéro de serial number série dans cet encadré. label from Transferir aquí...
- Page 2 ZGODNOŚCI MODELU WYDANE PRZEZ PRODUCENTA We the undersigned, ARIENS COMPANY, certify that: – Nous, soussignés ARIENS COMPANY, certifions que : – Der Unterzeichnete, ARIENS COMPANY, bescheinigt, dass: – La sottoscritta società, ARIENS COMPANY, certifica che: – Nosotros, los abajo firmantes, ARIENS COMPANY, certificamos que: –...
- Page 3 Philip J. Smucker: 6/27/2003 Manager of Product Conformance (Keeper of Date – Technical File) – Responsable de la conformité Data – Signature – Firma – des produits (en possession du document Datum – Unterschrift – Signatur – technique) – Leiter der Produktübereinstimmung Fecha –...
-
Page 4: Table Of Contents
PRODUCT REGISTRATION The contents will provide you with safety The Ariens dealer must register the product instructions for the safe use of your unit at the time of purchase. Registering the during normal operation and maintenance. -
Page 5: Safety
6. Fill out a Product Registration Card and 1. Read and understand all assembly return the card to the Ariens Company or instructions in this manual. If you do not go to www.ariens.com. understand or have difficulty following the instructions, contact your nearest Ariens Dealer for assistance. - Page 6 REQUIRED OPERATOR SAFETY DECALS AND TRAINING LOCATIONS Original purchaser of this unit was instructed ALWAYS replace missing or damaged Safety by the seller on safe and proper operation. If Decals. Refer to figure 2 below for Safety unit is to be used by someone other than Decal locations.
- Page 7 SAFETY RULES DO NOT wear loose clothing or jewelry and tie back hair that may get caught in rotating Read, understand, and follow all safety parts. practices in Owner/Operator Manual before Protect eyes, face and head from objects that beginning assembly or operating. Failure to may be thrown from unit.
- Page 8 Use only approved extension cords and DO NOT park unit on a slope unless absolutely necessary. When parking on a receptacles when starting units equipped with electric starter. DO NOT connect electric slope always block the wheels. starter cord to any wiring system that is not a ALWAYS shut off engine, remove key, and three-wire grounded system.
-
Page 9: Assembly
ALWAYS keep protective structures, guards, Shut off fuel and allow engine to cool and panels in good repair, in place and completely before storing in closed area or securely fastened. NEVER modify or remove covering unit. safety devices. For extended storage, clean unit thoroughly. DO NOT change engine governor settings or See Engine Manual for proper storage. - Page 10 Discharge Chute Crank Assembly (938017, 018, 300) 1. Remove nut from bolt that holds recoil starter handle bracket in place (figure 5). 2. Pull the chute crank assembly up so hole in chute crank bracket fits behind/under lower handle bar and over bolt end. NOTE: DO NOT pull chute crank bracket past the lower handle bar or the 48T gear and spacer will fall off into unit.
-
Page 11: Controls & Features
CONTROLS & FEATURES 1. Auger Clutch Bail 2. Handlebar 3. Discharge Chute Crank (938017, 018, 300) 4. Handlebar Knob 5. Discharge Chute Handle 6. Exhaust 7. Discharge Chute Deflector 8. Auger Housing 9. Auger 10. Ignition Switch 11. Fuel Level Indicator 12. -
Page 12: Operation
OPERATION 2. Pull recoil starter handle. Auger should WARNING: AVOID INJURY. Read rotate with the turning of the engine. and understand the entire Safety 3. Release the auger clutch bail. section before proceeding. 4. Pull recoil starter handle again. Auger must not rotate as engine turns. -
Page 13: Filling Fuel Tank
Rotating Discharge Chute (Figure 7) Scraper Blade Two options are available to rotate discharge The scraper blade allows the back of the chute: housing to keep better contact with the surface being cleared. It also prevents • Discharge Chute Crank (938017, 018, damage to the housing from normal wear. -
Page 14: Snow Removal
2. Check Auger Clutch 5. Turn key to RUN. 6. Stand to right of unit. Grasp starter WARNING: Check auger clutch handle and pull rope out slowly until it before each use. Auger brake MUST pulls harder, let rope rewind slowly. DISENGAGE when clutch is IMPORTANT: DO NOT let starter handle engaged. -
Page 15: Maintenance Schedule
DO NOT transport machine while engine is by attempting to clear snow at too fast a rate. running. MAINTENANCE SCHEDULE Ariens Dealers will provide any service or WARNING: AVOID INJURY. Read adjustments which may be required to keep and understand the entire Safety your unit operating at peak efficiency. -
Page 16: Service And Adjustments
SERVICE AND ADJUSTMENTS 3. Remove auger drive pulley. WARNING: AVOID INJURY. Read and understand the entire Safety 4. Remove old belt. section before proceeding. Install (Figure 8) SERVICE POSITION 1. Install new belt on drive pulley and idler. 2. Install drive belt on auger drive pulley. Place unit on a flat level surface. - Page 17 DISCHARGE CHUTE DEFLECTOR ADJUSTMENT Pull up on Bail Spring If discharge chute deflector does not stay in Hook position while throwing snow, adjust chute by tightening fasteners (figure 10). Fasteners Figure 10 OS0181 DRIVE BELT ADJUSTMENT WARNING: Improper adjustment could result in death or serious injury. Auger brake MUST DISENGAGE when clutch is engaged.
- Page 18 Measure Bail Spring Length Adjust Idler (Figure 13) (Figure 12) 1. Remove cowl. 2. Loosen idler nut. NOTE: Repositioning the idler will increase or decrease bail spring length. 3. Move idler towards the drive belt to increase bail spring spring length or move idler away from drive belt to decrease bail spring length.
-
Page 19: Storage
3. Disengage auger clutch bail. • If auger stops within 5 seconds, the adjustment is complete. • If auger does not stop within 5 seconds, repeat the entire Drive Belt Adjustment procedure. IMPORTANT: Replace the drive belt if the Drive Belt Adjustment procedure has been completed twice and the drive belt is still not adjusted properly. -
Page 20: Troubleshooting
4. Adjust drive belt. See (see Drive Belt Adjustment on page 17). 4. Drive belt slipping. ACCESSORIES SERVICE PARTS See your authorized Ariens dealer to add Order the following parts through your the additional accessories available to your Dealer: Sno-Thro. -
Page 21: Specifications
SPECIFICATIONS Model Number 938017 938018 938019 938300 Description SS522EC SS722EC SS522 SS522C Engine - Tecumseh (Two-Cycle) TH139SA TH139SP TH139SA 5 (3.73) 7 (5.22) 5 (3.73) Power Max – HP (Kw/min 3600 ± 150 3950 ± 150 3600 ± 150 Fast Idle Speed – RPM (min Displacement –... -
Page 22: Warranty
Ariens Company warrants to the original purchaser that consumer products manufactured by Ariens Company will be free from defects in material and workmanship for a period of three (3) years after the date of purchase, and will repair any defect in material or... - Page 23 Ariens Company may from time to time change the design of its products. Nothing contained in this warranty shall be construed as obligating Ariens Company to incorporate such design changes into previously manufactured products, nor shall such changes be construed as an admission that previous designs were defective.
- Page 24 Ariens Company 655 West Ryan Street P.O. Box 157 Brillion, WI 54110-0157 920-756-2141 Fax 920-756-2407 www.ariens.com WARNING The engine exhaust from this product contains chemicals known to the State of California to cause cancer, birth defects or other reproductive harm.
Need help?
Do you have a question about the Sno-Thro 938017 and is the answer not in the manual?
Questions and answers