
Related Manuals for Santint A2


Summary of Contents for Santint A2
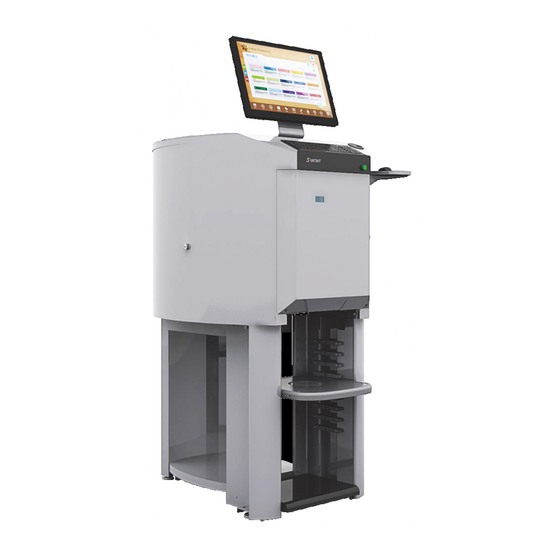
- Page 1 A2 Automatic Dispenser 100% Recirculation Hummingbird User Manual A2 Automatic Dispenser V3.0...
-
Page 2: Table Of Contents
Contents 1.Using Requirement…………………………………………………………………………………1 2.Specifications…………………………………………………….…………………………………2 3.Safety Instructions…………………………………………….……………………………………2 4.Machine Composition………………………………………………………………………………3 5.Installation……………………………………………………………….…………………………4 5.1 Installing Machine…………………………………………..……………………………………4 5.2 Installing Computer………………………………………………………………………………5 5.3 Installing Software………………………………………………………………………..………6 6.Machine Adjustment……………………………………………………………………..…………6 6.1 Software Adjustment……………………………………………………………………..………6 6.2 Machine Adjustment………………………………………………………………………..……6 6.3 Add Colorant……………………………………………………………………………..………7 6.4 Emptying Pump……………………………………………………………………..……………7 6.5 Calibration of Colorants…………………………………………………………………………8 7.Operation……………………………………………………………………………………….……8 7.1 Put the Base Paint Can……………………………………………………………………………8 7.2 Changing the Water of the Cleaning Box…………………………………………………………9 8.Maintenance…………………………………………………………………………………….……12 8.1 Daily Maintenance………………………………………………………………..………………12... -
Page 3: Using Requirement
13) Do not operate the machine in case the machine shell is removed. 14)Computer Composition: CPU PIII CD-ROM Driver 15 Inches Monitor, screen resolution is 1024X768 pixels or higher USB/COM Interface Windows 2000 or higher Operating System A2 Automatic Dispenser V3.0... -
Page 4: Specifications
The machine should be kept in ventilated and dry room which is moisture-proof fire-proof. 10. It is forbidden to work the machine in the inflammable and explosive environment. 11. No hot-plug of the serial port line. A2 Automatic Dispenser V3.0... -
Page 5: Machine Composition
The plastic lid of the canister shall be properly covered to prevent dryness. Turntable assembly:canisters are fixed on the turntable, which can be turned to send the canisters to dispensing position, stirring inside canisters also can be carried out while turning. Stirring avoids the A2 Automatic Dispenser V3.0... -
Page 6: Installation
19. Move the machine to the working site. Fig 5.1.2 Use the spanner 19 to rotate the four feet clockwise. Level the machine. Make sure the machine doesn’t move or make noise. Fig 5.1.3 A2 Automatic Dispenser V3.0... -
Page 7: Installing Computer
Do not operate the machine in case the machine shell is removed. Unpack the carton, locate the computer on the bottom plate under the dispenser. Locate the keyboard and the mouse on the top of the machine. Install the monitor A2 Automatic Dispenser V3.0... -
Page 8: Installing Software
Check whether the piston is on the bottom; the initialization of turntable should be in normal condition. Locate the paint can in the center of the loading plate. If there is no paint can or take away the paint can A2 Automatic Dispenser V3.0... -
Page 9: Add Colorant
If there is no colorant dropping from the valve rod, it means the pump is emptied. Then turn the valve rod to horizontal position. If any colorant drops, turn the valve rod to horizontal position. Lift A2 Automatic Dispenser V3.0... -
Page 10: Calibration Of Colorants
Insert the tray inside the rail Lead Rail till the bottom. 2) Open the lid of the base paint can. 3) Locate the base paint can in the center of the tray. 4) Start dispensing Tray Fig.7.1. A2 Automatic Dispenser V3.0... -
Page 11: Changing The Water Of The Cleaning Box
Cleaning of the cleaning box The cleaning box is built-in. The daily maintenance and periodically maintenance shall be implemented according to the dispensing software reminders. Please follow these steps to clean the cleaning box to ensure the cleaning effects. A2 Automatic Dispenser V3.0... - Page 12 4) Put the cup back and screw it down. Rotate the cup to remove it. C. Cleaning of the type C built-in cleaning box. The cleaning box is built-in. The daily maintenance and periodically maintenance shall be implemented A2 Automatic Dispenser V3.0...
- Page 13 Clean each valve bottom thoroughly. 4) Put the cleaning box back and push down lock handle. Lock the side door. Brush Assy Brush Brush Wheel Wheel Lock Handle Cleaning Clean bottom of valve bodies A2 Automatic Dispenser V3.0...
-
Page 14: Maintenance
Remove the screw on the bracket to fix the canister, pull out the bracket for 10mm. Pay attention to not to pull out the bracket too much to avoid the colorant leaking off the canister. c. Rotate the canister anticlockwise, the canister can be taken off the turntable A2 Automatic Dispenser V3.0... -
Page 15: Circuit Diagram
10. Circuit Diagram A2 Automatic Dispenser V3.0... -
Page 16: Troubleshooting
LCD shows “Emergency 2. Broken emergency stop Stop Switch Unreleased” Change the switch or connect the wire. switch or the wire is broken. LCD shows “Door 1. The door is not closed Close it properly. Unclosed” properly. A2 Automatic Dispenser V3.0... - Page 17 Valve motor sensor is broken. Change the driver circuit board. Left valve sensor is too far away. Make it nearer. Left valve sensor is broken. Change it. Contact the supplier with the model and serial number for other issue(s) A2 Automatic Dispenser V3.0...
- Page 18 ZHENGZHOU SANHUA TECHNOLOGY & INDUSTRY CO., LTD. ADD: Feilong Road, Xingyang City, Henan 450121 P.R. China TEL:(86) 371-67857168 After-Service:(86) 371-67857219 FAX:(86) 371-67857166 WEB:http://www.santint.com E-mail:info@santint.com A2 Automatic Dispenser V3.0...
Need help?
Do you have a question about the A2 and is the answer not in the manual?
Questions and answers