Table of Contents
Advertisement
Advertisement
Table of Contents

Subscribe to Our Youtube Channel
Related Manuals for Renault MEDIA NAV


Summary of Contents for Renault MEDIA NAV
- Page 1 Instruction Manual RENAULT MEDIA NAV for RENAULT...
-
Page 2: Table Of Contents
INDEX Specifications Main Spec -------------------------------------------- Diagram ---------------------------------------------- Components ----------------------------------------- Exterior ----------------------------------------------- Settings Dip Switch -------------------------------------------- How to distinguish “MEDIA NAV” and “R-LINK”----- Touch control ----------------------------------------- Key board --------------------------------------------- OSD Menu -------------------------------------------- Installation Diagram ----------------------------------------------- FFC Cable Connection -------------------------------- Caution ------------------------------------------------... -
Page 3: Specifications
Specification 1. Main spec. 1-1 Input Spec. (MULTI VIDEO INTERFACE) - 1 x HDMI Input - 2 x A/V Input (External video source). - 1 x CVBS(REAR CAMERA) Input. (Rear camera source) - 1 x CVBS(FRONT CAMERA) Input. (Front camera source) - 1 x Analog RGB Input (Navigation System output) 1-2 Output Spec. -
Page 4: Diagram
Specification 2. Diagram INTERFACE COMMAND EEPROM SYSTEM RECEIVER LVDS LVDS Scaler NAVIGATION LVDS RELAY (PIP) SYSTEM CVBS1 CVBS2 COMPOSITE FRONT CAMERA REAR CAMERA REAR CAMERA POWER TFT-LCD LVDS GU Electronic... -
Page 5: Components
Specification 3. Components FFC Cable 1EA (50 * 50 * 0.5 * P6) Sub Board 1EA + steel plate 1EA FFC Cable 1EA (40 * 50 * 0.5 * P6) LVDS Cable (800mm) 1 EA OSD Board 1EA RGB NAVI Cable(7pin) 1EA Touch Cable(KD-900) 1EA Power Cable 1EA A/V Cable 1EA... -
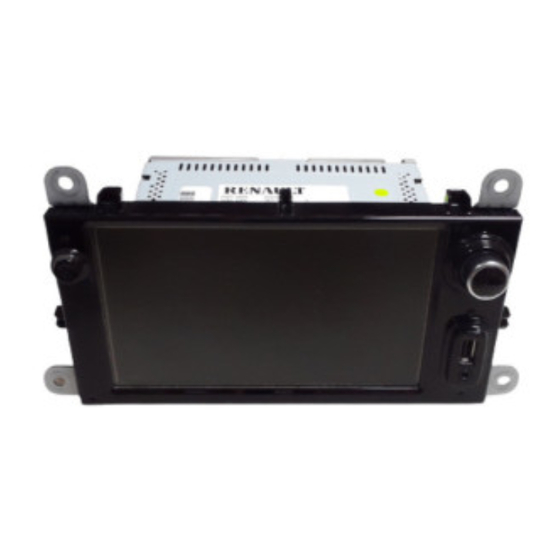
Page 6: Exterior
Specification 4. Exterior 171 mm 22 mm 93 mm Touch Connect *NAVI Connect *POWER Connect ① ② ③ ④ ⑤ ⑥ ⑦ ① ② ③ ④ 1. Y- ① R DATA (Red) 1. ACC (Red) 9. N.C 2. X- ② G DATA (Green) 2. -
Page 7: Settings
ON : Skipping AV2 (DVD) AV2 (DVD) OFF : Display ON : Skipping HDMI HDMI OFF : Display OFF : Media NAV 7” Model Car Model OFF : Media NAV 7” Model OFF : Media NAV 7” Model * Example Media NAV 7” Model... -
Page 8: How To Distinguish "Media Nav" And "R-Link
Settings 2. How to distinguish “MEDIA NAV” and “R- LINK” ? ※ Check the shape of the buttons on the right MEDIA NAV R-LINK GU Electronic... -
Page 9: Touch Control
Settings 3. Touch screen – Touch calibration 1. OEM Screen Setting Touch OEM screen in any mode more than Touch the “+” correctly 7sec. For calibration (This function can be activated only one time after switching mode) 2. OSD Setting OSD메뉴에서... - Page 10 Settings 3. Touch screen - DVB-T, DVD Menu (Select the type of I-con) • [Ch+] [POEWER][MENU] [Right] [Left] [POWER][SCAN] [Ch+] [Ch-] [USB] [RETURN] [Ch-] [Type -1] [Type -2] • [POWER] [Play/Pause] [DISC UP] [stop] [DISC DOWN] [Audio] [Play next [FR] chapter] [Play previous [FF]...
- Page 11 Settings 3. Touch screen – Switching mode ※ It is needed to select “Assist UI-ON” in Option menu to activate HOME button Assist UI – “ON” Press long : Switching to OEM directly Press short : Activating OSD menu OSD Menu for switching input mode Press “HOME”...
-
Page 12: Key Board
Settings 4. OSD Key board ③ ④ ① ② MENU DOWN ① MENU :Activating OSD Menu ② SEL :Selection ③ Up :Moving upward (Increasing value) ④ Down :Moving downward (Decreasing value) 5. OSD Menu ※Press “MENU” button on Key board Config - NAVI-RGB : Setup for the type of RGB Config - DVB-T(DMB) : Setup for the type of DVB-T(DMB) Config - DVD : Setup for the type of DVD... - Page 13 Settings 5. OSD Menu ※Press “MENU” button on Key board Wire Option RearCam-Type : Setup for rear camera • ExtDevice - External rear camera OEM - Original camera RearCam-Power : Setup for Rear VCC wire in power cable • ON - +12V out always (current consumption : 200mA) AUTO - +12V out in rear mode only (200mA) OFF - Power OFF RearCam-Det : Setup for Rear detection...
- Page 14 Settings 5. OSD Menu ※Press “MENU” button on Key board Option FrontCam-Power : Setup for Front VCC wire in power cable • ON - +12V out always (current consumption : 200mA) AUTO - +12V out in rear mode only (200mA) OFF - Power OFF FrontCam-Det : Setup for front detection •...
- Page 15 Settings 4. OSD Menu ※Press “MENU” button on Key board Option UI DVB-T(DMB) : Setting UI ICON - ON or OFF • UI DVD : Setting UI ICON - ON or OFF • Reset : Reset all value • GU Electronic...
- Page 16 Settings 5. OSD Menu ※Press “MENU” button on Key board - NAVI(RGB) Image / Screen MENU IMAGE NAVI Config Brightness Option Contrast Image Image Color- RED Screen Color- GREEN Parking Color- BLUE MENU Screen NAVI Config Horizontal Vertical Option Scale X Up Image Scale X Down Screen...
- Page 17 Settings 4. OSD Menu ※Press “MENU” button on Key board - Parking guide line ON/OFF Selecting a use of packing guide line (N.C) Parking line “ON” (OSD Menu – Parking – Line display – ON (OPS function N.C) or OFF) - Warning Language for rear screen Selecting a type of language (OSD Menu –...
- Page 18 Settings 4. OSD Menu ※Press “MENU” button on Key board - OSD OSD – Horizontal • OSD – Vertical • OSD – Display : Setting time for displaying OSD menu • OSD – Transparency • OSD – Language : Setting language of OSD menu •...
- Page 19 Settings 4. OSD Menu– Register IR code ※Press “MENU” button on Key board - IR Ctrl ① ② MENU DVB-T(DMB) MENU DVB-T(DMB) DVB - T ALL - Clear DVB - T Learn Cancel ____ _____ IR-Ctrl IR-Ctrl IR-Ctrl IR-Ctrl POWER User ____ _____ Utility...
-
Page 20: Installation Diagram
Installation 1. Installation Diagram BACKSIDE OF MONITOR Offered LCD cable Apple TV Offered Power cable Touch cable for KD900 GU Electronic... -
Page 21: Ffc Cable Connection
Installation 2. FFC Cable Connection Offered SUB Board + steel plate Connect the offered LVDS Cable Connect the OEM FFC Cable. 1. As the picture above, Install the offered Connect the offered FFC Cable sub-board+steel plate the connect the offered FFC cable 2. -
Page 22: Caution
Caution 1. FAQ Not possible to switch mode • - Check connection of OSD Key pad wire - Check CAN connection Display wrong size of picture • - Check Dip s/w setting Display black screen in OEM mode • - Check connection of LVDS/LCD cable Not possible to switch to rear screen •...
Need help?
Do you have a question about the MEDIA NAV and is the answer not in the manual?
Questions and answers