
Related Manuals for CyberPower SM30KPMX


Summary of Contents for CyberPower SM30KPMX
- Page 1 User’s Manual SM30KPMX SM180KMFX SM300KMFX SM600KMFX CyberPower Systems, Inc. www.cyberpower.com...
- Page 2 Ver 1.0.2...
- Page 3 Safety Precautions Safety Precautions This manual contains information concerning the installation and operation of Modular UPS. Please carefully read this manual prior to installation. The Modular UPS cannot be put into operation until it is commissioned by engineers approved by the manufacturer (or its agent). Not doing so could result in personnel safety risk, equipment malfunction and invalidation of warranty.
- Page 4 Safety Precautions Move & Install Keep the equipment away from heat source or air outlets. In case of fire, use dry powder extinguisher only, any liquid Danger extinguisher can result in electric shock. Do not start the system if any damage or abnormal parts founded.
- Page 5 Safety Precautions in this manual. Battery Safety All the battery maintenance and servicing procedures involving internal access need special tools or keys and should be carried out only by trained personnel. When connected together, the battery terminal voltage will exceed 400Vdc and is potentially lethal.
- Page 6 Safety Precautions eyes and your skin may be damaged by the acid. At the end of battery life, the battery may have internal short circuit, drain of electrolytic and erosion of positive/negative plates. If this condition continues, the battery may have temperature out of control, swell or leak.
-
Page 7: Table Of Contents
Contents Contents Chapter 1 Product Introduction .................... 1 1.1 System Configuration .................... 1 1.2 Power Module ......................2 1.3 Operation Mode ..................... 2 1.3.1 Normal Mode ...................... 2 1.3.2 Battery Mode ...................... 2 1.3.3 Bypass Mode ...................... 3 1.3.4 Maintenance Mode (Manual Bypass) ..............3 1.3.5 ECO Mode ...................... - Page 8 Contents 3.4.3 Setting ......................39 3.4.4 Log ........................41 3.4.5 Operate ......................45 3.4.6 Scope ....................... 46 Chapter 4 Operations ......................48 4.1 UPS Start-up ....................... 48 4.1.1 Start in Normal Mode ..................48 4.1.2 Start from Battery ..................... 49 4.2 Procedure for Switching between Operation Modes ..........
-
Page 9: Chapter 1 Product Introduction
Chapter 1 Product Introduction Chapter 1 Product Introduction 1.1 System Configuration The Modular UPS is configured by the following part: Power modules, Bypass & Monitoring module, and cabinet with manual Bypass switch. One or several battery strings should be installed to provide backup energy once the utility fails. The UPS structure is shown in Fig. -
Page 10: Power Module
Chapter 1 Product Introduction 1.2 Power Module The power module structure is shown as Fig.1-3. The power module contains a rectifier, an inverter, and a DC/DC converter for charge and discharge of the external batteries. Input Output Rectifier Inverter AC/DC DC/AC Battery DC/DC... -
Page 11: Bypass Mode
Chapter 1 Product Introduction Manual Bypass Static Bypass Bypass Main Output Rectifier Inverter AC/DC DC/AC Battery Discharge DC/DC Fig.1-5 Battery mode operation diagram 1.3.3 Bypass Mode If the inverter overload capacity is exceeded under Normal mode, or if the inverter becomes unavailable for any reason, the static transfer switch will perform a transfer of the load from the inverter to the bypass source, with no interruption in power to the critical AC load. -
Page 12: Eco Mode
Chapter 1 Product Introduction Manual Bypass Static Bypass Bypass Output Main Rectifier Inverter AC/DC DC/AC Battery Charger DC/DC Fig.1-7 Maintenance mode operation diagram Danger During Maintenance mode, dangerous voltages are present on the terminal of input, output and neutral, even with all the modules and the LCD turned off. 1.3.5 ECO Mode To improve system efficiency, UPS rack system works in Bypass mode at normal time, and inverter is standby. -
Page 13: Frequency Converter Mode
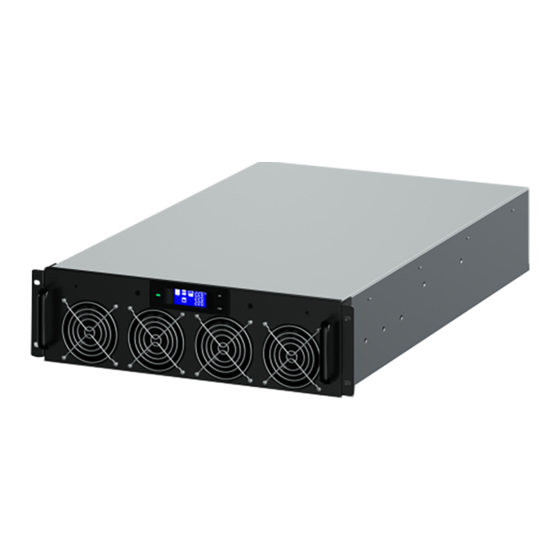
Chapter 1 Product Introduction after a delay time when the AC main recovers. The mode and the delay time are programmed by the commissioning engineer. 1.3.7 Frequency Converter Mode By setting the UPS to Frequency Converter mode, the UPS could present a stable output of fixed frequency (50 or 60Hz), and the bypass static switch is not available. - Page 14 Chapter 1 Product Introduction Outlook of 6-slot UPS Fig.1-9 Outlook of 10-slot UPS Fig.1-10 Outlook of 20-slot UPS Fig.1-11 The UPS front view are shown in Fig.1-12 to Fig. 1-14 SM 180-600 KMFX User Manual...
- Page 15 Chapter 1 Product Introduction Front view of 6-slot UPS Fig. 1-13 Front view of 10-slot UPS Fig.1-12 Fig. 1-14 Front view of 20-slot UPS ①LCD control panel; ②SPD; ③Manual Bypass switch ④Battery cold start; ⑤Monitoring &static bypass module; ⑥Monitoring unit; ⑦Static Bypass unit; ⑧Output switch of 20-slot cabinet Q3;...
- Page 16 Chapter 1 Product Introduction Fig. 1-15 Back view of 6-slot UPS Fig. 1-16 Back view of 10-slot UPS Fig. 1-17 Back view of 20-slot UPS ①PDU; ②Bypass Input switch of 20-slot cabinet Q3; ③Manual bypass switch of 20-slot cabinet Q3 SM 180-600 KMFX User Manual...
-
Page 17: Chapter 2 Installation Instruction
Chapter 2 Installation Instruction Chapter 2 Installation Instruction 2.1 Location As each site has its requirements, the installation instructions in this section are to act as a guide for the general procedures and practices that should be observed by the installing engineer. - Page 18 Chapter 2 Installation Instruction (a.) 6-slot cabinet (b.) 10-slot cabinet (c.) 20-slot cabinet Fig.2-1 Space reserved for the cabinet(Unit:mm) The dimension and weight for the UPS cabinet is shown in Table 2.1 Table 2.1 Weight for the cabinet Configuration Dimension(W×D×H)(mm) Weight(Kg) 6-slot Cabinet 600×1100×1600...
-
Page 19: Unloading And Unpacking
Chapter 2 Installation Instruction 10-slot Cabinet 600×1100×2000 (with bypass module) 20-slot Cabinet 2000×1100×2000 (with bypass module) 460×790×133 30KVA power module 2.2 Unloading and Unpacking 2.2.1 Moving and Unpacking of the Cabinet The steps to move and unpack the cabinet are as follows: 1. - Page 20 Chapter 2 Installation Instruction 4. Remove the protective foam around the cabinet. Fig.2-4 Remove the protective foam 5. Check the UPS. (a) Visually examine if there are any damages to UPS during transportation. If any, contact to the carrier. (b) Check the UPS with the list of the goods. If any items are not included in the list, contact to our company or the local office.
-
Page 21: Positioning
Chapter 2 Installation Instruction (see Fig.2-6). Fig.2-6 Open the carton 4. Remove the foam cover (See Fig.2-7). Fig.2-7 Remove the foam cover 5. Take out the UPS with plastic package and dismantle the packaging materials. Attention The waste materials of unpacking should be disposed to meet the demand for environmental protection. - Page 22 Chapter 2 Installation Instruction (a.) 6&10-slot cabinet (b.) 20-slot cabinet ①Adjustable anchor bolt ②L-shape corner fittings ③ supporting wheels Fig.2-8 Supporting structure(Bottom view) The steps to position the cabinet are as follows: 1. Ensure the supporting structure is in good condition and the mounting floor is smooth and strong.
- Page 23 Chapter 2 Installation Instruction Attention Auxiliary equipment is needed when the mounting floor is not solid enough to support the cabinet, which helps distribute the weight over a larger area. For instance, cover the floor with iron plate or increase the supporting area of the anchor bolts. 2.3.2 Installing Power Module The installation position of power module is shown in Fig.2-10 .Please install the power modules following the principle of from bottom to top to prevent inclination of the cabinet due to...
-
Page 24: Battery
Chapter 2 Installation Instruction Attention Do not place the module on the floor by rear side with connectors; bypass module and power module should be done by 2 All installation works for persons together, for its heavy weight. 2.4 Battery Three terminals (positive,... - Page 25 Chapter 2 Installation Instruction (a.) Bottom entry (b.) Top entry Fig.2-10 Cable entry for 6-slot cabinet Fig.3-11 Top entry for 10-slot cabinet SM 180-600 KMFX User Manual...
- Page 26 Chapter 2 Installation Instruction Bottom entry Top entry Fig.3-12 Cable entry for 20-slot cabinet SM 180-600 KMFX User Manual...
-
Page 27: Power Cables
Chapter 2 Installation Instruction 2.6 Power Cables 2.6.1 Specifications The UPS power cables are recommended in Table 2.2. Table 2.2 Recommended cables for power cables Contents 150/25 180/30 250/25 300/30 500/25 600/30 2*150 2*185 2*150 2*185 Cable Main Input (mm²) 2*150 2*185 2*150... -
Page 28: Circuit Breaker
Chapter 2 Installation Instruction Cables crimped Battery 13mm 22Nm OT terminal Cables crimped Output 13mm 22Nm OT terminal Cables crimped 13mm 22Nm OT terminal Cables crimped Main Input 17mm 96Nm OT terminal Cables crimped Bypass Input 17mm 96Nm OT terminal Cables crimped 20-slot cabinet Battery... - Page 29 Chapter 2 Installation Instruction Fig.2-13 6-slot connections terminals Fig.2-14 10-slot connections terminals Fig.2-15 20-slot connections terminals 3. Connect the protective earth wire to protective earth terminal (PE). 4. Connect the AC input supply cables to the Input terminal and AC output supply cables to the Output terminal.
-
Page 30: Control And Communication Cables
Chapter 2 Installation Instruction qualified technical personnel. If you have any difficulties, contact the manufacturer or agency. Warning Tighten the connections terminals to enough torque moment, refer to Table 3.3, and please ensure correct phase rotation. Before connection,ensure the input switch and the power supply are off,attach warnings label to warn not to operate by others ... -
Page 31: Dry Contact Interface
Chapter 2 Installation Instruction Fig.2-17 Dry contact &communication interface for20-slot cabinet The UPS accepts external signal from zero-voltage (dry) contacts connected through external dry contact terminals produced and phoenix terminals. Through software programming, these signals become active when these contacts connect to +24V to ground).The cables connected to DRY terminal must be separated from power cables. - Page 32 Chapter 2 Installation Instruction Default: Utility abnormal alarming Output dry contact, (Normally open) function is settable. J10-2 UTILITY_FAIL_NO Default: Utility abnormal alarming J10-3 UTILITY_FAIL_GND Common terminal for J10-1 and J10-2 Note The settable functions for each port can be set by the monitor software. The default functions of each port are described as follows.
- Page 33 Chapter 2 Installation Instruction +24V +24V +24V Fig.2-16 Diagram of input port for remote EPO Table 2.7 Description of input port for remote EPO Port Name Function J4-1 REMOTE_EPO_NC Trigger EPO when disconnect with J4-2 J4-2 +24V_DRY +24V J4-3 +24V_DRY +24V J4-4 REMOTE_EPO_NO...
- Page 34 Chapter 2 Installation Instruction +24V +24V +24V Fig.2-18 BCB Port Table 2.9 Description of BCB port Port Name Function BCB contact drive, provides +24V voltage,20mA J6-1 BCB_DRIV drive signal BCB contact status, connect with the normally J6-2 BCB_Status open signal of BCB J7-1 GND_DRY Power ground for +24V...
- Page 35 Chapter 2 Installation Instruction General Alarm Output Dry Contact Interface The default function of J9 is the general alarm output dry contact interface. When one or more warnings are triggered, an auxiliary dry contact signal will be active via the isolation of a relay.
-
Page 36: Communication Interface
Chapter 2 Installation Instruction Port Name Function Mains failure warning relay(normally closed) will J10-1 UTILITY_FAIL_NC be open during warning Mains failure warning relay (normally open) will J10-2 UTILITY_FAIL_NO be closed during warning J10-3 UTILITY_FAIL_GND Common terminal 2.7.2 Communication Interface RS232、RS485 and USB port:Provide serial data which can be used for commissioning and maintenance by authorized engineers or can be used for networking or integrated monitoring system in the service room. -
Page 37: Chapter 3 Ups And Module Control Panel
Chapter 3 LCD Panel Chapter 3 LCD Panel 3.1 Introduction This chapter introduces the functions and operator instructions of the operator control and display panel in detail, and provides LCD display information, including LCD display types, detailed menu information, prompt window information and UPS alarm information. 3.2 LCD panel for Power Module The structure of LCD panels for power module is shown in Fig.3-1. -
Page 38: Control And Operation Keys
Chapter 3 LCD Panel 3.2.2 Control and Operation Keys The control and operation keys include FUNC keys and OFF key that have different functions: (a) The FUNC key is used for turning the display pages; (b) The OFF key is mainly for turning off the power module, as the following procedures: Enable Module “OFF”... - Page 39 Chapter 3 LCD Panel highlighted: Fault and warning codes are shown in Digit Displays Area in recycle (shown with short dash when less than 3).The meanings of the codes are listed in Table 3.2. flashing: Indicating a fault occurs. ...
-
Page 40: Ups Operator Panel
Chapter 3 LCD Panel Rectifier fail Power share fail Inverter fail Inverter bridge open Temperature difference Rectifier over temperature over limit Fan fail Input current unbalanced Output overload DC bus over voltage Output overload time out Rectifier soft start fail Inverter over temperature Relay open UPS inverter Inhibited... -
Page 41: Control And Operation Keys
Chapter 3 LCD Panel Indicator State Description Rectifier not operating Steady green Battery charging Flashing green Battery discharging Battery abnormal (battery failure, no battery or battery reversed) or Battery Steady red battery converter abnormal (failure, over current or over indicator temperature) , EOD Flashing red Battery low voltage... -
Page 42: Lcd Touch Screen
Chapter 3 LCD Panel Long press, transfer to the inverter MUTE Long press to switch between turning off and on the buzzing Attention When bypass frequency is over track, there is interruption time(less than 10ms) for transferring from bypass to inverter. 3.3.3 LCD touch Screen Users can easily browse the information, operate the UPS, and set the parameters through the LCD touch screen, which is friendly for users. -
Page 43: Main Menu
Chapter 3 LCD Panel Fig.3-5 Structure of menu tree 3.4 Main Menu The main menu includes Cabinet, Module, Setting, Log, Operate and Scope and it is described in details below. 3.4.1 Cabinet Touch the icon , (At the bottom left of the screen), and the system enters the page of the Cabinet, as it is shown in Fig.3-6. - Page 44 Chapter 3 LCD Panel The Cabinet comprises sectors of title, information display, version running status, information display and submenu. The sectors are described as follows. Title Display the information of the selected submenu. Running status The squares shown on the mini current path represent the various UPS power paths and show the current UPS operating status.
-
Page 45: Module
Chapter 3 LCD Panel Submenu Name Contents Meaning Phase voltage Phase current Bypass Bypass frequency Power factor Phase voltage Phase current Output Output frequency Power factor Sout: Apparent Power Pout: Active Power Load Qout: Reactive power kVar Load (The percentage of the UPS load) %... - Page 46 Chapter 3 LCD Panel Information display Display information of each submenu. Power module information The users can choose the power module to browse the information in the “Information display” sector. Colors of the square on the mimic current path represent the various power module paths and show the current operating status.
-
Page 47: Setting
Chapter 3 LCD Panel Submenu Name Contents Meaning Output phase voltage of selected module Output phase current of selected module Output Output frequency of selected module Output power factor of selected module Load voltage of selected module Load (The percentage of the power module selected) Load Pout: Active Power... - Page 48 Chapter 3 LCD Panel Submenu Contents Meaning Name Three formats: (a) year/month/day, (b) Date format setting month/date/year , (c) date/month/year Date&Time Time setting Setting time Current language Language in use Language Simplified Chinese and English selectable ( The setting taking action immediately Language selection after touching the language icon )...
-
Page 49: Log
Chapter 3 LCD Panel Submenu Contents Meaning Name Single ECO, parallel ECO,LBS, parallel Configure rated RATE For the factory use Parameter CONFIGURE Configure the system For the factory use Note Users have various permissions to the configuration of the Setting :( a) for the Date &Time, LANGUAGE and COMM, user can set on their own without password. - Page 50 Chapter 3 LCD Panel the time stamp when it occurs, as is marked in the red box. Sequence number The serial number for the event. Content of the event Display the information of events, warnings and faults. (0# means the event happens to the cabinet, n# means the information is sent by the nth power module.) ...
- Page 51 Chapter 3 LCD Panel Byp Freq Over Track-Set Bypass Frequency Over Track Range Byp Freq Over Track-Clear Event above disappears Transfer times (from inverter to bypass) in 1 hour Exceed Tx Times Lmt-Set exceed the limit. Event above disappears Exceed Tx Times Lmt-Clear Output Short Circuit-Set Output shorted Circuit Output Short Circuit-Clear...
- Page 52 Chapter 3 LCD Panel Inverter Protect-Clear Event above disappears Input Neutral Lost-Set Input Grid Neutral Lost Bypass Fan Fail-Set Bypass Module Fan Fail Bypass Fan Fail-Clear Event above disappears Manual Shutdown-Set N# Power Module Manually Shutdown Manual Boost Charge-Set Manually Battery Boost Charge Manual Float Charge-Set Manually Battery Float Charge UPS Locked-Set...
-
Page 53: Operate
Chapter 3 LCD Panel Note Different colors of the words represent different level of events: (a)Green, an event occurs; (b)Grey, the event occurs then clears; (c)Yellow, warning occurs; (d) Red, faults happen. 3.4.5 Operate Touch the icon (At the bottom of the screen), and the system enters the page of the “Operate”, as it is shown in Fig.3-12. -
Page 54: Scope
Chapter 3 LCD Panel Enable the switch for powering off the Power Module by touching the icon Reset Battery History Data , the history data includes the Reset the battery history data by touching the icon times of discharge, days for running and hours of discharging. ... - Page 55 Chapter 3 LCD Panel Fig.3-13 Scope Menu Users can view the waves for output voltage, output current and bypass voltage by touching the corresponding icon in the left side of the interface. The waves can be zoomed in and zoom out.
-
Page 56: Chapter 4 Operations
Chapter 4 Operations Chapter 4 Operations 4.1 UPS Start-up 4.1.1 Start in Normal Mode The UPS must be started up by commissioning engineer after the completeness of installation. The steps below must be followed: 1. Ensure all the external circuit breakers are open. 2. -
Page 57: Start From Battery
Chapter 4 Operations menu Log. Users can check the information of the power module by the keys in the front of it. 4.1.2 Start from Battery The start from battery is referring to battery cold start. Take the 10-slot UPS as example, the steps for the start-up are as follows:... -
Page 58: Switching The Ups Into Normal Mode From Bypass Mode
Chapter 4 Operations (b) Press and hold the BYP key on the operator control panel for longer than two seconds and the system transfers to bypass mode. This needs to enable the switch behind the front door. See Fig.4-3. Fig.4-3 Enable the switch Warning Ensure the bypass is working normally before transferring to bypass mode. -
Page 59: Switching The Ups Into Normal Mode From Maintenance Bypass Mode
Chapter 4 Operations Warning Before making this operation, read messages on LCD display to be sure that bypass supply is regular and the inverter is synchronous with it, so as not to risk a short interruption in powering the load. Danger If you need to maintain the power module, wait for 10 minutes to let the DC bus capacitor fully discharge before removing the cover. -
Page 60: Epo
Chapter 4 Operations 2. Auto discharging. The system can maintenance the battery automatically when the setting is done. The setting procedures are as follows. (a) Enable battery auto discharge. Enter the “CONFIGURE” page of the menu Setting, tick the “Battery Auto Discharge” and confirm (This needs to be done by factory). (b) Setting period for battery auto discharge. -
Page 61: Installation Of Parallel Operation System
Chapter 4 Operations Fig .4-6 EPO Button 4.5 Installation of Parallel Operation System For the 6-slot and 10-slot system ,it can have three UPS cabinets in parallel,which can extend to a capacity of total 900KVA.Howerever, for the 20-slot system, parallel is not supported at present. - Page 62 Chapter 4 Operations Fig.4-7 Location of the Parallel board The control cables for the parallel operation must be connected with all single devices to form a closed loop, as is shown in Fig.4-8. Fig.4-8 Parallel connection For more details of parallel operation, please refer to the “Instruction for Parallel Operation of Modular UPS”.
-
Page 63: Chapter 5 Maintenance
Chapter 5 Maintenance Chapter 5 Maintenance This chapter introduces UPS maintenance, including the maintenance instructions of power module and monitoring bypass module and the replacement method of dust filter. 5.1 Precautions 1. Only certified engineers are authorized to maintain the UPS. 2. -
Page 64: Maintaining Static Bypass Unit For 20-Slot Cabinet
Chapter 5 Maintenance 5.3.2 Maintaining Static Bypass Unit for 20-slot Cabinet 1. Transfer the system to bypass mode through the LCD control panel (Refer to section4.5.5); 2. Open the battery switch, Close maintenance bypass switch; the UPS power will be supplied by maintenance bypass;... -
Page 65: Disconnect The Inner Control Neutral Cable
Chapter 5 Maintenance 5.3.5 Disconnect the Inner Control Neutral cable Inner control Neutral cable can be disconnected by turning off the Neutral Cable Switch. By doing this, the Auxiliary power supply is cut off from the utility. 6-slot cabinet and 10-slot cabinet doesn’t need to disconnect the inner control neutral cable. The Inner Control Neutral Cable is located in the right of the maintenance bypass and is protected by the protective board, as is shown in Fig.5-1. -
Page 66: Battery Setting
Chapter 5 Maintenance Fig.5-3 Configuration through monitoring software 5.4.1 Setting of Battery Type The battery type can be only set through the monitoring software. The system at present supports lead acid battery and Lithium iron phosphate battery (LFPB). 5.4.2 Setting of Battery Number 1) Setting battery number for Lead- Acid battery The nominal voltage of one block battery is 12V and for each block of battery, it consists of 6 cells (each cell of 2V).For the setting, as is shown in Fig.5-2, if the battery is 40, it means that... -
Page 67: Eod Voltage Setting
Chapter 5 Maintenance 5.4.5 EOD Voltage Setting The EOD voltage 0.6C is the EOD voltage when the discharging current is larger than 0.6C; EOD voltage 0.15C is the EOD voltage when the discharging current is less than 0.15C.EOD voltage decreases linearly as the EOD voltage Current increases from 0.15C to 0.6C, as shown in Fig.6-4. -
Page 68: Warnings For Battery And Environment Temperature Overheat
Chapter 5 Maintenance Fig.5-5 Enable the Auto maintenance Discharge period The EOD voltage of Auto maintenance Discharge is 1.05 times of the normal EOD voltage. 5.4.11 Warnings for Battery and Environment Temperature Overheat This function can be set through the monitoring software. The system will read the temperature information of the battery and environment and give warning of overheat. -
Page 69: Chapter 6 Product Specification
Chapter 6 Product Specification Chapter 6 Product Specification This chapter provides the specifications of the product, including environmental characteristics mechanical characteristics and electrical characteristics. 6.1 Applicable Standards The UPS has been designed to conform to the following European and international standards: Table 6.1 Compliance with European and International Standards Item... -
Page 70: Electrical Characteristics
Chapter 6 Product Specification Characteristics for Power Module Table 6.4 Mechanical Item Unit 30KVA Mechanical Dimension , 460*790*134 W*D*H Weight 6.4 Electrical Characteristics 6.4.1 Electrical Characteristics (Input Rectifier) Table 6.5 Rectifier AC input Mains Item Unit Parameter Grid System 3 Phases + Neutral + Ground 380/400/415 (three-phase and sharing neutral Rated AC Input Voltage with the bypass input) -
Page 71: Electrical Characteristics (Input Rectifier)
Chapter 6 Product Specification 6.4.2 Electrical Characteristics (Intermediate DC Link) Table 6.6 Battery Items Unit Parameters Rated:±240V Battery bus voltage Quantity of Nominal 40=[1 battery(12V)] ,240=[1 battery(2V)] lead-acid cells V/cell 2.25V/cell(selectable from 2.2V/cell~2.35V/cell) Float charge (VRLA) voltage Constant current and constant voltage charge mode Temperature mV/ ℃... -
Page 72: Electrical Characteristics (Bypass Mains Input)
Chapter 6 Product Specification 6.4.4 Electrical Characteristics (Bypass Mains Input) Table 6.8 Bypass Mains Input Item Unit 380/400/415 Rated AC voltage (three-phase four-wire) Rated AC Current 110% Long term operation 110%~125% for 5min Overload 125%~150% for 1min 150%~400% for 1s >400% ,less than 200ms Current rating of 1.7×In...
Need help?
Do you have a question about the SM30KPMX and is the answer not in the manual?
Questions and answers