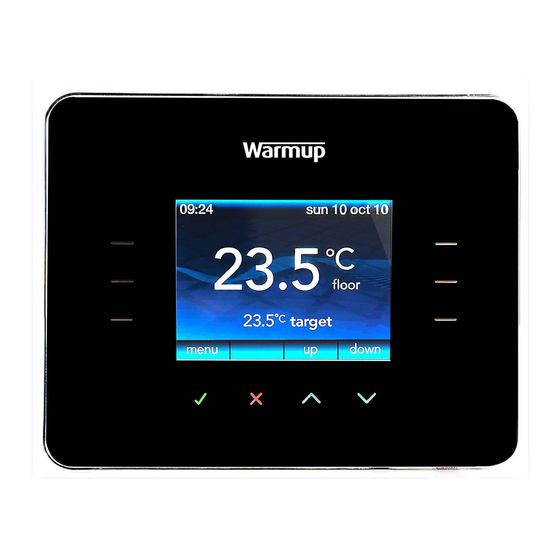
Warmup 3iE Installation Manual
Hide thumbs
Also See for 3iE:
- Installation and operation manual (36 pages) ,
- Installation manual (28 pages) ,
- Operating manual (9 pages)
Advertisement
Quick Links
Installation Guide:
for the Warmup 3iE Programmable Thermostat
Introduction:
The 3IE thermostat is designed to aid in the comfort of your home by providing timed regulation of your Warmup un-
derfloor heating system. The thermostat is designed to receive temperature input signals from the following sensors:
1. Air sensor located inside thermostat
2. Floor sensor installed in floor to be heated (see Warmup heater instructions for details)
3. Optional 2nd sensor (either installed in floor or outside house)
The thermostat is not a safety device and should only be used with Warmup heating products. In order to avoid dam-
aging your flooring the correct floor type should be selected during the thermostat programming process.
Electrical Specification:
•
Supply voltage: 230V +/-15% at 50Hz
•
Thermostat is not designed for use with intermittent power supply.
•
Maximum Switch Load: 16A resistive
•
Standards: EN60730-1 & EN60730-2-9 standards
WARNING – important safety note
This product uses mains voltage electricity and work should only be carried out by a qualified electrician. You should
always isolate the power supply before attempting to install or repair the 3IE thermostat. The thermostat should not
be put into operation unless you are certain that the entire heating installation complies with current general safety
requirements for electrical installations. Electrical installation to be in accordance with latest IEE Wiring Regulations
and appropriate Statutory Regulations.
Location of Thermostat:
The thermostat should be installed inside a standard 55mm wall socket that is at least 30mm deep. For optimal per-
formance the thermostat should be located in an area with good ventilation. It should not be beside a drafty window/
door, in direct sun-light or above another heat generating device (e.g. radiator or TV).
The thermostat is designed for operation between 0°C and 55°C with relative humidity less than 80%.
Location and installation of floor sensor:
The optimum location of the floor sensor is described in each Warmup heater installation manual. Refer to that manual
when selecting floor sensor location.
A conduit has been provided with this 3IE thermostat. The use of this conduit will protect the sensor and will allow
easier repair of the sensor in the case of sensor damage after flooring has been laid.
When installing the floor sensor, it is recommended to use
the following process:
1. Work out the desired locations of the thermostat and
floor sensor. Measure distance of conduit required and
cut conduit to correct length. The end of the conduit
should be located somewhere easily accessible even
after all flooring material has been fixed. It is recom-
mended to minimize the length of conduit and avoid
sharp corners.
2. Straighten both sensor cable and conduit. Push sen-
sor all the way through conduit and ensure the sensor
protrudes from the protective conduit by 3-4 cm.
3. Place metal cap over the sensor and then push back
ensuring a firm fit between conduit and metal cap
Warning: Do not attempt to cut conduit with sensor in-
stalled. This could lead to irreparable damage to your
sensor.
Assembley of probe, conduit and metal cap
3 - 4 cm
3iE Installation Guide - 08/10 v1
© Warmup plc - 2010
Advertisement

Subscribe to Our Youtube Channel
Summary of Contents for Warmup 3iE
-
Page 1: Installation Guide
Warmup 3iE Programmable Thermostat Introduction: The 3IE thermostat is designed to aid in the comfort of your home by providing timed regulation of your Warmup un- derfloor heating system. The thermostat is designed to receive temperature input signals from the following sensors: 1. -
Page 2: Installation
2. Connect to Power Supply (Live – MAX 240V) 3. Connect to Power Supply (Neutral – MAX 240V) 4. Connect to Warmup heater(s) (Neutral – MAX 3600W/ 16 Amps) 5. Connect to Warmup heater(s) (Live – MAX 3600W/ 16 Amps) 7. - Page 3 3. “er1”: This will occur if no floor sensor is detected 4. “er2”: This will occur if the floor sensor has a short circuit Contact: FRANCE PORTUGAL Warmup Plc Warmup plc Warmup Portugal 702 Tudor Estate 16, Rue du Dr Leroy Rua Fundo de Vila, Loja R 3700-120 S.
- Page 4 Installer’s Notes:...
- Page 5 Check out our full range of Heating Products Central Heating Controls Honeywell Heating Controls Danfoss Heating Controls Radiator Valves Fernox Sentinel Magnaclean Warmup underfloor heating Water Heaters Hand Dryers...


Need help?
Do you have a question about the 3iE and is the answer not in the manual?
Questions and answers