
Related Manuals for RaceChip Ultimate Connect


Summary of Contents for RaceChip Ultimate Connect
- Page 1 RaceChip Ultimate Connect Installation Guide Common Rail 1-Channel Item number: EBA-ALLG-ULTIMATEC-CR-K1-ENG-V1 Test winner, September 2013...
-
Page 2: Table Of Contents
............................First steps for installing the RaceChip ..............................Removing the engine cover .................................. Connecting to sensors ................................... Connecting the RaceChip to a wiring harness ..........................Fastening the RaceChip ..................................Completing the installation .................................. Connecting the RaceChip with the RaceChip app ........................ -
Page 3: Foreword
Foreword Dear customer, Finally - you are now the proud owner of a new RaceChip Ultimate Connect! In just a few minutes you will experience the tremendous driving pleasure that RaceChip offers. Regardless of whether you are on bending country roads, accelerating away at traffi c lights or coasting on motorways, your RaceChip is guaranteed to thrill! The “RaceChip Effect”... -
Page 4: Scope Of Delivery
Other equipment • Deactivation plug for resetting your vehicle to its factory settings • Cable tie for fastening the RaceChip and wiring harness in your engine bay • Torx key in case you wish to open the RaceChip • Installation guide for installing your new RaceChip in just a handful of steps If they are available, we will send you additional vehicle images for the installation process via e-mail. -
Page 5: Installation
RaceChip app, please contact our Customer Service staff. Now download the RaceChip app for free and install it on your smartphone. The icon of the RaceChip app should now appear on your smartphone and you should be able to open the program. Page 6... -
Page 6: Locating And Entering The Serial Number
Locating and entering the serial number Open the RaceChip app. After you have opened the RaceChip app for the fi rst time, you will fi rst go through a short setup process in order to establish a connection to the RaceChip Ultimate Connect. -
Page 7: First Steps For Installing The Racechip
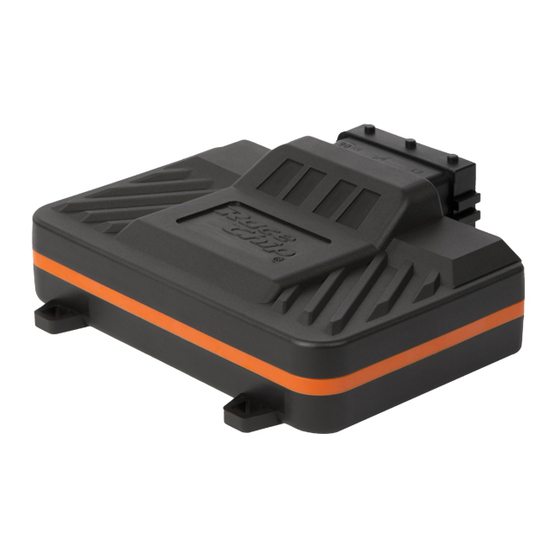
In the following section we explain how to install your RaceChip using an example engine. If your engine has a different design, individual engine parts may be arranged differently in the engine compartment when compared to the images here. - Page 8 Installed RaceChip Common Rail connection socket RaceChip Ultimate Connect This is how the RaceChip looks in its fi nal installed position. We will now explain step-by-step how to install it. Setup illustration cable with disconnected Common Rail series plug connection socket...
-
Page 9: Removing The Engine Cover
Removing the engine cover Step 1 of 9 Remove the engine cover from the holding clips and place it next to the car. You must jiggle the cover slightly to release it from the holding clips. If there is no cover on your engine, you can proceed directly to step 2. Removing a bolted engine cover In some vehicles it is necessary to loosen one or more bolts before you can remove the engine cover. -
Page 10: Connecting To Sensors
Connecting to sensors Step 2 of 9 Common Rail connection socket Transverse engine This image shows the connection that is relevant for the installation in your vehicle. It may be the case that the engine in your vehicle is not longitudinal, as shown in step 2, but rather transverse. - Page 11 These always lead directly into the injection system, i.e., they can be traced back from the engine block. Setup illustration Common Rail connection socket Common Rail connection socket cable with disconnected cable coming from the series plug RaceChip Ultimate Connect Page 12...
- Page 12 Step 4 of 9 Now remove the plug from the connection socket by gently pressing the locking plug (see image below) while removing the plug from the socket. Locking clip The plugs are locked into the connection sockets by means of a locking clip. Press the locking clip and pull the plug.
- Page 13 Step 5 of 9 Now connect one part of the RaceChip wiring harness with the disconnected series plug and the other part with the socket in your vehicle. Make sure that the locking clip of the plug engages once again.
-
Page 14: Connecting The Racechip To A Wiring Harness
Wiring harness with RaceChip connected Now connect your RaceChip to the newly installed wiring harness. To do so, fi rst remove the deactivation plug that is still connected to the RaceChip wiring harness in its as-delivered condition. Pull the purple-coloured plug outwards and then remove the deactivation plug from the wiring harness connector. -
Page 15: Fastening The Racechip
Step 7 of 9 When searching for a secure fastening point for the RaceChip, make sure that the wiring harness can be properly routed in the engine bay in the next installation step. The harness must not, for instance, be routed along engine parts that become very hot, nor should the harness be routed under tension. - Page 16 Step 8 of 9 Route the cable along a suitable path (for example, along an existing harness) and then fasten it using the supplied cable tie. Using a wire cutter, you can remove the excess length of the cable tie. •...
-
Page 17: Completing The Installation
Step 9 of 9 Re-attach the cover of your engine and close the bonnet. The installation process is now complete and your RaceChip is ready for use. Now you just need to pair the RaceChip with the RaceChip app on your smart phone. -
Page 18: Connecting The Racechip With The Racechip App
Connecting the RaceChip with the RaceChip app A working Bluetooth connection is required for the RaceChip Ultimate Connect to communicate with the RaceChip app. Activate your smartphone’s Bluetooth function. This is located in the settings of your smartphone operating system. - Page 19 Turn the key in the ignition to the start position to supply power to the RaceChip Ultimate Connect. Please do not completely start your engine at this point however. The setup process cannot be completed if the engine is switched on fully.
-
Page 20: Using The Racechip App
The „DRIVE MODES“ dialog box ON/OFF function You can enable and disable the Ultimate Connect via the ON/OFF function. If you disable the chip, the performance of your vehicle will correspond once again to the default factory performance. You can only change the settings of the Ultimate Connect with the engine of your vehicle turned off and with the ignition switched on. - Page 21 Your RaceChip Ultimate Connect always saves your selected settings so you do not have to enter them each time the engine starts. Even if you don’t have your phone with you it’s still not a problem! The RaceChip Ultimate Connect operates using the last saved settings.
- Page 22 Manage serial numbers If you want use your smartphone to control different RaceChip Ultimate Connect systems in several vehicles, you can manage different serial numbers here. The following options are available: Add additional Choose between stored...
- Page 23 Enable “Service Mode” The performance improvement of the race chip Ultimate Connect will be reduced to a minimum. You should only select this setting in exceptional cases (see Troubleshooting) or if you have been requested to do so by our Customer Service staff.
-
Page 24: Troubleshooting
Troubleshooting If, after the installation, your RaceChip does not function as desired, the following list serves as a set of troubleshooting tips. No connection to your Ultimate Please make sure that your vehicle’s ignition is in “start” mode. The Ultimate Connect Connect must be supplied with power for a pairing to work. - Page 25 – the on-board computer often displays incorrect values. It is important that you do not inappropriately adjust your driving style as a result of the RaceChip performance boost, i.e. by accelerating more frequently. If the fuel savings provided by the RaceChip in its as-delivered condition are not satisfactory, please contact our Customer Service staff for a fine-tuning adjustment.
-
Page 26: Index Of Plugs
Index of plugs If you have problems identifying your serial plug, you will fi nd a list of all relevant plugs for your vehicle here. Your plug is not listed? Please contact our Customer Service staff. Our contact information can be found on page 28. Plug variant I In the fi rst step, the red locking clip is pulled out. -
Page 27: Contact Us
You can also get in touch using our contact form: www.racechip.de/kontakt Imprint RaceChip Chiptuning GmbH & Co. KG Ulmer Straße 123 73037 Göppingen Germany Umsatzsteuer (VAT) Identifi cation number: DE 260672432 Registered at the District Court of Ulm: HRA 721734...
Need help?
Do you have a question about the Ultimate Connect and is the answer not in the manual?
Questions and answers