
Related Manuals for Fora P20


Summary of Contents for Fora P20
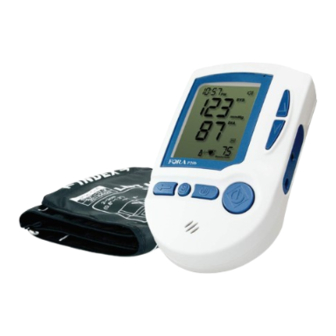
- Page 1 BLOOD PRESSURE MONITORING SYSTEM Sistema de Vigilancia de Presión Arterial Owner’s Manual Manual del Propietario...
- Page 3 These studies also suggest that diabetes patients could reduce the risk of cardiovascular diseases by managing their blood pressure. With the use of this FORA P20 Blood Pressure Monitoring System, you can easily monitor your blood pressure by yourself. In...
- Page 4 IMPORTANT SAFETY INSTRUCTIONS READ BEFORE USE 1. Use this device ONLY for the intended use described in this manual. 2. Do NOT use accessories which are not specified by the manufacturer. 3. Do NOT use the device if it is not working properly or damaged. 4.
-
Page 5: Table Of Contents
TESTING YOUR BLOOD PRESSURE Before Measurement Taking Measurements MONITOR MEMORY Reviewing Test Results DOWNLOADING RESULTS Data Transmission Via Cable (For FORA P20v only) Data Transmission Via Bluetooth (For FORA P20b only) MAINTENANCE Battery Using AC Adapter Caring for Your Monitor... -
Page 6: Before You Begin
BEFORE YOU BEGIN Intended Use The FORA P20 Blood Pressure Monitoring System is intended to be used to measure the systolic and diastolic blood pressure and pulse rate by using a non-invasive technique in which an inflatable cuff is wrapped on the upper arm. This system should only be used for the testing of people who are 18 years old or older. -
Page 7: Contents Of System
Contents of System Your new FORA P20 system kit includes: Monitor Batteries Owner ’ s Manual Protective Wallet Pressure Cuff (arm type) Quick Start User Guide / Warranty Card NOTE If any items are missing from your kit or opened before use, please contact... -
Page 8: Monitor Overview
Right Side Left Side Pressure Cuff Back Display Screen Up Button Repeat Button Data Port (for FORA P20v only) (for FORA P20v only) Press to repeat the voice Earphone Jack instructions. DC Adapter Port Repeat/Pairing Button Air Plug (for FORA P20b only) -
Page 9: Screen Display
Screen Display Date and Time Three Time Average Volume Symbol Stethoscope Symbol Systolic Pressure Symbol Pulse Rate Systolic Pressure Value User Number Unit of Measurement Pulse Rate Symbol Battery Symbol Diastolic Pressure Symbol Diastolic Pressure Value Memory Mode Symbol... -
Page 10: Speaking Function
Speaking Function FORA P20 “ speaks ” aloud with step-by-step instructions to guide you through the process of using the meter. The following table tells you when and what the monitor “ speaks ” . WHEN does the monitor WHAT does the monitor say? - Page 11 Selecting language Thank you for using FORA TeleHealth products. Today's date is (day) (month) (date)th, (year). The time is (hour minute) AM/ At the end of monitor PM. Blood pressure unit is setting (millimeters of mercury / kilopascals). Voice volume is (number). Have a nice day.
- Page 12 1. Thank you for using FORA Tele- Health products. Today ’ s date is (day) (month) (date)th, (year). The time is (hour minute) AM/PM. You are now in memory mode. The user ’ s number is (number). Please select user ’ s number.
-
Page 13: Setting The Monitor
SETTING THE MONITOR Before using your monitor for the first time, check and update these settings. Make sure you complete the steps below and save the desired settings. ► Entering the setting mode Start with the monitor off. Press until the monitor turns on. - Page 14 With the day flashing, press select the correct day. Press to set. Step 2 Set the time format. Press to select the desired time format --- 12h or 24h. Press to set. Step 3 Set the time With the hour flashing, press select the correct hour.
- Page 15 Step 4 Set the unit of measurement. Press to select mmHg or Kpa. Press to set. Step 5 Setting the speaking volume. There are seven (7) speaking volume options you can choose from. Press to select the desired speaking volume. Press to set.
- Page 16 Step 6 Delete the memory. While “ dEL ” and a blinking “ ” symbol appear on the display, if you do not wish to delete the saved results, press to skip this step. twice. “ ” and “ ”” are If you wish to delete ALL the results, press displayed on the monitor, which indicates that all results have been deleted.
-
Page 17: Testing Your Blood Pressure
TESTING YOUR BLOOD PRESSURE This monitor provides you three different ways to measure your blood pressure. Select from the operations below: • Single measurement Perform an individual blood pressure measurement. • Averaging measurement Automatically perform three (3) consecutive blood pressure measure- ments and display the average result at the end. - Page 18 ► Fitting the Cuff Correctly Step 1 Connect the air plug of the tubing to the air jack of the monitor. Step 2 Assemble the cuff as shown on the right. The smooth surface should be Pile Side Material inside the cuff loop and the metal RED LINESHOULD BE AT THE INSID D-ring should not touch your skin.
- Page 19 Step 5 Press the hook material firmly against the pile material. The top and bottom RED LINESHOULD BE AT THE INSID edges of the cuff should be tightened evenly around your upper arm. INDEX MUST ►The range index of cuff should fall into this range.
-
Page 20: Taking Measurements
Taking Measurements ► Taking a Single Measurement Always apply the pressure cuff before turning on the monitor. Step 1 Press . All the LCD symbols will appear. Press to select user “ ” (numbers from 1 to 4) whose test reading will be stored in memory. - Page 21 ► Averaging Measurement Mode Always apply the pressure cuff before turning on the monitor. Step 1 Press and hold for three seconds. The monitor will turn on and enter to select user “ ” (numbers the averaging mode. Press from 1 to 4) whose test reading will be stored in memory and press confirm.
- Page 22 ► Auscultatory Mode Only trained healthcare professionals may perform this manual blood pressure measurement. This manual method involves applying a stethoscope to patient ’ s arm and listening to the pulse while the air is slowly let out again. The systolic pressure is the maximum pressure in an artery at the mo- ment when the heart is beating and pumping blood through the body.
- Page 23 Step 3 After reaching the cuff pressure, the deflation begins. The operator can adjust the inflation pressure if necessary. During the measurement, press and hold button at any time to keep inflating, release at the desired pressure. Step 4 The systolic pressure is measured when the operator first hears the pulse.
-
Page 24: Monitor Memory
MONITOR MEMORY Your monitor stores the 400 most recent test results along with respective dates and times in its memory. To recall the memory, start with the monitor off. Reviewing Test Results Step 1 Press and release “ ” will appear on the display. The user symbol (numbers from 1 to 4) appears first, press to select which one you used to store in the memory. -
Page 25: Downloading Results
DOWNLOADING RESULTS There are two subtypes of FORA P20 system available. Each one of them offers a different way to transmit, allowing users to choose their own desired way to manage their test results. These feature functions are listed below:... -
Page 26: Data Transmission Via Cable (For Fora P20V Only)
(For FORA P20v only) Step 1 Install Software. To download the Health Care Software System, please visit the FORA Care, Inc. website at http://www.foracare.com/support.html and select the “ Software & App ” to download the “ Health Care Software System ” software. Follow the online instructions to install the software to your computer. -
Page 27: Data Transmission Via Bluetooth (For Fora P20B Only)
Data Transmission Via Bluetooth (For FORA P20b only) You can transmit your data from the meter to your devices (e.g. smart phone, tablet, PC … ) via Bluetooth. Please contact your local customer service or place of purchase for assistance. Please note that you must pair your meter to your device before transmitting data. - Page 28 NOTE • While the meter is in transmission mode, it will be unable to perform a test. • The meter is compatible with the following devices, iOS (6 or above) and Android system (4.3 or above). Make sure device is in proper receiving range of the meter before transmitting data.
-
Page 29: Maintenance
MAINTENANCE Battery Your monitor comes with four (4)1.5V AA size alkaline batteries. ► Low Battery Signal The monitor will display either of the two messages below to alert you when the monitor power is getting low. Step 1 The “ ”... - Page 30 ► Replacing the Battery To replace the batteries, make sure that the monitor is turned off. Step 1 Press the edge of the battery cover and lift it up to remove. Step 2 Remove the old batteries and replace with four 1.5V AA size alkaline batteries.
-
Page 31: Using Ac Adapter
Using AC Adapter ► Connect AC adapter to the monitor Step 1 Connect AC adapter plug to AC adapter jack of the monitor. Step 2 Plug AC adapter power plug into an electri- cal outlet. The monitor is ready for use. ►... -
Page 32: Caring For Your Monitor
Caring for Your Monitor To prevent the meter from dirt, dust or other contaminants, please wash and dry your hands thoroughly before use. ► Cleaning • To clean the monitor exterior, wipe it with a cloth moistened with tap water or a mild cleaning agent, then dry the device with a soft dry cloth. -
Page 33: System Troubleshooting
SYSTEM TROUBLESHOOTING If you follow the recommended actions but the problem persists, or er- ror messages other than the ones below appear, please contact local customer service. Do not attempt to repair by yourself and never try to disassemble the monitor under any circumstances. Error Messages MESSAGE CAUSE... -
Page 34: Troubleshooting
Troubleshooting 1. If nothing is displayed after pressing POSSIBLE CAUSE WHAT TO DO Batteries exhausted. Replace the batteries. Batteries incorrectly installed or Check that the batteries are correctly absent. installed. 2. If the heart rate is higher/lower than user ’ s average: POSSIBLE CAUSE WHAT TO DO Movement during measurement. -
Page 35: Detailed Information
DETAILED INFORMATION Reference Values Clinical studies show that adult diabetes is often accompanied by ele- vated blood pressure. People with diabetes can reduce their heart risk by managing their blood pressure along with diabetes treatment Knowing your routine blood pressure trend tells you whether your body is in good condition or not. -
Page 36: Specifications
SPECIFICATIONS SYSTEM PERFORMANCE Power Source Four 1.5V AA alkaline batteries 152 (L) x 99 mm (W) x 55 mm (H), Size of Monitor w/o Cuff 340g with batteries M (medium): 24-35 cm (9.4-13.8 inches) Cuff Size with air tube 80 cm 4 users with 100 records for each;... - Page 37 BLOOD PRESSURE MEASUREMENT PERFORMANCE Pressure Range 0 - 300 mmHg Measurement Unit mmHg or KPa Systolic Measurement Range 50 mmHg to 250 mmHg Diastolic Measurement Range 30 mmHg to 180 mmHg Pulse Rate Measurement Range 40 to 199 beats / minute Maximum Inflation Pressure 300 mmHg Accuracy of Pressure...
-
Page 38: Federal Communications Commision (Fcc) Statement
FEDERAL COMMUNICATIONS COMMISION (FCC) STATEMENT 15.21 You are cautioned that changes or modifications not expressly approved by the part responsible for compliance could void the user’s authority to operate the equipment. 15.105(b) Federal Communications Commission (FCC) Statement This equipment has been tested and found to comply with the limits for a Class B digital device, pursuant to part 15 of the FCC rules. - Page 39 Con el Sistema de Vigilancia de Presión Arterial FORA P20, usted puede fácilmente y por sí mismo, revisar y contro- lar sus niveles de la presión arterial.
- Page 40 IMPORTANTES MEDIDAS DE SEGURIDAD LEA ESTO ANTES DE USAR 1. Utilice este sistema SOLAMENTE para el uso previsto en este manual. 2. NO utilice accesorios que no hayan sido especificados o suminis- trados por el fabricante. 3. NO utilice este aparato si sospecha que está trabajando errónea- mente o ha sufrido algún daño.
- Page 41 Realizando la Medición MEMORIA DEL MEDIDOR Revisando los Resultados de la Prueba DESCARGANDO LOS RESULTADOS Transmisión de datos mediante un cable (Exclusivo para el FORA P20v) Transmisión de datos mediante Bluetooth (Exclusivo para el FORA P20b) MANTENIMIENTO Batería Usando el Adaptador AC...
-
Page 42: Antes De Comenzar
ANTES DE COMENZAR Uso Previsto El Sistema de Monitoreo de la Presión Arterial FORA P20 está previsto a ser utilizado para medir la presión arterial diastólica y sistólica y fre- cuencia cardiaca mediante el uso de una técnica no invasiva en la que una banda inflable se envuelve en la parte superior del brazo. -
Page 43: Contenidos Del Sistema
Contenidos del Sistema Su nuevo sistema FORA P20 incluye: Un Medidor 4 x AA baterías alcalinas Manual del Usuariol Estuche protector Banda de Presión Certificado de Garantía / Tarjeta de garantía NOTA Si alguno de estos artículos no están incluidos o si la caja ha sido abierta an- tes de su uso, por favor contacte con su distribuidor local o bien con servicio al cliente para mayor asistencia. -
Page 44: Generalidades Del Medidor
Lado Derecho Lado Izquierdo Banda de Presión Pantalla de LCD Botón de Repetición Puerto de Datos Parte Trasera (exclusivo para FORA P20v) (exclusivo para FORA P20v) Oprimir para repetir las Puerto para los instrucciones con voz. Audífonos Botón para Repetir/... -
Page 45: Visualización En La Pantalla
Visualización de la Pantalla Fecha y hora Promedio de Tres Mediciones Símbolo de Volumen Símbolo de Estetoscopio Símbolo de Presión Sistólica Frecuencia de Pulso Valor de Presión Diastólica Número de Usuario Unidad de Medida Símbolo de Frecuencia de Pulso Símbolo de Bateríal Símbolo de Presión Diastólica Valor de Presión Diastólica Símbolo de Función de Memoria... -
Page 46: Función De Voz
Función de Voz FORA P20 “ habla ” en voz alta con instrucciones paso-a-paso para guiarle a través del proceso sobre le uso del medidor. La siguiente tabla le indicará cuándo y qué dice su medidor. CUÁNDO habla su monitor QUÉ... - Page 47 El volumen de la voz es (núme- ro). Que tenga un buen dia. Usando el monitor Gracias por usar el producto de FORA, el número de usuario es Cuando enciende su monitor (número). Por favor seleccione el número de usuario.
- Page 48 1. Gracias por usar el producto de FORA. Son las (horas y minutos, am/ pm). Ahora usted está en la función de memoria. El número de usuario es (número). Por favor seleccione el número de usuario. 2. El número de usuario es (número).
-
Page 49: Configurando El Medidor
CONFIGURANDO EL MEDIDOR Antes de usar el medidor por primera vez o si desea cambiarle las baterías, debe verificar y actualizar estas configuraciones. Asegúrese de completar los pasos descritos a continuación y guardar los nuevos cambios deseados. ► Entrando a la función de configuración Comience con el medidor apagado. - Page 50 Con el día parpadeando, presione hasta que el día correcto apa- rezca. Presione para elegir. Paso 2 Configurando el formato de hora. Presione para seleccionar el formato de hora, ya sea 12h o 24h. Presione para elegir. Paso 3 Configurando la hora. Con la hora parpadeando, presione hasta que la hora correcta aparezca.
- Page 51 Paso 4 Configurando la unidad de medición. Presione para seleccionar mmHg o Kpa. Presione para elegir. Paso 5 Seleccionando el volumen de la voz. Hay (7) opciones que usted puede escoger para el volumen de voz. Presione hasta que obtenga el volumen de la voz deseado. Para confirmar su selección, presione para elegir.
- Page 52 Paso 6 Borrando la memoria. Con los símbolos “ dEL ” y “ ” aparecen parpadeando en pantalla, presione conservar los resultados en la memoria. Si quiere borrar TODOS los resultados de la memoria, presione el botón dos veces. Los símbolos. “ ”...
-
Page 53: Midiendo Su Presión Arterial
MIDIENDO SU PRESIÓN ARTERIAL Este monitor le proporciona tres modalidades diferentes para la medición de su presión arterial. Seleccione de las siguientes opera- ciones: • Medición individual Realiza una medición individual de la presión arterial • Medición promedio Realiza automáticamente tres (3) mediciones de presión arterial consecutivas y muestra el promedio de los resultados al final de la prueba. - Page 54 ► Colocando Correctamente la Banda de Presión Paso 1 Conecte el enchufe de aire del tubo a la salida de aire a un lado del medidor. Paso 2 Ensamble la banda de presión como se muestra en el dibujo. Pile Side Material Asegúrese de que la parte suave de RED LINESHOULD BE AT THE INSID la tela esté...
- Page 55 Paso 5 Presione la tela de cierre de la banda (Velcro) firmemente contra el material de RED LINESHOULD BE AT THE INSID tela adhesiva. Los bordes del lado supe- rior y del lado inferior de la banda deben INDEX MUST estar unidos uniformemente alrededor ►The range index of cuff should de la parte superior de su brazo.
-
Page 56: Realizando La Medición
Realizando la Medición ► Llevando a Cabo una Medición Individual Siempre recuerde colocar su banda de presión antes de encender el medidor. Paso 1 Presione . Todos los símbolos de la pantalla aparecerán. para seleccionar el usuario “ ” (los números del Presione 1 al 4), cuya prueba de lectura se almacenará... - Page 57 ► Función de Medición Promedio Siempre recuerde colocar su banda de presión antes de encender el monitor. Paso 1 Mantenga presionando el botón por 3 segundos. El monitor se en- cenderá en la función de promedio. Presione para seleccionar el usuario “...
- Page 58 ► Método Ausculatorio Solamente personal entrenado profesionalmente puede hacer este tipo de medición de presión arterial. Este método manual involucra colocar el audífono del estetoscopio sobre el pulso humeral o branquial del brazo del paciente y escuchar el pulso mientras el aire va saliendo lentamente. La presión sistólica corresponde al valor máximo de la tensión arterial en el momento en que el corazón está...
- Page 59 Paso 3 El dispositivo empezará automáticamente el proceso de desinflado. El operador del aparato puede ajustar la presión de inflado de ser nece- sario. Durante el proceso de medición, mantenga presionando cualquier momento para mantener inflado, liberación a la presión de- seada.
-
Page 60: Memoria Del Medidor
MEMORIA DEL MEDIDOR La memoria de su medidor puede almacenar las 400 pruebas más reci- entes con sus respectivas fechas y horas. Para ingresar en la memoria de su medidor comience con el medidor apagado. Revisando los Resultados de la Prueba Paso 1 Presione y libere “... -
Page 61: Descargando Los Resultados
DESCARGANDO LOS RESULTADOS Hay dos subtipos de sistema de FORA P20 disponibles. Cada uno de el- los ofrece un método de transmisión de datos distintos, permitiéndole al usuario seleccionar la forma más conveniente en que desea manejar los resultados de los análisis. Las características de las funciones es- tán detalladas a continuación:... -
Page 62: Transmisión De Datos Mediante Un Cable
Transmisión de Datos Mediante Un Cable (Exclusivo para el FORA P20v) Paso 1 Instando el Software Para descargar Health Care Software System, visite el sitio web de ForaCare, Inc. en http://www.foracare.com/support.html y seleccione “ Software & App ” para descargar el software “ Health Care Software System ”... -
Page 63: (Exclusivo Para El Fora P20B)
Transmisión de Datos a Través de Bluetooth (Exclusivo para el FORA P20b) Usted puede transmitir sus datos del medidor a sus dispositivos (ej. teléfono inteligente, tableta, computadora … ) via Bluetooth. Favor con- tactar a su servicio al cliente local o al lugar de compra para asisten- cia. - Page 64 NOTA • Mientras el medidor está en modo de transmisión, no podrá realizar un test de glucosa en sangre. • Asegúrese de que su dispositivo iOS(6 o superior) o Sistema Android (4.3 o superior) haya activado Bluetooth antes de transmitir los datos y de que el medidor se encuentre dentro del rango de recepción.
-
Page 65: Mantenimiento
MANTENIMIENTO Batería Su sistema viene con cuatro baterías alcalinas AA de 1.5V. ► Señal de Batería Agotada o Baja El medidor mostrará uno de los mensajes a continuación, con el fin de alertarlo cuando el medidor se esté quedando sin batería. Paso 1 El símbolo “... - Page 66 ► Reemplazando las Baterías Asegúrese de que el medidor está apagado antes de sacar las baterías. Paso 1 Presione el borde del cobertor de la batería y luego levántelo para quitarlo. Paso 2 Remueva las baterías viejas y reemplácelas con cuatro baterías alcalinas AA de 1.5V.
-
Page 67: Usando El Adaptador Ac
Usando el Adaptador AC ► Conecte el adaptador AC al medidor Paso 1 Conecte el adaptador AC a su medidor. Paso 2 Conecte el adaptador AC al enchufe eléctrico. El medidor esta listo para ser usado. ► Desconecte el adaptador AC del medidor Paso 1 Cuando el medidor esté... -
Page 68: Cuidados De Su Medidor
Cuidados de su Medidor Para evitar que su medidor se llenen de polvo o se ensucien con algún contaminante, por favor recuerde lavarse y secarse las manos antes de usarlo. ► Limpieza • Para limpiar el medidor en su parte exterior, hágalo con un paño de material blando humedecido en agua y un detergente suave, luego séquelo con un paño blando y seco. -
Page 69: Localizacion Y Resolucion De Problemas En El Sistema
LOCALIZACION Y RESOLUCION DE PROBLEMAS EN EL SISTEMA Si usted sigue las acciones recomendadas pero el problema persiste, o hay mensajes de error distintos a los que aparecen a continuación, por favor llame a su agente de servicio al cliente local. No trate de reparar por sí... -
Page 70: Localización Y Resolución De Problemas
Localización y Resolución de Problemas 1. Si no muestra ningún mensaje después de presionar CAUSAS POSIBLES QUÉ HACER Batería agotada. Reemplace las baterías. Las baterías pueden haber sido Verifique que las baterías hayan sido instaladas incorrectamente o quizás instaladas correctamente. no hayan sido colocadas. -
Page 71: Información Detallada
INFORMACIÓN DETALLADA Valores de Referencia Estudios clínicos han demostrado que la diabetes en adultos está frecuentemente acompañada por presión arterial elevada. Las personas con diabetes pueden reducir el riesgo de sufrir un ataque cardiaco supervisando su presión arterial mientras llevan un tratamiento contra la diabetes Conocer la tendencia de su presión arterial puede ayudarle a determinar si su cuerpo goza de buena salud o no. -
Page 72: Especificaciones
ESPECIFICACIONES CARACTERĺSTICAS DEL SISTEMA Fuente de Energía Cuatro baterías alcalinas AA de 1.5V Tamaño del Medidor Sin 152 (L) x 99 mm (W) x 55 mm (H), la Banda de Presión 340g sin baterías Tamaño de la banda de M (medium): 24-35 cm (9.4-13.8 inches) presión with air tube 80 cm 4 usuarios con 100 memorias cada uno;... - Page 73 CARCTERĺSTICAS DE MEDICIÓN DE LA PRESIÓN ARTERIAL Rango de presión 0 - 300 mmHg Unidad de Medida mmHg or KPa Rango de Medida para la Presión 50 mmHg to 250 mmHg Sistólica Rango de Medida para la Presión 30 mmHg to 180 mmHg Diastólica Rango de Medida para Frecuencia 40 to 199 beats / minute...
-
Page 74: Comunicado Oficial De La Comisión Federal De
COMUNICADO OFICIAL DE LA COMISIÓN FEDERAL DE COMUNICACIONES (FCC, siglas en inglés) 15.21 Tenga presente que todo cambio o modificación que no se encuentre expresamente aprobado por la parte responsable puede causar la anu- lación de la autorización del usuario para utilizar el equipo. 15.105(b) Comunicado oficial de la Comisión Federal de Comunicaciones (FCC, siglas en inglés) Las pruebas a las que ha sido sometido este equipo comprobaron que cumple... - Page 76 Distributed by ForaCare/ Distribuido por ForaCare ForaCare, Inc. 893 Patriot Dr., Suite D, Moorpark, CA 93021 USA Products made in Taiwan/ Productos hecho en Taiwan Toll Free/ Número de Teléfono Gratuito : 1-888-307-8188 (7:00 am-6:00 pm PST, Mon.-Fri./ 7:00 am~6:00 pm N, Lunes a Viernes) For assistance outside of these hours, please contact your healthcare professional./ Para obtener asistencia fuera de estos horarios, póngase en contacto con el profesional de la salud.
Need help?
Do you have a question about the P20 and is the answer not in the manual?
Questions and answers