Altrex MiTower Assembly Manual
Hide thumbs
Also See for MiTower:
- Instruction manual (64 pages) ,
- Manual (25 pages) ,
- Safety and assembly instructions manual (20 pages)
Advertisement
Available languages
Available languages
Quick Links
Advertisement
Chapters

Related Manuals for Altrex MiTower


Summary of Contents for Altrex MiTower
- Page 1 760266-B-0115 ASSEMBLY GUIDE MONTAGEANLEITUNG...
-
Page 2: Table Of Contents
MiTOWER 3 m - Montage MiTOWER 4 m - Montage MiTOWER PLUS-Komponenten Spezifikationen PLUS Lager- und Transporttrolley PLUS MiTOWER PLUS 5 m - Montage MiTOWER PLUS 6 m - Montage MiTOWER STAIRS-Komponenten Sicherheit STAIRS - Do’s & Don’ts Anfang MiTOWER STAIRS - Montage... -
Page 3: Introduction
All instructions in this manual have to be strictly adhered to. If the instructions contained in this manual are not followed, accidents may arise. Altrex cannot be held liable for any loss resulting from the assembly or use of an Altrex MiTOWER that is not in compliance with the manual. -
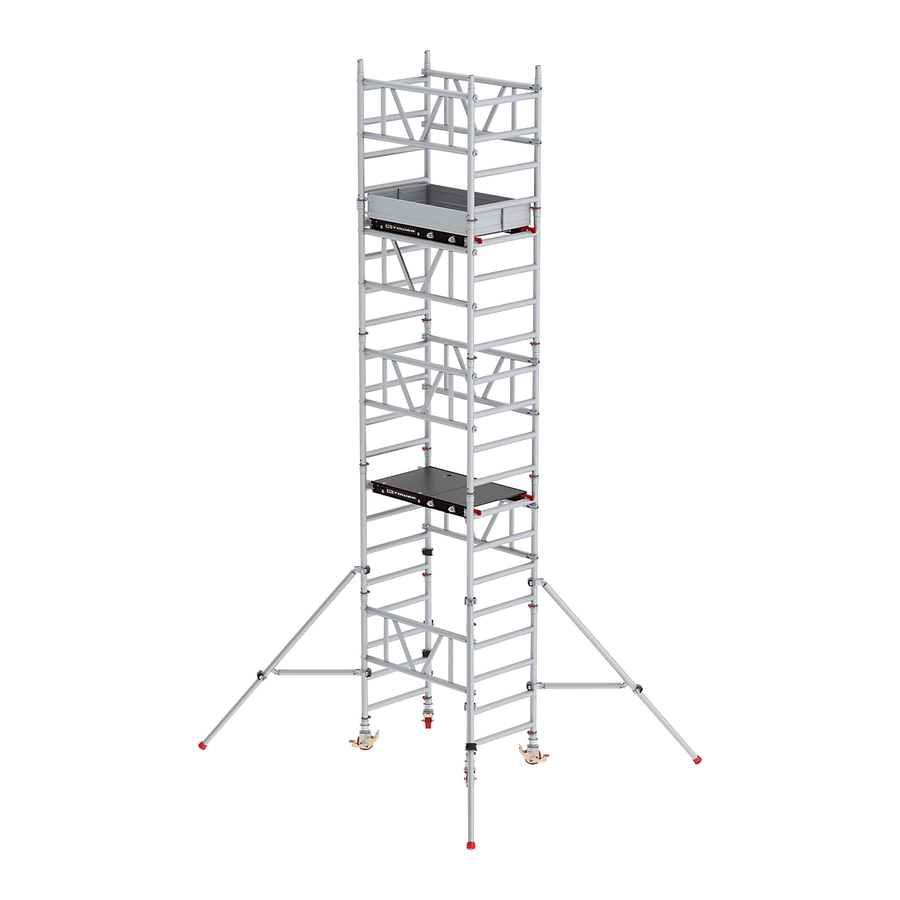
Page 4: Mitower Components
MiTOWER Components Parts Listing 4 Rung Frame Adjustable Leg and Castor Toe Board Guardrail Brace Panel Telescopic Stabiliser Hatch Platform... - Page 5 To disengage, simply lift and hold the jaw as you raise the platform clear. 5. Platform with built in Component Hangers To enable one man to erect MiTOWER, each hatch platform is fitted with four component hangers which are stowed (two either side) within Retract the platform’s frame.
-
Page 6: Specifications
Telescopic Outrigger 305640 Hatch Platform 305006 Guardrail Brace Panel 301215 125mm Locking Castor 324515 with adjustable Leg Toe Board Set 305581 MiTOWER Weight (kg) 76.5 98.9 109.3 Platform Safe Working 150kg 150kg 150kg Load MiTOWER 2m MiTOWER 3m MiTOWER 4m... -
Page 7: Storage And Transport Trolley
Storage and Transport Trolley Transport & Storage Trolley Components Guardrail Brace Panel x 2 For ease of storage and of transportation, MiTOWER Toe Board Set has been designed so that all components can be safely stored Hatch Platform within the tower’s base assembly. -
Page 8: Safety Do's & Don'ts
Safety Do’s & Don’ts Always read and understand this guide before you begin assembly Always ensure that all safety requirements are met and that MiTOWER is the correct access solution for the task you wish to perform Always ensure that MiTOWER is assembled and dismantled by a qualified, competent person... - Page 9 Never use MiTOWER if you don’t understand something in this guide; please contact the supplier for advice Never assemble, use, move or dismantle MiTOWER if you are tired or unwell or if you are under the influence of alcohol or drugs...
-
Page 10: Before You Start
Dismantling Your MiTOWER MiTOWER is easily dismantled by simply reversing the erection procedure. Make sure that the component hangers are evenly loaded to ensure your MiTOWER remains balanced. You must, however, be protected by guardrail brace panels when standing on any platform and ensure that you use the method of construction when... -
Page 11: Getting Started
Once moved, always check MiTOWER before using. If MiTOWER is to be moved to a new location, a new level or over rough terrain, it must be fully dismantled and rebuilt at the new location. Hoisting or suspending the... -
Page 12: Mitower 2M - Assembly
MiTOWER 2m - Assembly Step 1 Step 2 Fully insert the adjustable legs with Attach a guardrail brace panel to the vertical tube of one frame with the upper castors into two frames, turning the leg’s height adjustment collar to bring each leg claw positioned above the fourth rung and with all claws facing outward. - Page 13 MiTOWER 2m - Assembly Step 5 Stand inside the tower and fit a platform on to the eighth rung, making sure that the wind-lock catches engage. Step 6 Fit a stabiliser to each corner of the tower. Position the lower horizontal stabiliser coupler clamp just above the frame’s second rung, then secure the top stabiliser...
-
Page 14: Mitower 3M - Assembly
MiTOWER 3m - Assembly Step 1 Step 2 Fit a platform on to the fourth rung, Replicate steps 1 & 2 from 2m assembly. making sure that the wind-lock catches Fit a single 1m frame to a base frame and engage. - Page 15 MiTOWER 3m - Assembly Step 5 Place a guardrail brace panel on to a component hanger on one side of the platform and a second platform on the other side. Access the first platform and attach the guardrail brace panel with its upper jaw positioned beneath the twelfth frame rung.
-
Page 16: Mitower 4M - Assembly
MiTOWER 4m - Assembly Step 1 Step 2 Fit one set of conjoined frames to each Replicate steps 1 - 6 from 2m assembly. end of the tower and apply the frame Place three guardrail brace panels on to clips. Next, attach the guardrail brace... - Page 17 MiTOWER 4m - Assembly Step 3 Access the tower then carefully fit the second platform on to the sixteenth rung, making sure that the wind-lock catches engage. Extend and lock the four component hangers located on either side of the platform. Transfer the two...
-
Page 18: Mitower Plus Components
MiTOWER PLUS Components Parts Listing 4 Rung Frame Adjustable Leg and Castor Toe Board PLUS Guardrail Brace Panel PLUS Telescopic Stabiliser PLUS Hatch Platform PLUS... - Page 19 To disengage, simply lift and hold the jaw as you raise the platform clear. 5. Platform with built in Component Hangers To enable one man to erect MiTOWER PLUS, each hatch platform is fitted with four component hangers which are stowed (two either side) Retract within the platform’s frame.
-
Page 20: Specifications Plus
Specifications PLUS... -
Page 21: Storage And Transport Trolley Plus
PLUS 2m PLUS 3m PLUS 4m PLUS 5m Transport & Storage For ease of storage and of transportation, MiTOWER PLUS has been designed so that all components can be safely stored within the tower’s base assembly. See illustration. Trolley Components... -
Page 22: Mitower Plus 5M - Assembly
Step 2 For the assembly of lower configurations the Fit one set of conjoined frames to each instructions of the MiTOWER can be used. end of the tower and apply the frame clips. For the required components refer to the Next, attach the guardrail brace panel component matrix. - Page 23 MiTOWER PLUS 5m - Assembly Step 3 Access the tower till the first platform and then transfer the components to the component hangers of the second platform. Climb to the second platform and then carefully fit the third platform on to the twentieth rung, making sure that the wind-lock catches engage.
-
Page 24: Mitower Plus 6M - Assembly
MiTOWER PLUS 6m - Assembly Step 1 Step 2 Fit one set of conjoined frames to each Replicate steps 1 - 6 from 4m assembly. end of the tower and apply the frame clips. Place three guardrail brace panels on to... - Page 25 MiTOWER PLUS 6m - Assembly Step 3 Access the tower till the first platform and then transfer the components to the component hangers of the second platform. Climb to the second platform and then carefully fit the third platform on to the tweny-fourth rung, making sure that the wind-lock catches engage.
-
Page 26: Mitower Stairs Components
MiTOWER STAIRS Components Parts Listing 4 Rung Frame Walkthrough Frame Horizontal Stabiliser Adjustable Leg and Cap Toe Board Guardrail Brace Panel Telescopic Stabiliser Hatch Platform... - Page 27 3. Adjustable Leg and Cap The adjustable leg and cap allows for accurate positioning of your Extend MiTOWER STAIRS in relation to your workplace. The leg can be extended or retracted to allow for levelling and the cap prevents movement. Retract...
-
Page 28: Safety Do's & Don'ts Stairs
Always ensure that all safety requirements are met and that MiTOWER STAIRS is the correct access solution for the task you wish to perform. Always perform a full risk assessment prior to assembling or using MiTOWER STAIRS and abide by your findings. -
Page 29: Getting Started
Getting Started MiTOWER STAIRS requires only one person to assemble and dismantle it. Your MiTOWER STAIRS is supplied with a walkthrough frame that may only be used in the base of the MiTOWER STAIRS. Your MiTOWER STAIRS can be assembled to 4m platformheight, measured from the lowest point of the tower. -
Page 30: Mitower Stairs - Assembly
Now attach the base frame and apply the frame clips. second panel opposite the first to create Stand inside the MiTOWER STAIRS and fit the MiTOWER STAIRS base frame assembly. a platform on to the highest rung of the... - Page 31 MiTOWER STAIRS - Assembly Step 4 If possible fit a stabiliser to each corner of the MiTOWER STAIRS. Position the lower horizontal stabiliser coupler clamp just beneath the fourth rung of the 4 rung frame, then secure the top stabiliser coupler clamp just beneath the frame’s sixth rung.
-
Page 32: 10 Point Pre-Use Safety Checklist
Components check all components are free from damage Castors ensure they are locked Environment check your MiTOWER is level Stabiliser Coupler check they are secure Clamps Guardrails make sure all platforms are fully enclosed by guardrails... -
Page 33: Repair And Warranty
To make a claim under the warranty, Altrex or your Altrex dealer has to be provided with the proof of purchase. 5. Any defects of the product have to be reported to Altrex or your Altrex dealer as soon as pos- sible, but in any case within 14 days of the defect being found. - Page 34 MiTOWER 3 m - Montage MiTOWER 4 m - Montage MiTOWER PLUS-Komponenten Spezifikationen PLUS Lager- und Transporttrolley PLUS MiTOWER PLUS 5 m - Montage MiTOWER PLUS 6 m - Montage MiTOWER STAIRS-Komponenten Sicherheit STAIRS - Do’s & Don’ts Anfang MiTOWER STAIRS - Montage...
-
Page 35: Einleitung
Alle Anweisungen in dieser Anleitung sind genau zu befolgen. Das Nichtbeachten der Anweisungen in dieser Anleitung kann zu Unfällen führen. Altrex haftet nicht für Schäden, die als Folge eines nicht ordnungsgemäß und entsprechend der Anleitung aufgebauten und benutzten Altrex-Gerüstes entstanden sind. -
Page 36: Mitower-Komponenten
MiTOWER-Komponenten Komponentenliste Aufbaurahmen 75-4sp Fahrrolle ø125mm inklusiv einstellbaren Spindel Bordbretter Satz Doppelte Geländerstrebe MiTOWER Dreiecksausleger Plattform Holz mit Luke MiTOWER... - Page 37 Auskuppeln, heben Sie die Klaue einfach an und halten Sie, während Sie die Plattform anheben. 5. Plattform mit integrierten Komponentenaufhängungen Um zu ermöglichen, dass eine einzige Person, den MiTOWER aufbauen kann, ist jede Plattform mit vier Komponentenaufhängungen versehen, die in den Verkleinern Plattformsprossen geschoben werden (zwei an jeder Seite).
-
Page 38: Spezifikationen
Spezifikationen KOMPONENTENMATRIx UND GEWICHTE Gewicht Beschreibung Art.nr. Menge Menge Menge Aufbaurahmen 75-4sp MiTOWER 301206 Dreiecksausleger MiTOWER 305640 Plattform Holz mit Luke MiTOWER 305006 Doppelte Geländerstrebe MiTOWER 301215 Fahrrolle ø125mm 324515 Bordbretter Satz 305581 Gesamtgewicht MiTOWER 76.5 98.9 109.3 Plattformsichere 150kg... -
Page 39: Lager- Und Transporttrolley
Transport und Aufbewahrung Trolley-Komponenten Doppelte Geländerstrebe Zur einfachen Aufbewahrung und/oder den Transport wurde Bordbretter Satz der MiTOWER so entwickelt, Plattform Holz mit Luke dass alle Komponenten innerhalb des Basisgestells Einstellbares Spindel & Fahrrolle x 4 sicher aufbewahrt werden können. Siehe Abbildung. -
Page 40: Sicherheit - Do's & Don'ts
Seil auf die Arbeitsbühne gehoben werden. Begehen Sie die Plattformen immer im MiTOWER und über die Aufbaurahmen an der Luke der Plattform. Halten Sie Ihre Füße in der Mitte der Sprossen und ergreifen Sie die oberen Sprossen mit Ihren Händen. - Page 41 Montieren oder verwenden Sie den MiTOWER niemals in der Nähe von Risikobereichen, z.B. bei Stromkabeln, die sich in der Nähe des MiTOWERs oder des Benutzers befinden. Stegen Sie den MiTOWER niemals hinauf oder hinab, wenn Sie nicht beide Hände frei haben. Bringen Sie niemals Banner, Anschlagsbretter, usw. an den MiTOWER an.
-
Page 42: Bevor Sie Anfangen
Reihenfolge ausgeführt wird. Vergewissern Sie sich, dass die Komponentenaufhängungen gleichmäßig belastet sind, um zu gewährleisten, dass Ihr MiTOWER im Gleichgewicht bleibt. Sie müssen beim Stehen auf irgendeiner Plattform immer durch Doppelte Geländerstrebe geschützt sein und sich vergewissern, dass Sie... -
Page 43: Anfang
Abb. 2 Wand Bewegen Ihres MiTOWERS Wenn Ihr MiTOWER ein kleines Stück bewegt werden muss, damit Sie Ihre Aufgabe fortführen können, kann dies erfolgen, vorausgesetzt dass die Stützen eingerastet bleiben und sämtliche Werkzeuge, Materialien und Personen vom Gerüstturm entfernt wurden. -
Page 44: Mitower 2 M - Montage
MiTOWER 2 m - Montage Schritt 2 Schritt 1 Verbinden Sie eine Strebe mit dem Schieben Sie die einstellbaren Gestelle mit den Rollen in zwei Rahmen, drehen Sie die senkrechten Rohr eines Rahmens, wobei Gestellhöhe, um jedes Gestell 25 mm von der sich die obere Klaue über der vierten Strebe... - Page 45 MiTOWER 2 m - Montage Schritt 5 Stellen Sie sich in das Gerüst und befestigen Sie eine Plattform an die achte Sprosse und achten Sie darauf, dass die Anhebesicherung angebracht ist. Schritt 6 Bringen Sie eine Stütze an jeder Ecke des Gerüstturms an.
-
Page 46: Mitower 3 M - Montage
MiTOWER 3 m - Montage Schritt 2 Schritt 1 Befestigen Sie eine Plattform an der vierten Wiederholen Sie Schritt 1 - 2 der 2-m-Montage. Bringen Sie einen 1-m-Aufbaurahmen an dem Sprosse und achten Sie darauf, dass die Aufbaurahmen an und befestigen Sie die Anhebesicherung angebracht ist. - Page 47 MiTOWER 3m - Montage Schritt 5 Platzieren Sie eine Geländerstrebe an eine Komponentenaufhängung der Plattform und eine zweite Plattform an der anderen Seite. Begeben Sie sich auf die erste Plattform und bringen Sie eine Geländerstrebe an, wobei sich die obere Klaue unter der zwölften Sprosse befindet.
-
Page 48: Mitower 4 M - Montage
MiTOWER 4 m - Montage Schritt 2 Schritt 1 Bringen Sie einen Satz verbundener Rahmen Wiederholen Sie Schritt 1 - 6 der 2-m-Montage. Platzieren Sie drei Doppelte Geländerstreben an jedem Endstück des Gerüstturms an und an einen Aufhängungssatz und ein Paar von befestigen Sie die Rahmenklemmen. - Page 49 MiTOWER 4m - Montage Schritt 3 Befestigen Sie jetzt vorsichtig die zweite Plattform an der sechzehnten Sprosse und achten Sie darauf, dass die Anhebesicherung angebracht ist. Erweitern und befestigen Sie die vier Komponentenaufhängungen, die sich an jeder Plattformseite befinden. Übertragen Sie die zwei Geländerstreben und das Bordbretter...
-
Page 50: Mitower Plus-Komponenten
MiTOWER PLUS-Komponenten Komponentenliste Aufbaurahmen 75-4sp Fahrrolle ø125mm inklusiv einstellbaren Spindel Bordbretter Satz PLUS Doppelte Geländerstrebe MiTOWER PLUS Dreiecksausleger PLUS Plattform Holz mit Luke MiTOWER PLUS... - Page 51 Auskuppeln, heben Sie die Klaue einfach an und halten Sie, während Sie die Plattform anheben. 5. Plattform mit integrierten Komponentenaufhängungen Um zu ermöglichen, dass eine einzige Person, den MiTOWER PLUS aufbauen kann, ist jede Plattform mit vier Komponentenaufhängungen versehen, die in den Plattformsprossen geschoben werden (zwei an jeder Seite). Die Retract Aufhängungen können bei Bedarf erweitert oder verkleinert werden, Um die...
-
Page 52: Spezifikationen Plus
Spezifikationen PLUS... -
Page 53: Lager- Und Transporttrolley Plus
PLUS 2m PLUS 3m PLUS 4m PLUS 5m Transport und Aufbewahrung Zum einfachen Aufbewahrung und/oder den Transport wurde der MiTOWER PLUS so entwickelt, dass alle Komponenten innerhalb des Basisgestells sicher aufbewahrt werden können. Siehe Abbildung. Trolley-Komponenten Doppelte Geländerstrebe PLUS (2x) -
Page 54: Mitower Plus 5M - Montage
Schritt 2 Zum Aufbau der kleinere Konfigurationen Bringen Sie einen Satz verbundener Rahmen an jedem Endstück des Gerüstturms an und kann die Bauanleitung für die MiTOWER befestigen Sie die Rahmenklemmen. Danach verwendet werden. bringen Sie eine Geländerstrebe an, wobei sich Die benötigten Teile finden Sie in der... - Page 55 MiTOWER PLUS 5m - Montage Schritt 3 Begehen Sie den Gerustturm bis zum ersten Plattform. Übertragen Sie die Komponenten auf die Komponentenaufhängungen der zweiten Plattform und klettern Sie weiter. Befestigen Sie jetzt vorsichtig die dritte Plattform an der zwanzigsten Sprosse und achten Sie darauf, dass die Anhebesicherung angebracht ist.
-
Page 56: Mitower Plus 6M - Montage
MiTOWER PLUS 6m - Montage Schritt 1 Schritt 2 Bringen Sie einen Satz verbundener Rahmen Wiederholen Sie Schritt 1 - 6 der an jedem Endstück des Gerüstturms an und 4-m-Montage. befestigen Sie die Rahmenklemmen. Danach bringen Sie eine Geländerstrebe an, wobei sich Platzieren Sie drei Doppelte Geländerstreben... - Page 57 MiTOWER PLUS 6m - Montage Schritt 3 Begehen Sie den Gerustturm bis zum ersten Plattform. Übertragen Sie die Komponenten auf die Komponentenaufhängungen der zweiten Plattform und klettern Sie weiter. Befestigen Sie jetzt vorsichtig die dritte Plattform an der vierundzwanzigsten Sprosse und achten Sie darauf, dass die Anhebesicherung angebracht ist.
-
Page 58: Mitower Stairs-Komponenten
MiTOWER STAIRS-Komponenten Komponentenliste Aufbaurahmen 75-4sp Durchlaufrahmen Horizontalausleger Einstellbaren Spindel mit Kappe Bordbretter Satz Doppelte Geländerstrebe Dreieckausleger Plattform Holz mit Luke... - Page 59 3. Einstellbaren Spindel mit Kappe Extend Das einstellbare Spindel mit Kappe ermöglicht eine genaue Positionierung Ihres MiTOWER STAIRS in Relation zu Ihrem Arbeitsplatz. Das Spindel kann erweitert oder verkleinert werden, um eine Ebene zu schaffen und die Kappe verhindert Bewegungen Ihres MiTOWER STAIRS.
-
Page 60: Sicherheit Stairs - Do's & Don'ts
Sicherheit STAIRS - Do’s en Don’ts Sicherheit - Do’s Lesen und verstehen Sie diese Anleitung, bevor Sie mit der Montage des MiTOWER STAIRS anfangen. Achten Sie immer darauf, dass alle Sicherheitsanforderungen eingehalten werden und dass MiTOWER STAIRS die korrekte Zugangslösung für die von Ihnen auszuführende Aufgabe ist. -
Page 61: Anfang
Falls nötig kann den Horizontalausleger entlang die Sprosse verschoben werden. Wenn der MiTOWER STAIRS auf eine offene Treppe verwendet wird kann das Gerüst mit die mitgelieferten Spanngurten befestigt werden. Die Spannguten gehen um die Sprossen des Rahmens und die Stufen der Treppe. -
Page 62: Mitower Stairs - Montage
Rahmenklemmen an und vergewissern Sie sich, der ersten Strebe, um den Basisrahmen des dass diese korrekt befestigt wurden. Stellen MiTOWER STAIRS zu erstellen. Verwenden Sie Sie sich in das Gerüst und befestigen Sie eine eine Wasserwaage als Richtlinie und justieren Plattform an die höchste Sprosse und achten Sie... - Page 63 MiTOWER STAIRS - Montage Stap 5 Schritt 4 Bringen Sie wenn möglich eine Dreiecksausleger an jeder Ecke des Gerüstturms an. Positionieren Sie die untere waagerechte Stützverbindungsklemme direkt unter der vierten Aufbaurahmensprosse und sichern Sie die obere Stützverbindungsklemme direkt unter der sechsten Sprosse.
-
Page 64: 10-Punkte-Sicherheitscheckliste Vor Dem Gebrauch
Komponenten Prüfen Sie, ob alle Komponenten unbeschädigt sind. Rollen Vergewissern Sie sich, dass sie befestigt sind. Umgebung Prüfen Sie, ob Ihr MiTOWER waagerecht ist. Stützenverbin- Kontrollieren Sie die Sicherheit dungsklemmen Vergewissern Sie sich, dass alle Plattformen komplett von Geländer Geländern umgeben sind. -
Page 65: Reparatur Und Garantie
5. Sollte sich das Produkt als defekt erweisen, dann sind die Mängel so schnell wie möglich, jeden- falls innerhalb von 14 Tagen nach dem Entdecken, der Firma Altrex oder Ihrem Altrex Händler zu melden. 6. a) Altrex muss in die Gelegenheit gestellt werden, sofern man sich auf die Garantiebe-stimmun- gen beruft, um das Produkt im Altrex Qualitätszentrum zu untersuchen. - Page 68 Altrex B.V. P.O. Box 30160 8003 CD Zwolle The Netherlands www.altrex.com www.altrex.com/mitower Relax. It’s an Altrex.
Need help?
Do you have a question about the MiTower and is the answer not in the manual?
Questions and answers