Midland BTNEXT PRO Instruction Manual
Dual core intercom system
Hide thumbs
Also See for BTNEXT PRO:
- User manual ,
- Instruction manual (45 pages) ,
- Instruction manual (58 pages)

Related Manuals for Midland BTNEXT PRO


Summary of Contents for Midland BTNEXT PRO
- Page 1 › MANUALE D’USO › INSTRUCTION GUIDE › BEDIENUNGSANLEITUNG › MANUAL DE INSTRUCCIONES › GUIDE D’UTILISATION › HANDLEIDING...
-
Page 3: Table Of Contents
Caratteristiche tecniche Midland BTNEXT PRO ..........................................3 Ricarica delle batterie .................................................... 4 Descrizione dispositivo e sistema di fissaggio ............................................. 4 Accensione e spegnimento del Midland BTNEXT PRO ........................................6 Modalità operative ....................................................6 Come abbinare un altro dispositivo Midland BTNEXT PRO ......................................7 Conference......................................................10... -
Page 4: Principali Caratteristiche
BT NEXT PRO è dotato di molteplici funzioni che si attivano facilmente gra- › 2 kit di montaggio a slitta completo di speaker stereo zie ai 3 grandi tasti posti sul frontale del dispositivo. Midland BT NEXT PRO si può fissare › 2 microfoni a braccetto e 2 microfoni a filo al casco in due modi: tramite basetta adesiva o tramite l’aggancio a morsetto. -
Page 5: Ricarica Delle Batterie
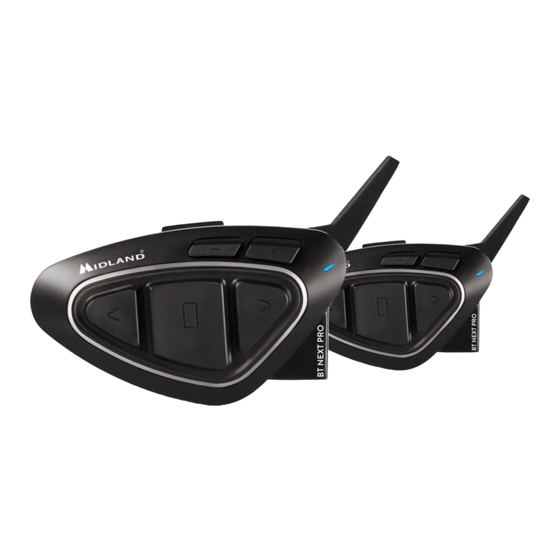
Descrizione Midland BTNEXT PRO Altoparlanti stereo Il dispositivo Midland BTNEXT PRO è dotato di 5 pulsanti, tutti nella parte frontale. I due altoparlanti stereo hanno una fascia adesiva/velcro che facilita il loro fissaggio all’in- Volume - Volume + terno del casco. - Page 6 2) Tramite le due viti in dotazione avvitate la base a morsetto alla slitta. Descrizione sistema di fissaggio al casco Il Midland BTNext PRO è fornito con due sistemi di fissaggio al casco, uno tramite base con biadesivo e l’altro con aggancio a morsetto.
-
Page 7: Accensione E Spegnimento Del Midland Btnext Pro
Midland BTNEXT PRO ha tre modalità di funzionamento distinte: Intercom, Telefono e Radio FM. In base alla modalità attiva in un dato momento, le funzioni del Midland BTNEXT PRO cambiano e di conseguenza anche i tre pulsanti centrali assumono funzionalità diverse. -
Page 8: Come Abbinare Un Altro Dispositivo Midland Btnext Pro
Se invece i dispositivi non fanno parte della stessa confezione o avete acquistato un Utilizzo della funzionalita’ Intercom con due dispositivi altro Midland BTNEXT PRO in un secondo momento (per esempio per il passeggero), Per utilizzare la funzionalità intercom, assicuratevi che entrambi i dispositivi siano accesi dovete prima eseguire la procedura di abbinamento. - Page 9 Rossa fissa. Un Midland BT NEXT PRO può essere abbinato ad un massimo di 5 dispositivi, per un 5. Ora potete procedere ad un secondo e poi ad un terzo abbinamento, basta ripetere totale di 6 unità...
- Page 10 VOL-. nire solo verso il dispositivo abbinato tramite il tasto “Centrale”. Il vostro BTNext PRO può funzionare sia in modalità classica, con la comunicazione Suggerimento: La funzionalità VOX può essere molto utile per comunicare con la persona “uno ad uno”, oppure in modalità “conference” dove tutti parlano contemporaneamente.
-
Page 11: Conference
Attenzione: in modalità “Conference” anche la funzione “Talk2All-Universal Intercom”, per › Attivazione modalità Audio Pubblico: tenete premuto il tasto “Vol –“ per 3 sec., parlare con dispositivi non Midland non è disponibile. sentirete l’annuncio vocale “Public”. › Attivazione modalità Audio Privato: tenete premuto il tasto “Vol –“ per 3 sec., sen- Disabilitare la modalità... -
Page 12: Talk 2 All - Abbinamento A Dispositivi Non Midland
Attenzione: in questa configurazione il dispositivo non Midland non potrà utilizzare il te- connessione è disponibile solo per il passeggero. lefono (essendo già stato abbinato il Midland BTNEXT PRO al posto del telefono stesso). E’ possibile abbinare anche un dispositivo Midland in modalità “Talk2ALL-Universal In- Talk 2 All - Abbinamento a dispositivi non Midland tercom”... -
Page 13: Funzione Background
(fate riferimento al manuale sponibile. del telefonino). 2. Attivate la modalità “Setup: spegnete il Midland BTNEXT PRO e tenete premuto il Funzione Background pulsante “Centrale” fino a che la luce non rimane di colore rosso fisso. - Page 14 Telefono collegato al pulsante “Vol+”: premete brevemente il pulsante “Avanti”, se il vostro telefonino supporta la chiamata vocale, vi verrà chiesto di pronunciare il nome del Midland BTNEXT PRO per gestire le seguenti funzioni: Play, Stop/Pause, Avanti ed B - Utilizzo pulsanti in modalità Phone Modalità...
-
Page 15: Condividere La Musica
Intercom senza nessun audio aperto. 4. Il Midland BTNEXT PRO uscirà dalla modalità setup (luce rossa fissa) e passerà au- Il passeggero non può controllare la musica ma può interrompere la condivisione pre- tomaticamente allo stato di funzionalità normale (luce blu lampeggiante). Ora il GPS mendo brevemente il tasto “Centrale”. -
Page 16: Utilizzo Della Funzionalita' Radio Fm
Utilizzo della funzionalita’ Radio FM Attivazione: Fate la stessa procedura; questa volta un lampeggio della luce blu indicherà Il Midland BTNEXT PRO è dotato di un ricevitore radio FM integrato. Per utilizzarlo è l’attivazione. sufficiente passare alla modalità “FM Radio”. -
Page 17: Ingresso Audio In Background
Il dispositivo rimane nell’ultimo stato selezionato e per accendere di nuovo la luce di emergenza dovete premere contemporaneamente i tasti “Indietro” BTNEXT PRO ha un ingresso audio per collegare una sorgente audio a filo, per esempio e “Avanti”. -
Page 18: Configurazione E Aggiornamento Firmware
› Premete i tasti “Avanti” e “Centrale” per 3 sec la luce Blu lampeggerà tre volte. fisso. Ora il Midland BTNEXT PRO è in modalità “Setup” . › Fate doppio click sul tasto centrale per uscire dalla modalità Set-Up ora potete uti- 3. -
Page 19: Garanzia
Garanzia La durata della garanzia è di 24 mesi per l’apparato e di 6 mesi per gli accessori (batterie, caricatori, antenne, auricolari e microfoni). Per maggiori informazioni visitate il sito www.midlandeurope.com Certificazioni e Conformità di Sicurezza CE/Informazioni generali Questo prodotto è conforme alla direttiva e può... - Page 21 Technical specifications of Midland BTNEXT PRO .........................................21 Charging batteries ....................................................22 Unit and fixing system description ..............................................22 Switching ON and OFF your Midland BTNEXT PRO ........................................24 How to pair two Midland BTNEXT PRO units ..........................................25 Set up of the AGC system .................................................26 Conference mode with one Bluetooth device on “VOL-”...
-
Page 22: Main Features
› 2 plates with bi-adhesive strip to fix the unit onto the helmet on the front of the unit. Midland BTNEXT PRO is fixed on the helmet using the adhesive › 2 plates with screw to fix the unit onto the helmet plate or the screw mounting clamp. -
Page 23: Charging Batteries
BTNEXT PRO description nector on the microphone allows you to choose the microphone that best suits the The BTNEXT PRO has five buttons on the front; the main three big button are multi helmet you are using. functions buttons: the Forward (on the left), the middle button and the Backward (on the right), the two squared buttons are the Volume + and Volume -. - Page 24 By either using the plate with bi-adhesive strip, or the screw plate. These methods allow you to safely “fix” the BTNext PRO unit onto your helmet and to remove it at any time in order to recharge or store it.
-
Page 25: Switching On And Off Your Midland Btnext Pro
(6 memory are available). Fitting and removing your Midland BTNEXT PRO The BTNEXT PRO can be easily fitted onto the helmet by sliding it downwards on the You can switch (toggle) from one mode to the other simply pressing the Middle button sliding mounting kit. -
Page 26: How To Pair Two Midland Btnext Pro Units
To use the intercom feature, be sure that both units are turned on and correctly paired together. The two units supplied in the same Midland BTNEXT PRO box, are already paired and ready to use, this means you don’t need to perform this procedure. The units are already Manual activation paired using the Middle button. -
Page 27: Set Up Of The Agc System
The Blue and Red lights will flash. One Midland BTNEXT PRO unit can be paired to maximum five other BT units, that 4. Repeat the same procedure on the other unit, you don’t need to use the same but- means six in total (3 Midland unit + 2 Talk2All + yourself). - Page 28 VOL-, up to 8 people (4 couple). You can decide to use the BTNext Pro in “one to one” communication up to 6 people (“classic” Intercom mode) or with 8 people (4 couples) conference intercom (Conference mode).
-
Page 29: Conference Mode With One Bluetooth Device On "Vol
The two units that › On the BTNext Pro go in “Setup mode”, press the “VOL-” button for 3 sec. The Blue are in the middle of the chain (unit 2 and 3) must keep the intercom open on both FWD and BWD buttons to allow the full communication of the four units together. -
Page 30: Talk 2 All - Universal Intercom With Different Brand Unit
Talk 2 All - Universal Intercom with different brand unit. You can pair also a Midland unit as Talk2All, that means the pairing must be done as a phone (one unit use the Talk2All procedure and the other unit use the pairing to “Phone”... - Page 31 To redial the last number: › Phone on Vol+: Press“Forward”button for 3 seconds in order to redial the last num- To pair the Midland BTNEXT PRO to a Phone, you must first enter the setup mode: 1. Turn off the unit ber (you will hear one audio confirmation tone).
- Page 32 .Attention: It is possible to have all the controls (Play/Pausa, FWD, BWD) of the A2DP phone’s MP3 player. You can even use the buttons on the Midland BTNEXT PRO unit music only in “Phone mode”.
-
Page 33: How To Listen To The Fm Radio
How to pair the Midland BTNEXT PRO to a GPS to “FM Radio” or “Intercom” mode, you can still listening to A2DP music but you don’t In general it is possible to pair the Midland BTNEXT PRO to all the GPS for motorbike have all the controls buttons available. -
Page 34: Wired Audio Input
RDS pressing together the “Volume +” and “Volume –“ buttons for 3 Your Midland BTNEXT PRO can be connected to a wired audio source, like an iPod (or sec when the radio is on. A voice announcement will tell you the RDS status. -
Page 35: Emergency Stop Light
3 seconds. The Blue Light will be lit on for 1 sec and then back to steady RED. › Double click on the “Middle” button to exit the “Setup” mode and use the Midland If needed the wired input can be enabled or disabled: BTNEXT PRO. - Page 36 Setting mode by double clicking the “Middle” button. Once the Use at your own risk red light turns off, the blue led starts blinking. Now you can use your BTNEXT PRO The use of the device will impair your ability to hear other sounds and others around you.
-
Page 37: Warranty
European CE Notice Certification and Safety Approval FCC Compliance Information Information This device complies with Part 15 of the FCC Rules. Operation is subject to the fol- lowing two conditions: (1) this device may not cause harmful interference, and (2) this This product is CE marked according to the RED Directive and is free use 2014/53/UE... - Page 39 Konferenz ......................................................46 Verbinden eines Intercomgerätes mittels Vol-: ..........................................47 Talk 2 All - Universelles Gegensprechen mit einem Gerät einer anderen Marke................................ 47 Kopplung des Midland BTNEXT PRO mit Bluetooth Geräten......................................48 ”Hintergrund“-Funktion ..................................................48 Music Share (Musik weiterleiten) ..............................................50 Kopplung mit einem GPS Navigator ..............................................51 Verwenden eines PMR 446 Funkgeräts mit integriertem Bluetooth ....................................51...
-
Page 40: Dual Core Gegensprechanlage
› 1 Slide-In Halterungssatz mit zwei Stereolautsprechern › 1 Klapphelmmikrofon und 1 Integralhelmmikrofon Midland BTNEXT PRO ist ein Gegensprechsystem mit 2 Bluetooth Chipsätzen für Kon- › 1 Platte mit Klebestreifen, um das Gerät am Helm zu befestigen ferenzkommunikation und echte Stereo Audioübertragung im Hintergrund. Das Design ›... -
Page 41: Aufladen Des Akkus
Beschreibung des Geräts und Montagehalterung austauschbare Mikrofone, eine Klapphelmversion und eine Integralhelmversion. Mit Das BTNEXT PRO hat fünf Tasten auf der Vorderseite, wobei die drei großen Tasten dem Mini-Stecker am Mikrofon können Sie für jeden Helmtyp das passende Mikrofon Multifunktionstasten sind: Vorwärts (links), die mittlere Taste und Zurück (rechts); die auswählen. -
Page 42: Mikrofonbefestigung
Gerätes nicht zu weit zu erhöhen. Sie müssen weiterhin den Verkehr um Sie herum wahrnehmen können. Slide-In Halterungssatz Das Midland BTNEXT PRO kann am Helm befestigt werden, indem man die Slide-In Halterung auf zwei verschiedene Weisen anbaut: entweder mittels des Klebestreifens oder mittels der Schraubenplatte. Mit beiden Verfahren können Sie das BTNEXT PRO sicher an Ihrem Helm befestigen und es jederzeit wieder abnehmen, um es aufzuladen oder zu lagern. -
Page 43: Ein-/Ausschalten Des Midland Btnext Pro
Gummierte Grundplatte Das Midland BTNEXT PRO anbauen und abbauen Das BTNEXT PRO kann problemlos am Helm befestigt werden, indem es nach unten Schritt 2: Befestigen Sie die Klemmhalterung an der Slide-In Halterung mittels der 2 auf die Slide-In Halterung geschoben wird. Das BTNEXT PRO wird durch den Befesti- Schrauben. -
Page 44: Betriebsarten
Suchen Sie einen bestimmten Radiosender und speichern Sie ihn (Es sind 6 Speicherplätze vorhanden). Die beiden Geräte im BTNEXT PRO - Set sind bereits miteinander gekoppelt und Sie können von einem Modus in einen anderen umschalten (hin- und herschalten), betriebsbereit. - Page 45 Fahrer 2 ACHTUNG: Die Sprachsteuerung (VOX) kann die Sprechverbindung nur auf dem Gerät Das Midland BTNEXT PRO hat drei Haupttasten (Vorwärts, Mittel und Zurück). Sie aktivieren, das mit der „mittleren“ Taste gekoppelt wurde. Wenn Sie eine andere Taste können frei entscheiden, welchen Kommunikationspartner Sie mit welcher Taste kop- („Zurück“...
- Page 46 Kopplung des Midland BTNEXT PRO mit einem anderen Midland BTNEXT Taste, die der anderen Person zugeordnet wurde. Die aktuelle Verbindung wird dann automatisch beendet und die neue Verbindung wird gestartet. Um zwei Midland BTNEXT PRO miteinander zu koppeln, müssen diese zuerst in den Sprachsteuerung (VOX) Setupmodus gebracht werden: Die Sprachaktivierung kann nur genutzt werden, um die Intercomverbindung zu Ihrem 1.
-
Page 47: Konferenz
Intercomgeräte mittels “Vol-” gekoppelt wurden, bis zu 8 Personen (4 Bikes). Konferenzmodus deaktivieren Sie können das BTNext Pro entweder im “Eins-zu-Eins” Modus mit bis zu 6 Personen (klas- Wenn Sie sich im Konferenzmodus ohne offene Verbindung befinden, halten Sie die sisches Intercom) oder mit bis zu 8 Personen (4 Bikes) im Konferenzmodus verwenden. -
Page 48: Verbinden Eines Intercomgerätes Mittels Vol
Gegensprechanlagen von Fremdherstellern zu koppeln. erhalten, vorübergehend von der Konferenz getrennt. Alle anderen Konferenzteilneh- Sie können bis zu 2 nicht-Midland Geräte verbinden: eines auf der „Vorwärts“- und mer können sich weiterhin unterhalten. Ist der Anruf bzw. die Ansage beendet, wechseln eines auf der „Zurück“-Taste. -
Page 49: Kopplung Des Midland Btnext Pro Mit Bluetooth Geräten
Kompatibilität mit Geräten der Midland BT-Produktlinie entscheiden, ob Audiosignale von Vol- Geräten mit Ihrem Partner geteilt werden, wenn Das BTNEXT PRO ist mit BTX1 PRO, BTNext PRO, BT Next Conference, BTX1 FM das Intercom geöffnet ist. und BTX2 FM kompatibel. Wenn sie gekoppelt sind, hängt die Reichweite der Gegen- Kopplung mit einem oder zwei Telefonen sprechfunktion von dem Gerät ab, das die geringere Reichweite hat. - Page 50 Mobiltelefon über das BTNEXT PRO bedienen Wahlwiederholung: Nachdem Sie Ihr Mobiltelefon mit dem BTNEXT PRO gekoppelt haben, müssen Sie Telefon über Vol+: Drücken Sie die „Vorwärts”-Taste für 3s, um die Wahlwiederholung in den „Telefon“-Modus wechseln, um es zu verwenden. Wechseln Sie durch langes zu starten (Sie erhalten einen Bestätigungston).
-
Page 51: Music Share (Musik Weiterleiten)
„Zurück“-Taste drückt. lefon fernzusteuern. Wenn Sie Music Share aktiviert haben, können Sie die Intercom-Verbindung nicht Sie können die Tasten am BTNEXT PRO- Gerät nutzen, um die Abspielfunktionen geöffnet lassen. (Wiedergabe, Pause, Vorspulen und Zurückspulen) zu steuern. Es ist nur möglich ein Telefon auf diese Weise zu steuern. Sie können ein Telefon au- Kopplung mit einem GPS Navigator swählen, indem Sie die Vol+ Taste für 3 Sekunden gedrückt halten. -
Page 52: Kopplung Mit Einem Gps Navigator
Das BTNEXT PRO mit einem GPS-Navigationsgerät koppeln „UKW-Radio“-Modus wechseln, um ihn zu benutzen. Drücken Sie die „mittlere“ Allgemein ist es möglich, das BTNEXT PRO mit jedem GPS-Navigationsgerät für Mo- Taste, bis Sie die Sprachansage „UKW-Radio“ hören. Nun bedienen alle drei Tasten das torräder zu koppeln, das Bluetooth Headsets unterstützt. - Page 53 Hintergrund für UKW-Radio einzustellen. Kabelgebundener Audioeingang Bremslicht Sie können Ihr Midland BTNEXT PRO mit einer kabelgebundenen Tonquelle wie zum Auf der Rückseite des Montagesatzes Ihres BTNEXT PRO befindet sich ein extrem Beispiel einem iPod oder einem anderen MP3-Player verbinden. helles LED-Bremslicht. Wenn Sie eine Vollbremsung ausführen, leuchtet dieses C –...
-
Page 54: Setup Und Spezielle Konfiguration
Die Werkseinstellung des gekoppelten Verbindungen irgendwann unübersichtlich werden und es kann angebracht BTNEXT PRO ist „niedrig“. Sie können die VOX Funktion auch deaktivieren, um die sein, alle im BTNEXT PRO gespeicherten Kopplungsdaten zu löschen (Reset). -
Page 55: Benutzung Auf Eigene Gefahr
5x Aufblinken = sehr hohe Empfindlichkeit 4. Nun leuchtet rote LED erneut ständig auf („Setup-Modus“) und die Änderungen Die Firmware Ihres BTNEXT PRO kann mittels einer USB-Verbindung mit Ihrem PC werden bestätigt. konfiguriert und aktualisiert werden. Auf der Website von Midland 5. -
Page 56: Gewährleistung
Gewährleistung Gewährleistungsfrist beträgt 24 Monate ab Kauf-/Lieferdatum (bei Teilen mit be- schränkter Lebensdauer wie, Akkus, Ladegeräte, Headsets, mikrofone und Antennen 6 Monate). Für allen Informationen über die Garantie der Artikel, besuchen Sie bitte unsere www. midlandeurope.com Europäische CE Erklärung und Sicherheitshinweise Hiermit erklärt Cte International Srl, dass das Produkt die grundlegenden Anforderungen und anderen relevanten Bestimmungen der Richtlinie 2014/53/UE. - Page 57 Cómo emparejar dos unidades de Midland BTNEXT PRO ......................................61 Configuración del sistema AGC ................................................62 Cómo emparejar el Midland BTNEXT PRO a más de dos unidades .....................................62 Conference......................................................63 Talk 2 All - Universal Intercom: sincronización con Intercomunicadores de otras marcas ............................65 Music Share ......................................................68...
-
Page 58: Características Principales
› 2 láminas con biadhesivo para fijar al casco grandes botones situados en el frontal de la unidad. Midland BTNEXT PRO se fija al casco › 2 sistemas de fijación al casco mediante mordaza mediante la placa adhesiva o el soporte con mordaza. -
Page 59: Carga De La Batería
Descripción del dispositivo y del sistema de montaje mite escoger el micrófono que mejor convenga al casco que esté usando. BTNEXT PRO dispone de cinco pulsadores, todos ubicados en la parte frontal: los tres Montaje de los altavoces estéreo grandes son multifunción: Adelante (izquierda en el dibujo), Central y Atrás (derecha). - Page 60 Descripción del sistema de montaje deslizante El Midland BTNEXT PRO puede fijarse al casco de dos formas: usando la lámina con biadhesivo o la lámina con mordaza. Estos métodos permiten tanto fijar de forma se- gura el BTNEXT PRO al casco como retirarlo en cualquier momento para cargarlo o guardarlo.
-
Page 61: Encender Y Apagar El Btnext Pro
El BTNEXT PRO se mantiene en posición gracias emisora concreta y memorizarla (dispone de 6 memorias). al clip de fijación de la parte superior del soporte (A). Para retirar el BTNEXT PRO, Puede cambiar de un modo a otro pulsando durante 3 segundos el botón Central. Un simplemente presione el clip de fijación y empuje la unidad hacia arriba. -
Page 62: Distancia
Sincronizar BTNEXT PRO con otra unidad de BTNEXT PRO Activación vocal (VOX): Para sincronizar el BTNEXT PRO a otro BTNEXT PRO debe entrar en el modo Setup: Bastará con comenzar a hablar sin tocar ningún botón. Después de unos segundos, 1. -
Page 63: Configuración Del Sistema Agc
(luz Roja siempre encendida). des de BT, es decir, seis en total (3 unidades Midland + 2 Talk2All + usted). El Midland 6. Ahora que el emparejamiento está completado, puede proceder a emparejar otras BTNEXT PRO dispone de tres botones principales (Adelante, Central y Atrás). -
Page 64: Conference
(ver Tabla A). Puede decidir usar su BTNEXT PRO en modo comunicación «uno a uno» hasta 6 per- sonas (modo clásico), o en modo «Conference» Intercom con 8 personas (4 parejas) Activación vocal (VOX): donde todos pueden hablar simultáneamente. - Page 65 Cómo emparejar un Intercom en el botón «Vol-»: a la vez. › En el BTNEXT PRO vaya al modo Setup y pulse el botón «Vol-» durante 3 segundos. Función «One Click Talk» Los LED azul y rojo empezarán a parpadear.
-
Page 66: Talk 2 All - Universal Intercom: Sincronización Con Intercomunicadores De Otras Marcas
Central durante 7 segundos hasta que la luz Roja perma- BTNEXT PRO sólo es compatible con la anterior línea de Midland BT (BT Next, BTX2 y nezca encendida). BTX1) si ésta se actualiza a la versión de firmware de 2014 o posterior. - Page 67 3 segundos el botón Adelante o Atrás (oirá un tono de confirmación). Con el fin de obtener el mejor rendimiento con su teléfono móvil, recomendamos mante- nerlo lo más cerca posible de su unidad BTNEXT PRO, en el lado izquierdo de su cuerpo Realizar una llamada y, si es posible, en el bolsillo superior de la chaqueta.
- Page 68 A2DP y AVRCP, que permiten escuchar música estéreo y controlar el re- ción de marcación por voz, el sistema le pedirá que pronuncie el nombre de la persona productor MP3. Incluso es posible utilizar los botones del BTNEXT PRO para las si- guientes funciones: Reproducir, Stop/Pausa, Avanzar y Retroceder canción.
-
Page 69: Music Share
Music Share › Active el modo «Setup» (Apague el BTNEXT PRO, mantenga pulsado el botón Cen- tral hasta que el LED rojo fijo). Pulsa el botón «Vol+» o «Vol-» hasta que el LED Music Share (compartir música) sólo es posible desde el teléfono emparejado en el parpadee rojo y azul. - Page 70 «Vol+» El Midland BTNEXT PRO puede conectarse a una fuente de audio por cable, como un y «Vol–« mientras la radio está encendida. Un anuncio vocal le indicará el estado. Para iPod (o cualquier otro reproductor MP3).
-
Page 71: Luz De Frenada De Emergencia
Luz de frenada de emergencia fijo En la parte trasera del kit de montaje de su BTNEXT PRO tiene una › Pulse al mismo tiempo los botones «Vol+» y «Vol-» durante 3 segundos. El LED azul luz de frenada de emergencia LED ultra brillante. Cada vez que efec- se enciende durante 1 segundo y volverá... -
Page 72: Setup Y Actualización De Firmware
› Doble click en el botón Central para salir del modo «Setup» y usar el BTNEXT PRO. Esta garantía sólo es válida en el país donde se ha adquirido el producto. -
Page 73: Garantía Limitada De Midland Iberia
Las modificaciones que no están aprobadas por el fabricante invalidan la garantía. © MIDLAND IBERIA. Queda prohibida la reproducción total o parcial sin el permiso por escrito del titular. Para más información, visite nuestra web: www.midland.es... - Page 75 “Mode” de fonctionnement ................................................79 Distance maximale ....................................................79 Comment coupler deux modules BTNEXT PRO ..........................................79 Comment coupler le BTNEXT PRO a plus de deux modules ...................................... 80 Conférence......................................................81 Talk2All – Couplage avec un interphone d’une autre marque......................................83 Compatibilité avec modules de la gamme Midland BT ........................................84 Associer le Midland BTNEXT PRO aux périphériques Bluetooth ....................................84...
-
Page 76: Caractéristiques Principales
à utiliser grâce aux › 2 Kit de montage glissière avec deux oreillettes stéréo trois gros boutons placés sur le devant de l’appareil. Midland BTNEXT PRO est fixé sur le › 2 micro tige et 2 micro filaire casque en utilisant la plaque adhésive ou la bride de fixation à... -
Page 77: Rechargement Des Batteries
Sur le fond de l’appareil, vous pouvez trouver la prise du chargeur qui permet de rechar- Attention: Le Midland BTNEXT PRO a été conçu pour résister à la pluie et à l’eau. Cepen- ger l’appareil en utilisant une alimentation micro USB standard. - Page 78 Étape 2. Serrer la plaque à vis au support avec les deux vis fournies. Description du kit de montage à glissière Le Midland BTNEXT PRO peut être fixé sur votre casque en utilisant le kit de montage à glissière de deux façon différentes, soit en utilisant la plaque avec adhésif double face ou alors la plaque avec vis.
-
Page 79: Allumer Et Eteindre Votre Midland Btnext Pro
› En “Mode radio FM” vous pouvez écouter votre station radio favorite en stéréo, re- cherché une station spécifique et la sauvegarder (6 emplacement mémoire dispo- Le BTNEXT PRO peut être facilement mise en place sur le casque en le faisant glisser nible). -
Page 80: Distance Maximale
Activation manuelle Pour coupler le BTNEXT PRO à un autre BTNEXT PRO, vous devez tout d’a- Lorsque vous êtes dans le mode intercom pressez le touche centrale d’un des deux mo- bord entrer en mode configuration: dules en mode Intercom. -
Page 81: Comment Coupler Le Btnext Pro A Plus De Deux Modules
Un appareil Midland BTNEXT PRO peut être couplé à un maximum de cinq autres voyant rouge soit allumé en permanence. unités BT, cela signifie six au total (3 unité Midland + 2 Talk2All + vous). Le Midland BT- 3. Maintenant, appuyez sur le bouton avant pendant 3 secondes ou Central ou arrière. -
Page 82: Conférence
également sur le VOL-, jusqu’à 8 personnes Activation vocale (VOX) (4 couples). Vous pouvez décider d’utiliser le BTNext Pro en « one to one » communica- tion jusqu’à 6 personnes (mode Intercom “classique”) ou avec 8 personnes (4 couples) La fonction d’activation vocale peut ouvrir l’interphone uniquement à... - Page 83 Attention: lorsque le mode « conférence » est active, la fonction « Talk2All- Universal In- “Public” tercom » (pour parler avec un interphone n’etant pas de la marque Midland) n’est pas Activer le mode Privé: appuyer à nouveau sur le bouton « VOL- », la voix vous indiquera disponible.
-
Page 84: Talk2All - Couplage Avec Un Interphone D'une Autre Marque
Le BTNEXT PRO est compatible avec le BTX1 PRO, BTX2 PRO, BT Next Conférence, “Avant” et un autre sur le bouton “Arrière”. Sur le BTNEXT PRO entrez dans le mode BTNEXT FM et BTX1 FM. Quand il sont connectés la distance maximale pour l’Inter- configuration : (avec le module éteint, maintenez la touche centrale enfoncée pendant 7... -
Page 85: Associer Le Midland Btnext Pro Aux Périphériques Bluetooth
› Dongle (HFP/A2DP Stereo) › Dongle (HFP/A2DP Stéréo) Comment coupler le BTNEXT PRO avec un telephone Pour coupler le BTNEXT PRO avec un téléphone , il faut d’abord entrez dans le mode de configuration: › Éteignez le module › Appuyez sur la touche centrale et maintenez-la pendant 7secondes, jusqu’à ce que le voyant soit rouge fixe. - Page 86 Comment utiliser le telephone rappeler le dernier Après avoir couplé votre téléphone au BTNEXT PRO vous devez basculer en mode numéro (vous entendez une tonalité de confirmation). “téléphone “ afin de pouvoir l’utiliser. Appuyer longuement sur la touche centrale jusqu’à...
-
Page 87: Partage De Musique
Le conducteur peut arrêter le partage de musique lecteur. Vous pouvez même utiliser les touches de votre BTNEXT PRO pour controler simplement en reproduisant la même manipulation, un appuie long sur le bouton “ar- les actions suivantes : Lecture, Pause, Avancer et Reculer. -
Page 88: Gps Navigateur
Comment connecter le BTNEXT PRO à un GPS Attention: Appuyez brièvement sur la touche “Avant” ou “Arrière” pour chercher la station En général il est possible de connecter le BTNEXT PRO à tous les GPS pour moto qui de radio FM. -
Page 89: Feu Stop D'urgence
Feu stop d’urgence iPod (ou tout autre lecteur MP3). Sur le dos de votre kit de montage BTNEXT PRO vous avez une LED Haute luminosité Écouter de la musique d’arrêt d’urgence. Chaque fois que vous faites un freinage appuyé, le feu stop se met en marche pour donner une alerte supplémentaire... -
Page 90: Installation Et Configuration Speciale
Installation et configuration speciale par défaut du BTNEXT PRO est “faible “. Il est également possible de désactiver la fonction VOX pour activer l’Intercom et appel téléphonique fonctionnalités répondant Remise à zéro uniquement en mode manuel. Parfois, il peut être nécessaire de supprimer toutes les références de couplage enregi- Régler la sensibilité... -
Page 91: Garantie
Configuration et mise à jour logiciel Pour de plus amples informations, veuillez visiter notre site Internet: www.midlandeu- Il est possible de configurer et de mettre à jour le logiciel embarqué du BTNEXT PRO en rope.com utilisant la connexion USB vers votre PC. Sur le site web Midland www.midlandeurope. - Page 92 FCC Compliance Information This device complies with Part 15 of the FCC Rules. Operation is subject to the fol- lowing two conditions: (1) this device may not cause harmful interference, and (2) this device must accept any interference received, including interference that may cause undesired operation.
- Page 93 Technical specifications of Midland BTNEXT PRO .........................................21 Charging batteries ....................................................22 Unit and fixing system description ..............................................22 Switching ON and OFF your Midland BTNEXT PRO ........................................24 How to pair two Midland BTNEXT PRO units ..........................................25 Set up of the AGC system .................................................26 Conference mode with one Bluetooth device on “VOL-”...
- Page 94 › 1 plaatje om de unit mee aan de helm vast te schroeven › 1 micro USB oplader voor in het stopcontact De Midland BTNEXT PRO is een intercom systeem met Dual Bluetooth Core voor het voeren van gesprekken en heldere audio in stereo. Het ontwerp is rank en aerodynamisch, Midland BTNEXT PRO Twin met voorop drie grote knoppen die zorgen voor een gemakkelijke bediening.
- Page 95 De twee stereospeakers zijn voorzien van een plakstrip voor bevestiging aan je helm. Zet het volume niet te hoog en zorg dat je de verkeersgeluiden nog steeds kunt horen. Forward Middle Backward Op de voorkant van de BTNEXT PRO zitten vijf knoppen; de grote drie zijn multifun- www.midlandeurope.com...
- Page 96 Met elk van beide methodes wor- dt de BTNEXT PRO veilig aan je helm bevestigd en kan deze er op elk gewenst moment af worden gehaald om op te laden of om te worden opgeborgen.
- Page 97 Aanbrengen en verwijderen van je Midland BTNEXT PRO voorkeurszenders). De BTNEXT PRO is eenvoudig op je helm aan te brengen door deze naar omlaag te Je kunt eenvoudig van de ene naar de andere modus wisselen door de CTRL-knop drie seconden lang ingedrukt te houden.
- Page 98 De Midland BTNEXT PRO koppelen aan een andere Midland BTNEXT PRO unit is nu mogelijk totdat je opnieuw op CTRL drukt. Het activeren van de intercom duurt Om de Midland BTNEXT PRO te koppelen aan een andere Midland NEXT PRO unit, enkele seconden en is geslaagd wanneer een pieptoon hoorbaar wordt.
- Page 99 Elk ap- 6. De unit is nu klaar voor een volgende koppeling aan nog een andere Midland BTNEXT paraat kan altijd aan drie andere units naar keuze kan gekoppeld; zoals de afbeelding hieronder toont, kun je ook ‘kruiselings koppelen’.
- Page 100 Voor één op één communicatie kun je met de de unit van die persoon gekoppeld is. De eerdere verbinding wordt dan automatisch BTNEXT PRO met tot 6 personen (in de klassieke intercom-modus) of zelfs met 8 verbroken en de nieuwe verbinding komt tot stand (zie tabel A).
- Page 101 De twee units (2 en 3) in het midden van de reeks moeten de intercom openzetten via de beide knoppen Vooruit en Terug, zodat alle › Met je BTNEXT PRO in de installatie-modus houd je VOL- 3 seconden lang inge- vier de units kunnen deelnemen.
- Page 102 Dankzij de ‘Talk2All – Universele Intercom’-specificatie is het nu ook mogelijk om je Midland BT serie, zoals de BT Next FM, de BTX2 FM en de BTX1 FM), echter wel pas Midland BTNEXT PRO te koppelen aan een intercom van een willekeurig ander ver- na installatie van een firmware versie van 2014 of nieuwer.
- Page 103 4. Schakel zichtbaarheid van en voor Bluetooth apparaten in op je telefoon. te bedienen is, zal worden gevraagd om het contact te benoemen naar wie je wil 5. Na enkele seconden verschijnt de tekst ‘Midland BTNEXT PRO’ op het scherm van bellen.
- Page 104 A2DP en AVRCP om in stereokwaliteit muziek te luisteren en de muziekspeler Om deze automatische voorrang te wijzigen, kun je gebruik maken van de ‘BT UPDA- van je telefoon op afstand te bedienen. Je kunt de knoppen op de Midland BTNEXT TER’ PC software of de ‘BT SET-APP’ applicatie voor smartphone.
- Page 105 De Midland BTNEXT PRO koppelen aan GPS FM Radio is geïntegreerd in de unit zelf. Je hoeft enkel de FM Radio-modus in te In het algemeen is het mogelijk om de Midland BTNEXT PRO te koppelen aan alle voor schakelen.
- Page 106 Dubbelklik CTRL om de installatiemodus te verlaten en de Midland BTNEXT PRO te Bekabelde aansluitingen in en uitschakelen gebruiken. Je kunt de apparatuur die via een kabel aan je Midland BTNEXT PRO verbonden is, naar Inschakelen: eigen wens in- en uitschakelen. Hiervoor houd je Vooruit en CTRL drie seconden lang ›...
- Page 107 De gevoeligheid van VOX instellen Hiervoor ga je eerst naar de installatie-modus: Soms kan het nodig zijn om alle koppelingen uit het geheugen van de Midland BTNEXT PRO te wissen. Dit noemen we een Reset. Voor een Reset ga je naar de installatie-mo- 1.
- Page 108 1 keer oplichten betekent dat VOX is uitgeschakeld. 2 keer staat voor een lage gevoeligheid. Je kunt de firmware voor je Midland BTNEXT PRO configureren en bijwerken met een 3 keer staat voor een normale gevoeligheid. USB verbinding aan je PC. Via www.midlandeurope.com vind je de de software en even- 4 keer staat voor een hoge gevoeligheid.
- Page 109 Garantie De garantie op de unit zelf geldt voor een duur van 24 maanden. Voor de accessoires (batterijen, oplader, antennes, headsets, microfoons) geldt een garantieduur van zes maanden. Voor meer informatie over de garantie verwijzen we je naar www.midlandeurope.com. Europese veiligheidsvoorschriften en informatie over goedkeuring van de veiligheid Dit product is voorzien van het Europese veiligheidskeurmerk CE, conform de RED 2014/53/EU regelgeving en mag vrijelijk worden gebruikt in landen binnen de Europese...
- Page 110 IT / RSM Cte International Srl dichiara che il prodotto è conforme ai requisiti essenziali e alle disposizioni della Direttiva 2014/53/UE. La Dichiarazione di conformità si può scaricare dal sito http://www.midlandeurope.com/it/pagina/10090-certifications GB / CY / MT Hereby Cte International Srl declares that this product is in compliance with the essential requirements and other relevant provisions of Directive 2014/53/UE. The declaration of conformity is available on the web site http://www.midlandeurope.com/it/pagina/10090-certifications AT / DE / CH / LI Hiermit erklärt Cte International Srl, dass das Produkt die grundlegenden Anforderungen und anderen relevanten Bestimmungen der Richtlinie 2014/53/UE.
- Page 111 CTE INTERNATIONAL Srl erklærer at produktet er i overensstemmelse med de viktigste kravene og andre relevante betingelser i Direktivet 2014/53/UE. Samsvarserklæringen finnes tilg jengelig på nettstedet http://www.midlandeurope.com/it/pagina/10090-certifications Hermed erklærer Cte International Srl , at dette apperat er i overensstemmelse med kravene og andre relevante bestemmelser i direktiv 2014/53/UE. Overensstemmelseserklæringen findes på...
- Page 112 › INFORMAZIONE AGLI UTENTI: i sensi dell’art. 13 del decreto legislativo 25 luglio 2005, n.151 “At- › Alle Artikel, die auf der Verpackung oder der Gebrauchanweisung dieses Symbol tragen, dürfen nicht tuazione delle Direttive 2002/95/CE, 2002/96/CE e 2003/108/CE, relative alla riduzione dell’uso in den normalen Mülltonnen entsorgt werden, sondern müssen an gesonderten Sammelstellen abge- di sostanze pericolose nelle apparecchiature elettriche ed elettroniche, nonché...
- Page 113 I / RSM από το σώμα σας. Importante: L’apparato deve essere utilizzato ad una distanza superiore a 5 cm dal corpo Važno: Oprema se mora koristiti na udaljenosti većoj od 5 cm od tijela UK / CY / IRL/ M Important: The equipment must be used at least 5cm away from the body of use Fontos! Használat közben győződjön meg arról, hogy az eszköz legalább 5cm-re a testétől van.
- Page 115 Prodotto o importato da: CTE INTERNATIONAL srl Via. R.Sevardi 7 42124 Reggio Emilia - Italia. Prima dell’uso leggere attentamente le istruzioni. Produced or imported by: CTE INTERNATIONAL srl Via. R.Sevardi 7 42124 Reggio Emilia - Italy. Read the instructions carefully before installation and use. Vertrieb durch: ALAN ELECTRONICS GmbH Daimlerstraße 1K - D-63303 Dreieich Deutschland.
- Page 116 www.midlandeurope.com...
Need help?
Do you have a question about the BTNEXT PRO and is the answer not in the manual?
Questions and answers