Zodiac G2 User Manual
Hide thumbs
Also See for G2:
- Instruction manual (20 pages) ,
- Owner's manual (23 pages) ,
- Installation instructions manual (65 pages)

Related Manuals for Zodiac G2


Summary of Contents for Zodiac G2
-
Page 1: Table Of Contents
G2 2010.qxd 23/02/10 9:30 Page 11 Contents 1 / WORKING PRINCIPLE 2 / ASSEMBLY 3 / INSTALLATION 4 / POOL PULSE 5 / RECOMMENDATIONS 6 / MAINTENANCE, STORAGE 7 / WINTER STORAGE 8 / TROUBLE-SHOOTING 9 / GUARANTEE... -
Page 2: Working Principle
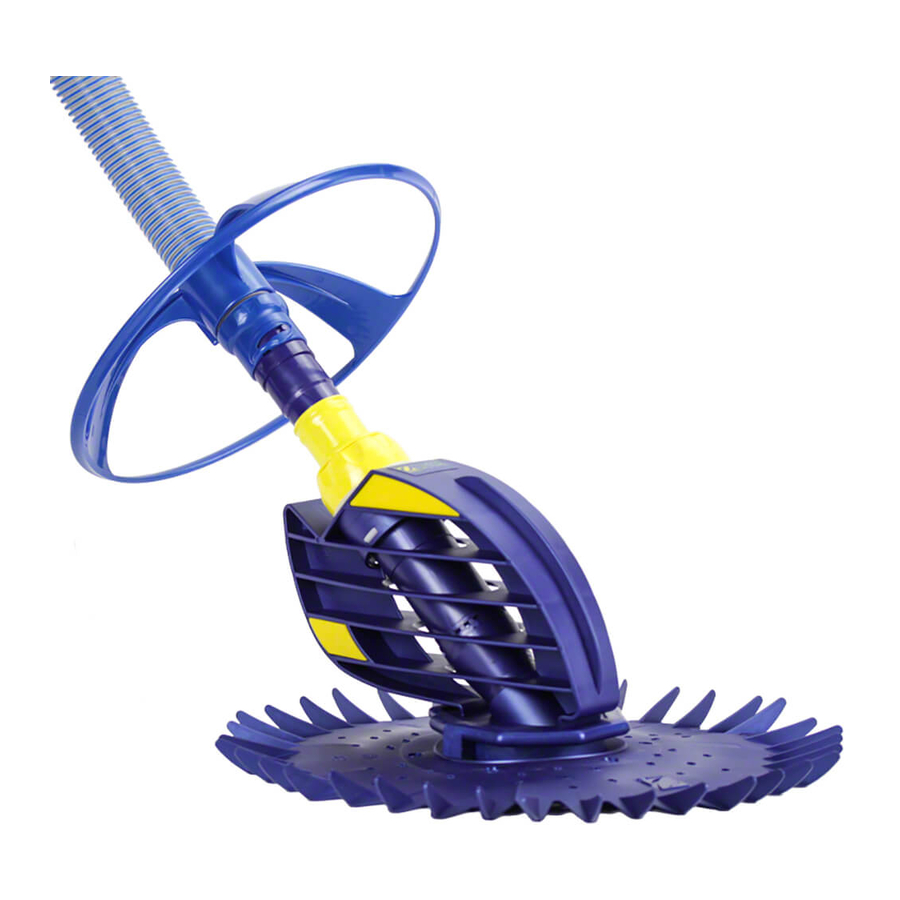
They will be able to supply spare parts and will provide qualified After Sales service. BELOW IS A LIST OF THE PARTS SUPPLIED IN THE PACKAGING AND WHICH YOU NEED IN ORDER TO INSTALL YOUR G2 The G2 cleaner 1 disc 1 deflector wheel 1 hose weight 1 weir adpater... - Page 3 G2 2010.qxd 23/02/10 9:30 Page 13 Ref. CODE DESCRIPTION QUANTITY W70291 Body W69721 Flexible foot (blue) W69911 Disc W56525 Internal extension pipe W81710 Diaphragm W81600 Holding ring W70293 External extension pipe W74000P Compression ring W70401 Diaphragm cartridge Parts list W69720P Deflector wheel (large)
-
Page 4: Assembly
G2 2010.qxd 23/02/10 9:30 Page 14 2 / Assembly THIS UNIT COMES FULLY ASSEMBLED : ALL YOU HAVE TO DO IS FIX IT Schema A The disk, with the face marked “Top” uppermost, on the flexible foot. The disk must be correctly positioned in the throat of the flexible foot... -
Page 5: Installation
• Close the main drain on the bottom of your pool. • Turn on the pool drain. • Fill the G2 hose with water using the flow from the inlet jets ensuring that the hose remains beneath the surface of the water during and after these... -
Page 6: Pool Pulse
6 5 4 4 3 2 1 0 (Schema F) “IDEAL” The red flap valve is on level 4. The flow rate is ideal for running your G2. Remove the tester and connect the appliance to the hose. Schema G (Schema G) “MIN”... -
Page 7: Recommendations
• Don’t allow objects in the pool that may obstruct the appliance. NOTA : Do not use your G2 pool cleaner if your pool is full of silt. of this should be the case, then please use a manual brush. -
Page 8: Trouble-Shooting
The G2 jams on the steps : • Have you fitted the bumper fin ? The G2 often rises up the sides and above the water line : • Reduce the flow by adjusting the manual adjustment valve. • Move the hose weight to less than 50 cm from the end. - Page 9 STAGE 1 : REMOVING THE DIAPHRAGM (Schema J) 1. Hold the main body of the G2 and disconnect the cassette from The body. Remove the cassette from the body of the G2 2. Whilst holding the outer extension pipe with one hand, unscrew the cassette chamber completely 3.
-
Page 10: Guarantee
Any claims under guarantee should be addressed to your retailer. PERIOD OF GUARANTEE The period of the guarantee is fixed at 2 years for the G2, from the date of invoicing the first user. The diaphragm, the result of Baracuda patented technology, benefits from an unconditional guarantee of 2 years.
Need help?
Do you have a question about the G2 and is the answer not in the manual?
Questions and answers