Table of Contents
Advertisement
Quick Links
Advertisement
Table of Contents

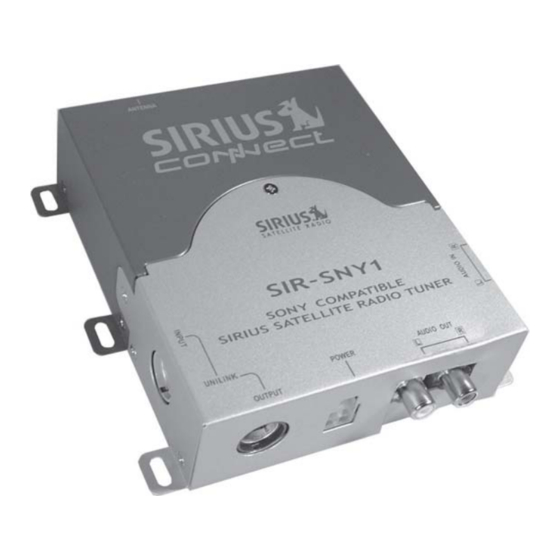
Summary of Contents for Sirius Satellite Radio SIRIUS SiriusConnect SIR-SNY1
- Page 1 Installation Guide...
- Page 2 Congratulations on your purchase of the SIR-SNY1– the Sony Compatible SIRIUS Satellite Radio Tuner! Your new SIRIUS Tuner is designed to work designated to be “SATELLITE RADIO READY”. Contact Sony or SIRIUS for model compatibility. What is SIRIUS Satellite Radio?
-
Page 3: Table Of Contents
Table of Contents Package Contents ... 3 Warnings and Cautions ... 4 Installation ... 6 Mounting the Tuner ... 6 Installing the Antenna ... 6 Optimum Antenna Mounting Locations ... 7 Wiring and Cable Connections ... 8 System Connection Examples ... 10 Activating Your SIRIUS Subscription ... - Page 4 WARNING This symbol means important instructions. Failure to heed them can result in serious injury or death. DO NOT OPERATE ANY FUNCTION THAT TAKES YOUR ATTENTION AWAY FROM SAFELY DRIVING YOUR VEHICLE. Any function that requires your prolonged attention should only be performed after coming to a complete stop.
- Page 5 CAUTION This symbol means important instructions. Failure to heed them can result in injury or material property damage. HALT USE IMMEDIATELY IF A PROBLEM APPEARS. Failure to do so may cause personal injury or damage to the product. Return the unit to your authorized retailer or nearest service center for repairing.
-
Page 6: Installation
Installation It is recommended that prior to starting the installation, you thoroughly read this manual and follow the guidelines listed below: Consider the mounting location carefully. You should make sure that you avoid the following: • Any location where the tuner is exposed to moisture. -
Page 7: Optimum Antenna Mounting Locations
3) Remove the remaining protective tape from the adhesive, carefully position the antenna with cover/tail and apply pressure to secure to the vehicle. Cable Cover/Tail Optimum Antenna Mounting Locations The optimum location to mount the included antenna is on the roof of the vehicle. -
Page 8: Wiring And Cable Connections
Wiring and Cable Connections A. Antenna Input Connect the right-angle SMB connector from the antenna. Push firmly to attach. B. UniLink Output Connector Use the supplied UniLink cable to connect to the Sony Headunit. See “System Connection Examples” for more specific details. C. - Page 9 Right-angle SMB Connector FILTER & FUSE BOX SIR-SNY1 Operation and Installation Guide SIR-SNY1 Installation Guide Antenna (21’ cable) - Mount on Roof of Vehicle 2.5-meter RCA Cable (Connect to Sony SAT-Radio Ready Headunit) Yellow - Connect to Battery Positive Black - Connect to Chassis Ground 1-AMP Fuse 2.5-meter UniLink Cable (Connect to Sony...
-
Page 10: System Connection Examples
System Connection Examples System 1: Sony Headunit and SIR-SNY1 SIR-SNY1 Installation Guide... - Page 11 System 2: Sony Headunit, DVD/CD Changer and SIR-SNY1 Note: The UniLink pass-through connector can accommodate most optional audio equipment, including CD changers. However, it can not be used to add a second satellite radio tuner. SIR-SNY1 Operation and Installation Guide SIR-SNY1 Installation Guide...
-
Page 12: Activating Your Sirius Subscription
Once updated and the SIRIUS channels are received, you will be tuned to SIRIUS Satellite Radio’s Preview Channel (Channel 184). You should be able to hear the SIRIUS Preview channel’s Audio. 6. Find the SIRIUS ID (SID) of your unit. -
Page 13: Basic Operation
Seek button will quickly step through the channels. Note: “LOADING” is indicated while the receiver is reading the information. Display items A variety of Sirius Satellite Radio program information (channel name, artist name, song title) is available on the display. Press the Display (DSPL) button. - Page 14 Receiving a stored channel Press either Disc/Preset button to select the preset channel you want to listen to. Press the Shuffle (SHUF) button. Press the Disc/Preset + (DISC +) button to select the preset channel and then press the SEEK + or SEEK - button to start.
-
Page 15: Specifications
Specifications Operational Frequencies Satellite ... 2322.293/2330.207 MHz Terrestrial ... 2326.250MHz Power Requirements ... 11-16 Volts DC Chassis Size ... 126.75mm x 125.75mm x 34.75mm (WxHxD) Antenna Type ... Mini-Magnetic Antenna Cable Length ... 21’ (single micro-cable) Connector Type ... SMB (Right-angle) Audio Output ... - Page 16 SIRIUS Satellite Radio 1221 Avenue of the Americas New York, NY 10020 (888) 539-7474 www.sirius.com © 2006 SIRIUS Satellite Radio Inc. SIR-SNY1-Install-Manual-(v11082006) “SIRIUS” and the SIRIUS dog logo are trademarks of Sirius Satellite Radio Inc.


Need help?
Do you have a question about the SIRIUS SiriusConnect SIR-SNY1 and is the answer not in the manual?
Questions and answers