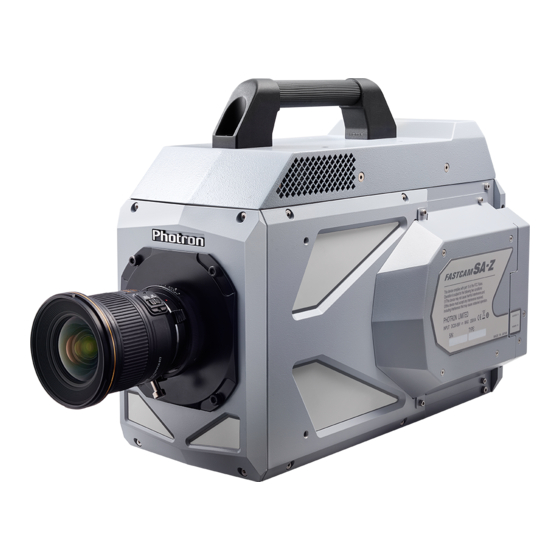
Photron FASTCAM Mini Series First Step Manual

Photron FASTCAM Mini Series First Step Manual

Fastcam cameras

Advertisement

First-Step Guide Booklet
For FASTCAM Cameras
Revision 4.01 E
F
A
S
T
C
F
A
S
T
C
HIGH-SPEED DIGITAL CAMERA
Easy to learn
Easy to use
A
M
A
M

Advertisement

Table of Contents
loading

Summary of Contents for Photron FASTCAM Mini Series

  • Page 1 HIGH-SPEED DIGITAL CAMERA First-Step Guide Booklet For FASTCAM Cameras Revision 4.01 E Easy to learn Easy to use...
  • Page 2 INTRODUCTION FASTCAM Congratulations on your acquisition of a Photron high-speed camera system, the When using, you need to set up and operate the camera in the following steps. This First-step Guide Booklet describes the very basic items (minimum of contents) regarding the setting and operation of the camera.
  • Page 3 •Photron is unable to assume responsibility for any effects resulting from the use of the system and/or this booklet. We at Photron appreciates your understanding •The formal name of Windows is Microsoft®...
  • Page 4: Device Connections

    Ⅰ Device Connections Standalone type (Mini series) Status LEDs Gigabit Ethernet LAN cable connector Power on/off SW PC with PFV installed DC22-32V 55VA Power connector Rear panel LAN Cable (Gigabit Ethernet) Controller details Camera body DC Cable AC power cord Note: The configuration of the AC AC power adaptor power supply unit and cable differs...
  • Page 5 Ⅰ Standalone type (SAZ series) Status LEDs Power on/off SW Gigabit Ethernet LAN cable connector PC with PFV installed DC22-32V 100VA Power connector Rear panel LAN Cable Controller details (Gigabit Ethernet) Camera body DC Cable AC power cord AC power adaptor CAUTION ・...
  • Page 6 Ⅰ Standalone type (SA series) Status LEDs Power on/off SW Gigabit Ethernet LAN cable connector PC with PFV installed DC18-36V 100VA Power connector Rear panel Controller details Note: The connector location differs based on LAN Cable the camera model, but the connector display (Gigabit Ethernet) is the same.
  • Page 7: Front Panel

    Ⅰ Separate head type (MC・MH Multi series) Multi example Status LEDs For the MC/MH, refer to each of the product Power on/off SW manuals. DC20-34V 180VA Power connector Gigabit Ethernet LAN cable connector CAMERA CABLE Camera Cable connector PC with PFV installed Front panel LAN Cable (Gigabit Ethernet)
  • Page 8: Pfv Installation

    Ⅰ PFV Installation Insert the PFV installation DVD in the DVD drive. Click “Start Menu -> Computer” and open the DVD drive. DVD-ROM is opened. Click “PFV SetupXX” folder and open it. (XX is 32 or 64. Select your OS’s system bit. In case of the OS is a 64bit version of Windows, you select “PFV Setup64”.) Double click “setup.exe”...
  • Page 9: Network Setup For Pc

    Ⅰ Network setup for PC IP address setup Move the cursor to "MENU" on the upper left of the screen. Click [Configuration] in the menu. Click [Connection] on the left side of the "Configuration" dialog box. "Connection" is opened. Click [Settings] button in the "PC network" box. "PC Network Setup"...
  • Page 10 Ⅰ Firewall setup Move the cursor to "MENU" on the upper left of the screen. Click [Configuration] in the menu. Click [Connection] on the left side of the "Configuration" dialog box. "Connection" is opened. Click [Settings] button in "PC network" box. "PC Network Setup"...
  • Page 11 Ⅰ Jumbo frame setup The download speed may become fast if the Jumbo frame setting is changed. The setting procedures are as follows. Press [Windows] key + [R] key on the keyboard. Input "ncpa.cpl" on the window displayed and click [OK] button. "Network Connections"...
  • Page 12: Starting Camera And Pfv

    Ⅱ Starting camera and PFV Switch on camera system (Power switch). Switch on PC. See if the below status LED’s have lighted. ・[POWER] LED (Green) ・[IF LINK/TRANS] LED (Red) Double click icon on desktop. PFV starts up and live image is displayed. ビューウィンドウ...
  • Page 13: Setting Recording Conditions

    * All of cameras except Mini UX, Multi, MH4, MH6, and SA8 require [Shading] calibration before recording. SUPPLEMENT ・ Menu items differ from model to model. Please see Photron FASTCAM Viewer User’s Manual. Ⅲ Recording and reviewing in the next page. 11...
  • Page 14 Ⅲ Recording Recording in START Mode Click [Record] button. Click [Ready] button. [START] Mode In START mode, camera starts recording at the moment a trigger is input (or REC button is pressed). Recording continues until the memory is full, and automatically stops recording. This mode is useful when you know for sure when an anticipated event will occur.
  • Page 15 Ⅲ Recording in END Mode Click [Record] button. Click [Ready] button. [END] Mode END mode records the images of target event right before the trigger is input. This mode is useful when it is hard to know when your target event will take place. Recording continues up to the maximum number of frames (memory capacity of the camera).
  • Page 16: Using External Triggers

    Ⅲ Using External Triggers SW IN and TTL IN These products support a start and stop of recording triggered by external signals. There are two types of trigger input terminals. Details are explained here, with two typical camera systems as examples. INPUT2 (DEF: TRIG TTL IN) IO Port...
  • Page 17 Ⅲ How to Use Start Trigger Settings of the start trigger mode when the TTL signal is used are explained here. Using the BNC cable, send the TTL signal generated by an external device to TRIG TTL IN connector of the camera. Mini AX: “INPUT2”...
  • Page 18 Ⅲ The time that the signal was input is the trigger point. Trigger point (start trigger) Trigger point (center trigger) How to Use Center, End, Manual Trigger Modes The settings of the other trigger modes are explained here. The procedures 1~3 of “How to Use Start Trigger” are the same. The procedures thereafter are described here.
  • Page 19 Ⅲ Other Cautions for the Use of Triggers Please beware of the following cautions. Inputting over-voltage The protection circuit is equipped, but it will be broken if over-voltage is input. TRIG SW IN supports 0V~+5V, and TRIG TTL IN supports 0V~+12V. How to divert the cable In case of diverting the cable to input signals to camera or other equipments, the signal level may be lowered depending on how to divert the cable.
  • Page 20: Playing Recorded Images

    Ⅲ Playing recorded images Use the playback control panel to play recorded images. ・At the end of a recording, the triggered frame is displayed in the view window. ・Setting of display on the control panel automatically switches from LIVE to MEMORY. Playback control panel (lower portion) Jog reverse play Jog forward play...
  • Page 21 Ⅲ Setting a range of frames to play (or to save) Specify first and last frames on control panel (upper portion) ◆ Playback control panel (upper portion) Last frame display/input box Start frame display/Input box Specify last frame by entering frame number. Specify first frame by entering frame number.
  • Page 22 Ⅳ Saving recorded images in PC Click [MEMORY] mode tab in the mode Click [Save] button on the lower switching tab on the upper left of the side of the screen. screen. Specify the folder in the save location. If you want to change the file name, When specifying the save location, enter a file name directly or press click [Edit] button next to [Path] and...
  • Page 23 Folder to save image files in Example: When saving image data in AVI format in default setting with [TEST] as its file name, a folder [TEST_C001H001S001] is made in [C:¥Users¥<user name>¥Documents¥Photron¥PFV4] (may be changed as needed), and an image file [TEST_C001H001S0010001.avi] and a CIHX file [TEST_C001H001S0001.cihx] are saved in the folder.
  • Page 24: Playing Saved Image Data

    Ⅳ Playing saved image data Click [FILE] mode tab of the Click [Open] button displayed on the right mode switching tab on the upper side of the screen. left of the screen. Select a CIHX file and click [Open] button. SUPPLEMENT ・...
  • Page 25 Ⅳ MEMO Ⅴ Product Specifications in the next page. 23...
  • Page 26: Product Specifications

    Ⅴ Product Specifications FASTCCAM SA1.1/SA1.1RV Product Name FASTCAM SA4/SA4RV FASTCAM SA5/SA5RV Storage Temperature -20℃ ~ 60℃ (No Condensation) Storage Humidity 85% or less (No Condensation) Environment 0~40℃ (No Condensation) Conditions Operating Temperture 0~45℃ (No Condensation)・・・RV Operating Humidity 85% or less(No Condensation) Power Voltage 20V ~...
  • Page 27 Ⅴ FASTCAM Mini UX50/100 Product Name FASTCAM Mini WX50/100 FASTCAM Mini AX50/100/200 Storage Temperature -20℃ ~ 60℃ (No Condensation) Storage Humidity 85% or less(No Condensation) Environment Conditions Operating Temperture 0~45℃ (No Condensation) Operating Humidity 80% or less(No Condensation) Power Voltage 22V ~...
  • Page 28 Ⅴ Product Name FASTCAM Nova Storage Temperature -20℃ ~ 60℃ (No Condensation) Storage Humidity 85% or less(No Condensation) Environment Conditions Operating Temperture -10 ~ 45℃ (No Condensation) Operating Humidity 80% or less(No Condensation) 22V ~ 240V Power Voltage DC Power Supply (A type cable up to 125 V) Power Consumption 120VA...
  • Page 29: Faq And Troubleshooting

    Ⅵ FAQ and Troubleshooting 1. The camera image is not displayed in the PFV. The IF LINK LED is not turned on ◆ The network cable may be disconnected or the PC LAN terminal may be broken. ◆ Press the UserSW1 on the rear panel for 10 seconds or more. The LEDs will turn on from left to right, and the camera will reset.
  • Page 30 ◆ Check to see if there is a problem with the power supply. If there are no problems, apologize for the inconvenience, but please contact Photron or your retailer. 5. Lines are shown in all or part of the image.
  • Page 31 Ⅵ 6. The image hues look strange. ◆ Turn the software pixel gain OFF. ◆ Adjust the color temperature. (For details, refer to the PFV Manual.) 1. Click [Configuration] in [MENU] on the upper left 2. Click [Image Quality]. of the screen. 3.
  • Page 32 ◆ On the FASTCAM Mini, you can apply the initial settings by holding down the Reset button If you have any other questions, are unable to resolve a problem, or are experiencing an issue not described above, apologize for the inconvenience, but please contact Photron or your retailer. 30...
  • Page 33: Contact Information

    Ⅵ Contact Information For inquires related to FASTCAM series, contact Photron at the contact information listed below. Additionally, the following items will be verified when inquiring, so please prepare them in advance. Contact Information PHOTRON USA, INC. 9520 Padgett Street, Suite 110...
  • Page 34 Ⅵ MEMO 32...
  • Page 35 Publication Date November, 2018 Publisher PHOTRON LIMITED 21F, Jimbocho Mitsui Bldg., 1-105 Kandajimbocho, Chiyoda-Ku, Tokyo 101-0051 © 201 7.P H O TR ON LI MI TE D , Al l r ights res er ved . P rin ted in Ja pan.

Table of Contents