Photron FASTCAM Multi Hardware Manual
Led light option
Hide thumbs
Also See for FASTCAM Multi:
- Hardware manual (81 pages) ,
- User manual (36 pages) ,
- First step manual (36 pages)

Related Manuals for Photron FASTCAM Multi


Summary of Contents for Photron FASTCAM Multi
- Page 2 The copyright of this manual is held by PHOTRON LIMITED. Product specifications and manual contents are subject to change without notice. PHOTRON LIMITED bears no responsibility for any results by using our products nor by applying this manual to any operations.
- Page 3 This manual contains the operating instructions and warnings necessary for using the system. Before using the system, please read the entire manual. If any part of this manual is unclear, contact Photron using the contact information printed at the back of the manual.
- Page 4 This chapter explains the system’s specifications. Chapter 4. Warranty This chapter explains about the warranty. Chapter 5. Contacting Photron This chapter lists the contact information to use when contacting Photron if the system malfunctions or if a portion of the manual is unclear.
- Page 5 In order to prevent injury to yourself and others, and to prevent damage to property, carefully observe the following safety precautions. Photron has given its full attention to the safety of this system. However, the extent of damage and injury potentially caused by ignoring the content of the safety precautions and using the system incorrectly is explained next.
- Page 6 Warning ■ Do NOT try to look directly at the laser beam, or look into the laser emission port. If you do, your eyesight can be seriously damaged. ■ Do NOT try to look directly at the laser beam using an optical equipment (such as a telescope or binoculars).
- Page 7 ■ Not fully plugging in the LED Light Option Cable Connector can cause fire from electric shock or heat. ■ When something is wrong with the system, unplug the Main Unit’s power cable immediately. - When a foreign substance or liquid, such as metal or water, gets inside. - When the outer case is broken or damaged, such as from a fall.
- Page 8 Caution ■ Always unplug the system when cleaning it or when it is unused for a long period of time. Leaving or storing the system connected to the power source might cause fire from insulation deterioration or electrical discharge. ■ Do not set the system in a location where the temperature gets unusually hot. The trunk and inside of a car can get especially hot in summer.
- Page 9 For more information about the recycling of this product, please contact your local city office, waste authority, approved scheme or your household waste disposal service or visit www.photron.com. (EEA: Norway, Iceland and Liechtenstein) This product is in conformity with the protection requirements of EU Council Directive 2014/30/EU (Class A) on the approximation of the laws of the Member States relating to electromagnetic compatibility.
- Page 10 About the Laser Conforming Standard This product is categorized as Class 2 laser equipment by the following standard. It emits visible laser light from the ports located in its front. EN60825-1:2007 Laser Specifications For the specifications of the laser, refer to Section 3.1.1. Product Specifications (Laser Pointer). Laser Caution Label Laser output direction Side view...
-
Page 12: Table Of Contents
3.1. Specifications ......................14 3.1.1. Product Specifications (LED) ..............14 3.1.2. Product Specifications (Laser Pointer) ............. 14 3.1.3. General Specifications ................14 3.2. Dimensions ......................15 Chapter 4. Warranty 4.1. About the Warranty ....................18 Chapter 5. Contacting Photron 5.1. Contact Information....................20... -
Page 13: Chapter 1. Overview
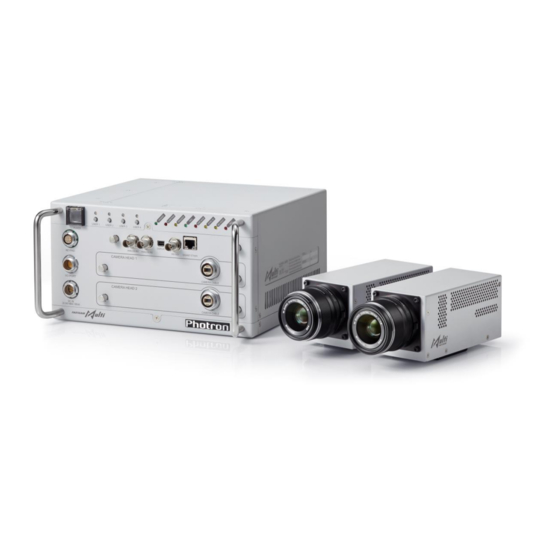
Chapter 1. Overview 1.1. Product Overview and Features 1.2. Components and Accessories 1.3. Part Names 1.4. Connection FASTCAM Multi LED Light Option... - Page 14 Chapter 1 Overview 1.1. Product Overview and Features This product is an LED light option for the FASTCAM Multi Camera Head HS-01 (hereinafter referred to as HS-01). The LED light will supplement the amount of light during recording of high-speed video with 4 high-brightness LED powered by the HS-01 camera head.
-
Page 15: Components
Refer to the attached packing list for this product's standard components and accessories. 1.2.2. Accessories/Options This product is connected to FASTCAM Multi camera head for actual operation. In addition, the following optional items are offered for the FASTCAM Multi camera system (as of March 2015). -
Page 16: Part Names
1.3.1. LED Light Option The unit comprises four LED light sources and two laser sources. The LED is used as supplementary light for recording and the laser pointer is used to correctly aiming at the object being recorded. FASTCAM Multi LED Light Option... -
Page 17: Led Light Option Part Names
1.3.2. LED Light Option Part Names FASTCAM Multi LED Light Option LED Light LED Light Laser Pointer Laser Pointer LED Light LED Light Front Cable Connector (Cable is attached) Rear FASTCAM Multi LED Light Option... -
Page 18: Connection
Chapter 1 Overview 1.4. Connection 1.4.1. Mounting to HS-01 camera head Connect this product to the camera head using the provided cable. Follow the below procedure to connect between this product and the camera head. Make sure the camera cable is away (disconnected) from the camera head. Remove the four screws, shown in the below picture, and remove the tripod adapter from the camera head. -
Page 19: Connection Of Cable
2. Connect the LED Light Option cable to the dedicated connector on the camera head. First confirm the position of connector on HS-01 camera head and then insert the connector aligning the angle to the red mark. LED Light Option Cable Connector Camera Head HS-01 Connector FASTCAM Multi LED Light Option... - Page 20 Chapter 1 Overview 3. To disconnect, first turn off the main unit. Remove the cable by pulling back the connector sliding the part with dotted line along the arrow. LED Light Option Cable Connector Before power-on, without fail, make sure the cable connector has been firmly engaged. When connecting or disconnecting the LED Light Option cable, be sure to remove the camera cable from the camera head, or turn off power to the main unit.
-
Page 21: Chapter 2. Functions
Chapter 2. Functions 2.1. LED Light 2.2. Laser Pointer 2.3. Slider FASTCAM Multi LED Light Option... -
Page 22: Button Operation On Camera Head Hs-01
Chapter 2 Functions 2.1. LED Light This product has four high-intensity LED light sources built in it, which are used for illuminating the object to be framed. 2.1.1. Button operation on Camera Head HS-01 LED Light is turned ON or OFF by the black button on the back panel of Camera Head HS-01. Press the black button for longer than 1 second to turn on the Light. -
Page 23: Laser Pointer
Press the white button for longer than 1 second to turn on the Laser Pointer. Press the button again to turn off the Laser Pointer. 2.2.2. Operation from PFV Laser Pointer is turned ON or OFF by the plug-in button on PFV. For detailed operation, refer to PFV3 User’s Manual. FASTCAM Multi LED Light Option... -
Page 24: Slider
Chapter 2 Functions 2.3. Slider The camera mount can be adjusted to fit the lens’s length. Loosen the screw at the slider’s side, and then slider its position. The adjustable length is 40mm as maximum. Keep tighten up the screw of the slider except for adjusting. -
Page 25: Chapter 3. Specifications
Chapter 3. Specifications 3.1. Specifications 3.2. Dimensions FASTCAM Multi LED Light Option... -
Page 26: Product Specifications (Led)
Chapter 3 Specifications 3.1. Specifications 3.1.1. Product Specifications (LED) White Power LED (4 of) Luminance Approx. 18,000 Lx (Distance: 500mm, Measured at center) Color Temperature Approx. 6,500K Lens Collimator Lens (4 of) Expected Life Time Approx. 25,000 ~ 30,000 hours * * Denotes the average time lapse for the light to decrease to 70 % of the initial light output under continuous operation. -
Page 27: Dimensions
3.2. Dimensions (mm) Front Rear 64.6 ※Caution If installing a longer screw than the specified depth (in mm), its screw hole or the camera may be damaged. FASTCAM Multi LED Light Option... - Page 28 Chapter 3 Specifications 164.2 150.9 47.8 φ10 40(MAX) 248.6 12.8 Side 100.5 185.5 225.5 154.5 106.5 4-M4 DEPTH6 Bottom 3/8-16UNC DEPTH6 1/4-20UNC DEPTH6 φ4.5 DEPTH5.5 113.5 127.5 142.5...
-
Page 29: Chapter 4. Warranty
Chapter 4. Warranty 4.1. About the Warranty FASTCAM Multi LED Light Option... - Page 30 Consumable goods (cables) When repair, adjustment, or alternation done by an entity other than Photron service has been performed on the system, or damage or malfunction that is determined to be attributed to a fault in the use the product.
-
Page 31: Chapter 5. Contacting Photron
Chapter 5. Contacting Photron 5.1. Contact Information FASTCAM Multi LED Light Option... - Page 32 Chapter 5 Contacting Photron 5.1. Contact Information For inquires related to FASTCAM Multi LED Light Option, contact Photron at the contact information listed below. Additionally, the following items will be verified when inquiring, so please prepare them in advance. Items Verified...
- Page 33 Publication Date April, 2018 Publisher PHOTRON LIMITED 21F, Jimbocho Mitsui Bldg., 1-105 Kanda Jimbocho, Chiyoda-Ku, Tokyo 101-0051 © 201 6.P H O TR ON LI MI TE D , Al l r ights res er ved . P rin ted in Ja pan.
Need help?
Do you have a question about the FASTCAM Multi and is the answer not in the manual?
Questions and answers