Thermo Scientific CryoStar NX70 series Operator's Manual
Hide thumbs
Also See for CryoStar NX70 series:
- Operator's manual (116 pages) ,
- Operator's manual (126 pages)

Related Manuals for Thermo Scientific CryoStar NX70 series


Summary of Contents for Thermo Scientific CryoStar NX70 series
- Page 1 Thermo Scientific CryoStar NX70 Product Code 956960, 956970, 956980, 956990, 957000, 957010, 957020, 957030, 957040, 957050, 957060, 957070 Operator Guide 387928 Issue 10...
- Page 2 Thermo Scientific CryoStar NX70 Operator Guide...
-
Page 3: Company Information
The development of Thermo Scientific products and services is an ongoing process. Please ensure that any published information you use as a reference is up to date and relates to the condition of the product. If necessary, check with your local Thermo Fisher Scientific representative. -
Page 4: Emc Statement
Thermo Scientific CryoStar NX70 Operator Guide NX70 110V EC Regulation No 517/2014 – Fluorinated Greenhouse Gas Regulations Contains fluorinated greenhouse gases Refrigerant: R404A R404A GWP value = 3992 System charge weight = 0.400 Kg System CO2 equivalent charge weight = 1.597 tonnes NX70 230V EC Regulation No 517/2014 –... -
Page 5: Important Note Regarding Instrument Variants
Thermo Scientific CryoStar NX70 Operator Guide Important Note Regarding Instrument Variants This document is designed for use with all variants of the Thermo Scientific CryoStar NX70 cryostat. A range of optional features are available on this instrument and the instructions contained in this manual are not specific to any one variant. -
Page 6: Symbols
Thermo Scientific CryoStar NX70 Operator Guide Symbols The following symbols and conventions may be used throughout this document and on the instrument: This symbol is used on the instrument, or in a document, to indicate that instructions must be followed for safe and correct operation. If this symbol appears on the instrument, always refer to the operator guide. -
Page 7: Table Of Contents
Thermo Scientific CryoStar NX70 Operator Guide Table of Contents COMPANY INFORMATION............................3 EMC S ................................4 TATEMENT IMPORTANT NOTE REGARDING INSTRUMENT VARIANTS ..................5 SYMBOLS ..................................6 TABLE OF CONTENTS..............................7 CHAPTER 1 - SAFETY INFORMATION ......................... 10 ................................10... - Page 8 Thermo Scientific CryoStar NX70 Operator Guide Filling the Cryostat with Disinfectant Solution (Sanosil®) ................35 CHAPTER 4 – OPERATION ............................37 ................................37 WITCHING ..............................38 YSTEM NTERFACING Using the Touchscreen ............................38 Main Screen ................................ 38 ..............................40 ETTING REFERENCES Quick Freezing of the Specimen.........................
- Page 9 Thermo Scientific CryoStar NX70 Operator Guide ..............................91 ANDWHEEL RAKES Electronic Handwheel Brake ..........................91 Mechanical Handwheel Brake ........................... 92 D..................................93 Starting the Disinfection (Cold D) Function....................... 93 Aborting the Disinfection ........................... 95 Programming Cold D ............................96 CHAPTER 5 - TROUBLESHOOTING..........................98 ............................
-
Page 10: Chapter 1 - Safety Information
Thermo Scientific CryoStar NX70 Operator Guide Chapter 1 - Safety Information Thermo Scientific instruments are designed for convenient and reliable service; however, improper use or handling by a user may damage the instrument. Protection might be impaired if the equipment is used in a manner not specified by the manufacturer. -
Page 11: Chemical Safety
Thermo Scientific CryoStar NX70 Operator Guide Chemical Safety The introduction of chemicals creates potential hazards. Thermo Fisher Scientific has adopted the following position with regard to the subject of volatile chemicals used in laboratories: • Customers using non-specified chemicals in the instrument, do so at their own risk. -
Page 12: Warranty Statement
Thermo Scientific CryoStar NX70 Operator Guide Warranty Statement Thermo Shandon Limited as part of Thermo Fisher Scientific is proud of their quality, reliability and of our after-sales service. We continuously strive to improve our service to our customers. Please ask your distributor or Thermo Fisher Scientific representative about service contracts which can help maintain your instrument in an optimal operating condition. -
Page 13: Chapter 2 - Introduction
Chapter 2 - Introduction Intended Use The Thermo Scientific cryostat NX70 is an in vitro diagnostic device, designed to take precision sections of tissue specimens including the sectioning of paraffin embedded samples in medical, pharmaceutical laboratories as necessary preparation for their examination. -
Page 14: Technical Specifications
Thermo Scientific CryoStar NX70 Operator Guide Technical Specifications Mechanical Specifications Depth 100 cm (39.4 in) Width 75.5 cm (29.7 in) Height Range Adjustable range 82 - 112 cm (32.3 - 44.0 in) Maximum Weight 200 kg (440 lb) Electrical Specifications Power Requirements Dedicated line recommended. -
Page 15: Cooling Specifications
Thermo Scientific CryoStar NX70 Operator Guide Cooling Specifications Specimen Temperature -50°C to +10°C (-58°F to +50°F) at +20°C room Temp. (decrease Control 0,7°C/1°C room temp. increase) Blade Temperature -35°C to -5°C (-31°F to +23°F) at 20°C room Temp (decrease 0.5°C Control 71°C room temp. -
Page 16: Cold D Specification
Thermo Scientific CryoStar NX70 Operator Guide Coarse Feed Motorized Cutting Drive Motorized, electronically controlled and manual via handwheel Cutting Window Manually adjusted to specimen size Operating Modes Interval, single, multi- and continuous-stroke Cutting Speed 0 - 256 mm/s (0-120 1/min) Clearance Angle Disposable blade carrier 8- 16°... - Page 17 Thermo Scientific CryoStar NX70 Operator Guide Disinfection, Cycle (Automatic) ON (03:00 Night) Defrost Cycle (Automatic) ON (00:00 Night) Standby Mode 1h (After 1 hour, the Cryostat enters the Standby Mode automatically). Kept temperature: -15°C. Sleep Mode 3h (After 3 hours, the Cryostat enters the Sleep Mode automatically).
-
Page 18: Chapter 3 - Instrument Setup
Thermo Scientific CryoStar NX70 Operator Guide Chapter 3 - Instrument Setup Unpacking and Repacking Safety Precautions The CryoStar NX70 is heavy and requires a minimum of two people to safely unpack and manoeuvre it. The CryoStar NX70 has a high centre of gravity and care should be taken when moving. -
Page 19: Repacking The Instrument
Thermo Scientific CryoStar NX70 Operator Guide • Using the wing-nuts affix the wooden top of the crate to the pallet to serve as an unloading ramp for the instrument. • The instrument can be moved on its castors. However, ensure that it does not roll off the pallet inadvertently. -
Page 20: Location & Setup
Thermo Scientific CryoStar NX70 Operator Guide Location & Setup When deciding where to locate the CryoStar NX70, the following items must be taken into consideration: • Approximately 10 cm (4 in) must be allowed around the cooling system to allow free air flow. -
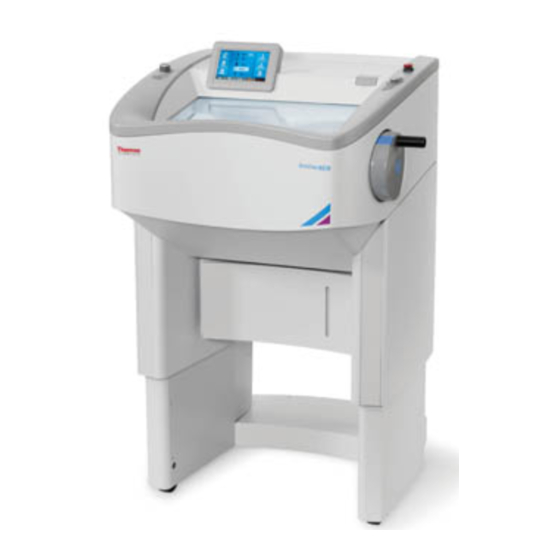
Page 21: Identification Of Parts
Thermo Scientific CryoStar NX70 Operator Guide Identification of Parts Overview Cryochamber Connections Panel Cryochamber Window Handwheel Touch Screen Handwheel Mechanical Brake Cold D Reservoir Cover Water Drain Reservoir Cover Emergency Stop Button... -
Page 22: Connections Panel
Thermo Scientific CryoStar NX70 Operator Guide Connections Panel 10 Power Switch 13 X1 – RJ45 port (for Service purposes only) 11 Power Socket 14 X2 – USB port (for service purposes only) 12 Rating and Serial Number Label 15 X3 – Foot Pedal Connector... -
Page 23: Cryochamber
Thermo Scientific CryoStar NX70 Operator Guide Cryochamber Cryobar and Cooled Storage Area Cutting Speed Control Trim Button Motorized Cutting Start / Stop Button Joystick Handwheel Electronic Brake Button Specimen Head Vacutome Filter Cover Blade Holder with Anti-Roll Plate Vacutome Filter Cover Release Knob... -
Page 24: Blade Holder
Thermo Scientific CryoStar NX70 Operator Guide Blade Holder 29 Lateral Adjustment Lever Blade Holder Base 30 Anti-Roll Plate Anti-Roll Plate Adjustment 31 Blade Clamping Lever Clearance Angle Adjusting Screw 32 Top Stage (Angle Adjustment) -
Page 25: Specimen Head Nx70
Thermo Scientific CryoStar NX70 Operator Guide Specimen Head NX70 Y-axis Fine Adjustment Knob Specimen Head Clamping Lever Specimen Chuck Release Lever Upper Specimen Chuck Jaw (Static) X-Axis Fine Adjustment Knob Lower Specimen Chuck Jaw (Moving) -
Page 26: Set Up
Thermo Scientific CryoStar NX70 Operator Guide Set Up Before sectioning, the blade holder and the Cryochamber should be at a stable temperature close to the desired cutting temperature. These temperatures should be selected to suit the consistency of the specimen. -
Page 27: Fitting Or Exchanging Low Profile Blades
Thermo Scientific CryoStar NX70 Operator Guide Fitting or Exchanging Low Profile Blades Microtome blades are extremely sharp and can cause severe injuries- always use good laboratory practice when handling them. Always cover the blade with the knife / blade guard and activate the electronic and mechanical brakes prior to making modifications to the blade/knife and specimen or changing the specimen. -
Page 28: Removing Used Blades With The Magnetic Blade Tool
Thermo Scientific CryoStar NX70 Operator Guide Removing Used Blades with the Magnetic Blade Tool The magnetic blade tool allows the user to remove used blades from the blade holder in a safe way. Remove the used blade with the magnetic blade tool: •... -
Page 29: Blade Positioning And Orientation
Thermo Scientific CryoStar NX70 Operator Guide Blade Positioning and Orientation Always cover the blade with the knife/blade guard and activate the electronic and mechanical brakes prior to making modifications to the blade/knife! If the cutting area of the blade is no longer usable, the upper part of the blade holder can be moved without removing the blade. -
Page 30: Adjusting The Cutting Angle
Thermo Scientific CryoStar NX70 Operator Guide Adjusting the Cutting Angle The cutting angle can be adjusted. The recommended cutting angle is approximately 10° for Thermo Scientific low profile blades. Note The factory pre-set cutting angle is 10°. • Loosen the clearance angle adjustment screw on the lower left site of the blade holder. - Page 31 Thermo Scientific CryoStar NX70 Operator Guide • Re-tighten the clearance angle adjusting screw to fix the selected clearance angle.
-
Page 32: Adjusting The Anti-Roll Plate
Thermo Scientific CryoStar NX70 Operator Guide Adjusting the Anti-Roll Plate The fine adjustment of the anti-roll plate is carried out using the knurled screw. • To raise the height of the Anti-Roll Plate, turn the screw anti clockwise. • To lower the height of the Anti-Roll Plate, turn the screw clockwise. -
Page 33: Specimen Setup
Thermo Scientific CryoStar NX70 Operator Guide Specimen Setup Specimen Orientation Before sectioning can begin, the specimen must be correctly clamped and oriented in the specimen head. To clamp and orient the specimen: • Loosen the specimen chuck release lever and insert the specimen chuck into the jaws of the specimen head. - Page 34 Thermo Scientific CryoStar NX70 Operator Guide Note The fine adjustment knobs will click into place when the centre position has been reached. • Tighten the specimen head clamping lever again. For further specimen orientation, the specimen chuck can also be rotated by 360° as described below: •...
-
Page 35: Filling With Disinfectant To Perform The Coldd Function
Thermo Scientific CryoStar NX70 Operator Guide Filling with Disinfectant to Perform the Cold D Function The Cold D function is an integrated system for the delivery of disinfectant (Sanosil®) into the cold cryostat chamber. This method of disinfection ensures an even distribution of the disinfectant throughout the Cryochamber. - Page 36 Thermo Scientific CryoStar NX70 Operator Guide • Empty the contents of one litre Sanosil into the tank. • Close the reservoir cover.
-
Page 37: Chapter 4 - Operation
Thermo Scientific CryoStar NX70 Operator Guide Chapter 4 – Operation Switching On Before switching on the instrument for the first time, ensure that the power requirements indicated on the rating label correspond to the power supply voltage being used. Note No other instruments should be connected to the circuit used for the cryostat, as the compressor needs high surge currents when started. -
Page 38: System Interfacing
Thermo Scientific CryoStar NX70 Operator Guide System Interfacing Using the Touchscreen The CryoStar NX70 has an embedded touchscreen user interface which is used to set all preferences. Avoid using sharp or pointed objects to press buttons on the touchscreen Main Screen The Main screen appears after the instrument has been switched on. - Page 39 Thermo Scientific CryoStar NX70 Operator Guide • Press the required key to activate / deactivate the function or to display the options screen for the selected function - See Setting Preferences. "OK" Button • Press the “OK” button to save any changes to specific settings.
-
Page 40: Setting Preferences
Thermo Scientific CryoStar NX70 Operator Guide Setting Preferences Quick Freezing of the Specimen The Cryobar provides on-demand, quick freezing of specimens. Note When the Cryobar is activated, it will take approximately 2 - 3 minutes for the Cryobar to reach a temperature of -60°C. -
Page 41: Trimming And Fine Section Thickness
Thermo Scientific CryoStar NX70 Operator Guide Trimming and Fine Section Thickness The trimming and fine section thickness can be set in two ways: Using the joystick • Tilt the joystick either to the left or to the right to toggle between "Fine" and "Trimming"... - Page 42 Thermo Scientific CryoStar NX70 Operator Guide • Either select one of the pre-set values (400µm, 200µm, 100µm or 10µm) or adjust the value using the arrow keys. • For details of the thickness steps, refer to the Technical Specifications section.
-
Page 43: Temperature
Thermo Scientific CryoStar NX70 Operator Guide Temperature Both the specimen head and the blade holder are actively cooled and the user can adjust either temperature independently. Setting the temperature of the specimen head • Press the "Specimen Head Temperature" button on the Main screen. -
Page 44: Set The Blade Temperature
Thermo Scientific CryoStar NX70 Operator Guide Set the Blade Temperature • Press the "Blade Temperature" button on the Main screen. • The Temperature Blade screen will be displayed. • Either select one of the pre-set temperatures (-35°C, -30°C, -20°C or -10°C) or adjust the temperature using the arrow keys. -
Page 45: Cutting Window
Thermo Scientific CryoStar NX70 Operator Guide Cutting Window The cutting window allows the user to customise this setting for each specimen. • On the Main screen press the "Cutting Window" button. • The Set Cutting Window screen will be displayed. -
Page 46: Select A Favourite
Thermo Scientific CryoStar NX70 Operator Guide Select a Favourite Favourites are user-definable, pre-selectable temperature settings for the specimen head and the blade holder. To select one of the pre-set Favourites: • Press the "Favourites" button on the Main screen. •... -
Page 47: Vacutome And Cleaning Mode
Thermo Scientific CryoStar NX70 Operator Guide Vacutome and Cleaning Mode The Vacutome system provides an active vacuum that aids in chamber cleaning and stretching of sections. Note The user sets the desired value depending upon the intended function (stretching or suction process), section thickness and the size of the specimen. - Page 48 Thermo Scientific CryoStar NX70 Operator Guide Activate the Vacutome To activate the Vacutome: • Press "Vacutome" to display the Vacutome settings screen. • Use the arrow keys to increase or decrease the Vacutome suction value - the default setting is 100%.
- Page 49 Thermo Scientific CryoStar NX70 Operator Guide Turning off the Vacutome function • Press the yellow "Vacutome" button on the Main screen. • Press the yellow "Vacutome" button on the Vacutome screen - the button will now appear white. • Press "OK" to confirm the setting and to return to the Main screen.
- Page 50 Thermo Scientific CryoStar NX70 Operator Guide Attach the hose extension (standard accessory 435560) to the Vacutome hose and vacuum clean the small parts. The hose extension provides enough length to reach all parts of the cooling chamber. Turning Off the cleaning mode To deactivate the cleaning mode: •...
-
Page 51: Height Adjustment
Thermo Scientific CryoStar NX70 Operator Guide Height Adjustment The CryoStar NX70 cryostat has an electronic height adjustment which enables the user to raise or lower the cryostat to a convenient working height. Ensure that the area to the rear of the CryoStar is free of obstructions to avoid damaging the instrument when the height adjustment is in use. -
Page 52: Multi-Function Bar
Thermo Scientific CryoStar NX70 Operator Guide Multi-Function Bar The multi-function bar provides the user access to useful information and functions. The Multi-Function Bar is located at bottom of the Main screen. Time / Date / Service Message Multifunction Button Cutting Mode... -
Page 53: Cutting Mode Selection
Thermo Scientific CryoStar NX70 Operator Guide Cutting Mode Selection The cutting mode selection aids in utilizing the motorized cutting function. Four cutting modes for the motorized cutting drive are available. • Single • Interval • Multi-Stroke • Continuous-Stroke Note In case of emergency, the motor drive can be stopped in every operating mode by pressing the emergency stop button or the emergency stop in the (optional) foot pedal. - Page 54 Thermo Scientific CryoStar NX70 Operator Guide To switch between the cutting modes using the cutting mode submenu: • Press the "Menu" button on the Main screen. • The Menu screen will be displayed. • Press the "Cutting Mode" button. •...
- Page 55 Thermo Scientific CryoStar NX70 Operator Guide To switch between the cutting modes using the "Mode Selection" button on the right touch panel: • Press the mode selection button on the left touch panel. • The actual cutting mode is displayed on the multi function bar on the Main screen.
- Page 56 Thermo Scientific CryoStar NX70 Operator Guide Mode: Multi-Stroke A pre-set number of strokes will be carried out. Note When "Multi-Stroke" is first selected, the default number of strokes is two. To set the number of strokes for the Multi-Stroke Mode: •...
- Page 57 Thermo Scientific CryoStar NX70 Operator Guide Note The default number of cutting strokes is 2. The minimum number of strokes is 2, the maximum number is 99. • Press "OK" to confirm the setting and to return to the Main screen.
-
Page 58: Handwheel Brake
Thermo Scientific CryoStar NX70 Operator Guide Handwheel Brake Always activate the brake when manipulating the blade/knife and specimen. For your personal safety, also activate the handwheel mechanical brake. To activate the Handwheel Brake: Press the "Brake" button on the Main screen or press the "Brake" button on the right touch pad. -
Page 59: Multi-Function Button
Thermo Scientific CryoStar NX70 Operator Guide Multi-Function Button The Multi-Function button provides to the user additional information on the sectioning process. • Four different indications can be displayed by pressing this button. Remaining Distance to the Front End Position This button indicates the remaining distance to front end position of the blade holder. - Page 60 Thermo Scientific CryoStar NX70 Operator Guide Setting the Cutting Speed To set the speed at which motorized cutting drive will operate: • Select the Speed settings on the multi-function bar on the Main screen. • The speed can be varied from 0 to 100 using the knob on the right hand site of the instrument.
-
Page 61: Menu
Thermo Scientific CryoStar NX70 Operator Guide Menu The "Menu" button provides access to submenus for adjustments, settings and the user guide. To enter the Menu screen: • Press the "Menu" button. • The Menu screen will be displayed. • Press the "Back" button to return to the Main screen. -
Page 62: Chamber Light
Thermo Scientific CryoStar NX70 Operator Guide Chamber Light To adjust the brightness of the chamber light: • Press the "Menu" button on the Main screen. • The Menu screen will appear. • Press the "Chamber Light" button. • The Menu: Chamber Light screen will appear. -
Page 63: Standby
Thermo Scientific CryoStar NX70 Operator Guide Standby When the CryoStar is switched on but has been inactive for 1 hour, it will automatically enter the Standby mode. After 3 more hours, the instrument enters the sleep mode. The cryostat maintains the user adjusted temperatures for both blade holder and specimen head during Standby. -
Page 64: Display Lock
Thermo Scientific CryoStar NX70 Operator Guide Display Lock Note The display lock is used to avoid unwanted changes to the settings of the cryostat. To activate the Display Lock: • Press the "Menu" button on the Main screen. • The Menu screen will appear. -
Page 65: Favourites
Thermo Scientific CryoStar NX70 Operator Guide Favourites Favourites are a set of pre-set values for the specimen head and blade temperature. The user can program three favourites to allow quick selection of the set of temperatures most often used. Note Whenever a temperature setting is altered the cryostat will require a period of time to reach the set temperature. - Page 66 Thermo Scientific CryoStar NX70 Operator Guide Each favourite setting is divided into four sections (from left to right): • Favourite name (displayed on the main screen if highlighted). • Specimen head temperature. • Blade temperature. • Alternative indication (displayed on the main screen if highlighted).
-
Page 67: User Guide
Thermo Scientific CryoStar NX70 Operator Guide User Guide This function contains an electronic version of this user guide. To activate the User Guide: • Press the "Menu" button on the Main screen. • The menu screen will appear. • Press the “User Guide” button. - Page 68 Thermo Scientific CryoStar NX70 Operator Guide • Press the "Back" button to return to the settings menu screen. • Press the "Back" button twice to return to the Main screen.
-
Page 69: Settings Menu
Thermo Scientific CryoStar NX70 Operator Guide Settings Menu To enter the Settings menu: • Press the "Menu" button on the Main screen. • The menu screen will appear. • Press the "Settings" button. • The Menu: Settings screen will appear. -
Page 70: Language
Thermo Scientific CryoStar NX70 Operator Guide Language To set the Language: • Press the "Menu" button on the Main screen. • The menu screen will appear. • Press the "Settings" button. • The Menu: Settings screen will appear. • Press the "Language" button. -
Page 71: Time And Date
Thermo Scientific CryoStar NX70 Operator Guide Time and Date Note If a Defrost or Cold D cycle is running, the cycle must finish before the time or date can be adjusted. • Press the "Menu" button on the Main screen. - Page 72 Thermo Scientific CryoStar NX70 Operator Guide Set the Year Press the "Year" button to highlight it. Use the arrow keys to select the desired year. Press "OK" to confirm the setting and to return to the Main screen. Press the "Back" button three times to exit back to the Main screen without saving the changes.
- Page 73 Thermo Scientific CryoStar NX70 Operator Guide • The Menu: Settings: Time screen will be displayed. Set the minutes • Press the "Minute" button to highlight it. • Use the arrow keys to select the desired minute. Set the hour •...
-
Page 74: Start Time
Thermo Scientific CryoStar NX70 Operator Guide Start Time The Start Time is the time were the cryostat switches from the sleep mode to the Active mode on every programmed day. To set the Start Time: • Press the "Menu" button on the Main screen. - Page 75 Thermo Scientific CryoStar NX70 Operator Guide • The Menu: Settings: Start Time screen will appear. Note The default setting is every day, from Monday to Sunday. • Press the weekdays on which the cryostat should not start automatically. Note Deactivated weekdays will turn white.
-
Page 76: Defrost
Thermo Scientific CryoStar NX70 Operator Guide Defrost Inevitably, when working on the microtome the dry cold air of the Cryochamber mixes with the warm humid air outside the chamber. Frost forms on the finned evaporator. The increasing thickness of the frost reduces the efficiency of the evaporator. - Page 77 Thermo Scientific CryoStar NX70 Operator Guide • Press the "Back" button three times to return to the Main screen without starting the defrosting. • Press the "Now" button to start the defrosting immediately. • The Defrosting screen will appear, showing the progress of the defrosting and the actual temperature of the evaporator.
-
Page 78: Programming The Daily Defrost Cycle
Thermo Scientific CryoStar NX70 Operator Guide Programming the Daily Defrost Cycle Note The time for the daily defrost cycle should be programmed outside of the normal working hours to avoid delays in the workflow. To program the Daily Defrost Cycle: •... - Page 79 Thermo Scientific CryoStar NX70 Operator Guide Note The standard setting for the daily defrost cycle is daily at 00:00 a.m. • To change the standard setting, press the "Hour" and / or the "Minute" button. • Adjust the time by using the arrow keys.
-
Page 80: Screen
Thermo Scientific CryoStar NX70 Operator Guide Screen The brightness of the Screen can be adjusted. To set the Screen brightness: • Press the "Menu" button on the Main screen. • The Menu screen will be displayed. • Press the "Settings" button. -
Page 81: Retraction
Thermo Scientific CryoStar NX70 Operator Guide Retraction If required, the Retraction function can be turned off. To toggle the retraction on or off: • Press the "Menu" button on the Main screen. • The Menu screen will be displayed. •... - Page 82 Thermo Scientific CryoStar NX70 Operator Guide To turn on the Retraction: • Enter the Retraction menu screen as described above. • Press the OK" button on the Menu: Settings: Retraction screen to turn on the Retraction and to return to the Main screen.
-
Page 83: Data Log
Thermo Scientific CryoStar NX70 Operator Guide Data Log The Data Log records all events and error messages on the cryostat. The Data Log file can be exported to a USB-Stick for Service purposes in case of a malfunction. To enter the Data Log •... -
Page 84: Default Settings
Thermo Scientific CryoStar NX70 Operator Guide Default Settings If required, the instrument can be reset to the default settings. To restore the Default Settings: • Press the "Menu" button on the Main screen. • The Menu screen will be displayed. -
Page 85: Service
Thermo Scientific CryoStar NX70 Operator Guide Display icons with text The text underneath the Main screen icons can be switched off if required. To switch the text off: • Enter the Menu: Settings: Default Settings screen as described above. •... -
Page 86: Emergency Stop
Thermo Scientific CryoStar NX70 Operator Guide Emergency Stop Standard Emergency Stop Function To activate the emergency stop: Press the red emergency stop button to immediately stop the motorized cutting drive. Note When the emergency stop is activated, the handwheel brake button in the display and the handwheel brake button on the right keypad light up and a red button are shown on the display. -
Page 87: Optional Foot Pedal Emergency Stop
Thermo Scientific CryoStar NX70 Operator Guide Optional Foot Pedal Emergency Stop A second emergency stop device is integrated into the optional foot pedal. To activate the emergency stop using this method: • Firmly step on the foot pedal to immediately stop the motorized cutting drive. -
Page 88: Sectioning Procedures
Thermo Scientific CryoStar NX70 Operator Guide Sectioning Procedures Cutting Movement and Retraction Front Rear Lateral view into instrument Note The retraction prevents the surface of the specimen being damaged during the return stroke of the specimen head. The retraction can be switched off - see "Switching the Retraction On - Off". -
Page 89: Trimming And First Cuts
Thermo Scientific CryoStar NX70 Operator Guide Trimming and First Cuts After the specimen orientation and the blade angle have been set, trimming can be carried out using the trimming function. Trimming • Make sure that the trimming thickness setting is selected by using the joystick. -
Page 90: Sectioning And Taking Off Sections
Thermo Scientific CryoStar NX70 Operator Guide Sectioning and Taking Off Sections • Set the desired section thickness - see Cutting Thickness • Set the desired vacuum level - see Vacutome and Cleaning Mode. • Place the anti-roll plate against the blade. -
Page 91: Handwheel Brakes
Thermo Scientific CryoStar NX70 Operator Guide Handwheel Brakes Before placing or removing a specimen on the specimen head, or adjusting the orientation, always ensure that the mechanical handwheel brake is engaged. The cryostat is equipped with an electronic and a mechanical handwheel brake to prevent unintended movement of the specimen head. -
Page 92: Mechanical Handwheel Brake
Thermo Scientific CryoStar NX70 Operator Guide Mechanical Handwheel Brake The mechanical handwheel brake acts as an additional safety device, especially when the instrument is turned off and the electronic handwheel brake is inoperable. The mechanical handwheel brake can be activated by a switch on the handwheel. -
Page 93: Cold D
Thermo Scientific CryoStar NX70 Operator Guide Cold D Starting the Disinfection (Cold D) Function The Cold D function allows the user to disinfect the Cryochamber with Sanosil®. Disinfection is either on-demand or pre-programmed. The Cold D cycle takes 50 minutes to complete. - Page 94 Thermo Scientific CryoStar NX70 Operator Guide Note After the disinfection cycle is completed, the Disinfection Remaining Time screen will disappear and the Main screen will be displayed. A small amount of liquid and, occasionally, a small amount of icing remain in the Cryochamber following completion of a Cold D cycle.
-
Page 95: Aborting The Disinfection
Thermo Scientific CryoStar NX70 Operator Guide Aborting the Disinfection Note The disinfection process can be aborted at any time to facilitate an urgent frozen section. To abort the disinfection process: • Press the "Abort" button on the Disinfection Remaining Time screen. -
Page 96: Programming Cold D
Thermo Scientific CryoStar NX70 Operator Guide Programming Cold D In addition to the instant use, automatic Cold D cycles can be programmed. Follow the directions below to activate (or deactivate) the automatic Cold D feature. • Press the "Menu" button on the Main screen. - Page 97 Thermo Scientific CryoStar NX70 Operator Guide Note The default setting is every day, from Monday to Sunday at 3:00 am. • Press the weekdays on which the automatic disinfection should not be carried out. Note Deactivated weekdays will turn white.
-
Page 98: Chapter 5 - Troubleshooting
Thermo Scientific CryoStar NX70 Operator Guide Chapter 5 - Troubleshooting Troubleshooting Tables Problem Possible Reason Advice 1. Specimen is too warm. Lower specimen temperature 2. Knife holder too warm. Lower chamber temperature. Tip – use freezer spray on clamp plate and blade to Sections fold or confirm. - Page 99 Thermo Scientific CryoStar NX70 Operator Guide Problem Possible Reason Advice 1. Check knife holder and specimen correctly clamped. 2. Ensure specimen is securely attached to the Cryocassette/chuck. 3. Temperature of specimen Raise or lower temperature. incorrect. 4. Blade not sharp.
-
Page 100: Tips For Successful Sectioning
Thermo Scientific CryoStar NX70 Operator Guide Tips for Successful Sectioning For optimal sectioning, the following points should be followed: • Check the condition of the blade edge; move it horizontally to the left or right side to obtain a sharp cutting edge. -
Page 101: How To Avoid Malfunctions When Working With The Vacutome
Thermo Scientific CryoStar NX70 Operator Guide How to avoid malfunctions when working with the Vacutome • Accurately adjust the cutting and suction window to the specimen size, to avoid inadvertent disposal of good sections. • Adjust the suction vacuum setting according to the size of the specimen and the selected section thickness. -
Page 102: Sectioning Temperature Guidelines For Fresh Tissues
Thermo Scientific CryoStar NX70 Operator Guide Sectioning Temperature Guidelines for Fresh Tissues Specimen Type Knife/Blade Temp Specimen Temp Adipose Tissue -35°C -30°C or below Bone Marrow -25°C to -30°C -20°C Brain -20°C -12°C Breast -35°C -25°C Breast with Fat -35°C -30°C or below... -
Page 103: Chapter 6 - Cleaning And Maintenance
Thermo Scientific CryoStar NX70 Operator Guide Chapter 6 - Cleaning and Maintenance Cleaning the Touch Screen Display Use commercially available cleaning tissues or use a soft and slightly wet towel to clean the Touch screen. Do not use household cleaner or chemicals (i. e. Xylene) for cleaning of the Touch screen to avoid severe damage. -
Page 104: Emptying The Defrosting And Coldd Liquids
Thermo Scientific CryoStar NX70 Operator Guide Emptying the Defrosting and Cold D Liquids The liquids from the daily defrosting cycle as well as the liquid of a Cold D cycle is collected in a bottle, located in the base of the cryostat. -
Page 105: Exchange The Vacutome Filter Bag
Thermo Scientific CryoStar NX70 Operator Guide Exchange the Vacutome Filter Bag The Vacutome Filter Bag collects all section waste which has been removed with the Vacutome function. Section waste can be hazardous! Dispose of the used Vacutome filter bag in accordance to the laboratory regulations. - Page 106 Thermo Scientific CryoStar NX70 Operator Guide • Clean and disinfect the empty Vacutome filter chamber with disinfectant. • Replace the cover, rear end first. • Reattach the Vacutome hose. • Lock the cover with the lever.
-
Page 107: Adjustment Of The Movable Specimen Head Jaw
Thermo Scientific CryoStar NX70 Operator Guide Adjustment of the Movable Specimen Head Jaw The clamping mechanism can be adjusted in case the chucks cannot be clamped properly. • Lock both the electronic and mechanical handwheel brakes. • Turn the adjusting ring by using the pin, provided with the standard accessories. -
Page 108: Transportation Of The Instrument
Any transportation of the instrument requires original packaging materials. Note If the original packaging is no longer available, please contact your local Thermo Scientific representation. • Clean and disinfect the Cryochamber - see Recommended Disinfection Procedure. •... - Page 109 Thermo Scientific CryoStar NX70 Operator Guide Bringing the instrument back into service After moving the CryoStar NX70, wait at least 8 hours before switching on to allow the refrigerant to settle - failure to do so may cause damage to the unit.
-
Page 110: Appendices
Thermo Scientific CryoStar NX70 Operator Guide Appendices Appendix A - Spares and Accessories Description Part Number Knife and Blade Holder Standard Knife Holder 705950 Disposable Blade Holder for high profile blades 705940 Disposable Blade Holder for low profile blades 705840... - Page 111 Thermo Scientific CryoStar NX70 Operator Guide Description Part Number Coarse filter for use with Vacutome (pk of 25) 281000 Nozzle (for trimming) 336090 Nozzle (for sectioning) 336080 Blade handling tool 419500 Foot pedal (optional) 640380 Paraffin repellent PARA GARD, 100ml...
-
Page 112: Appendixb - Recommended Disinfection Procedure
Spray the chamber surfaces with 70% alcohol. Allow the solution to sit for 10 minutes, drain, and again wipe all surfaces with absorbent towels. Sanosil® can be ordered by the manufacturer and/or the local dealers in the respective countries or by your respective Thermo Scientific contractual partner (cat. no. 350150). www.sanosil.ch... -
Page 113: Appendixc - Cold Disinfection Certificate
Thermo Scientific CryoStar NX70 Operator Guide Appendix C - Cold Disinfection Certificate... -
Page 114: Index
Thermo Scientific CryoStar NX70 Operator Guide Index EMC Statement ............4 Emergency Stop ............86 Emptying the Defrosting and Cold D Liquids ....104 Environment ..............11 Aborting the Disinfection ........... 95 Environmental Specifications ........14 Adjusting the Anti-Roll Plate ........32 Exchange the Vacutome Filter Bag ......105 Adjusting the Cutting Angle ........ - Page 115 Thermo Scientific CryoStar NX70 Operator Guide Set Up ................26 Setting Preferences ............40 Settings Menu ............69 Magnetic Blade Tool ..........28 Shutting Off for Cleaning ..........103 Main Screen............... 38 Specimen and blade holder cooling......87 Malfunctions with the Vacutome......101 Specimen Head NX70 ..........25 Mechanical Handwheel Brake ........
- Page 116 Thermo Scientific CryoStar NX70 Operator Guide...
Need help?
Do you have a question about the CryoStar NX70 series and is the answer not in the manual?
Questions and answers