Table of Contents
Advertisement
Advertisement
Table of Contents

Related Manuals for HIKVISION DS-MH2111 Series


Summary of Contents for HIKVISION DS-MH2111 Series
- Page 1 Body Camera User Manual UD04976B...
- Page 2 (hereinafter referred to be “the Manual”) cannot be reproduced, changed, translated, or distributed, partially or wholly, by any means, without the prior written permission of Hikvision. Unless otherwise stipulated, Hikvision does not make any warranties, guarantees or representations, express or implied, regarding to the Manual.
- Page 3 Body Camera User Manual Regulatory information FCC information FCC compliance: Please take attention that changes or modification not expressly approved by the party responsible for compliance could void the user’s authority to operate the equipment. Note: This product has been tested and found to comply with the limits for a Class B digital device, pursuant to Part 15 of the FCC Rules.
- Page 4 Body Camera User Manual This device complies with Industry Canada licence-exempt RSS standard(s). Operation is subject to the following two conditions: this device may not cause interference, and this device must accept any interference, including interference that may cause undesired operation of the device.
- Page 5 Body Camera User Manual Applicable Models This manual is applicable to the models listed in the following table. Series Model DS-MH2111/32G DS-MH2111 Series DS-MH2111/32G/GLE Symbol Conventions The symbols that may be found in this document are defined as follows. Symbol Description Provides additional information to emphasize or supplement important points of the main text.
- Page 6 Only use the battery, power adapter and assembly parts specified by the manufacturer. Consult the authorized dealer or technician from Hikvision for any question and request for product using. After the laboratory measurement, the Max SAR value is 0.121W/kg for 2.4G...
-
Page 7: Table Of Contents
Body Camera User Manual TABLE OF CONTENTS TABLE OF CONTENTS ..................... 6 Chapter 1 Introduction ..................8 1.1 Introduction ....................... 8 1.2 Package List ......................8 Chapter 2 Buttons and Interfaces ................9 Chapter 3 Installation and Connections ..............12 3.1 Install SIM Card .................... - Page 8 Body Camera User Manual Chapter 10 Playback ..................... 32 Chapter 11 Platform ..................... 33 Chapter 12 Group Intercom .................. 34 Chapter 13 Group Intercom .................. 34 Chapter 14 Backup ....................36 14.1 Media Information ..................36 14.1.1 File Operation via Assistant ..............36 14.1.2 File Operation in USB Mode ..............
-
Page 9: Chapter 1 Introduction
Body Camera User Manual Chapter 1 Introduction 1.1 Introduction Purpose: Body camera is a video recording system that is typically used by law enforcement to record their interactions with the public and gather video evidence at crime scenes. 1.2 Package List Following objects are delivered with package list. -
Page 10: Chapter 2 Buttons And Interfaces
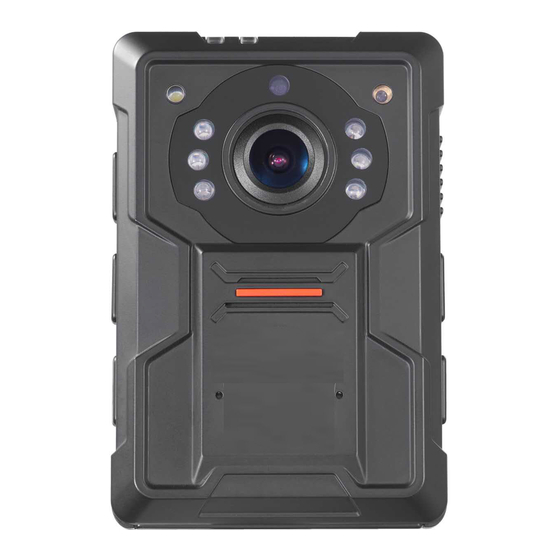
Body Camera User Manual Chapter 2 Buttons and Interfaces LED 3 LED 1 LED 2 LED 4 Sleep/Wake Capture Figure 2-1 Overall View (1) Lens IR Light Recording Taping USB Interface HDMI Interface Figure 2-2 Overall View (2) - Page 11 Body Camera User Manual Menu/Return SIM Card Slot Down OK/Play Angle Adjustable Clip Figure 2-3 Overall View (3) Table 2-1 Button Description Button Description LED 1 Flashing blue: Body camera is in network transmission. LED 2 Flashing yellow: Body camera is taping. LED 3 Solid green: Body camera is starting up.
- Page 12 Body Camera User Manual Menu button In LCD live view mode, press it to enter main menu. In LCD menu, press it to exit. In LCD menu, press it to navigate between fields and items in menus. ...
-
Page 13: Chapter 3 Installation And Connections
Body Camera User Manual Chapter 3 Installation and Connections 3.1 Install SIM Card The section is only available for DS-MH2111/32G/GLE. Step 1 Make sure the body camera is powered off. Step 2 Open the cover of SIM card slot. Figure 3-1 Open Cover of SIM Card Slot Step 3 Insert SIM card into the slot button with gold contact facing upwards. -
Page 14: Quick Charge Mode
Body Camera User Manual Figure 3-2 Charging via Computer 3.2.3 Quick Charge Mode Purpose: You can speed up charging by turning on quick charge mode. Step 1 Go to System Settings > Quick Charging Mode. Step 2 Select Quick Charging Mode as On. ... - Page 15 Body Camera User Manual Figure 3-3 Install Shoulder Clip...
-
Page 16: Chapter 4 Start-Up
Ensure the power is sufficient. If not, charge body camera. For details, refer to 3.2.2 How to Charge. Step 1 Hold Sleep/Wake for 3 seconds. Then the LED 3 turns green, the HIKVISION logo pops up, and you will hear an audible notification. All of these indicate the body camera starts successfully. -
Page 17: Chapter 5 Body Camera Assistant
Body Camera User Manual Chapter 5 Body Camera Assistant Purpose: Log into body camera via the Body Camera Assistant to view device’s logs, videos, audios, and pictures, and configure parameters remotely. Assistant mentioned below refers to the Body Camera Assistant. 5.1 Assistant Installation Purpose: The body camera assistant’s installation package is delivered with the CD. - Page 18 Body Camera User Manual Figure 5-2 Destination Location Step 3 Click Next to enter Select Start Menu Folder window. Optionally, you can edit the shortcut name and click Browser to select the folder where to create shortcut. Figure 5-3 Start Menu Folder Step 4 Click Next to enter Select Additional Tasks window.
- Page 19 Body Camera User Manual Figure 5-5 Ready to Install Step 6 During the installation process, the following window will pop up. Figure 5-6 Device Driver Installation Wizard Step 7 Click Next to start installing device driver. Figure 5-7 Device Driver Installation Wizard...
-
Page 20: Device Login
Body Camera User Manual Step 8 Click Finish in Device Driver Installation Wizard and click Finish in Body Camera Assistant Wizard to finish the installation. Figure 5-8 Finish Step 9 Then the body camera assistant window appears. Figure 5-9 Body Camera Assistant 5.2 Device Login Purpose: You need to connect the assistant with body camera. -
Page 21: Exit Assistant
Body Camera User Manual Figure 5-10 Recognized Device Step 3 Click the recognized device, input device password, and then click Login to log in. Then the assistant window shows. If you forget the password, refer to 18.1 Restore Password to restore password. Figure 5-11 Body Camera Assistant 5.3 Exit Assistant Step 1 Click the... -
Page 22: Chapter 6 Network Settings
Body Camera User Manual Chapter 6 Network Settings 6.1 Dial Before you start: Install a SIM card first. For details, refer to 3.1 Install SIM Card. Step 1 Go to Network Settings > Dial. Figure 6-1 Dial Step 2 Select On. Step 3 Save the settings. -
Page 23: Turn On Wi-Fi
Body Camera User Manual Figure 6-2 Wi-Fi Parameters 6.2.2 Turn on Wi-Fi Purpose: You can turn on Wi-Fi in local menu. Step 1 Go to Network Settings > Wi-Fi. Figure 6-3 Turn on Wi-Fi Step 2 Select Wi-Fi as On. Step 3 Press to save the settings. -
Page 24: Onvif Protocol
Body Camera User Manual Figure 6-4 Network Settings Step 2 Configure Net Resolution, Net Bitrate, or Net Frame Rate parameters. Step 3 Save the settings. 6.4 ONVIF Protocol Body camera can be connected to NVR or third-party device via ONVIF protocol. -
Page 25: Chapter 7 Camera Settings
Body Camera User Manual Chapter 7 Camera Settings 7.1 Encoding Parameters Purpose: Set the parameters for video, including resolution, frame rate, bitrate, and so on. Step 1 Go to Camera Settings. Figure 7-1 Camera Settings Step 2 Configure Video Resolution, Bitrate, Frame Rate, Pre-Record, Post-Record, etc. -
Page 26: Start Recording After Startup
Body Camera User Manual Figure 7-2 Encoding Parameters 7.3 Start Recording after Startup Purpose: Device can automatically start recording after startup. Step 1 In local menu, go to System Settings > Record after startup. Figure 7-3 Start Recording after Startup Step 2 Select ON. -
Page 27: Record And Capture
Body Camera User Manual Step 2 is invalid in playback, quick charging, USB communication interface. Exit the interfaces before operation. The picture is saved in memory in .jpg format and named by taking picture date and time. You can play back the picture in playback menu or download and save it in computer local path. - Page 28 Body Camera User Manual Step 2 Press to start taping. Then pops up in live view interface. Step 3 Press again to stop taping. Then disappears. The operation is invalid in playback, quick charging, USB communication interface. Exit the interfaces before operation. ...
-
Page 29: Chapter 8 Live View
Body Camera User Manual Chapter 8 Live View 8.1 Local Live View Purpose: Once the body camera starts up completely, it automatically enters the live view image. The chapter introduces how to judge device status with appearance of icons. Figure 8-1 Live View Icons Table 8-1 Live View Icon Description No. -
Page 30: Remote Live View
Body Camera User Manual Wi-Fi status Shows whether Wi-Fi is connected. Disconnected: Connected: Dialing status Shows body camera dialing status Dialing feature is off: Connected with 2G network: Connected with 3G network: Connected with 4G network: Positioning status Shows whether positioning is successful. - Page 31 Body Camera User Manual Step 2 Enter body camera user name (admin) and password (body camera assistant password) for authentication.
-
Page 32: Chapter 9 Storage
Body Camera User Manual Chapter 9 Storage Purpose: Format helps you to clear all data saved in device. It’s not recommended to format the body camera like the way you format USB flash disk, or the body camera will fail to recognize the memory. -
Page 33: Chapter 10 Playback
Body Camera User Manual Chapter 10 Playback Purpose: You can play back recorded videos, pictures, and audios. Step 1 Go to Playback. Step 2 If verify function is on, you need to enter device password to get permission. Figure 10-1 Input Password Step 3 Select the playback file type as Video, Picture, or Audio. -
Page 34: Chapter 11 Platform
Body Camera User Manual Chapter 11 Platform Purpose: You can log into device via iVMS to monitor device and receive alarms. Step 1 In body camera assistant, go to Device Configuration > Platform Settings. Figure 11-1 Platform Settings Step 2 Check Enable to enable platform connection. Step 3 Select address type as IP or Domain Name. -
Page 35: Chapter 12 Group Intercom
Body Camera User Manual Chapter 12 Group Intercom Chapter 13 Group Intercom Purpose: You can talk to other body cameras in the same intercom group. Before you start: Build group intercom platform. Register your body camera in group intercom platform by adding a user to the platform. - Page 36 Body Camera User Manual Figure 13-2 Group Intercom Step 2 Check Enable. Step 3 Enter Server IP, Port, User ID, Password, and Current Group. Server IP: Group intercom server IP address. Port: Group intercom server port. User ID: The user ID of the user registered in group intercom platform. ...
-
Page 37: Chapter 14 Backup
Body Camera User Manual Chapter 14 Backup 14.1 Media Information Purpose: Two methods are provided to operate files saved in body camera: Log into body camera via body camera assistant. Switch body camera to USB mode and operate body camera as an USB flash drive. -
Page 38: File Operation In Usb Mode
Body Camera User Manual 14.1.2 File Operation in USB Mode Step 1 Log into device via assistant. Step 2 Click Switch USB Mode in top right corner of assistant window. Step 3 Click OK in the pop up dialog box. Then the assistant will exit. Figure 14-2 Dialog Box Step 4 Enter Computer window to view the body camera. - Page 39 Body Camera User Manual Figure 14-4 Local Configuration...
-
Page 40: Chapter 15 Events And Alarms
Body Camera User Manual Chapter 15 Events and Alarms 15.1 Manual Alarm In emergency, hold the SOS button on the side of body camera for at least 1 second to manually upload alarm information to platform. 15.2 Memory Full Alarm Purpose: If memory is full, when you start recording, taping, capture, or other function consumes storage, the message “Memory is full.”... -
Page 41: Chapter 16 User Account Management
Body Camera User Manual Chapter 16 User Account Management Purpose: You can customize the police ID and device ID. Step 1 In body camera assistant, go to Device Configuration > Device Information. Figure 16-1 User Information Step 2 You can edit the Police ID and Device ID. ... -
Page 42: Chapter 17 General System Configuration
Body Camera User Manual Chapter 17 General System Configuration 17.1 Sound Purpose: Turn on and turn off system volume. If it is on, when you press a button or alarm occurs, body camera will send out a tone. By default it is on. Step 1 Go to System Settings >... -
Page 43: Login Settings
Body Camera User Manual Step 3 If Manual Time Synchrony is selected, select the Device Time and Time Zone according to your needs. Step 4 Click Save to save the settings. 17.3 Login Settings Purpose: If login feature is on, you need to log into device by entering your ID at every boot. The ID will show in the file name of the recorded video. -
Page 44: Language Settings
Body Camera User Manual Figure 17-4 IR Light Step 2 Select Infrared as OFF, ON, or AUTO. OFF: By default, IR light is off. The status adapts to daylight period. ON: In night period or dark environment, it is recommended to turn on IR light. ... - Page 45 Body Camera User Manual Step 1 Go to System Settings > Positioning. Step 2 Select Positioning as Off, GPS, BeiDou, or GPS + BeiDou. Step 3 Save the settings and reboot device to take effect the settings. If positioning succeeded, the positioning icon in live view will turn from Figure 17-6 Positioning...
-
Page 46: Chapter 18 Maintenance
Body Camera User Manual Chapter 18 Maintenance 18.1 Restore Password Purpose: If you forgot your device password, you can restore it to default password. Step 1 Enter device login window. Figure 18-1 Login Window. Step 2 Click Forget Password. Step 3 Click File Export to export file DeviceKey.xml. Step 4 Send the file to your manufacturer. -
Page 47: Security Settings
Body Camera User Manual Figure 18-2 Password Recovery 18.2 Security Settings Step 1 Go to Device Configuration > Security Settings. Step 2 Input Current Password and New Password. Password can only contain the number, instead of the letter and the symbol. Step 3 Click Save. -
Page 48: Battery Information
Body Camera User Manual 18.4 Battery Information Purpose: Go to System Settings > System Information to view remaining battery, time to fully charged, and charging status. Figure 18-4 Battery Information 18.5 System Resetting Purpose: You can reset all parameters to default settings by resetting system. Step 1 In body camera assistant, go to Device Configuration >... -
Page 49: Upgrading Device
Body Camera User Manual 18.6 Upgrading Device Purpose: It is recommended to upgrade device with the help of professional technical support. Step 1 Switch to USB mode. For detailed steps, refer to 14.1.2 File Operation in USB Mode. Step 2 Enter the Removable Disk of body camera through Computer. Step 3 Copy the upgrade file into the removable disk. - Page 50 Body Camera User Manual Step 4 To clear logs, do following steps: 1) Search the logs you want to clear. 2) Click the Clear button to clear them.
-
Page 51: Chapter 19 Shut Down Device
19.1.1 Shutdown Step 1 Hold Sleep/Wake for 3 seconds. When you hear an audible notification, and the HIKVISION logo pops up on the LCD, the LCD shut down successfully. 19.1.2 Force to Shutdown Step 1 If body camera crashed or it cannot be shut down normally, you can hold the... -
Page 52: Chapter 20 Troubleshooting
Body Camera User Manual Chapter 20 Troubleshooting Unable to start up. Possible Reason: Device runs out of power. Solution: Get device be charged. Unable to start recording. a) Possible Reason: Memory is full. Solution: Back up device and clear the memory. b) Possible Reason: Formatting memory error. - Page 53 Body Camera User Manual UD09655B...
Need help?
Do you have a question about the DS-MH2111 Series and is the answer not in the manual?
Questions and answers