HIKVISION DS-MH2311 Series User Manual
Body camera
Hide thumbs
Also See for DS-MH2311 Series:
- Quick start manual (23 pages) ,
- Quick start manual (13 pages) ,
- User manual (39 pages)
Table of Contents
Advertisement
Quick Links
Advertisement
Table of Contents

Related Manuals for HIKVISION DS-MH2311 Series


Summary of Contents for HIKVISION DS-MH2311 Series
- Page 1 Body Camera User Manual...
- Page 2 INDIRECT DAMAGES, INCLUDING, AMONG OTHERS, DAMAGES FOR LOSS OF BUSINESS PROFITS, BUSINESS INTERRUPTION, OR LOSS OF DATA OR DOCUMENTATION, IN CONNECTION WITH THE USE OF THIS PRODUCT, EVEN IF HIKVISION HAS BEEN ADVISED OF THE POSSIBILITY OF SUCH DAMAGES. REGARDING TO THE PRODUCT WITH INTERNET ACCESS, THE USE OF PRODUCT SHALL BE WHOLLY AT YOUR OWN RISKS.
- Page 3 Body Camera User Manual Regulatory Information FCC Information FCC compliance: Please take attention that changes or modification not expressly approved by the party responsible for compliance could void the user’s authority to operate the equipment. This equipment complies with FCC/IC RSS-102 radiation exposure limits set forth for an uncontrolled environment.
- Page 4 Body Camera User Manual include lettering to indicate cadmium (Cd), lead (Pb), or mercury (Hg). For proper recycling, return the battery to your supplier or to a designated collection point. For more information see: www.recyclethis.info Industry Canada ICES-003 Compliance This device meets the CAN ICES-3 (B)/NMB-3(B) standards requirements. This device complies with Industry Canada licence-exempt RSS standard(s).
- Page 5 Body Camera User Manual Applicable Models This manual is applicable to the models listed in the following table. Series Model DS-MH2311/32G DS-MH2311 DS-MH2311/32G/GLE Symbol Conventions The symbols that may be found in this document are defined as follows. Symbol Description Provides additional information to emphasize or supplement important points of the main text.
-
Page 6: Table Of Contents
Body Camera User Manual TABLE OF CONTENTS Chapter1 Introduction ..................7 1.1 Main Features....................7 1.2 Package List ....................7 1.3 Buttons and Interfaces ................. 8 1.4 Charge Body Camera .................. 10 1.4.1 Charger Specifications ............... 10 1.4.2 Charge ....................10 1.4.3 How to Protect Charger .............. - Page 7 Body Camera User Manual 6.8 Set Satellite Time Synchronization ............. 28 6.9 Set Quick Charging Mode ................28 6.10 Set Overwriting ..................29 6.11 Set Password Verification ................. 29 6.12 View Battery Information ................ 29 6.13 View System Information ................. 30 Chapter 7 Body Camera Assistant ..............
-
Page 8: Chapter1 Introduction
Body Camera User Manual Chapter1 Introduction Body camera, a video recording system, is typically used by law enforcement officers to record their interactions with the public and gather video evidences at crime scenes. 1.1 Main Features H.264 and H.265 encoding technology. ... -
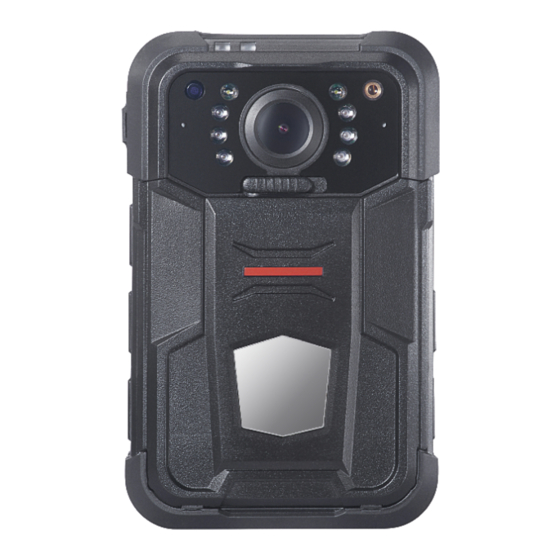
Page 9: Buttons And Interfaces
Body Camera User Manual 1.3 Buttons and Interfaces Refer to Figure 1-1 for the overall view of the body camera. Figure 1-1 Overall View Table 1-1 Description of Overall View Button Description When body camera is being charged, it is solid red. ... - Page 10 Body Camera User Manual Button Description Press it to start/stop taping. Taping Hold it for 3 seconds to turn on/off white light. Capture Press it to capture current live view image. USB interface Connect USB cable or charger to it. ...
-
Page 11: Charge Body Camera
Body Camera User Manual Button Description Laser positioning You can turn on the laser positioning light to judge the position light when recording or capturing. Lens Lens. MIC. You can turn on the IR light to supply body camera sufficient light IR Light to get a visible image. -
Page 12: How To Protect Charger
Body Camera User Manual When the body camera is being charged, LED 1 is solid red. When it is fully charged, LED 1 is solid green. You can enable quick charging mode in system settings. In quick charging mode, the body camera cannot be operated. -
Page 13: Chapter 2 Startup And Shutdown
Hold the On/Off button for 3 seconds. Then LED 2 turns green, and after 10 seconds, the HIKVISION logo pops up. You will hear an audible notification. All of these indicate the body camera starts successfully. Then it automatically enters the live view interface. -
Page 14: Chapter 3 Basic Functions
Body Camera User Manual Chapter 3 Basic Functions 3.1 Live View Interface Introduction Once the body camera starts up completely, it automatically enters the live view interface. XXXX-XX-XX XX:XX:XX XXXXXXXX XXXXXXX Figure 3-1 Live View Interface... - Page 15 Body Camera User Manual Table 3-1 Live View Icons Description Name Description Recording status Shows the recording status. Not recording: Recording: Remaining recording time The time is variable and is decided by video resolution, frame rate, and bitrate. OSD (On Screen Display) Shows the device date and time.
-
Page 16: Menu Introduction
Body Camera User Manual 3.2 Menu Introduction Wake up LCD. Tap to enter the main menu, and tap to enter the sub-menu. Table 3-2 Sub-Menu Description Menu Description Playback You can play back recorded videos, pictures, and audios. Camera You can set camera parameters including video Settings resolution, bitrate, frame rate, pre-record time, post-record time, video clip time, picture quality, and... -
Page 17: Tape Audio
Body Camera User Manual Step 3 Press again to stop recording. Then turns to The operation is invalid in playback, quick charging, and USB communication interface. Exit the interfaces before operation. The video is saved in memory in .mp4 format and named by the start time of recording. ... - Page 18 Body Camera User Manual Figure 3-2 Input Password The default password is 123456. You can go to Main Menu > System > Verify to disable password verification. Step 3 Tap to select the playback file type as Video, Picture, or Audio. And tap enter the corresponding menu.
-
Page 19: Set Tag
Body Camera User Manual Step 5 In file list, tap to select the file to play back. Step 6 Tap to start playback. In video playback, you can tap again to stop playback, and tap to speed up/slow down playback speed. Step 7 Tap to exit playback. -
Page 20: Set Video Tag After Recording
Body Camera User Manual 3.7.2 Set Video Tag After Recording Step 1 Go to Main Menu > Playback > Video. Step 2 Enter the file list. Step 3 Select the file and hold for 3 seconds to set tag for it. The file with tag is named in red. Figure 3-5 Set Tag After Recording Step 4 (Optional) Hold for 3 seconds again to cancel the tag. - Page 21 Body Camera User Manual Step In emergency, hold SOS button for more than 1 second to alarm manually and send the alarm to the platform.
-
Page 22: Chapter 4 Network Configuration
Body Camera User Manual Chapter 4 Network Configuration 4.1 Connect to Wi-Fi Purpose You can access Internet by connecting to a Wi-Fi. Before you start Configure Wi-Fi parameters, including SSID and key, in Body Camera Assistant. Refer to Chapter 7.6.1 Connect to Dynamic Wi-Fi for details. Step 1 Go to Main Menu >... -
Page 23: Dial Via 3G/4G Microsim Card
Body Camera User Manual Figure 4-2 Wi-Fi Information 4.2 Dial via 3G/4G MicroSIM Card Purpose You can connect to the Internet via 3G/4G public network. Before you start Install 3G/4G microSIM card. Refer to Quick Start Guide for details. Step 1 Go to Main Menu > Network. Step 2 Tap to position the cursor on Dial item. -
Page 24: Connect To Platform
Body Camera User Manual Figure 4-3 Dialing Information If you enable 3G/4G and Wi-Fi at the same time, Wi-Fi is in priority. If you want to use 3G/4G, disable Wi-Fi first. Dialing via 3G/4G microSIM card is only applicable to DS-MH2311/32G/GLE. 4.3 Connect to Platform Purpose You can connect the body camera to platform. -
Page 25: Set Network Transmission Parameters
Body Camera User Manual 4.4 Set Network Transmission Parameters Purpose To determine the resolution, frame rate, and bitrate used by iVMS platform when it views body camera image, configure the network transmission parameters. Step 1 Go to Main Menu > Network. Figure 4-4 Network Settings Step 2 Tap to position the cursor on Net Resolution, Net Bitrate, or Net Frame Rate. -
Page 26: Chapter 5 Camera Configuration
Body Camera User Manual Chapter 5 Camera Configuration Purpose You can set the video parameters, including resolution, frame rate, bitrate, and so on. Step 1 Go to Main Menu > Camera. Figure 5-1 Camera Settings Step 2 Tap to position the cursor on Resolution, Bitrate, Frame Rate, Pre-Record, Post-Record, or other items. -
Page 27: Chapter 6 System Configuration
Body Camera User Manual Chapter 6 System Configuration Go to Main Menu > System to configure parameters such as system volume, voice prompt, LED, auto-lock, IR light, etc. 6.1 Set System Sound Purpose Turn on and turn off system sound. If it is on, when you press a button or alarm occurs, body camera will send out a sound. -
Page 28: Set Auto-Lock Time
Body Camera User Manual 6.4 Set Auto-Lock Time Purpose You can set the auto-lock time. The LCD will sleep if there is no operation during the configured time. Step 1 Go to Main Menu > System. Step 2 Tap to position the cursor on Auto-Lock. And tap to enter the menu. -
Page 29: Set Positioning
Body Camera User Manual 6.7 Set Positioning Purpose Body camera has a built-in positioning module. By turning on positioning function, the device can obtain the latitude, longitude, and speed information. Before you start Ensure the body camera locates in a place where the positioning signal exists. Step 1 Go to Main Menu >... -
Page 30: Set Overwriting
Body Camera User Manual Step 4 Tap to save the settings. Step 5 Reboot the body camera to take the settings into effect. 6.10 Set Overwriting Purpose You can enable overwriting if you want to overwrite the former videos when the memory is full. If you enable overwriting, backup the important data in time, or they will be overwritten. -
Page 31: View System Information
Body Camera User Manual 6.13 View System Information Purpose System information menu shows the device model, serial number, and version. Step 1 Go to Main Menu > System. Step 2 Tap to position the cursor on System Information item. Step 3 Tap to view the system information. -
Page 32: Chapter 7 Body Camera Assistant
Body Camera User Manual Chapter 7 Body Camera Assistant Purpose You can log in to the body camera via Body Camera Assistant to view logs, videos, audios, and pictures, and configure parameters remotely. Get Body Camera Assistant from the attached CD in the package. ... - Page 33 Body Camera User Manual Figure 7-2 Select Destination Location Step 3 Click Next to enter Select Start Menu Folder window. You can edit the shortcut name and click Browser to select the folder where to create shortcut. Figure 7-3 Select Start Menu Folder Step 4 Click Next to enter Select Additional Tasks window.
- Page 34 Body Camera User Manual Figure 7-5 Ready to Install Step 6 During the installation process, the following window will pop up. Figure 7-6 Device Driver Installation Wizard Step 7 Click Next to start installing device driver.
- Page 35 Body Camera User Manual Figure 7-7 Device Driver Installation Wizard Step 8 Click Finish in Device Driver Installation Wizard and click Finish in Body Camera Assistant Wizard to finish the installation. Figure 7-8 Finish Installation Step 9 Then the Body Camera Assistant window appears.
-
Page 36: Log In
Body Camera User Manual Figure 7-9 Body Camera Assistant 7.2 Log in Purpose Log in to the assistant to operate the body camera. Before you start Connect the body camera to your computer with the USB cable. Step 1 Click to start the assistant. -
Page 37: Log Out
Body Camera User Manual Figure 7-11 Body Camera Assistant The default password is 123456. If you forget the password, refer to Chapter 7.4 Recover Password for details. 7.3 Log out Step 1 Click on the upper left corner of the interface. Figure 7-12 Log out Step 2 Click Exit to log out of the assistant. - Page 38 Body Camera User Manual Figure 7-13 Login Window Step 2 Click Forgot Password. Step 3 Click File Export to export file DeviceKey.xml. Step 4 Send the file to your manufacturer. They will send you an encryption file. Step 5 Click to import the encryption file received in step 4.
-
Page 39: Export File
Body Camera User Manual 7.5 Export File Purpose You can export videos, audios, and pictures to your computer via assistant or USB mode. 7.5.1 Export File via Assistant Purpose You can download or clear files via assistant. Step 1 Log in to the body camera via assistant. Step 2 Click Media Information tab. -
Page 40: Export File Via Usb Mode
Body Camera User Manual Figure 7-16 File Download Step 6 Click to select Local File Saving Path. Step 7 Click OK to start downloading. Step 8 (Optional) Click on the upper right corner to view downloading status. Figure 7-17 Downloading Status 7.5.2 Export File via USB Mode Purpose You can switch the body camera as a USB flash disk and export files to your computer. -
Page 41: Configure Network
Body Camera User Manual Figure 7-18 Switch USB Mode Step 4 Enter Computer window to view the body camera. It will be recognized like an USB flash disk. Figure 7-19 Devices with Removable Storage Step 5 Double-click the disk to enter it and export files. Figure 7-20 Root Directory of Body Camera ... -
Page 42: Connect To Static Wi-Fi
Body Camera User Manual Step 1 Click Device Configuration tab, and click Network Settings item in the left menu list. Figure 7-21 Set Dynamic Wi-Fi Parameters Step 2 Check Enable of Wi-Fi Parameters. Step 3 Input SSID and Key of Wi-Fi signal you want to connect in text fields. Step 4 Click Save to save the settings. -
Page 43: Set Platform
Body Camera User Manual You can connect to the Internet via 3G/4G public network. Before you start Install 3G/4G microSIM card. Refer to Quick Start Guide for details. Step 1 Click Device Configuration tab, and click Network Settings item in the left menu. Figure 7-23 Dial via 3G/4G MicroSIM Card Step 2 Check Enable Dialing. -
Page 44: Configure Device
Body Camera User Manual Figure 7-24 Platform Settings Step 2 Check Enable to enable platform connection. Step 3 Edit IP, Port, and Device ID. IP: The IP address of platform server you want to connect. Port: The port of platform. The default port of iVMS is 7660. ... -
Page 45: Synchronize Time
Body Camera User Manual 7.7.2 Synchronize Time Purpose You can synchronize device time with your custom time or network time. Step 1 Click Device Configuration tab, and click Time Settings item in the left menu list. Figure 7-26 Time Settings Step 2 Select time synchronization type as Auto Time Synchrony or Manual Time Synchrony. -
Page 46: Maintemance
Body Camera User Manual Step 2 Select the parameters listed. Step 3 Click Save to save the settings. 7.8 Maintemance 7.8.1 Set User Information Purpose You can customize the police ID and device ID. Step 1 Click Device Configuration tab, and click Device Information item in the left menu list. Figure 7-28 User Information Step 2 Edit Police ID and Device ID. -
Page 47: Log Operations
Body Camera User Manual Figure 7-29 Change Password Step 2 Input Current Password. Step 3 Input New Password. Step 4 Click Save to save the settings. Password can only contain the number, instead of the letter and the symbol. 7.8.3 Log Operations Purpose By searching logs, you can review the history device status, device operation, and so on. -
Page 48: Set File Saving Path
Body Camera User Manual The exported logs are saved in .txt format in the configured log saving path. Step 4 To clear logs, do following steps: 1) Search the logs you want to clear. 2) Click Clear to clear them. 7.8.4 Set File Saving Path Purpose You can customize the local file and log file saving path. -
Page 49: Reset System
Body Camera User Manual Figure 7-33 Format Step 2 Click Format. Figure 7-34 Format Device Step 3 Input password in the text field. Step 4 Click OK to start formatting. 7.8.6 Reset System Purpose You can reset all parameters to default settings by resetting system. Step 1 Click Device Configuration tab, and click System Settings item in the left menu. -
Page 50: Upgrade Body Camera
Body Camera User Manual Figure 7-36 Factory Defaults Step 3 Input password in the text field. Step 4 Click OK to start resetting. 7.8.7 Upgrade Body Camera Purpose You can upgrade body camera via the assistant. It is recommended to upgrade device with the help of professional technical support. Step 1 Switch the body camera to USB mode. -
Page 51: Chapter 8 Troubleshooting
Body Camera User Manual Chapter 8 Troubleshooting Unable to start up. a) Possible Reason: Device runs out of power. Solution: Get device be charged. b) Possible Reason: The battery is damaged or runs out of power. Solution: Change battery. ... - Page 52 Body Camera User Manual UD10762B...
Need help?
Do you have a question about the DS-MH2311 Series and is the answer not in the manual?
Questions and answers