Sony MHC-V72D Operating Instructions Manual
Hide thumbs
Also See for MHC-V72D:
- Operating instructions (2 pages) ,
- Operating instructions (2 pages) ,
- Service manual (70 pages)
Table of Contents
Advertisement
Advertisement
Table of Contents

Subscribe to Our Youtube Channel
Related Manuals for Sony MHC-V72D


Summary of Contents for Sony MHC-V72D
- Page 1 Home Audio System Getting Started Disc/USB Playback Operating Instructions USB Transfer Tuner BLUETOOTH Connection Apps Control Control for HDMI Gesture Control Sound Adjustment Multiple Systems Playback Karaoke Other Operations Additional Information MHC-V82D/MHC-V72D...
- Page 2 CAUTION WARNING The use of optical instruments with this product will increase eye hazard. To reduce the risk of fire, do not cover the ventilation opening of For customers in Europe the appliance with newspapers, tablecloths, curtains, etc. Do not expose the appliance to naked flame sources (for example, lighted candles).
- Page 3 • Enjoying social gatherings with the This product has been manufactured Wired Party Chain and Wireless by or on behalf of Sony Corporation. Party Chain functions EU Importer: Sony Europe Limited. Inquiries to the EU Importer or related For customers in Australia and...
- Page 4 License and Trademark Notice owned by the Bluetooth SIG, Inc. • is a trademark of DVD Format/ and any use of such marks by Sony Logo Licensing Corporation. Corporation is under license. Other trademarks and trade names are • “DVD+RW”, “DVD-RW”, “DVD+R”, those of their respective owners.
-
Page 5: About This Manual
• • the badge, and has been certified are for models MHC-V82D and by the developer to meet Apple MHC-V72D. In this manual, the performance standards. Apple is not MHC-V82D is used for illustration responsible for the operation of this purpose unless stated otherwise. -
Page 6: Table Of Contents
Table of Contents USB Transfer About this manual ....5 Unpacking ......9 Transferring music ....30 Playable discs or files on Erasing audio files or folders discs/USB device ....9 on the USB device ....32 Websites for compatible Tuner devices ........ - Page 7 Apps Control Multiple Systems Playback Operating the system using “Sony | Music Center” and Enjoying Wired Party Chain “Fiestable” apps ....39 function ........ 49 Achieving and sharing a Enjoying Wireless Party Party People ranking and Chain function ......51 getting bonus features Listening to music (Party King) ......40...
- Page 8 Additional Information Troubleshooting ....61 Precautions ......71 Specifications ....... 73 Parental Control area code list......... 75 Language code list ....76...
-
Page 9: Unpacking
MP3 files (.mp3) , MPEG4 This unit (MHC-V82D or • • files (.mp4/.m4v) 3)4)6) , Xvid files MHC-V72D) (1) 6)7) (.avi) and conforms to UDF Remote control (DC 3 V) (1) • • (Universal Disk Format). R03 (DC 1.5 V) (size AAA) batteries •... - Page 10 DualDisc and some music discs AAC file in AAC DRM and AAC Lossless • • format or which is encoded at 96 kHz encoded with copyright protection cannot be played back. technologies do not conform to the CD standard. Therefore, these Note discs may not be compatible with The system will attempt to play back...
-
Page 11: Websites For Compatible Devices
For customers in Americas: The playback order may not be • • <https://www.sony.com/am/ applicable depending on the support> software used for creating the For customers in Europe: audio file or video file. -
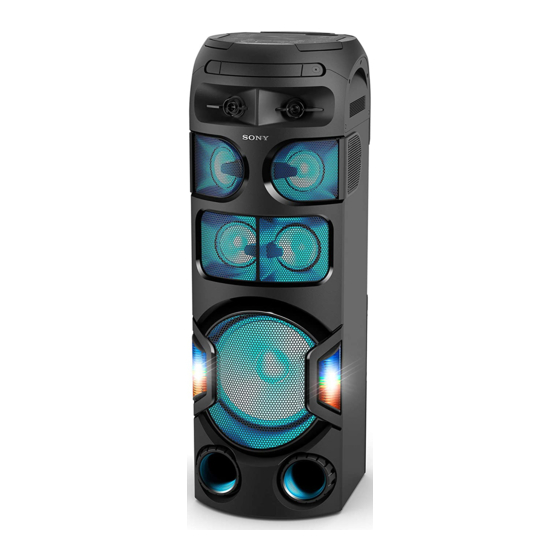
Page 12: Guide To Parts And Controls
Guide to parts and controls Unit Front Rear... - Page 13 (power) USB/MIC cover (page 31, 54, 55) Press to turn on the system, or set it to standby mode. (USB) (REC/PLAY) port (play) (page 20, 21, (page 20, 31) 36, 60) MIC1 jack (page 54) • (stop) (page 21, 23, MIC2/GUITAR jack 31, 33, 60) (page 54, 55)
- Page 14 Remote control / (previous/next) (page 21) TUNING +/– (page 33) TAIKO (page 56, 57) Party Light (page 58) Do not look directly at the light-emitting part when the illumination is turned on. Disc tray Remote control sensor (page 18) ...
- Page 15 REC TO USB (page 31) (volume) +/– Adjust the volume. MEDIA MODE (page 20) / (fast reverse/fast SUBTITLE (page 22) forward) (page 21) AUDIO (page 22) / (slow back/slow forward) (page 21) ANGLE (page 22) TUNING+/– (page 33) SCORE (page 55) (play) VOICE CHANGER (page 55) (page 20, 21) /...
- Page 16 The numeric button 5/AUDIO, + and buttons have a tactile dot. Use the tactile dot as a reference when operating the system.
-
Page 17: Getting Started
Getting Started Hooking up the system Be sure to make cable connections before connecting the AC power cord (mains lead). High Speed HDMI Cable with Ethernet (not supplied) Audio cable (not supplied) FM lead antenna (aerial) (supplied) AC power cord (mains lead) (supplied) To wall outlet Select the connection methods according to the jacks/connector on your TV. -
Page 18: Inserting Batteries
Connect the AC power cord (mains Note lead) last. The demonstration starts Do not mix an old battery with a new • • automatically. If you press (power) to one or mix different types of batteries. turn on the system, the demonstration If you do not use the remote control •... -
Page 19: Changing The Color System
Performing the quick Handle (front) setup Before using the system, you can make the minimum basic Handle adjustments in the quick setup. (rear) Turn on your TV and select the input according to the connection. Note Press to turn on the system. Exercise extreme caution when carrying •... -
Page 20: Turning Off The Demonstration
Press / repeatedly to select Disc/USB Playback the setting that matches your TV type, then press Basic playback After [QUICK SETUP is complete.] appears on the TV screen, the system is ready for playback. For compatible USB devices, see To change the setting manually “Websites for compatible devices”... -
Page 21: Other Playback Operations
Other operations To play from a specific file Depending on the disc or file, the Press MEDIA MODE repeatedly to function may not work. select [MUSIC] or [VIDEO]. Do this Press SEARCH to display the Stop playback Press . folder list on the TV screen. Press . - Page 22 Hold down SHIFT and press the Changing the camera angles numeric buttons to enter the title, chapter, scene, track, or index number you want, then press Press ANGLE repeatedly during Playback starts. playback to select the camera angle you want. Note For VIDEO CD with PBC playback, press •...
-
Page 23: Using Play Mode
Press or SUPER VIDEO CD Playback starts from the selected [1:STEREO]: The stereo sound of • • track. audio track 1. [1:1/L]/[1:2/R]: The monaural • • To return to PBC playback sound of the left or right channel Press twice, then press . of audio track 1. - Page 24 [FOLDER (SHUFFLE)]*: Shuffles all • • Playing repeatedly (Repeat audio files in the specified folder Play) on the disc. * Cannot be selected for AUDIO CD. When playing a USB device Press REPEAT repeatedly. [ONE USB DEVICE]: Plays the USB •...
-
Page 25: Restricting Playback Of The Disc (Parental Control)
Press / repeatedly to select Restricting playback of the level you want, then press the disc (Parental The lower the value, the stricter the Control) limitation. To turn off the parental control function You can restrict playback of Set [LEVEL] to [OFF] in step 8. DVD VIDEOs according to a predetermined level. -
Page 26: Viewing Information Of A Disc And Usb Device
Note Viewing information of Depending on the source being played, • • a disc and USB device some information or characters cannot be displayed. • • Depending on the play mode, the information displayed may be different. Information on the TV screen Information on the display Hold down SHIFT and press Press DISPLAY repeatedly when... - Page 27 Press / repeatedly to select [SUBTITLE] the setup item you want, then press Switches the language of the subtitle. Press / repeatedly to select When you select [AUDIO FOLLOW], the item you want, then press the language for the subtitles changes according to the language you selected for the sound track.
- Page 28 [4:3 PAN SCAN]: Selects this [PAUSE MODE] when you connect a 4:3 screen TV that does not have a wide-mode [AUTO]: The picture, including function. Displays a full-height subjects that move dynamically, is picture on the entire screen, with output with no jitter. Normally select trimmed sides.
- Page 29 [DOWNMIX] [RESET] Returns the setup menu settings to [NORMAL]: Outputs multi-channel the default settings. For details, see audio into a 2-channel stereo signal. “Returning the setup menu settings [DOLBY SURROUND]: Outputs to the default” (page 69). multi-channel audio into a 2-channel surround signal. Setting the HDMI options –...
-
Page 30: Usb Transfer
[AUDIO RETURN CHANNEL] USB Transfer Set this function when the system is connected to a TV’s HDMI IN Transferring music connector that is compatible with Audio Return Channel. This function is available when you set You can transfer music from a disc [CONTROL FOR HDMI] to [ON]. - Page 31 Press / repeatedly to select Note the bit rate you want, then press If you start transferring in Shuffle Play or Repeat Play, the selected play mode changes to Normal Play automatically. “128 KBPS”: Encoded MP3 files • • have smaller file size and lower REC1 Transfer: audio quality.
-
Page 32: Erasing Audio Files Or Folders On The Usb Device
REC1 Transfer • • You cannot perform the following operations during transfer: When transferring a track from — Eject the disc. — Select another track or file. an AUDIO CD — Pause playback or find a point in the Folder name: “REC1-CD”... -
Page 33: Tuner
Press / repeatedly to select Tuner an audio file you want to erase, then press Listening to the radio If you want to erase all the audio files in the folder, select [ALL TRACKS] on the list. Press FUNCTION repeatedly to “FOLDER ERASE”... -
Page 34: Bluetooth Connection
BLUETOOTH Connection Presetting radio stations Streaming music from a You can store up to 20 FM stations as your favorite stations. BLUETOOTH device Tune to the station you want. Supported BLUETOOTH version, Press DVD/TUNER MENU. profiles and codecs Press / repeatedly to select For details, see “BLUETOOTH the preset number you want, section”... - Page 35 If your device is an NFC-compatible Note BLUETOOTH device, the manual If passkey is required on the pairing procedure is not necessary. BLUETOOTH device, enter “0000”. (See “One Touch BLUETOOTH “Passkey” may be called “Passcode”, Connection by NFC” (page 37).) “PIN code”, “PIN number”, or “Password”.
-
Page 36: Listening To Music On A Paired Bluetooth Device
To terminate the BLUETOOTH Listening to music on a connection paired BLUETOOTH Touch BLUETOOTH on the unit. “BT AUDIO” appears on the display. device Depending on the BLUETOOTH device, the BLUETOOTH connection may be terminated automatically Before playing music, check that when you stop playback. -
Page 37: One Touch Bluetooth Connection By Nfc
If you try to connect a 4th BLUETOOTH • • Note device, the oldest playback device will Depending on your NFC-compatible be disconnected. BLUETOOTH device, you may need to turn Depending on the BLUETOOTH device, • • on the NFC function in advance. you may not be able to make three For details, refer to the operating BLUETOOTH connections at the same... -
Page 38: Setting The Bluetooth Audio Codecs
Hint Setting the BLUETOOTH LDAC is an audio coding technology audio codecs developed by Sony that enables the transmission of High-Resolution (Hi-Res) Audio content, even over a BLUETOOTH You can enable AAC, LDAC or SBC connection. Unlike other BLUETOOTH codec reception from BLUETOOTH compatible coding technologies device. -
Page 39: Turning On Or Off The Bluetooth Signal
Music Center” and “Fiestable” — Pair and/or connect with BLUETOOTH on your smartphone/iPhone. device. “Sony | Music Center” and “Fiestable” — Use “Sony | Music Center” app. are available on both Google Play — Change the BLUETOOTH audio and the App Store. codecs. -
Page 40: Achieving And Sharing A Party People Ranking And Getting Bonus Features (Party King)
Note Operating the system using If the “Sony | Music Center” app does • • the apps not work properly, touch BLUETOOTH on the unit to terminate the BLUETOOTH connection, then perform the Establish a BLUETOOTH BLUETOOTH connection again so that... -
Page 41: Using Voice Control Via "Fiestable
(page 34). The system is muted. Speak into the microphone of your smartphone/ Launch “Sony | Music Center” iPhone. Your voice will be sent to an and touch the “Fiestable” icon. online speech to text conversion service. -
Page 42: Control For Hdmi
Launch “Fiestable” and touch Note “Party Light via Fiestable”. This function may work with devices All smartphone/iPhone screen other than those manufactured by Sony, illumination and flash light flashes but operation is not guaranteed. synchronously. Preparing to use the Control for... - Page 43 System Power Off function Hold down SHIFT and press SETUP, then set [HDMI SETUP] – [AUDIO When you turn off the TV, the system RETURN CHANNEL] to [ON] will turn off automatically. (page 30). The default setting is Hold down SHIFT and press SETUP, [ON].
-
Page 44: Gesture Control
For DJ mode: Gesture Control You can select a DJ Effect to create a party atmosphere. Operating playback, DJ Swipe in this Effect, sampler, and direction Select FLANGER karaoke Select ISOLATOR Select WAH You can control the operations Select PAN for PLAYBACK, DJ, SAMPLER and KARAOKE mode by swiping your Increase the level... -
Page 45: Controlling The Pitch Of Your Voice Or Music Source
For KARAOKE mode: To deactivate the Gesture Control You can operate the following karaoke features. Touch GESTURE ON/OFF repeatedly to select “OFF”. Swipe in this The GESTURE CONTROL lights off. direction Reduce the pitch Note of music () • • Do not touch or contact to the GESTURE Increase the pitch CONTROL sensor when you perform the... - Page 46 Push to open the USB/MIC Notes on pitch control cover, then connect an optional microphone to MIC1 or MIC2/ Do not touch or contact to the • • GUITAR jack on the unit. GESTURE CONTROL sensor when you move your hand up or down Touch GESTURE ON/OFF over it.
-
Page 47: Deactivating The Controls On The Unit For A Short Time (Party Lock)
Sound Adjustment Deactivating the controls on the unit for Adjusting the sound a short time (Party Lock) Reinforcing bass sound and creating more powerful sound You can deactivate the controls (except ) on the unit for Press MEGA BASS repeatedly to 30 seconds to wipe the touch panel. -
Page 48: Creating Your Own Sound Effect
“OFF NARRATION”: You can enjoy a • • more immersive feeling of being in a football stadium by minimizing the volume level of narration in addition to the enhancement of cheers. Note • • If you hear unnatural sounds in the content when “OFF NARRATION”... -
Page 49: Multiple Systems Playback
Multiple Systems Playback Enjoying Wired Party Chain function You can connect multiple audio systems in a chain to create a more exciting party environment and to produce higher sound output. One activated system in the chain serves as the Party Host and shares music with other systems (Party Guests). - Page 50 Plug in the AC power cord • • For detailed operation on other systems, refer to the operating (mains lead) and turn on all the instructions of the systems. systems. To select a new Party Host (when Adjust the volume on each all the systems are equipped system.
-
Page 51: Enjoying Wireless Party Chain Function
Press / repeatedly to select Touch WIRELESS PARTY CHAIN the mode you want, then press on the unit. “CHAINING” flashes on the display. The system enters the “STEREO”: Outputs the stereo • • Wireless Party Chain setup sound. mode. “RIGHT CH”: Outputs the •... - Page 52 Wait 30 seconds after the last Note Party Guest is connected. When you change the function or turn off “P.CHAIN” stops flashing on the the Party Host, the Wireless Party Chain is display of the Party Host and the also deactivated. BLUETOOTH device reconnects to the Party Host.
-
Page 53: Listening To Music Wirelessly With Two Systems (Speaker Add Function)
Host system, and Note the left channel from Guest To use this function, make sure “Sony | • • system. Music Center” app (page 39) has “Stereo mode - left”: Outputs the •... -
Page 54: Karaoke
To deactivate the Speaker Add cover, then connect an optional function microphone to MIC1 or MIC2/ Use “Sony | Music Center” and GUITAR jack on the unit. follow the on-screen instructions. Connect another optional microphone if you want to sing in Note duet. -
Page 55: Enjoying Sound From A Guitar
Microphone sound will not be Press SCORE before singing a • • transferred to the USB device during song. USB transfer. You cannot adjust the microphone • • After singing for more than a volume level using the VOLUME +/– on minute, press SCORE again to the unit or ... -
Page 56: Other Operations
Touch GUITAR on the unit Other Operations repeatedly to select the guitar effect. Playing the drum GUITAR indicator lights up. “CLEAN”: Original guitar sound. (Taiko) • • Recommended for electric guitar or electro-acoustic guitar. You can play a virtual drum by using “O DRIVE”: Distorted sound •... - Page 57 Top to bottom ( ) Example: • • Tap! Swipe your hand over the GESTURE CONTROL sensor in a clockwise ( ) or anticlockwise ( ) direction to adjust the drum sound volume. 1st flash: 2nd flash: 3rd flash: Green Green Blue Make sure you tap on the correct...
-
Page 58: Enjoying Music With The Illumination (Party Light/Speaker Light)
Launch “Sony | Music Center” Enjoying music with the and touch the “Fiestable” icon. illumination (Party Touch “Taiko Game Ranking”. Light/Speaker Light) The current leaderboard is displayed on the smartphone/ iPhone screen. Press PARTY LIGHT repeatedly Touch “Play” and start playing during playback to select “LED... -
Page 59: Using The Voice Guidance
Press / repeatedly to adjust Using the Voice the Voice Guidance level, then Guidance press To exit the options menu, press OPTIONS. IMPORTANT: THE VOICE GUIDANCE FOR THIS SYSTEM IS ONLY Note AVAILABLE IN ENGLISH. The Voice Guidance volume level •... -
Page 60: Deactivating The Controls On The Unit (Child Lock)
By default, the automatic standby Follow the online instructions to function is turned on. update the software. For customers in Americas: Press OPTIONS. <https://www.sony.com/am/ support> Press / repeatedly to select “AutoSTBY”, then press For customers in Europe: <https://www.sony.eu/support> Press / repeatedly to select For customers in other countries/ “ON”... -
Page 61: Additional Information Troubleshooting
15 minutes If the problem persists, consult your when there is no operation or nearest Sony dealer. audio signal output (page 60). Note that if the service personnel There is no sound. changes some parts during repair, Adjust the volume. - Page 62 The disc tray does not open and the disc. Press twice. Then, press “LOCKED” appears on the display. to start playback. Consult your nearest Sony dealer • • or local authorized Sony service You cannot perform some facility.
- Page 63 USB playback. device. If this display pattern You are using an unsupported USB • • persists, contact your nearest Sony device. Check the information on dealer. the website about compatible USB devices (page 11). The USB device is not recognized.
- Page 64 Check the information on the The language for sound track, • • website about compatible USB subtitles, or camera angles cannot devices (page 11). be changed. The USB device is not working • • Multilingual tracks, multilingual • • properly. Refer to the operating subtitles, or multi-angles are not instructions of the USB device on recorded on the DVD VIDEO being...
- Page 65 Audio files or folders on the USB Connection is not possible. device cannot be erased. The BLUETOOTH device you • • Check if the USB device is write- attempted to connect does not • • protected. support the A2DP profile, and The USB device was disconnected cannot be connected with the •...
- Page 66 If there is equipment that The system does not turn off even • • generates electromagnetic when the TV is turned off. radiation, such as a wireless LAN, To turn the system off • • other BLUETOOTH device, or a automatically regardless of the microwave oven nearby, move input when you turn off the TV, set...
- Page 67 No TV sound is output from the The Control for HDMI function system. does not work properly. Check the type and connection of Check the connection with the • • • • the HDMI cable or audio cable that system (page 17). is connected to the system and Enable the Control for HDMI •...
- Page 68 The Gesture Control does not BLUETOOTH device cannot be operate properly. connected to the system during Wireless Party Chain function. Move your hand closer to • • GESTURE CONTROL sensor when After connecting all the systems, • • you perform the swiping motion. perform the pairing and Perform the swiping motion at a connecting operations between...
- Page 69 You can return the setup self-diagnosis function. menu settings (except for • • Contact your nearest [PARENTAL CONTROL] settings) to Sony dealer or local the default settings. authorized Sony service facility and give the Hold down SHIFT and press 5-character service SETUP.
- Page 70 NO DISC Messages There is no disc in the unit. NO MUSIC One of the following messages may No supported audio files exist in the appear or flash on the display during playback source. operation. NO SUPPORT CANNOT PLAY An unsupported USB device is A disc that cannot be played back •...
-
Page 71: Precautions
AC power cord (mains lead) must be • • Precautions changed only at the qualified service shop. When carrying the unit On handling the system • • Do not splash water on the unit To avoid damaging the disc on purpose. Dust and drip proof mechanism, perform the following performance is improved by the flat procedure before carrying the unit. - Page 72 — Locations where a wireless LAN is when performing communication using installed. BLUETOOTH technology. — Around microwave ovens that are Sony cannot be held liable in any way • • in use. for damages or other loss resulting — Locations where other...
-
Page 73: Specifications
Laser Diode Properties Woofer: 300 mm, cone type Emission Duration: Continuous MHC-V72D Laser Output*: Less than 44.6 μW Speaker system: * This output is the value 4-way, Double Bass Reflex measurement at a distance of... - Page 74 Video color system format: Compatible BLUETOOTH profiles Latin American models: A2DP (Advanced Audio NTSC Distribution Profile) Other models: AVRCP (Audio Video Remote NTSC and PAL Control Profile) SPP (Serial Port Profile) USB section Supported codecs: Supported USB device: SBC (Subband Codec) Mass Storage Class AAC (Advanced Audio Coding) Maximum current:...
-
Page 75: Parental Control Area Code List
2174 France 2501 Singapore Power consumption: 2109 Germany 2149 Spain MHC-V82D: 190 W 2248 India 2499 Sweden MHC-V72D: 120 W 2238 Indonesia 2086 Switzerland Power consumption (at the Power 2254 Italy 2528 Thailand Saving mode): 2276 Japan 2184 United Kingdom 0.5 W (When “BT STBY”... -
Page 76: Language Code List
Language code list The language spellings conform to the ISO 639:1988 (E/F) standard. Code Language Code Language Code Language Code Language 1027 Afar 1186 Scots Gaelic 1350 Malayalam 1513 Siswati 1028 Abkhazian 1194 Galician 1352 Mongolian 1514 Sesotho 1032 Afrikaans 1196 Guarani 1353... - Page 80 ©2019 Sony Corporation Printed in Malaysia 5-000-538-13(1)
Need help?
Do you have a question about the MHC-V72D and is the answer not in the manual?
Questions and answers