Table of Contents
Advertisement
Quick Links
Advertisement
Table of Contents

Related Manuals for Geotech BIOGAS 3000


Summary of Contents for Geotech BIOGAS 3000
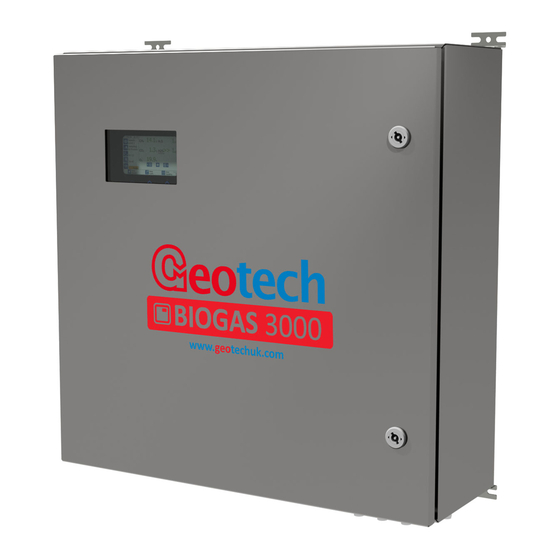
- Page 1 BIOGAS 3000 OPERATING MANUAL...
-
Page 2: Table Of Contents
BG3K2 ............................. 16 BG3K3 ............................. 17 BG3K4 ............................. 17 BG3KD ............................. 18 BG3KE ............................. 19 BIOGAS 3000 Internal Components ......................20 BIOGAS 3000 Module Features ....................... 22 Physical Characteristics of the Module ....................22 Definitions ............................23 Installation .............................. 25 Pre-Installation Requirements ...................... - Page 3 Default Configuration of the BIOGAS 3000 Modbus Port ............... 40 Readable Parameters of the BIOGAS 3000 ..................41 4-20mA Outputs ..........................47 General Information ........................47 Wiring the BIOGAS 3000 to a Current Sinking Input ............... 47 4-20mA Scaling ..........................49 Relays ..............................50 Profibus Digital Output ........................51 Configuration of the Profibus Module ....................
- Page 4 Readable Parameters of the Ethernet Module ................69 Heater Option ............................. 72 Final Checks ............................72 General Operating Instructions ....................... 73 Switching the BIOGAS 3000 System On ....................73 System Start-Up ..........................73 Language Selection ......................... 73 Time and Date ..........................73 Interface Board Firmware Update ....................
- Page 5 Adding a Mixture ........................... 112 Deleting a Mix ..........................113 Edit O2 in Fresh Air Mix ......................... 114 Connecting a Gas Bottle to the BIOGAS 3000 ................... 115 Gas Check and Calibration ........................ 117 Status Icons ............................119 OMBG3000 Iss.05 www.geotechuk.com...
- Page 6 Cleaning and Decontamination ......................143 Service ..............................144 General ............................. 144 Service Notifications ......................... 144 Replacement BIOGAS 3000 Module for Service – Hot Swap ............144 Problem Solving ............................ 147 Fault Detection ..........................147 Non-Critical Faults ......................... 147 Critical Faults ..........................148 System Will Not Power On ........................
- Page 7 User Zero Calibration ........................153 User Span Calibration ........................154 Trouble Shooting ........................... 154 Event Log ............................156 BIOGAS 3000 Warranty Terms and Conditions ..................157 WEEE Compliance ..........................159 Declaration of Conformity........................160 Glossary of Terms ..........................162 OMBG3000 Iss.05 www.geotechuk.com...
-
Page 8: Manual Guidelines
B I O G A S 3 0 0 0 Page 8 of 162 Operating Manual MANUAL GUIDELINES Safety symbol Information in this manual that may affect the safety of users and others is in the following format: Information in this manual that may affect the safety of users and others will be in a box indentical to this one. -
Page 9: Safety Information
SAFETY INFORMATION Safety instructions The BIOGAS 3000 comes with a guard that covers all accessible components with mains power. This guard must only be removed when power to the system is isolated. Failure to isolate the supply could result in an electric shock. -
Page 10: Atex And Iecex Certification
Marking In reference to European ATEX Directive 2014/34/EU and the IECEx International Certification Scheme, the BIOGAS 3000 has been certified according to the following designation: II 3G Ex nA nC IIA T1 Gc (-20°C ≤ Ta ≤ +50°C) -
Page 11: Instructions Specific To Hazardous Area Installations
3 0 0 0 Page 11 of 162 Operating Manual Nameplate 1 - BIOGAS 3000 markings Instructions Specific to Hazardous Area Installations The equipment may be used in zones 2 with flammable gases and vapours with apparatus groups IIA and with temperature classes T1. -
Page 12: Entity Parameters
B I O G A S 3 0 0 0 Page 12 of 162 Operating Manual If the equipment is likely to come into contact with aggressive substances, e.g. acidic liquids or gases that may attack metals or solvents that may affect polymeric materials, then it is the responsibility of the user to take suitable precautions that prevent it from being adversely affected thus ensuring that the type of protection is not compromised. -
Page 13: Range Of Environmental Conditions
-20°C to 50°C with the use of the approved heater. The BIOGAS 3000 is designed for use outdoors and has an IP65 rating. The mains voltages (110-230V) can fluctuate up to ±10% of the nominal voltage. -
Page 14: Biogas 3000 Overview
BIOGAS 3000 OVERVIEW Features The BIOGAS 3000, primarily for the AD Biogas and Bio-methane upgrading market has been designed to enable site operations to maximise gas production yield and protect expensive capital equipment from the damaging contaminant gases contained within the production process. The ATEX and IECEx certified BIOGAS 3000 builds on field proven, robust gas analysis technology to offer cost effective online monitoring with local data outputs. -
Page 15: Benefits
B I O G A S 3 0 0 0 Page 15 of 162 Operating Manual 6 x 4-20mA outputs Modbus RTU communication Optional Profibus and Profinet communication Clear, visual and informative colour display Optional heater to extend operating temperature range to -20°C ... -
Page 16: Model Type Definitions
B I O G A S 3 0 0 0 Page 16 of 162 Operating Manual Agricultural waste AD (large scale) Biogas upgrading Farm waste AD (small scale) Gas flaring Mixed food waste AD Sewage / waste water treatment AD Model Type Definitions BG3K1... -
Page 17: Bg3K3
B I O G A S 3 0 0 0 Page 17 of 162 Operating Manual BG3K3 The BG3K3 measures CH , CO , and O as standard with a choice of up to two additional gases (one internal to the module and one external) from three sample points. ... -
Page 18: Bg3Kd
B I O G A S 3 0 0 0 Page 18 of 162 Operating Manual sensor: The BG3K4 also has the option of measuring from the hydrolysis tank on sample point 1 and not passing this gas across the external sensor. This prolongs the life of the sensor. The following image is a block diagram if the system with this option selected: Note: For this option, you will need to fit the additional moisture filter supplied on ‘Sample Gas 1’. -
Page 19: Bg3Ke
B I O G A S 3 0 0 0 Page 19 of 162 Operating Manual BG3KE The BG3KE measures CH , CO , and O as standard with a choice of up to one additional gas (external to module only) from one sample point. ... -
Page 20: Biogas 3000 Internal Components
B I O G A S 3 0 0 0 Page 20 of 162 Operating Manual BIOGAS 3000 INTERNAL COMPONENTS Figure 1 - BIOGAS 3000 door internals Viewing window Heater (110V or 230V) Plastic wallet containing operating manual and calibration certificate OMBG3000 Iss.05 www.geotechuk.com... -
Page 21: Operating Manual
B I O G A S 3 0 0 0 Page 21 of 162 Operating Manual Figure 2 - BIOGAS 3000 internal components BIOGAS 3000 module Modbus terminals Heater thermostat Gas in/out valves Solenoid valves 4-20mA terminals Inline PTFE filter... -
Page 22: Biogas 3000 Module Features
B I O G A S 3 0 0 0 Page 22 of 162 Operating Manual BIOGAS 3000 MODULE FEATURES Physical Characteristics of the Module Front View: Reference: Display Soft keys Help key On/off key Keypad Return key ( ) -
Page 23: Definitions
Securely holds the module to the backplate. Rear label The serial number is the unique identification number for the BIOGAS 3000 module. The part number is the unique record for the internal configuration of the BIOGAS 3000 module at time of manufacture or last service. -
Page 24: Operating Manual
Page 24 of 162 Operating Manual Top View Gas outlet The gas sample exits the BIOGAS 3000 module here. Power supply connector Power supplied from the Interface PCB connects here. Gas inlet The gas sample enters the BIOGAS 3000 module here. -
Page 25: Installation
In order to effectively install the BIOGAS 3000 system, it is important that the site is ready and in a fit state. In particular, the following points should be noted: Power should NOT be applied before all piping and wiring has been completed and tested. -
Page 26: Storage Of The System And Module
Ventilation Requirements There is an enclosure breather fitted to the BIOGAS 3000 situated at the base of the enclosure (see annotation 13 on Figure 3 – BIOGAS 3000 customer connections. -
Page 27: External Customer Connections
Figure 3 - BIOGAS 3000 customer connections identifies the available connection points on the BIOGAS 3000: Figure 3 - BIOGAS 3000 customer connections Customer cable entry – mains supply Drain Customer cable entry – not used Vent to Atmosphere Customer cable entry –... -
Page 28: Mounting The Enclosure
Note: If it is difficult to position the BIOGAS 3000 system out of direct sunlight, measures should be taken to protect the system, such as a basic cover to provide shade. -
Page 29: Connecting The Gas Lines To The Biogas 3000
Care should be taken in routing the sample lines, especially in cold environments. The sample lines may need insulating or even trace heating to prevent freezing of water within the pipe. This is not part of the BIOGAS 3000 system and is the responsibility of the operator. ... -
Page 30: Process Return
Figure 3 – BIOGAS 3000 customer connections. Note: The maximum distance the BIOGAS 3000 can be from the sample point is 50 meters. Process Return This is the line where measured gas from the system is exhausted. It can be returned to the process or vented to atmosphere. -
Page 31: Air In
Atmosphere’ line should be routed to a safe and well-ventilated area. A ball valve should be incorporated in to the piping close to the BIOGAS 3000 system. This ball valve will be used as part of pressure testing the system during routine maintenance. -
Page 32: Operating Manual
The catchpot contains a liquid level (reed) switch. When the liquid reaches a certain level, the switch activates and informs the BIOGAS 3000 module. From here, an icon is displayed on screen and if configured triggers a relay (see Configure Relays). -
Page 33: Protective Cover
Operating Manual Protective Cover The BIOGAS 3000 has a protective cover fitted inside the main enclosure to cover areas where mains voltages are present. This cover must be removed in order to wire the mains supply to the BIOGAS 3000 system and to replace fuses. -
Page 34: Cable Gland Selection And Cord Anchorage
B I O G A S 3 0 0 0 Page 34 of 162 Operating Manual Cable Gland Selection and Cord Anchorage To maintain the integrity and certification of the equipment a cable gland must be selected that: is suitably certified – see section ATEX and IECEx Certification in this operating manual for the equipment marking... -
Page 35: Cable Conductor Sizes And Insulation Requirements
The safety of the equipment depends on it being effectively earthed via the mains supply. The mains requirement for the system can be found on the side of the enclosure and is shown on Figure 7 - BIOGAS 3000 electrical label: OMBG3000 Iss.05... -
Page 36: How To Wire The Mains Supply
3 0 0 0 Page 36 of 162 Operating Manual Figure 7 - BIOGAS 3000 electrical label The mains fuse rating (FS1) of the equipment is 3.15A. The equipment must be provided with a double-pole switched and fused mains supply. The switch must be mounted as close to the equipment as practicably possible so that it can be easily reached and clearly identified as the disconnecting device for the system. -
Page 37: Operating Manual
Sizes and Insulation Requirements. If using armoured cable, the armour must not be used as the main earth connection for the BIOGAS 3000. If earthing of the armour is required, this must not be taken from the BIOGAS 3000. All cables should be crimped with an appropriate insulated ferrule for the size of the cable being used. -
Page 38: Modbus Digital Output
Figure 2 - BIOGAS 3000 internal components for the Modbus terminal connections. The BIOGAS 3000 Modbus terminals must only be used for standard Modbus communications. No other connections must be made as they could make the equipment unsafe resulting in a hazard and invalidate the ATEX/IECEx certification. -
Page 39: Wiring The Biogas 3000 Modbus Outputs
Sizes and Insulation Requirements. If using armoured cable, the armour must not be used as the main earth connection for the BIOGAS 3000. If earthing of the armour is required, this must not be taken from the BIOGAS 3000. All cables should be crimped with an appropriate insulated ferrule for the size of the cable being used. -
Page 40: Default Configuration Of The Biogas 3000 Modbus Port
Note: A termination resistor of 200 ohms is fitted internally between the positive and negative Modbus signals of the BIOGAS 3000, which must be the last connection on the ‘bus’. The termination resistor can be turned ‘On’ or ‘Off’ via the menu on the BIOGAS 3000 module (see Configure Modbus Slave). -
Page 41: Readable Parameters Of The Biogas 3000
B I O G A S 3 0 0 0 Page 41 of 162 Operating Manual Readable Parameters of the BIOGAS 3000 Below is a table of addresses that can be read from the BIOGAS 3000. Read-Only Single Bit Registers Register Address (Dec) (Hex) -
Page 42: Operating Manual
B I O G A S 3 0 0 0 Page 42 of 162 Operating Manual 1 – Triggered 2 – Triggered and in recovering zone 4 – Latched 8 – Muted 9 – Triggered alarm and muted 10 – Recovering alarm and muted 12 –... -
Page 43: Operating Manual
B I O G A S 3 0 0 0 Page 43 of 162 Operating Manual 0341h Last reading sample point reading x 10 1: CO e.g. 38.7% would be 387 0342h Last reading sample point reading x 10 1: O e.g. -
Page 44: Operating Manual
B I O G A S 3 0 0 0 Page 44 of 162 Operating Manual 1346 0542h Last reading sample point reading x 10 3: O e.g. 0.5% would be 5 1347 0543h Last reading sample point Internal cell reading 3: Internal cell e.g. -
Page 45: Operating Manual
B I O G A S 3 0 0 0 Page 45 of 162 Operating Manual Read-Only 32-Bit Registers Readings stored in two 16-bit read-only registers as a single precision real/floating point number: Register Address (Dec) (Hex) Parameter Content Information 33024 8100h Last reading sample point... -
Page 46: Operating Manual
B I O G A S 3 0 0 0 Page 46 of 162 Operating Manual 33298 8212h Last reading sample point Pump flow reading 2: Flow e.g. 275 33536 8300h Last reading sample point reading 3: CH e.g. 61.1 33538 8302h Last reading sample point... -
Page 47: 4-20Ma Outputs
Figure 3 - BIOGAS 3000 customer connections). The outputs on the BIOGAS 3000 power the loop (24V) to allow the customers system to sink it to ground (0V). Relays within the equipment can be used to indicate the status of the 4-20mA channel. Refer to... -
Page 48: Operating Manual
Requirements. If using armoured cable, the armour must not be used as the main earth connection for the BIOGAS 3000. If earthing of the armour is required, this must not be taken from the BIOGAS 3000. All cables should be crimped with an appropriate insulated ferrule for the size of the cable being used. -
Page 49: 4-20Ma Scaling
B I O G A S 3 0 0 0 Page 49 of 162 Operating Manual Wiring Diagram 3 - 4-20mA circuit Note: For wiring into a current source system, please contact your local distributor, or our technical support team at QED on +44(0)333 800 0088 or email technical@qedenv.co.uk. 4-20mA Scaling The following table details the scaling on the 4-20mA channels: 4 mA reading... -
Page 50: Relays
Sizes and Insulation Requirements. If using armoured cable, the armour must not be used as the main earth connection for the BIOGAS 3000. If earthing of the armour is required, this must not be taken from the BIOGAS 3000. All cables should be crimped with an appropriate insulated ferrule for the size of the cable being used. -
Page 51: Profibus Digital Output
Profibus Digital Output The Profibus option for the BIOGAS 3000 is via a Modbus to Profibus converter module. The converter is a Profibus slave module and acts as an interface between the Modbus output of the BIOGAS 3000 and Profibus network. -
Page 52: Operating Manual
Page 52 of 162 Operating Manual Figure 8 - Profibus module switch location Figure 9 - Profibus module switch identification In addition, the Modbus port on the BIOGAS 3000 must be configured as followed: Node Address Baud Rate 9600 Parity... -
Page 53: Wiring The Profibus Module
Requirements. If using armoured cable, the armour must not be used as the main earth connection for the BIOGAS 3000. If earthing of the armour is required, this must not be taken from the BIOGAS 3000. The power supply for the Modbus to Profibus converter module must not be taken from the BIOGAS 3000. -
Page 54: Operating Manual
B I O G A S 3 0 0 0 Page 54 of 162 Operating Manual For cable conductor sizes and cable insulation requirements, when wiring the Modbus connections, the twisted pairs must be as follows: Terminal Colour Wiring Information Pair Orange Signal A (RS485) ‘+’... -
Page 55: Readable Parameters Of The Profibus Module
B I O G A S 3 0 0 0 Page 55 of 162 Operating Manual Readable Parameters of the Profibus Module The data available to the Profibus network is two (16-bit) words, each word occupying two hex address locations as follows: Module Internal Name... -
Page 56: Operating Manual
B I O G A S 3 0 0 0 Page 56 of 162 Operating Manual Month 0x001E Sample Point 2 Last Reading: 0x0020 Sample Point 2 Last Reading: Hour 0x0022 Sample Point 2 Last Reading: Minute 0x0024 Sample Point 2 Last Reading: Second 0x0026 Sample Point 2 Last Reading:... -
Page 57: Operating Manual
B I O G A S 3 0 0 0 Page 57 of 162 Operating Manual CH4 x 10 +Low Byte 0x89 0x0040 Sample Point 3 Last Reading: CO2 x 10 0x0042 Sample Point 3 Last Reading: O2 x 10 0x0044 Sample Point 3 Last Reading: e.g. -
Page 58: Operating Manual
Current sample Point 1 to 4 The Profibus module updates the readings from the BIOGAS 3000 every 2.5 seconds. Successful communication between the Modbus output and the Profibus module is indicated by the subnet status light ‘5’ on the module showing green. If for any reason the communications is intermittent or fails, the light flashes red or is permanently red, and the value being read is cleared to zero and not frozen with a previous value. -
Page 59: Profinet Digital Output
Profinet Digital Output The Profinet option for the BIOGAS 3000 is via a Modbus to Profinet converter module. The converter is a Profinet slave module and acts as an interface between the Modbus output of the BIOGAS 3000 and Profinet network. -
Page 60: Wiring The Profinet Module
Sizes and Insulation Requirements. If using armoured cable, the armour must not be used as the main earth connection for the BIOGAS 3000. If earthing of the armour is required, this must not be taken from the BIOGAS 3000. The power supply for the Modbus to Profinet converter module must not be taken from the BIOGAS 3000. -
Page 61: Operating Manual
B I O G A S 3 0 0 0 Page 61 of 162 Operating Manual When wiring the Modbus connections, the twisted pairs must be as follows: Terminal Colour Wiring Information Pair Orange Signal A (RS485) ‘+’ Pair one Blue Signal B (RS485) ‘-‘... -
Page 62: Readable Parameters Of The Profinet Module
B I O G A S 3 0 0 0 Page 62 of 162 Operating Manual Readable Parameters of the Profinet Module The data available to the Profinet network is two (16-bit) words, each word occupying two hex address locations as follows: Module Internal Name... -
Page 63: Operating Manual
B I O G A S 3 0 0 0 Page 63 of 162 Operating Manual 0x001E Sample Point 2 Last Reading: Day 0x0020 Sample Point 2 Last Reading: Hour 0x0022 Sample Point 2 Last Reading: Minute 0x0024 Sample Point 2 Last Reading: Second 0x0026 Sample Point 2 Last Reading: CH4... -
Page 64: Operating Manual
B I O G A S 3 0 0 0 Page 64 of 162 Operating Manual 0x0044 Sample Point 3 Last Reading: e.g. 0x03E8 (1000 dec) is 1000ppm or High Byte Internal Cell 3x256 +Low Byte 0x232 0x0046 Sample Point 3 Last Reading: External cell 0x0048 Sample Point 3 Last Reading: Gas... -
Page 65: Ethernet Digital Output
Ethernet Digital Output The Ethernet option for the BIOGAS 3000 is via a Modbus to Ethernet converter module. The converter is an Ethernet slave module and acts as an interface between the Modbus output of the BIOGAS 3000 and Ethernet network. -
Page 66: Configuration Of The Ethernet Module
Sizes and Insulation Requirements. If using armoured cable, the armour must not be used as the main earth connection for the BIOGAS 3000. If earthing of the armour is required, this must not be taken from the BIOGAS 3000. The power supply for the Modbus to Ethernet converter module must not be taken from the BIOGAS 3000. -
Page 67: Operating Manual
Page 67 of 162 Operating Manual the ATEX/IECEx certification. The input voltage range to the BIOGAS 3000 Modbus terminals must not exceed -7 to +12V and the current must not exceed 83.3mA. Operating outside of this range will invalidate the ATEX/IECEx certification. -
Page 68: Operating Manual
B I O G A S 3 0 0 0 Page 68 of 162 Operating Manual Wiring Diagram 7 – Modbus to Ethernet converter module wiring OMBG3000 Iss.05 www.geotechuk.com © QED Environmental Systems Ltd. -
Page 69: Readable Parameters Of The Ethernet Module
B I O G A S 3 0 0 0 Page 69 of 162 Operating Manual Readable Parameters of the Ethernet Module The data available to the Ethernet network is two (16-bit) words, each word occupying two hex address locations as follows: Module Internal Name... -
Page 70: Operating Manual
B I O G A S 3 0 0 0 Page 70 of 162 Operating Manual 0x001E Sample Point 2 Last Reading: Day 0x0020 Sample Point 2 Last Reading: Hour 0x0022 Sample Point 2 Last Reading: Minute 0x0024 Sample Point 2 Last Reading: Second 0x0026 Sample Point 2 Last Reading: CH4 x e.g. -
Page 71: Operating Manual
Current sample Point 1 to 4 The Ethernet module updates the readings from the BIOGAS 3000 every 2.5 seconds. Successful communication between the Modbus output and the Ethernet module is indicated by the subnet status light ‘5’ on the module showing green. If for any reason the communications is intermittent or fails, the light flashes red or is permanently red, and the value being read is cleared to zero and not frozen with a previous value. -
Page 72: Heater Option
Turn the power on to the system. Within one minute of power being applied, the module will turn on and display the BIOGAS 3000 logo, shortly followed by the ‘system self-test’ screen (see Screen 3 - System Self-Test). -
Page 73: General Operating Instructions
Note: It can take up to one minute for the BIOGAS 3000 module to power on. If it does not turn on at the point power to the system is applied, please wait one minute before pressing any keys on the module. -
Page 74: Interface Board Firmware Update
B I O G A S 3 0 0 0 Page 74 of 162 Operating Manual Interface Board Firmware Update Before a self-test commences, the module will check that the firmware version of the Interface Board is to the latest revision. If it is not, the user is asked whether they would like to update their firmware: Screen 2 –... -
Page 75: Self-Test
Note: If the fault is ‘service overdue’ or a channel warning (non-critical) then the user can continue to the next stage by pressing the right soft key ‘Continue’. The BIOGAS 3000 will continue automatically after thirty seconds if continue is not pressed. -
Page 76: Help Function
B I O G A S 3 0 0 0 Page 76 of 162 Operating Manual Screen 4 - Self-test finished with warnings Help Function In some screens, there is a help screen available. An available help screen is indicated by a ‘?’ in the top right hand corner of the screen: Screen 5 - Help screen available To access the help screen, press the ‘?’... -
Page 77: First Time Configuration
First Time Configuration When switching on the module for the first time the system will detect the first time run conditions and run set-up mode. The BIOGAS 3000 is designed to be fully configurable by the end-user without QED support or configuration. -
Page 78: Operating Manual
B I O G A S 3 0 0 0 Page 78 of 162 Operating Manual Note: This option will only be present on BG3KE variants. Configure the sampling options for the various sample points. For more information on how to do this, refer to section Sample Times. -
Page 79: Gas Readings Screen
B I O G A S 3 0 0 0 Page 79 of 162 Operating Manual Gas Readings Screen Screen 8 - Gas readings is considered the normal operating screen and all options are carried out from this starting point: Screen 8 - Gas readings Note: The data shown on this display will be dependent on the system variant and the option(s) that was selected at the point of sale. -
Page 80: Current Operation
B I O G A S 3 0 0 0 Page 80 of 162 Operating Manual 3. Current operation Details the current operation for the sample point and cycle: Sampling from sample point System air purge following sample Idle – waiting for next cycle to begin 4. -
Page 81: Catchpot Full Icon
B I O G A S 3 0 0 0 Page 81 of 162 Operating Manual 8. Catchpot full icon Indicates to the user that there is liquid in the catchpot and it needs emptying. 9. Service icon An indication to the user that the module is due a service. See Service section. -
Page 82: Scroll Right
B I O G A S 3 0 0 0 Page 82 of 162 Operating Manual Scroll right Use key ‘6’ to scroll through previously stored gas readings. This will display the readings in memory for the data being output for the particular sample point shown. Current view Indicates which sample point the data on screen is representing with a number in the eye. -
Page 83: Viewing Alarms
B I O G A S 3 0 0 0 Page 83 of 162 Operating Manual The following notifications are available on the BIOGAS 3000: Icon Definition The alarm is active and the associated relay has been de-energised. The alarm is active but the channel is within its recovery zone. The associated relay remains de-energised until the recovery value is met. -
Page 84: Stop Sampling
B I O G A S 3 0 0 0 Page 84 of 162 Operating Manual Stop Sampling From the ‘Gas Readings Screen’, pressing the middle soft key will ‘Stop Sampling’. At this point, the sampling process is stopped, all solenoid valves are closed, and the outputs are frozen at their last known value. -
Page 85: Menu
B I O G A S 3 0 0 0 Page 85 of 162 Operating Manual Menu The menu enables the operator to select options to set-up specific parameters and perform operational tasks. The menu is divided in to three areas: Settings –... -
Page 86: Operating Manual
B I O G A S 3 0 0 0 Page 86 of 162 Operating Manual Screen 12 - Settings Menu Following a change to ‘Sample Times’, ‘Configure Interface’, or ‘Daily Air Purge’, when returning to the ‘Gas Readings Screen’, the system will apply the new configuration once ‘Confirm’ is pressed using the left soft key. -
Page 87: Operating Manual
B I O G A S 3 0 0 0 Page 87 of 162 Operating Manual Sample Times This option allows the operator to define the duration of each sample point (or the external sensor if the system is a BG3KE). From the ‘Settings’... -
Page 88: Operating Manual
B I O G A S 3 0 0 0 Page 88 of 162 Operating Manual Note: In addition to each sample point being editable, the ‘Sample’ time is also an editable parameter. This is the total time of the cycle before sample point 1 (or external cell) is monitored again. -
Page 89: Operating Manual
B I O G A S 3 0 0 0 Page 89 of 162 Operating Manual From the ‘Settings’ menu press key ‘2’ to select the ‘Configure Alarms’ option. Screen 17 - Configure Alarms Press the right soft key to ‘Exit’ without saving any changes. To ‘Edit’... -
Page 90: Operating Manual
This is to prevent erroneous errors or alarm conditions in the user’s remote system whilst maintenance is being performed on the BIOGAS 3000 or any other plant equipment. From the ‘Configure Interface’ menu press key ‘1’ to select the ‘Configure Analogue Outputs’... -
Page 91: Operating Manual
Once a parameter has been changed, the left soft key becomes available to ‘Save and Exit’. Once pressed, the user will be returned to the ‘Configure Interface’ menu. Configure Modbus Slave This option allows the user to configure the Modbus digital output of the BIOGAS 3000. The user can change the following parameters: ... -
Page 92: Operating Manual
B I O G A S 3 0 0 0 Page 92 of 162 Operating Manual Screen 19 - Configure Modbus Slave Press the right soft key to ‘Exit’ without saving any changes. To ‘Edit’ a parameter, press the middle soft key to enter edit mode. Using the scroll keys, select a parameter to edit (option will be highlighted) and select the field with the ... -
Page 93: Operating Manual
B I O G A S 3 0 0 0 Page 93 of 162 Operating Manual Figure 10 - 4-20mA notification Indicates current sample point solenoid – This mode enables a relay for when a sample point is being monitored. This is useful if the operator needs to know when a sample point is being monitored Figure 11 - Sample point notification Note: When enabling the relays for 4-20mA or sample point notification, the remaining available... -
Page 94: Operating Manual
B I O G A S 3 0 0 0 Page 94 of 162 Operating Manual Adjust Backlight This option allows the operator to set the brightness of the backlight and the timer for when it will auto dim. In addition, the backlight can also be controlled using the ‘backlight’ key at any time. Having a brighter backlight will improve the readability of the display in bright sunlight. -
Page 95: Operating Manual
B I O G A S 3 0 0 0 Page 95 of 162 Operating Manual Screen 22 - Set Time and Date Press the right soft key to ‘Exit’ without saving any changes. Press the left soft key to toggle the date format. Available options are DD/MM/YY, MM/DD/YY, and YY/MM/DD. -
Page 96: Operating Manual
B I O G A S 3 0 0 0 Page 96 of 162 Operating Manual Admin Passcode Calibration menu From the ‘Settings’ menu press key ‘6’ to select the ‘Admin Passcode’ option. Screen 23 - Set Administrator Passcode Press the right soft key to ‘Exit’... -
Page 97: Operating Manual
B I O G A S 3 0 0 0 Page 97 of 162 Operating Manual Screen 24 - Administrator Passcode Required prompt For the user to edit the setting, they must enter the correct passcode followed by the key. Once the passcode has been entered once, it will not need entering again whilst remaining in the menus. -
Page 98: Operating Manual
B I O G A S 3 0 0 0 Page 98 of 162 Operating Manual Screen 25 - Daily Air Purge settings Press the right soft key to ‘Exit’ without saving any changes. Press key ‘1’ to edit the start time, key ‘2’ to edit the air purge duration, or key ‘3’ to edit the wait time. -
Page 99: Device Information Menu
B I O G A S 3 0 0 0 Page 99 of 162 Operating Manual Screen 26 – Set Language Press the right soft key to ‘Exit’ without saving any changes. Press the number on the flag for the language you would like to select. Note: Once selected, a prompt in the selected language will pop-up advising the user to ‘please wait’. -
Page 100: Operating Manual
View Event Log The BIOGAS 3000 incorporates the facility to log significant events performed on the system via the event log. This can be used as an aid to monitoring the use of the system and used as a diagnostic tool if there is a problem. -
Page 101: Operating Manual
B I O G A S 3 0 0 0 Page 101 of 162 Operating Manual deleted and replaced with log file eleven. From the ‘Device Info’ menu press key ‘2’ to select the ‘View Event Log’ option. Screen 29 - View Event Log Press the right soft key to ‘Exit’... -
Page 102: Calibration Menu
B I O G A S 3 0 0 0 Page 102 of 162 Operating Manual Screen 30 - Diagnostics Press the right soft key to ‘Exit’ back to the ‘Device Info’ menu. Use the left soft key to scroll the page down and the middle soft key to scroll the page up. Calibration Menu The following options are available in the calibration menu: Gas check... -
Page 103: Operating Manual
The ability has been provided to perform a gas check and calibration on the gas channels of the system. This ensures the accuracy of the system in its current operating condition. To ensure optimum performance please ensure your BIOGAS 3000 module is returned for service and calibration on time. -
Page 104: Operating Manual
B I O G A S 3 0 0 0 Page 104 of 162 Operating Manual Screen 33 - Restore to Factory settings Press the right soft key to ‘Abort’ which does not reset the calibration data and will return the operator to the calibration menu. -
Page 105: Operating Manual
B I O G A S 3 0 0 0 Page 105 of 162 Operating Manual Screen 34 - Fit New External Cell confirmation Press the right soft key to ‘Exit’ and return to the ‘Calibration’ menu. If fitting a new cell or complete module, confirm the cell type and range, and press the left soft key to ‘Continue’. -
Page 106: Operating Manual
B I O G A S 3 0 0 0 Page 106 of 162 Operating Manual Screen 36 - User calibration recommendation Note: After a new cell or complete module is fitted, it is recommended that as a minimum a user zero be performed. -
Page 107: Biogas 3000 Sampling Process
B I O G A S 3 0 0 0 Page 107 of 162 Operating Manual BIOGAS 3000 Sampling Process BG3K1, 2, 3, 4, and D Variants START Complete first time run set-up Sample point 1 Sample point 1 Sample point 1... -
Page 108: Bg3Ke Variants
B I O G A S 3 0 0 0 Page 108 of 162 Operating Manual BG3KE Variants START Complete first time run set-up Sample point 1 monitored continuously Outputs updated Wait External External sensor interval sensor? monitor duration Time of External sensor Outputs daily air... -
Page 109: Switching The Biogas 3000 System Off
3 0 0 0 Page 109 of 162 Operating Manual Switching the BIOGAS 3000 System Off The BIOGAS 3000 system can only be turned off at the switched mains supply that is installed in section Mains Wiring. The BIOGAS 3000 module can be turned off independently to the system. To do this, press and hold the on/off key for approximately two seconds. -
Page 110: Gas Check And Calibration
Do not open when an explosive atmosphere is present. Introduction The BIOGAS 3000 system is carefully calibrated at manufacture and when returned for service using a number of gas concentrations and temperature points. However, it is sometimes desirable to carry out a gas check on the equipment to prove its accuracy and rectify any inaccuracies with a calibration process between services. -
Page 111: Flow Regulator
Gas Mixtures The BIOGAS 3000 provides the user with the ability to add, edit, or delete gas mixtures that can be used for the gas check and calibration process. There are three default mixtures: ... -
Page 112: Adding A Mixture
Screen 38 - Gas Check Adding a Mixture In addition to the three default mixtures, the BIOGAS 3000 also supports the addition of three user definable mixtures. To add a mix: In the ‘Gas Check’ screen, press the middle soft key to ‘Add’ a mix. -
Page 113: Deleting A Mix
B I O G A S 3 0 0 0 Page 113 of 162 Operating Manual Screen 40 - Edit gas mix details Using the scroll keys, select an editable field and press the key to edit: Name, Description and Bottle ID are text and number fields ... -
Page 114: Edit O2 In Fresh Air Mix
B I O G A S 3 0 0 0 Page 114 of 162 Operating Manual Press the middle soft key to ‘Add/Delete’. Screen 41 - Add or delete mix Press the middle soft key to ‘Delete’. Press the left soft key (Yes) to confirm deletion. Edit O2 in Fresh Air Mix The concentration of oxygen in the fresh air mix is editable between 20.8 and 21.0%. -
Page 115: Connecting A Gas Bottle To The Biogas 3000
The operator will be returned to the ‘Gas Check’ screen. Connecting a Gas Bottle to the BIOGAS 3000 This section explains how to connect a gas bottle to the BIOGAS 3000 system in preparation for a gas check or calibration. -
Page 116: Operating Manual
B I O G A S 3 0 0 0 Page 116 of 162 Operating Manual Disconnect the QRC from the top of the catchpot. Note: Ensure the pressure regulator is turned off. Attach the pressure regulator to the gas bottle and ensure it is adequately tightened. -
Page 117: Gas Check And Calibration
40% CO The BIOGAS 3000 performs a gas check before providing the user with a decision. If the result of the check is that the instruments accuracy is good, a calibration may not need to be performed. At this point, the user can decide to record the results and exit. -
Page 118: Operating Manual
B I O G A S 3 0 0 0 Page 118 of 162 Operating Manual START Does gas mix need Edit gas updating to match bottle? Select gas mix Sampling stops and outputs are frozen at their last known reading. Turn gas in and gas out valves on... -
Page 119: Status Icons
B I O G A S 3 0 0 0 Page 119 of 162 Operating Manual Status Icons Below is a list of status icons used after the gas check and calibration processes and their definition: Post Gas Check Icon Definition Channel has not been checked Recommends a calibration be performed... -
Page 120: Disconnecting A Gas Bottle From The Biogas 3000
Page 120 of 162 Operating Manual Disconnecting a Gas Bottle from the BIOGAS 3000 This section explains how to disconnect a gas bottle from the BIOGAS 3000 system following a gas check or calibration. Do not open when an explosive atmosphere is present. -
Page 121: Operating Manual
Note: The drain valve is to remain closed. It is critical that the connections are fully secured to ensure that no gas leaks in to the main enclosure. Once the BIOGAS 3000 tubing has been reconnected, it is recommended that a Pressure Test be completed to ensure that the system is leak free. -
Page 122: Maintenance
Note: This maintenance schedule is a minimum guide and dependent upon the application and usage of the BIOGAS 3000 system, may need to be adapted accordingly. As a minimum, QED recommend that each month the following be undertaken to ensure the BIOGAS 3000 system is in its optimum working and safe condition: ... -
Page 123: Operating Manual
Note: It is the operator’s responsibility to keep a record of when and what maintenance has been performed. Note: If you suspect the BIOGAS 3000 system to have been damaged and are unsure of the consequences of this, please contact your local distributor, or our technical support team at QED on +44(0)333 800 0088 or email technical@qedenv.co.uk. -
Page 124: Biogas 3000 Consumable Products
3 0 0 0 Page 124 of 162 Operating Manual BIOGAS 3000 Consumable Products Optional replacement parts may be purchased for the BIOGAS 3000 from your local distributor or QED directly. Refer to the next page for part numbers: OMBG3000 Iss.05 www.geotechuk.com... -
Page 125: Operating Manual
Catchpot with coalescing filter and built-in valve for systems BG3K.S1 without auto-drain Catchpot with coalescing filter and drainage tubing for BG3K.S2 systems with auto-drain BIOGAS 3000 Profibus option BG3K.S3 BIOGAS 3000 Profinet option BG3K.S4 Filter, Exhaust 1/4 MNPT (used as air purge filter) 2008277/S Inline PTFE filters (pack of 10) GA4.2... -
Page 126: Emptying The Catchpot
Emptying the Catchpot Do not open when an explosive atmosphere is present. Mains voltages are present within the BIOGAS 3000 system and great care needs to be observed. If there is any uncertainty, seek advice from a professional or isolate the supply. -
Page 127: Operating Manual
B I O G A S 3 0 0 0 Page 127 of 162 Operating Manual Open the drain valve to allow liquid to empty from the catchpot. The catchpot can hold approximately 90ml of liquid. Dependent upon the application the liquid removed may be contaminated and should be discharged to an area where it is safe to do so. -
Page 128: Operating Manual
B I O G A S 3 0 0 0 Page 128 of 162 Operating Manual Open the gas inlet and gas outlet valves. From the sampling stopped screen, press the left soft key to ‘Restart’ the monitoring process and return to the ‘Gas Readings Screen’. -
Page 129: Replacing The Catchpot Filter
The coalescing catchpot filter should be replaced if showing signs of contamination. Failure to replace the filter will result in the gas flow being restricted or blocked to the BIOGAS 3000 module. In addition, it will cause a flow fail error. -
Page 130: Operating Manual
B I O G A S 3 0 0 0 Page 130 of 162 Operating Manual Remove the catchpot from its clip. Unscrew the catchpot top by turning a quarter turn anti-clockwise. Lift the top from the body. Unscrew the filter stop from underneath the filter. -
Page 131: Operating Manual
B I O G A S 3 0 0 0 Page 131 of 162 Operating Manual Replace the filter stop and tighten into place. Align and fit the catchpot top to the body. Tighten the catchpot top by turning a quarter turn clockwise. -
Page 132: Operating Manual
B I O G A S 3 0 0 0 Page 132 of 162 Operating Manual Once secure, reconnect the couplings to the catchpot top, ensuring the tubing is not trapped or kinked. Note: Ensure that the couplings ‘clicks’ in to place. -
Page 133: Replacing The Inline Ptfe Filter
The inline PTFE filter should be replaced if showing signs of contamination or saturated with liquid. Failure to replace the filter will result in the gas flow being restricted or blocked to the BIOGAS 3000 module. In addition, it will cause a flow fail error. -
Page 134: Operating Manual
B I O G A S 3 0 0 0 Page 134 of 162 Operating Manual Disconnect one side of the tubing from the filter by turning anti-clockwise. Disconnect the remaining tubing length from the filter by turning anti-clockwise. Connect the new filter to the tubing by turning clockwise. -
Page 135: Operating Manual
B I O G A S 3 0 0 0 Page 135 of 162 Operating Manual Position the tubing assembly above the catchpot ensuring the tubing is not trapped or kinked. It is critical that the connections are fully secured to ensure that no gas leaks in to the main enclosure. -
Page 136: Pressure Test
‘vent to atmosphere’ outlets as recommended during the installation. Diagnostics Control Mode The BIOGAS 3000 includes a feature that allows the user to toggle the condition of the solenoids, relays, and pumps in the system. During the pressure systems tests, the user will need to control the position of the solenoid valves in order to complete a comprehensive test. -
Page 137: Operating Manual
B I O G A S 3 0 0 0 Page 137 of 162 Operating Manual Screen 43 – Diagnostics Control Mode Using the scroll keys, navigate to the desired parameter. Pressing the key will toggle the status of the hardware item between on and off. Pressing the right soft key at any point will return the user to the ‘Device Info’... -
Page 138: General Set-Up
B I O G A S 3 0 0 0 Page 138 of 162 Operating Manual General Set-Up The image below shows an example of how the equipment will look when performing the test procedure. Note: Due to the significant differences between models, each set-up will be slightly different to the image shown. -
Page 139: Operating Manual
B I O G A S 3 0 0 0 Page 139 of 162 Operating Manual ‘Vent to Atmosphere’ outlets as recommended during the installation. BG3K1 and BG3KE without an External Sensor Apply pressure to: Solenoid 1 Solenoid 6 Air Purge Sample Gas 1 Note: Ensure the ball valves on the ‘Process Return’... -
Page 140: Operating Manual
B I O G A S 3 0 0 0 Page 140 of 162 Operating Manual Note: When reattaching the sample pipes to the system, ensure all tube connections are tight and free from leaks. If assistance is required, please contact your local distributor, or our technical support team at QED on +44(0)333 800 0088 or email technical@qedenv.co.uk. -
Page 141: Operating Manual
B I O G A S 3 0 0 0 Page 141 of 162 Operating Manual BG3K4 With hydrolysis option: Apply pressure to: Solenoid 1 Solenoid 2 Solenoid 3 Solenoid 4 Solenoid 5 Solenoid 6 Air Purge Sample Gas 1 OFF Sample Gas 2 OFF Sample Gas 3 OFF Sample Gas 4 OFF... -
Page 142: Operating Manual
B I O G A S 3 0 0 0 Page 142 of 162 Operating Manual BG3KD Apply pressure Solenoid 1 Solenoid 2 Solenoid 3 Solenoid 4 Solenoid 5 Solenoid 6 Air Purge Sample Gas 1 Sample Gas 2 Note: Ensure the ball valves on the ‘Process Return’ and ‘Vent to Atmosphere’ lines are opened once testing is completed. -
Page 143: Cleaning And Decontamination
Should the need arise for the BIOGAS 3000 module to be returned for service, it is the responsibility of the owner to ensure that the module has been decontaminated or that QED has been made aware of any contaminants that may be present, prior to it being returned. -
Page 144: Service
QED on +44(0)333 800 0088 or email service@qedenv.co.uk. Service Notifications The BIOGAS 3000 uses two icons on the ‘Gas Readings Screen’ to notify the user that the module is due a service: The service is due in 28 days... -
Page 145: Operating Manual
Note: This will freeze the outputs at their last known value. Disconnect the gas inlet and gas outlet tubing from the top of the BIOGAS 3000 module. Disconnect the USB lead from the communications connector and the power... -
Page 146: Operating Manual
First Time Configuration. Note: After replacing the BIOGAS 3000 module, QED recommend that a gas check be performed on the system to ensure it is still reading accurately. If required, a user calibration can also be performed; refer to the... -
Page 147: Problem Solving
This section discusses various problems that may be encountered, and warnings or error messages that the operator may receive during general operation of the BIOGAS 3000. For further assistance please contact your local distributor, or our technical support team at QED on +44(0)333 800 0088 or email technical@qedenv.co.uk. -
Page 148: Critical Faults
Screen 45 - System Warnings (non-critical faults) From this screen: pressing the left soft key will ‘Reset’ the system and power cycle the BIOGAS 3000 module pressing the middle soft key will perform a system test. If the fault clears after this, monitoring will resume and the icon will be removed ... -
Page 149: System Will Not Power On
12Vdc power supplies. If they are not, check the mains fuse (fuse 1) and replace if necessary. If they are illuminating, it can take up to one minute for the BIOGAS 3000 module to power on. If it does not turn on at the point power to the system is applied, please wait one minute before pressing any keys on the module. -
Page 150: Module Lock-Up
+44(0)333 800 0088 or email technical@qedenv.co.uk. Module Lock-Up In the rare event that the BIOGAS 3000 ‘locks up’ and will not recognise button presses, the system should automatically power cycle the module due to a loss of communications. If this does not occur or fix the problem, isolate the supply to the system and leave the system switched off for 60 seconds. -
Page 151: Modbus Outputs Not Working
Wiring Diagram 2 – Modbus. Note: If the BIOGAS 3000 is last on the bus, ensure the termination is set to ‘On’. Likewise, if it is not, ensure the termination is set to ‘Off’. In addition, also check that no two nodes on the bus have the same slave address. If this is the case,... -
Page 152: Fuses
External sensor Solenoids 250V 20mm time delay, ceramic 24Vdc supply 250V 20mm time delay, ceramic BIOGAS 3000 250v 20mm time delay, module supply ceramic 12Vdc supply to 250V 20mm time delay, Interface PCB ceramic Note: Please contact your local distributor, or our sales team at QED on +44(0)333 800 0088 or email sales@qedenv.co.uk... -
Page 153: User Calibration Explained
Graph 1 - User calibration explained Factory Calibration When the BIOGAS 3000 module is factory calibrated, a stable gas curve is generated (see curve 1 on Graph 1 - User calibration explained). This curve is then used to determine the gas concentration based on the infrared signal strength after being absorbed by the gas. -
Page 154: User Span Calibration
BIOGAS 3000 system has been subjected to high levels of gas previously, in order to ensure there are no remains of the target gas present. On the BIOGAS 3000, this would result in leaving the system for several minutes before pressing ‘check’ during the gas check process. - Page 155 BIOGAS 3000 system. The BIOGAS 3000 has drifted since its calibration and may be due a user calibration; see section Gas Check and Calibration of this operating manual for further information.
-
Page 156: Event Log
Event Log The BIOGAS 3000 incorporates the facility to log significant events performed on the system via the event log. This can be used as an aid to monitoring the use of the system and used as a diagnostic tool if there is a problem. -
Page 157: Biogas 3000 Warranty Terms And Conditions
B I O G A S 3 0 0 0 Page 157 of 162 Operating Manual BIOGAS 3000 WARRANTY TERMS AND CONDITIONS OMBG3000 Iss.05 www.geotechuk.com © QED Environmental Systems Ltd. - Page 158 B I O G A S 3 0 0 0 Page 158 of 162 Operating Manual OMBG3000 Iss.05 www.geotechuk.com © QED Environmental Systems Ltd.
-
Page 159: Weee Compliance
B I O G A S 3 0 0 0 Page 159 of 162 Operating Manual WEEE COMPLIANCE The wheelie bin symbol displayed on electrical equipment supplied by QED signifies that the apparatus must not be disposed of through the normal municipal waste stream but through a registered recycling scheme. -
Page 160: Declaration Of Conformity
B I O G A S 3 0 0 0 Page 160 of 162 Operating Manual DECLARATION OF CONFORMITY OMBG3000 Iss.05 www.geotechuk.com © QED Environmental Systems Ltd. - Page 161 B I O G A S 3 0 0 0 Page 161 of 162 Operating Manual OMBG3000 Iss.05 www.geotechuk.com © QED Environmental Systems Ltd.
-
Page 162: Glossary Of Terms
H External gas sensor An electrochemical gas sensor incorporated in to an assembly external to the BIOGAS 3000 module but part of the overall system. It allows an additional gas to be monitored by the equipment. Factory settings Default settings pre-set at time of manufacture or service.
Need help?
Do you have a question about the BIOGAS 3000 and is the answer not in the manual?
Questions and answers