
Subscribe to Our Youtube Channel
Related Manuals for Geotech Biogas 300


Summary of Contents for Geotech Biogas 300
- Page 1 OPERATING MANUAL Geotech Sovereign House, Queensway, Leamington Spa, Warwickshire, CV31 3JR, UK www.geotechuk.com sales@geotechuk.com +44 (0)1926 338111...
-
Page 2: Table Of Contents
Notes ....................7 Introduction ..................8 General ....................8 Safety Instructions ................8 Range of Environmental Conditions............ 10 Safety Symbols Used on the BIOGAS 300 ..........10 BIOGAS 300 Overview ................. 11 Features ....................11 Options ....................12 Benefits ....................12 Main Applications ................ - Page 3 Connecting the Gas Lines to the BIOGAS 300 ........25 Sample Line ..................25 Process Return ..................26 Drain ....................27 Protective Cover ................. 28 Cable Gland Selection and Cord Anchorage ........29 Cable Conductor Sizes and Cable Insulation Requirements ....30 Cable Conductor Sizes ................
- Page 4 Detailed Instructions for User Span Calibration ........66 Simple User Span Calibration Instructions – Flow Chart ..... 69 Connecting a Gas Bottle to the BIOGAS 300 System ......71 Disconnecting a Gas Bottle from the BIOGAS 300 System ....73 Set-Up for Using Clean Ambient Air Zero ..........
- Page 5 Cleaning and Decontamination ............93 Service ....................94 General ....................94 Replacement BIOGAS 300 Module for Service – Hot Swap ....94 Problem Solving .................. 98 System Will Not Power On ..............98 Under and Over Range Codes ............. 98 System Lock-Up ..................
- Page 6 Reading Low ................106 BIOGAS 300 Warranty Terms and Conditions ........107 WEEE Compliance ................109 Sample Certificate of Calibration ............110 Declaration of Conformity ..............111 Glossary of Terms ................112 Geotechnical Instruments (UK) Ltd OMBG300 – Iss.03...
-
Page 7: Manual Guidelines
For example: Note: For further information please contact your local distributor, or our technical support team at Geotech on +44(0)1926 338111 or email technical@geotech.co.uk. Page 7 of 113 Geotechnical Instruments (UK) Ltd OMBG300 – Iss.03... -
Page 8: Introduction
Introduction Introduction General Welcome to the BIOGAS 300, a gas analyser that has been designed and manufactured in the UK by Geotech, an ISO 9001, and ISO 17025 accredited company whose products are distributed and supported worldwide. For more information about Geotech and its history, please refer to our website www.geotechuk.com. - Page 9 Repair and maintenance of this equipment should be carried out in accordance with the applicable code of practice. Only Geotech approved components are to be used as replacement parts. If the equipment is likely to be exposed to aggressive substances, e.g.
-
Page 10: Range Of Environmental Conditions
The system is only for use in ambient temperatures in the range 0°C to 50°C. The BIOGAS 300 is designed for use outdoors and has an IP65 rating. The mains voltages (110-240V) can fluctuate up to ±10% of the nominal voltage. -
Page 11: Biogas 300 Overview
BIOGAS 300 Overview BIOGAS 300 Overview Features Easy to self-install, operate, and maintain, the BIOGAS 300 is a cost effective fixed system biogas analyser for CH monitoring. It is ideal for 500kW or reduced scale anaerobic digestion plants, from agricultural to food waste applications. -
Page 12: Options
Operating Manual BIOGAS 300 Overview Options 4-20mA analogue data output (replaces Modbus) Loop-powered isolators are available for connecting to current sinking inputs with the 4-20mA option. Benefits No training required Low cost of ownership Quick and easy installation ... -
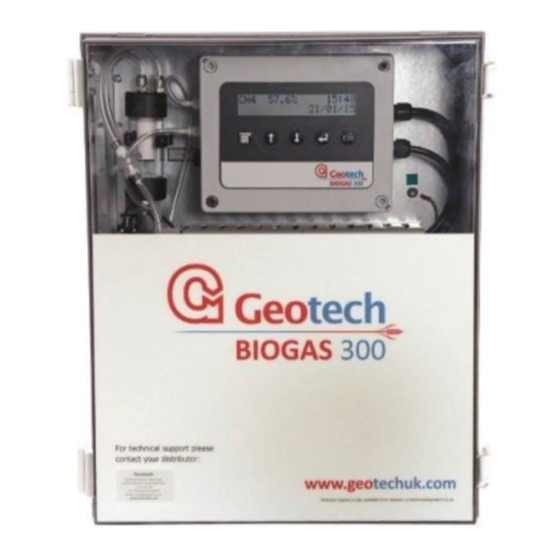
Page 13: Key Components
Operating Manual BIOGAS 300 Overview Key Components Figure 1 – BIOGAS 300 external components Page 13 of 113 Geotechnical Instruments (UK) Ltd OMBG300 – Iss.03... - Page 14 Operating Manual BIOGAS 300 Overview Figure 2 – BIOGAS 300 internal components Note: For clarity, the protective guard that covers the mains terminals has been removed in this image. Page 14 of 113 Geotechnical Instruments (UK) Ltd OMBG300 – Iss.03...
- Page 15 Operating Manual BIOGAS 300 Overview Figure 3 - BIOGAS 300 front components Page 15 of 113 Geotechnical Instruments (UK) Ltd OMBG300 – Iss.03...
- Page 16 Operating Manual BIOGAS 300 Overview Gas-in ball valve Sample button Catchpot Inline PTFE filter BIOGAS 300 module Control harness Communications harness Pump (optional) PLC (with 4-20mA option) 24vdc power supply (with 4-20mA option) 5vdc power supply Sample button and gas-in ball valve (internal location)
-
Page 17: Biogas 300 Module Features
Operating Manual BIOGAS 300 Overview BIOGAS 300 Module Features Physical Characteristics of the Module Reference: Front view: Display Menu key Scroll up Scroll down Escape key Return key Rear view: Manufacturer’s label Serial number Product option number Left side view:... -
Page 18: Definitions
This is the unique identification number for the BIOGAS 300 module. Product option number This is the unique record for the internal configuration of the BIOGAS 300 module at time of manufacture or last service. Left Side View Gas inlet port Gas sample enters the BIOGAS 300 module here. -
Page 19: Installation
In order to effectively install the BIOGAS 300 system it is important that the site is ready and in a fit state. In particular, the following points should be... -
Page 20: Package Contents
Note: Inlet pressure to the BIOGAS 300 system must not exceed 350 mbars (5psi) gauge on pumped versions. Where this is exceeded, additional pressure regulation is required. Output data cable has been installed (if required) to the BIOGAS 300 location. ... -
Page 21: Storage Of The System And Module
It is the user’s responsibility to ensure the system and module are kept within their ambient operating temperature range. Ventilation Requirements There is an enclosure breather fitted to the BIOGAS 300 situated at the base of the enclosure (see annotation 5 on Figure 4 - BIOGAS 300 connection points). -
Page 22: Mounting The Enclosure
Note: If it is difficult to position the BIOGAS 300 system out of direct sunlight, measures should be taken to protect the system, such as a basic cover to provide shade. - Page 23 IP rating of the enclosure would be void and water will enter the system resulting in a hazard. Dimensions of the enclosure are provided in Figure 5 - BIOGAS 300 mounting bracket dimensions. Page 23 of 113 Geotechnical Instruments (UK) Ltd OMBG300 –...
- Page 24 Operating Manual Installation Figure 5 - BIOGAS 300 mounting bracket dimensions Page 24 of 113 Geotechnical Instruments (UK) Ltd OMBG300 – Iss.03...
-
Page 25: Connecting The Gas Lines To The Biogas 300
Care should be taken in routing the sample line, especially in cold environments. The sample line may need insulating or even trace heating to prevent freezing of water within the pipe. This is not part of the BIOGAS 300 system and is the responsibility of the operator. -
Page 26: Process Return
The process return line may need insulating or even trace heating to prevent freezing of water within the pipe. This is not part of the BIOGAS 300 system and is the responsibility of the operator. The gas exhaust line should be returned to a suitable location at the required point. -
Page 27: Drain
Care should be taken in routing the drain line, especially in cold environments. The drain line may need insulating or even trace heating to prevent freezing of water within the pipe. This is not part of the BIOGAS 300 system and is the responsibility of the operator. -
Page 28: Protective Cover
To fit the cover, simply align the holes in the protective cover with the three pillars fixed to the BIOGAS 300 back plate and screw in to place using the 3mm hexagon tool. -
Page 29: Cable Gland Selection And Cord Anchorage
Operating Manual Installation Figure 7 – Protective guard removal and fitting Cable Gland Selection and Cord Anchorage To maintain the integrity of the enclosure a cable gland of IP65 or better must be used and tightened to the manufacturer’s recommended torque. In addition, the cable gland must have a means of anchoring the cable. -
Page 30: Cable Conductor Sizes And Cable Insulation Requirements
Note: Refer to the BIOGAS 300 Consumable Products of this operating manual for products available from your local distributor or Geotech. Cable Conductor Sizes and Cable Insulation Requirements Cable Conductor Sizes For the mains and data output wiring, the conductor must be suitably selected for the current carrying capacity, the environment, and the distance to the supply. -
Page 31: How To Wire The Mains Supply
Figure 8 – BIOGAS 300 electrical label: Figure 8 – BIOGAS 300 electrical label The mains fuse rating (FS1) in the system is 3.15A. The equipment must be provided with a double-pole switched and fused mains supply. - Page 32 Wiring Diagram 1 – Mains wiring for how to wire the mains cable to the BIOGAS 300 system. A label within the system identifies the appropriate inputs, namely from left to right neutral (N), earth (E), and live (L).
-
Page 33: 4.10 Modbus Digital Output
Figure 2 – BIOGAS 300 internal components for the Modbus terminal connections. Warning The BIOGAS 300 Modbus terminals must only be used for standard Modbus communications. No other connections must be made as they may affect the safety of the equipment. -
Page 34: Wiring The Biogas 300 Modbus Outputs
Ensure the power is isolated and the Protective Cover removed before wiring to the system. The input voltage range to the BIOGAS 300 terminals must not exceed -7 to +12V. Operating outside of this range could affect the safety of equipment. - Page 35 Operating Manual Installation When wiring the outputs the twisted pairs must be as follows: Terminal Colour Wiring Information Pair Orange Signal A (RS485) ‘+’ Pair one Blue Signal B (RS485) ‘-‘ White Logic Ground (0V) ‘LG’ Pair two Wiring Diagram 2 – Modbus wiring Page 35 of 113 Geotechnical Instruments (UK) Ltd OMBG300 –...
-
Page 36: Configuration Of The Biogas 300 Modbus Port
Note: If it is not possible for the BIOGAS 300 to be last on the bus, please contact your local distributor, or our technical support team at Geotech on +44(0)1926 338111 or email technical@geotech.co.uk. -
Page 37: 4.11 4-20Ma Outputs
4 on Figure 4 - BIOGAS 300 connection points). The outputs ‘current sink’ in to the BIOGAS 300 and labels identify the appropriate outputs namely from left to right (‘CH1’ and ‘CH2’). Refer to annotation 15 on Figure 2 – BIOGAS 300 internal components for the 4-20mA terminal locations. - Page 38 Operating Manual Installation insulation must be housed adequately within the protective sheath of the ferrule. Terminals that are wired should be tightened to a minimum of 35cN/m. Failure to tighten to this requirement could affect the safety of the apparatus. Cable glands should meet requirements of Cable Gland Selection and Cord...
- Page 39 Operating Manual Installation Wiring Diagram 3 – 4-20mA to current source inputs Page 39 of 113 Geotechnical Instruments (UK) Ltd OMBG300 – Iss.03...
-
Page 40: Wiring The Biogas 300 To 'Current Sink' Inputs
If using armoured cable, the armour must not be used as the main earth connection for the BIOGAS 300. If earthing of the armour is required, this must not be taken from the BIOGAS 300. - Page 41 Operating Manual Installation Wiring Diagram 4 – 4-20mA to current sink inputs Page 41 of 113 Geotechnical Instruments (UK) Ltd OMBG300 – Iss.03...
-
Page 42: 4-20Ma Scaling
100.0% 4.12 Security The BIOGAS 300 system is supplied with a padlock and key for the operator to use at their discretion. This padlock has been supplied to give the operator of the equipment confidence that the components within it can be secure. In... -
Page 43: 4.13 Final Checks
Turn the power on to the system. Several seconds after power is applied, the module will turn on and display the ‘Geotech BIOGAS 300’ logo (see Screen 1 – Power on screen). -
Page 44: General Operation Instructions
If this does not happen, refer to the Problem Solving section of this operating manual. If the power on is successful, the ‘Geotech BIOGAS 300’ logo will appear on screen. Geotech BIOGAS 300 Screen 1 – Power on screen Following this, the module will go in to standby mode awaiting instruction from the operator to take a gas sample. -
Page 45: Time And Date
Operating Manual General Operation Instructions Sample Duration User Calibration Factory Settings Last Reading Information Diagnostics Modbus Slave Add. (address) Standby Options can be scrolled through using the ↑ and ↓ keys on the keypad (refer to annotations 3 and 4 on Physical Characteristics of the Module). -
Page 46: Sample Duration
This option allows the operator to define the duration of the sample once the sample button (refer to annotation 2 on Figure 1 – BIOGAS 300 external components) is pressed. Using the ↑ or ↓ keys, navigate to the ‘Sample Duration’ option in the menu and select the option using the ... -
Page 47: User Calibration
The ability has been provided to perform a calibration on the CH channel. This calibration ensures the accuracy of the system in its current operating condition. To ensure optimum performance please ensure your BIOGAS 300 module is returned for service and calibration on time. Page 47 of 113 Geotechnical Instruments (UK) Ltd OMBG300 –... -
Page 48: Factory Settings
Operating Manual General Operation Instructions Using the ↑ or ↓ keys, navigate to the ‘User Calibration’ option in the menu and select the option using the key. Ensure inlet valve is closed – press Screen 12 – User calibration prompt Press the ‘Esc’... -
Page 49: Information
Using the ↑ or ↓ keys allows the operator to navigate through the available pages that can be seen. The information that can be viewed is: Serial No.: the serial number for the BIOGAS 300 module. It will be in the format ‘BGMnnnn’. -
Page 50: Diagnostics
It will be in the date format ‘DD/MM/YY’. User cal: is the date that the BIOGAS 300 module was last user zeroed, spanned or both. It will be in the date format ‘DD/MM/YY’. To exit to the menu, press the ‘Esc’ key. -
Page 51: Standby
ERROR Screen 21 – Modbus slave address set incorrectly Standby This option allows the operator to place the BIOGAS 300 module in to standby mode. Using the ↑ or ↓ keys, navigate to the ‘Standby’ option in the menu and select the option using the ... -
Page 52: Taking A Reading
Note: Alternatively, standby mode can be entered by pressing the ‘Esc’ key when in the menu. Taking a Reading Detailed Instructions This section explains how to take a reading on the BIOGAS 300 system. In addition, a simple flow chart can be followed in Simple Instructions – Flow Chart (see page 54). - Page 53 Screen 25 – Close inlet valve message Warning Failure to turn off the gas supply could cause a hazard. Finally, after ten seconds of the reading being on screen, the BIOGAS 300 system will automatically enter standby mode; see Screen 2 – Standby mode.
-
Page 54: Simple Instructions - Flow Chart
Operating Manual General Operation Instructions Simple Instructions – Flow Chart Flow Chart 1 – Simple process overview explains how to take a reading on the BIOGAS 300 system: Start Ensure catchpot is empty Open gas inlet valve Press sample button Measuring sample gas –... -
Page 55: Switching The Biogas 300 System Off
Operating Manual General Operation Instructions Switching the BIOGAS 300 System Off The BIOGAS 300 system can only be turned off at the switched mains supply that is installed in section Mains Wiring. Warning Attempting to turn off the BIOGAS 300 system in any other way could cause a hazard or damage to the system. -
Page 56: Calibration
User calibration of the system will greatly improve the data accuracy in the range of the calibration gas used and the environmental conditions for which the BIOGAS 300 is calibrated. This may cause less accurate readings of concentrations outside of this calibrated range. -
Page 57: Flow Regulator
Note: If using a regulator that was not supplied by Geotech, please ensure the flow rate is adjusted to a maximum of 300ml/min. Suitable pressure relief should be ensured to protect the system from over- pressurisation –... -
Page 58: Gas Check
Operating Manual Calibration Gas Check After the BIOGAS 300 system has been installed and pressure tested, it is recommended that a gas check be performed to ensure it is still accurate, as damage could have occurred during installation and/or transit. -
Page 59: Ch 4 User Zero Calibration
Calibration User Zero Calibration As a minimum, Geotech recommends that a user zero calibration be carried out monthly to compensate for any drifting of the infrared source. A calibration should be performed at a time of day and temperature that is typical of the monitoring pattern. - Page 60 Operating Manual Calibration From the user calibration menu, select ‘CH4 Zero’ to display the ‘CH4 Zero menu’. Bottled N2 < Pumped Air Screen 28 – CH Zero menu Select the ‘Bottled N2’ option in the menu using the key to display an instruction to connect the gas.
- Page 61 User Calibration Explained section of this manual. Alternatively, contact your local distributor, or our technical support team at Geotech on +44(0)1926 338111 or email technical@geotech.co.uk. Once the tubing has been reconnected, press the key to exit to the ‘user calibration menu’;...
-
Page 62: Detailed Instructions For User Zero In Air
Flow Chart 2 – CH4 user zero calibration (see page 65). Note: If the BIOGAS 300 does not have a system pump (see annotation 8 Figure 2 – BIOGAS 300 internal components) the user zero calibration will fail. - Page 63 Operating Manual Calibration can be attached and routed to a location if required). Press the key when ready to begin the zeroing countdown. 0.5% 179s to wait Screen 39 – CH zeroing Allow the system to count down to zero seconds in order to obtain a good zero calibration.
-
Page 64: Simple User Zero Calibration Instructions - Flow Chart
User Calibration Explained section of this manual. Alternatively, contact your local distributor, or our technical support team at Geotech on +44(0)1926 338111 or email technical@geotech.co.uk. Once the inline PTFE filter has been reconnected, press the key to exit to the ‘user calibration menu’; see Screen 36 –... - Page 65 Operating Manual Calibration Start Ensure Set-up Select ‘User inlet valve Press ‘Menu’ equipment Calibration’ is closed or Air zero Press to Select ‘CH Zero’ calibration? acknowledge Investigate Press to Select ‘Bottled Select ‘Pumped / rectify N2’ Air’ acknowledge issue Connect N gas inlet port...
-
Page 66: Ch 4 User Span Calibration
Operating Manual Calibration User Span Calibration Geotech recommends that a user span calibration be carried out following a user zero. In order to achieve the best accuracy, we recommend that users should select the correct calibration gas for the expected gas levels on their particular application. - Page 67 Attach gas to module gas press inlet – Screen 48 – Connect gas instruction Ensure the gas bottle is connected to the gas inlet of the BIOGAS 300 module (see annotation 10 on Physical Characteristics of the Module) and open the regulator to start flowing gas.
- Page 68 Screen 53 – CH span error Following the confirmation messages or continuing after an error, the operator will be prompted to disconnect the gas bottle and reconnect the BIOGAS 300 module tubing (follow Disconnecting a Gas Bottle from the BIOGAS 300 System).
-
Page 69: Simple User Span Calibration Instructions - Flow Chart
User Calibration Explained section of this operating manual. Alternatively, contact your local distributor, or our technical support team at Geotech on +44(0)1926 338111 or email technical@geotech.co.uk. Once the tubing has been reconnected, press the key to exit to the ‘user calibration menu’... - Page 70 Operating Manual Calibration Start Ensure Set-up Select ‘User inlet valve Press ‘Menu’ equipment Calibration’ is closed Connect gas Input gas Press to Select ‘CH bottle to gas concentration – press Span’ acknowledge inlet port Open Investigate regulator to / rectify flow gas issue...
-
Page 71: Connecting A Gas Bottle To The Biogas 300 System
338111 or email technical@geotech.co.uk to arrange a site visit. (Please note a charge may be applicable.) This section explains how to connect a gas bottle to the BIOGAS 300 module for a user calibration or gas check. Op. Image Instruction Ensure that the gas in valve is closed. - Page 72 Open the gas out valve. If your system exhausts to the process: No image Disconnect the tubing from the gas outlet port of the BIOGAS 300 module and attach a length of tube long enough to exhaust to a safe area.
-
Page 73: Disconnecting A Gas Bottle From The Biogas 300 System
338111 or email technical@geotech.co.uk to arrange a site visit. (Please note a charge may be applicable.) This section explains how to disconnect a gas bottle from the BIOGAS 300 module following a user calibration or gas check. Op. Image Instruction... - Page 74 No image Close the enclosure door. Warning Once the BIOGAS 300 tubing has been reconnected, it is recommended that a Pressure Test be completed to ensure that the system is leak free.
-
Page 75: Set-Up For Using Clean Ambient Air Zero
This section explains how to set-up the system so that clean ambient air can be purged through the BIOGAS 300 module for a user calibration or gas check. Note: This option can only be performed if the BIOGAS 300 system has an internal pump fitted. Image... - Page 76 Open the gas out valve. If your system exhausts to the process: No image Disconnect the tubing from the gas outlet port of the BIOGAS 300 module and attach a length of tube long enough to exhaust to a safe area.
-
Page 77: Set-Up Following Clean Ambient Air Zero
338111 or email technical@geotech.co.uk to arrange a site visit. (Please note a charge may be applicable.) This section explains how to reconnect the tubing in the BIOGAS 300 system following an air zero calibration. Image Instruction Ensure that the gas in valve is closed. - Page 78 Calibration Open the gas out valve. No image Close the enclosure door. Warning Once the BIOGAS 300 tubing has been reconnected, it is recommended that a Pressure Test be completed to ensure that the system is leak free. Page 78 of 113 Geotechnical Instruments (UK) Ltd OMBG300 –...
-
Page 79: Maintenance
Maintenance Schedule Note: This maintenance schedule is a minimum guide and dependent upon the application and usage of the BIOGAS 300 system, may need to be adapted accordingly. As a minimum, Geotech recommend that each month the following be... - Page 80 Note: If you suspect the BIOGAS 300 system to have been damaged and are unsure of the consequences of this, please contact your local distributor, or our technical support team at Geotech on +44(0)1926 338111 or email technical@geotech.co.uk.
-
Page 81: Biogas 300 Consumable Products
Operating Manual Maintenance BIOGAS 300 Consumable Products Optional replacement parts may be purchased for the BIOGAS 300 from your local distributor or Geotech directly. Please refer to our website (www.geotechuk.com) for further details on pricing and how to order: Description... -
Page 82: Emptying The Catchpot
BG300.S5 pack Emptying the Catchpot Warning Mains voltages are present within the BIOGAS 300 system and great care needs to be observed. If there is any uncertainty, seek advice from a professional. Alternatively, contact your local distributor, or our technical support team at Geotech on +44(0)1926 338111 or email technical@geotech.co.uk... - Page 83 Operating Manual Maintenance Open the drain valve to allow liquid to empty from the catchpot. Warning The catchpot can hold approximately 100ml of liquid. Dependent upon the application the liquid removed may be contaminated and should be discharged to an area where it is safe to do so.
- Page 84 Operating Manual Maintenance No image Close the enclosure and turn the power to the system back on. Warning Once all maintenance is completed, it is recommended that a Pressure Test be completed to ensure that the system is leak free. Page 84 of 113 Geotechnical Instruments (UK) Ltd OMBG300 –...
-
Page 85: Replacing The Catchpot Filter
The coalescing catchpot filter should be replaced if showing signs of contamination or saturated with liquid. Failure to replace the filter will result in the gas flow being restricted or blocked to the BIOGAS 300 module. In addition, it will cause a flow fail error. - Page 86 Operating Manual Maintenance Disconnect the gas in and gas out tubes from the BIOGAS 300 module. Remove the catchpot from its clip. Using a 10mm spanner, remove the tubing from the catchpot base. Note: Keep the compression fitting safe.
- Page 87 Operating Manual Maintenance Unscrew the filter stop from underneath the filter. Note: Keep the filter stop safe. Remove the coalescing filter from the threaded bar and replace with new. Replace the filter stop and tighten into place. Reattach the catchpot base and clear plastic tube assembly to the catchpot top and tighten into place.
- Page 88 Operating Manual Maintenance Attach the tubing to the fitting on the catchpot base and tighten the compression fitting using a 10mm spanner. Warning It is critical that the connections are fully secured to ensure that no gas leaks in to the main enclosure. Fit the catchpot back in to its clip.
-
Page 89: Replacing The Inline Ptfe Filter
The inline PTFE filter should be replaced if showing signs of contamination or saturated with liquid. Failure to replace the filter will result in the gas flow being restricted or blocked to the BIOGAS 300 module. In addition, it will cause a flow fail error. - Page 90 Operating Manual Maintenance Rotate filter anti-clockwise and remove filter from the top fitting. Attach a new inline PTFE filter to the top fitting by rotating clockwise. Attach the remaining tubing and fitting to the inline PTFE filter by turning clockwise. Warning It is critical that the connections are fully secured to ensure that no gas leaks in to the main enclosure.
-
Page 91: Pressure Test
Connect a length of tubing to the ‘GAS INLET’ line of the BIOGAS 300 system. Fit a t-piece to the tubing. One end of this t-piece should go to the pressure gauge. -
Page 92: Pressure Test
Operating Manual Maintenance Figure 11 – Pressure test equipment set-up Pressure Test The system does not need to be powered on to perform this test. Ensure the gas in and gas out ball valves are open and the drain valve is closed. -
Page 93: Cleaning And Decontamination
The enclosure can be cleaned externally using a mild soapy water and non-abrasive cloth. Should the need arise for the BIOGAS 300 module to be returned for service, it is the responsibility of the owner to ensure that the module has been decontaminated or that Geotech has been made aware of any contaminants that may be present, prior to it being returned. -
Page 94: Service
It is recommended that only qualified engineers service the BIOGAS 300 module. Failure to observe this will result in the warranty becoming invalid. To determine when your BIOGAS 300 module is due for a service, refer to the Information section of this operating manual. - Page 95 Disconnect the 4-way connector block. Disconnect the 10-way connector block. Disconnect the gas in and gas out tubes from the BIOGAS 300 module. Page 95 of 113 Geotechnical Instruments (UK) Ltd OMBG300 – Iss.03...
- Page 96 Warning Excessive tightening of the hexagonal bolts will cause the shoulder washers and/or the BIOGAS 300 module enclosure to crack. This will result in additional charges. Reconnect the gas in and gas out tubing to the BIOGAS 300 module.
- Page 97 No image Close the enclosure door and turn the power on to the system Warning Once the BIOGAS 300 tubing has been reconnected, it is recommended that a Pressure Test be completed to ensure that the system is leak free.
-
Page 98: Problem Solving
5v power supply. If it is not, check the mains fuse (fuse 1) and replace if necessary. If it is illuminating, check the fuse for the 5v supply to the BIOGAS 300 module (fuse 3) and replace if necessary (refer to section... -
Page 99: System Lock-Up
In addition, also check that no two nodes on the bus have the same slave address. If this is the case, the BIOGAS 300 slave address can be changed by referring to section Modbus Slave Add. (Address) in this operating manual. -
Page 100: Analogue Outputs Not Working
The PLC in the BIOGAS 300 is reading from module slave address ‘1’. Ensure that the Modbus slave address in the BIOGAS 300 module is set to ‘1’; see Modbus Slave Add. (Address). -
Page 101: Flow Fail
Screen 55 – Flow fail warning The first item to check is that the gas in and gas out ball valves (see annotation 1 on Figure 1 – BIOGAS 300 external components and annotation 14 on Figure 2 – BIOGAS 300 internal components) is in the open position when taking a reading. -
Page 102: Fuses
Pressure Test). retest the system. If after performing the above steps the problem is still present, please contact your local distributor, or our technical support team at Geotech on +44(0)1926 338111 or email technical@geotech.co.uk. Fuses Warning The use of alternative fuses may affect the safety of the apparatus. -
Page 103: User Calibration Explained
User Calibration Explained General User calibration is a means of optimising the performance of the BIOGAS 300 system to the current operating conditions such as temperature and pressure as well as correcting for analyser drift caused by the infrared source. -
Page 104: User Zero Calibration
CH previously, in order to ensure there are no remains of the target gas present. On the BIOGAS 300, this would result in performing a number of zero calibrations to purge the gas out, or flowing the gas whilst in the diagnostics screen. -
Page 105: Trouble Shooting
9.8.5.1 User Zero Calibration Failed Three possible reasons for this are that: The BIOGAS 300 module is trying to zero to a level which is outside the predetermined range set when the module was last factory calibrated The gas is not stable i.e. it is still purging out the measured gas. -
Page 106: Ch 4 Reading Low
Pressure Test section of this operating manual for instructions on how to pressure test the BIOGAS 300 system. The BIOGAS 300 has drifted since its calibration and may be due a user calibration; see section Calibration of this operating manual for further information. -
Page 107: Biogas 300 Warranty Terms And Conditions
This includes a Geotech sales order, invoice, or delivery note. all warranty repairs can only be carried out by Geotech or its authorised agents. In certain circumstances, permission may be granted by Geotech for the owner to replace a supplied part under warranty. - Page 108 The BIOGAS 300 module has been opened, unless by Geotech approved service centres (where applicable). The BIOGAS 300 system has been opened in poor weather conditions that have resulted in damage to any of its components. The equipment has been stored or installed outside of the operating range and environmental conditions determined in the operating manual.
-
Page 109: Weee Compliance
Geotech is registered with the Environmental Agency as a producer and has joined a recycling scheme provider that manage and report on our electrical waste on our behalf. -
Page 110: Sample Certificate Of Calibration
Operating Manual Sample Certificate of Calibration Sample Certificate of Calibration A calibration certificate will be issued following a calibration during manufacture or service of the BIOGAS 300 module. Below is a sample certificate. Page 110 of 113 Geotechnical Instruments (UK) Ltd... -
Page 111: Declaration Of Conformity
CV31 3JR ENGLAND Product: BIOGAS 300 Type of equipment: Entry level fixed system biogas analyser for CH4 monitoring. The BIOGAS 300 described above is in conformity with the relevant Union harmonisation legislation: 2014/30/EU: Electromagnetic capability (EMC) EN 50270:2006 2014/35/EU: Low Voltage Directive ... -
Page 112: Glossary Of Terms
Term Definition Air purge Process used to clear out gas from the tubing within the BIOGAS 300 system. Used as part of a user zero in air. Baro The atmospheric pressure at the given location. Measured in milli bar (mb/mbar). - Page 113 Examples include wool and PVC. Pump Used to draw the gas sample from the monitoring point to the BIOGAS 300. Reference channel An infrared channel that has no sensitivity to the gas of interest that is used as a baseline for the CH absorption.
Need help?
Do you have a question about the Biogas 300 and is the answer not in the manual?
Questions and answers