
Related Manuals for Beretta Power Plus Box 1003 P INT


Summary of Contents for Beretta Power Plus Box 1003 P INT
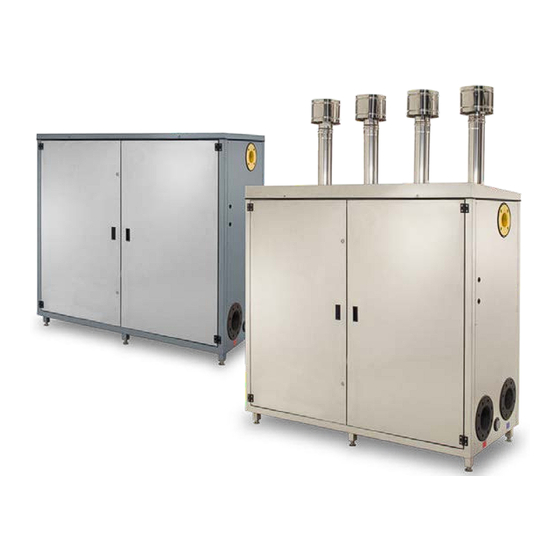
- Page 1 Installation Manual Power Plus Box 1002-1003-1004 P INT-EXT CONDENSING Installation Manual...
-
Page 2: Table Of Contents
INSTALLATION . . . . . . . . . . . . . . . . . . . . . . . . . 8 Power Plus Box 1003 P INT ERP 20107472 Product packaging and identification. -
Page 3: General Information
GENERAL INFORMATION part to be kept, marking the beginning of the period of guarantee at the terms and conditions specified on the relative slip.The appliance in its original packing Dear Customer, may be exposed to temperatures between 4°C and congratulations on your choice and thank you for placing 40°C. -
Page 4: Technical Features
TECHNICAL FEATURES Children and people with disabilities or without expe- rience and specific knowledge are forbidden to use the heating unit unless they are assisted by a qual- ified person responsible for their safety.It is forbid- 3 .1 Main features den to use electrical devices or equipment, such as switches, appliances, etc. -
Page 5: Advantages
3 .2 Advantages The combustion system includes: - gas electro valve in B+C class for each thermal ele- - Totally pre-mixed micro-flame jet burner; ment, with gas flux pneumatic compensation accord- - condensing stainless steel exchanger, with efficiency ing to the inlet air flow ( air/gas 1:1 ratio); up to 109% (see Figure 1);... - Page 6 EXHAUST FLUE DUCT COMBUSTIBLE SYSTEM INLET SYSTEM OUTLET CONDENSATE OUTLET Figure 2 Heat exchanger Water return manifold Burner Gas manifold Pump (or 2-way valve) Gas pipe Smoke-exhaust flue non-return valve Condensate drain manifold Condensate drainpipe Venturi tubes Flue Manifold Gas valve Exhaust flue duct Gas cock Water flow manifold...
- Page 7 SYSTEM COMPONENTS Figure 4 Frame Ignition electrode Control panel Automatic vent valve Exchanger Safety thermostat Air inlet pipe Gas cock Venturi tubes Return detection tap Flow probe Pump (or 2-way valve) Exhaust flue duct Unit Switch Gas manifold Return probe Water flow manifold Exhaust flue probe Condensate manifold...
-
Page 8: Installation
INSTALLATION - Efficiency according to 92/42/EEC Directive (η) - Max pressure and temperature (Pms) - Primary system (T) - NOx class (NOx) heating units must be in- Power Plus Box P INT-EXT stalled in conformity to the latest provisions of the law and standards in force concerning heating units, condensing boilers and/or other applicable regulato- ry provisions. -
Page 9: Water Connections
4 .3 Water connections If the old generator is not present or available, use a pump to circulate the water + additive through the system for thermal modules are made up of Power Plus Box P INT-EXT about 10 days and perform a final washing as described in 2, 3 or 4 thermal elements which are common to all the boil- the previous paragraph. -
Page 10: Condensate Outlet
4 .6 Condensate outlet 4 .7 Water circuit The condensate water produced by Power Plus Box P INT- WORKING PRESSURE a normal running conditions is evacuated into a spe- The maximum working pressure of the boiler is 6 bar (600 cial manifold. -
Page 11: Installation Diagrams
If you decide to bring together in one manifold the dis- charges of each unit, the diameter of the pipe to be used for one or two units Power Plus Box P INT-EXT series con- nected in series is Ø200 mm (see Figure 8). For cascade installations where there are more than two machines the diameter of the exhaust manifold must be properly sizing, or simply connect up to two Power Plus Box P INT-EXT using... -
Page 12: Electrical System
ELECTRICAL SYSTEM Always refer to the data given in the diagrams in this hand- book for operations of an electrical nature. Remember that is not to be held liable for any dam- ages caused by ignoring the information given in the wiring 6 .1 Power supply diagrams of this manual. -
Page 13: Master Board Connection
6 .2 .2 Master board connection Follow the instructions reported on the previous paragraph in order to connect the Master Board independently to the electricity network. The Master Board needs to be connect- ed to the related equipment (or to the equipment battery) by means of a special Bus connection with bi-polar cable (cable not supplied). -
Page 14: Connection To Thermoregulators
6 .2 .3 Connection to thermoregulators For example, by connecting the low temperature circula- tor to a timer and/or external room thermostat the electrical heating units are equipped with Power Plus Box P INT-EXT installation will be the one shown in Figure 18. By this sys- an extremely versatile control and operating system, able tem is possible to power on circulators (external devices) to operate three independent systems functioning at dif-... - Page 15 Initials Jumper N. Description Flow temp. probe J11 (1-2) (HT) Water tank temp. J11 (3-4) Probe Flow temp. probe J11 (5-6) (LT) J11 (7-8) External temp. Probe Room thermostat J12 (9-10) (HT) J12 (11-12) Room thermostat (LT) 0-10V analogic J12 (13-14) device J12 (15-17) Remote control...
-
Page 16: Frost Protection
6 .2 .7 Frost protection Qualified personnel only may work on the electrical system and in compliance to provisions of the law, The heating unit electronic control includes a frost protec- with particular attention to rules on safety. tion function. When the flow temperature sinks to below a The following procedure must be adopted to enable the minimum value, the burners start working at minimum pow- “Emergency”... -
Page 17: Cascade Installation
Figure 22 Figure 21 6 .5 Position of the flow probe 6 .4 Cascade installation Each unit upper water manifold is equipped with two pock- ets where the temperature probe has to be inserted. The latter probe continuously checks the flow temperature of 6 .4 .1 Connection to mains the heating circuit. -
Page 18: First Operating
FIRST OPERATING JUMPER J10 SLAVE AD- DRESS To complete the start-up of the boiler, the following opera- tions are necessary, that should only be performed by an authorized Service - verification of the installation; - slave board setting - combustion analysis. Following table shows the possible combinations of the 7 .1 Slave board setting jumpers (J17) we have the settings for the maximum (15) -
Page 19: Gas Valve Calibration
Figure 25 7 .2 Gas valve calibration Gas valve calibration jobs must be done by the Tech- nical Assistance Centre authorized by only. The procedure for calibrating the gas valve is given here below: - place the exhaust flue probe of the combustion ana- lyzer into the socket on the clapet;... -
Page 20: Use And Adjustment
USE AND ADJUSTMENT The control panel was designed to enable the user to enter the various user modes; each one of these has a set of corresponding functions, activated by pressing a button or combination of two buttons pressed together. Furthermore, 8 .1 Control panel: description each button has a specific function depending on the se- lected user mode. -
Page 21: Display Mode
8 .2 Display mode The red (error) LED turns on in the case of faults that involve the permanent block of a heating element (normal operation can be reset by pressing the Master or Slave reset button). The green (on) LED indicates the presence of the electric power supply. The 3 digits with seven segments display the system statuses: SYSTEM STATUS DISPLAY... -
Page 22: Changing The User Parameters
8 .4 Changing the user parameters Pressing displays the following values in succession: - manifold delivery temperature T1 - DHW temperature T3 - low temperature circuit delivery temperature T6. To change the relative setpoints: - press the “Set/esc” button: the relative value will appear, the two digits on the right will flash - if the value should not be changed, press ”Set/esc”... -
Page 23: Installer Programming Mode
The following values for each single unit can be visualized with POS. DIMENSIONS DISPLAY Flow temperature (e.g. 70° C) Return temperature (e.g. 50° C) Exhaust flue temperature (e.g. 60° C) Ionization current (index from 0 to 99). E.g. fig. Ionization current index 44. Fan PWM signal (%). -
Page 24: Test Mode
8 .7 Test mode In test mode it is possible to generate a high temperature heating demand at maximum power and at minimum power. All system fans must be activated. If the installer turns off the switch for some Slaves, the others, connected to the Master, must continue to operate. -
Page 25: Setting Functioning Parameters
SETTING FUNCTIONING PARAMETERS The heating functions can be set for the high temperature, low temperature and DHW circuits based on the system re- quirements by setting the functional parameters. The first three parameters can be accessed on the user level. The next three require a password (“22”, see the "INSTALL- ER PROGRAMMING mode"... -
Page 26: Setting The Dhw Parameters
Setpoint_T_CH_Low Low temperature circuit setpoint (parameter 3) If the "fixed point" operating mode is set (par. 22=CH_type_low=0), it is the target temperature. If the "climatic control" operating mode is set (par. 22=1) , it is the maximum target temperature with minimum outdoor temperature (T_out_min=par. -
Page 27: Heat Control Setting
DHW_Priority With the high temperature circuit attenuation parameter, Par. 21≠0, the high temperature thermostat contact is ig- DHW priority (parameter 9) nored and a heat demand is present for the high tempera- 0 = Shifting priority A ture circuit when: The purpose of shifting priority function A is that the system Manifold temperature <=Setpoint –... - Page 28 The burner is on when: Summer Mode Manifold temperature <=Setpoint – ignition hysteresis. Summer function (parameter 38.) Ignition hysteresis can be set, CH_Low_hyst_on = Par. 26, The Summer Mode function is used to deactivate requests preset to 5°C, can be set between 0 and 20°C. received by the High Temperature and Low Temperature The Master control unit converts the heat demand into pow- circuits and from the zones when the outside temperature,...
- Page 29 System power modulation is controlled by a PID regulator, Low load which controls the manifold temperature and the setpoint The low load function prevents burner ignition and shut off is that of the active circuit (high or low temperature circuit in the case of a low heat demand.
- Page 30 The burner ignited when: - Delivery temp. ≤ Setpoint_ch_high (Par.1) – Ch_high_ hist_on (Par.19) - (Delivery temp. ≤ Setpoint_ch_low (Par.3) – Ch_low_ hist_on (Par.26)) The burner shuts off when: - Delivery temp. > Setpoint_ch_high (Par.1) + Ch_ high_hist_off (Par.20) - (Delivery temp. > Setpoint_ch_low (Par.3) + Ch_low_ hist_off (Par.27)) MIX VALVE MANAGEMENT Voltage (Volt)
- Page 31 Mix delivery temperature (°C) default Par. 31 = 10 Fig. 34 Safety functions of the Slave cards If the delivery temperature > 90°C for 5s, the slave card is blocked (no. 46). If the return temperature > 80°C for 5s, the slave card is blocked (no.
-
Page 32: List Of Parameters
10 LIST OF PARAMETERS The list of parameters for Power Plus Box P INT-EXT is given here below. The user may only alter the first three parameters, whilst the Technical Assistance Centre must be called in for the others. User parameters Factory Lower Upper... - Page 33 Factory Lower Upper Parameter name Description setting limit limit CH1 max. Temp. 80°C 10°C 80°C Max. settable value for high system CH1 min. Temp. 50°C 10°C Par.1 Min temp. value high system (at max. external T.). Burner re-ignites after said differential. CH1 ON diff.
-
Page 34: Error List
11 ERROR LIST A and E type errors possibly encountered with Power Plus Box P INT-EXT are given in the tables below. In this sense it should be specified that an E-type error (volatile error) is a fault which automatically disappears as soon as the fault is resolved;... - Page 35 No. on the PC Cause Troubleshooting Internal error Replace the Slave card. Internal software error Press the rest button. Internal error Replace the Slave card. The limit thermostat contact is Connector disconnected or defective. open with the burner off Limit thermostat defective. Delivery sensor error due to Check that the flow rate in each unit’s water circuit is exceeding the limit temp.
-
Page 36: Wiring Diagrams
12 WIRING DIAGRAMS... - Page 37 Valvola 2 vie / Circolatore...
-
Page 38: Technical Specifications
13 TECHNICAL SPECIFICATIONS Detail 1002 P INT-EXT 1003 P INT-EXT 1004 P INT-EXT Certifications Boiler typology B23, B53, B53p, C13, C33, C53, C63 CE Certification Nr. 0085CL0333 Number of heat exchangers 2 (x128 kW) 3 (x128 kW) 4 (x128 kW) Overall dimensions and Connections Height x Width x Depth 1550x900x750... - Page 39 1002 P 1003 P 1004 P Detail INT-EXT INT-EXT INT-EXT Maximum rated heat input Minimum rated heat input 25,6 25,6 25,6 Domestic hot water maximum rated thermal input (80-60) Domestic hot water minimum rated thermal input (80-60) PARAMETER Seasonal heating energy efficiency class Water heating energy efficiency class Rated input Prated...
-
Page 40: Water In Central Heating Systems
14 WATER IN CENTRAL HEATING General note on water used to top up systems: - If softened water is used to top up a system, 8 weeks SYSTEMS of functioning after topping up, verify that the water in the system respects the above limits, in particular for INTRODUCTION electrical conductivity. - Page 41 3.2 Stray current corrosion Corrosion from stray currents can occur due to the differ- ing electrical potentials between water in the boiler and the metallic mass of the boiler or piping. This process leaves unmistakeable traces i.e. small regular conical holes. All metallic parts should be grounded by an efficient earth cable for this reason.
- Page 44 Commercial Offices: Via Risorgimento, 23 A 23900 - Lecco www.berettaboilers.com Beretta reserves the right to modify the characteristics and specifications given in this publication at any time and without prior notice as part of its policy of continuous product improvement.
Need help?
Do you have a question about the Power Plus Box 1003 P INT and is the answer not in the manual?
Questions and answers