
Related Manuals for Furuno WR-2100


Summary of Contents for Furuno WR-2100
- Page 1 SSE-14-0022_17 OPERATOR'S MANUAL MODEL: Compact X-band Dual Polarimetric Doppler Weather Radar WR-2100 TYPE: www.furuno.com...
-
Page 2: Important Notices
• The operator of this equipment must read and follow the descriptions in this manual. Wrong operation or maintenance can cancel the warranty or cause injury. • Do not copy any part of this manual without written permission from FURUNO. • If this manual is lost or worn, contact your dealer about replacement. -
Page 3: Safety Instructions
SSE-14-0022_17 SAFETY INSTRUCTIONS The user and installer must read the appropriate safety instructions before attempting to install or operate the equipment. Indicates a hazardous situation which, if not avoided, will DANGER result in death or serious injury. Indicates a potentially hazardous situation which, if not WARNING avoided, could result in death or serious injury. - Page 4 SSE-14-0022_17 Use only the specified power cable. Fire or damage to the equipment can result if a different cable is used. Use the power supply grounded certainly. Electrical shock or defect of operation can occur. When a thunderbolt is expected, do not approach a system or do not touch a hand.
-
Page 5: Table Of Contents
SSE-14-0022_17 CONTENTS: IMPORTANT NOTICES ........i 9. Menu Tree ........... 36 SAFETY INSTRUCTIONS ......... ii 10. DPU setting Outline of System ..........v 10.1. TeamViewer access password ..38 System Configuration ........vi 10.2. Trademarks ........39 1. Operating Procedure of System 10.3. -
Page 6: Outline Of System
SSE-14-0022_17 Outline of System This system observes the development of rain clouds, outputs the strength of precipitation, the speed of rain clouds (Doppler speed), and observes phenomena of rainfall. Features: 1. While installing antenna on a rooftop of building in urban area, it must be installed in the safety area covered by lightning rod based on JIS A 4201, JIS Z 9290 and IEC 62305. -
Page 7: System Configuration
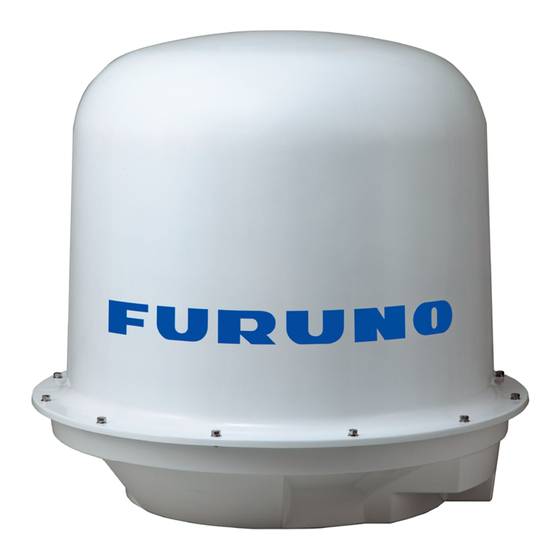
SSE-14-0022_17 System Configuration The observation system consists of Antenna Unit (radome), Signal Processing Unit (storage box), and Display Unit (indoor unit) as shown below. 1) Antenna Unit (radome) The Antenna is stored in the radome turning and radiating the radio waves. The radiated waves are backscattered by precipitation particles on the propagation path, return to the antenna, and are processed by RF converter to transfer the signals to Signal Processing Unit 2) Signal Processing Unit (storage box) -
Page 8: Operating Procedure Of System
SSE-14-0022_17 1. Operating Procedure of System 1.1. Startup the Radar System (1) Turn on the circuit breaker of the Antenna Unit and the Signal Processing Unit (storage box) The Antenna Unit and the Signal Processing Unit are in the waiting status. (2) Turn on the power of the Display Unit, and place the main outlet to supply a power for the Antenna Unit and the Signal Processing Unit (3) Start the observation from the menu of the Display Unit... -
Page 9: Startup The Display Unit
SSE-14-0022_17 1.2. Startup the Display Unit 1) Connect AC power supply cord from electrical outlet to DPU, and turn ON the power. (Turn ON the power of SPU before turn ON the power of DPU) 2) Connect LAN cable from SPU to DPU, and setup IP address for SPU. -
Page 10: Shutdown The Radar System
If turned off the circuit breaker in the Signal Processing Unit, the radar system will also be off. 1) Case of Windows version installed in PXI *Please ask either Windows or RT version from Furuno if you are not sure. Process of the Display Unit operation is necessary when shut down the Signal Processing Unit. -
Page 11: Reboot The Radar System
SSE-14-0022_17 (5) Use [Search programs and files] in a start menu and to enter “cmd” in the blank space. then press [Enter] indicate “Command prompt” on a screen. (6) Enter “shutdown /s /t 0” in a dialog box of command prompt, and then press [Enter]. (7) Confirm a lamp inside the PXI (inside the Signal Processing Unit). -
Page 12: Display Unit Configuration
SSE-14-0022_17 2. Display Unit Configuration 2.1. Configuration Signal Processing Unit (Storage box) Signal Processing Unit 192.168.1.100(LAN) LAN Cable (Cat5e or better) 192.168.1.5 (LAN) Display Unit USB-LAN adapter (USB3.0) LAN Cable (Cat5e or better) Remote control via network... -
Page 13: Display Unit
SSE-14-0022_17 2.2. Display Unit The Display Unit receives output data from the Signal Processing Unit (hereinafter called as SPU) and displays the rainfall data in real time. Software name Display software RainMap.exe Specification Function OS: Windows® 8.1, 64bit Professional • Language displayed: English and Japanese Change from English to Japanese corresponding to the (default: English) language setting of Windows®... -
Page 14: How To Install Software
SSE-14-0022_17 Specification Function Data manipulation: • Saving of displayed data Save as a chronological order unit (Time based file name) • Play of displayed data Play from the specification file name. Data output: Output per 1 to 5minutes • Output of data file 2.3. -
Page 15: Operating Procedure Of Dpu
SSE-14-0022_17 3. Operating Procedure of DPU 3.1. Power up Turn on the power of DPU to start Windows®. User name: radar Password: radar 3.2. Startup screen The following screen will display during startup. Drawing area shows various images (Rainfall strength, etc.). 3.3. -
Page 16: Software Operation
SSE-14-0022_17 4. Software operation 4.1. RainMap operation File Menu bar Click the menu name to display each selected menu item. ・ File ・ Disp ・ Setting ・ Radar Operation Drawing area shows various images ・ Help (Rainfall strength, etc.). ・ Emer gency Stop File menu File play: Display the play screen of log data. -
Page 17: View Setting
SSE-14-0022_17 4.2. View setting 1) View Range [km] Setup an indication range. DataType Select an indication of the radar parameter. ・ Rain [mm/h]: Intensity of rainfall [mm/h] ・ Zhh [dBz]: Reflection factor of the horizontal polarimetric radar ・ Zhh_corr [dBz]: Corrected Zhh ・... - Page 18 SSE-14-0022_17 Meteorological parameters: - Reference information. 1. Weather radar equation. The particle distributed volume observes by: 2. General radar equation. The solid objects observe by: For more description: - Reflectivity factor Zh (dBZ): 1. In this filed, unit “dBZ” is used for reflectivity. The unit of Z is mm .
- Page 19 SSE-14-0022_17 2) Acquisition Notice: Turn “OFF” all the setting at first. Rec echo Turn ON or OFF a Log of echo data. Rec file type Select a log form of echo data. (dat (idx) / ZIP / dat (idx) + ZIP) Echo folder Setup a log folder of echo data.
- Page 20 SSE-14-0022_17 Left Top Longitude [deg] Setup the longitude of left top corner of Map Image. Right Bottom Latitude [deg] Setup the latitude of bottom right corner of Map Image. Right Bottom Longitude [deg] Setup the longitude of bottom right corner of Map Image. 4) Scan There are 5 scan patterns that could customize and save a setting.
- Page 21 SSE-14-0022_17 PPI elevation [deg] Setup an angle of antenna’s elevation during PPI mode. PPI azimuth rotation speed [rpm] Setup a rotation speed of azimuth in rotation per minutes (rpm). Parameters affect only to PPI mode. SPI operation mode Setup an elevation angle step and azimuth rotation speed. For example, when the setting is shown as below , antenna will rotate at 2.99, 4.99 and 6.99 degrees.
- Page 22 SSE-14-0022_17 HSQ setting elevation 0 – 31 [deg] Setup each elevation variation, up to 32 different values. It automatically sort in ascending order of elevation setting value. Menu Range PPI azimuth rotation speed 0.5 to 16.0rpm SRHI elevation 0.5 to 6.0rpm HSQ elevation movement azimuth rotation speed 0.5 to 16.0rpm HSQ elevation movement difference rotation speed...
- Page 23 SSE-14-0022_17 Scan description: Ending point to Ending point to observe elevation observe elevation Vertical Vertical direction direction Starting point to Starting point to observe elevation observe elevation Starting point to Ending point to Starting point to Ending point to observe azimuth observe azimuth observe azimuth observe azimuth...
- Page 24 SSE-14-0022_17 Ending point to Ending point to observe elevation observe elevation Vertical Vertical direction direction Starting point to Starting point to observe elevation observe elevation Ending point to Starting point to Starting point to Ending point to observe azimuth observe azimuth observe azimuth observe azimuth Horizontal...
-
Page 25: Help
SSE-14-0022_17 Figure 5: Outline of slice mode 4.3. Help Version Indicate the version of software and connecting devices. 4.4. Emergency Stop Stop motor Stop motor of radar and TX at once. -
Page 26: Rainfall Observation Operation
SSE-14-0022_17 4. 5. Rainfall observation operation 1) Start rainfall observation Conduct the setting of elevation angle of antenna, recording of data, and display data. Click [Connect] from pull-down menu of [Radar Operation]. It will indicate [Connect] on the bottom-left of screen when the Signal Processing Unit (SPU) and communication has been connected. - Page 27 SSE-14-0022_17 Click [TX] from pull-down menu of [Radar operation] . Warning If clicked [Yes], it will initialize the Do you really want to update the antenna operation setting? antenna and will indicate a message There is a difference between antenna setting value of ¥r¥nRainMap and as below.
- Page 28 SSE-14-0022_17 Start the operation of radar, and display the observed information on the screen. The recorded data is saving on a data storage device. 2) Stop rainfall observation Click [STBY] to stop the radar operation. Click [Disconnect] to close SPU.
-
Page 29: Rainplay Operation
SSE-14-0022_17 4.6. RainPlay operation RainPlay will indicate observed data after selecting [File play] on RainMap. It could also possible to use RainPlay.exe from “RainMap_RainPlay” folder on desktop even during RainMap is activating. 1) Start playing the Observation Data Click [File] on File menu bar, and select [File play..] * [File play..] cannot control while accessing with the Signal Processing Unit (SPU). - Page 30 SSE-14-0022_17 Setting Scale: Setup a distance of scale into a pop-up window of [Scale] Azimuth offset: Setup a degree of offset into a pop-up window of [Azimuth Offset] Disp Select: Select an indication of data type: - Rain: Intensity of rainfall - Zhh:...
- Page 31 SSE-14-0022_17 Play Start: Start playing a log data Stop: Stop playing Pause: Pause playing Fast Forward: Fast forward playing Rewind: Rewind playing Time display: Popup a setup windows Setup a time display [between 1000 - 10,000 ms] List view: Show a play list on the right screen Snapshot Main screen: Copy a main screen and select a place to save a screen...
-
Page 32: Log File Function
SSE-14-0022_17 4.7. Log file function 1) Log record: Log record folder will be created automatically in to RainMap folder and to save log data. [log] ・RainMap.log (Log file) ・YYYYMMDDhhmmss.dat (The configuration file which compressed (ZIP) the transmission start date and time is up to 1, 000 files) 2) Limit of Log file (RainMap.log): When a file of transmission start date and time is over 1,000 files, it will overwrite from the oldest file. -
Page 33: Precautions On Operation
SSE-14-0022_17 5. Precautions on operation 5.1. Data backup Because of no guarantee to the data integrity such as observation data, output file, etc., make sure to backup data to external hard disk drives. We shall have no responsibility for damages, data integrity, repair, and any other damages resulting from the data loss. -
Page 34: When Having Trouble
SSE-14-0022_17 6. When having trouble 6.1. How to reset the radar system Restart the radar system when the radar system is hanged up. 1. Open the door of Signal Processing Unit (storage box). 2. Press the reset button of PXI. 3. -
Page 35: Maintenance
SSE-14-0022_17 7. Maintenance 7.1. Troubleshooting STATE CONTENT/PROCEDURE Cannot turn the power on Make sure that the power cable has not loosened. Make sure that the contact of the power cable plug has not stained. Make sure that the power cable has not damaged. Make sure that the circuit breaker in the Signal Processing Unit is “ON”. -
Page 36: Output Data Format
SSE-14-0022_17 8. Output Data Format 8.1. Data file type 1 1) Record unit Write down a file to any folder in a computer in each setting cycle (e.g. 60 sec.) It is possible to set up a log folder. 2) Record file name Output files extension: csv Form: DATE_TIME_DATAKIND.csv (YYYYMMDD_HHMMSS_xx.csv). - Page 37 SSE-14-0022_17 Sample of Output Data:...
-
Page 38: Data File Type 2
SSE-14-0022_17 8.2. Data file type 2 1) Record unit Each scn file includes one scan data (e.g. one round in azimuth) which is stored in a capture folder specified in RainMap acquisition setting. 2) Record file name Note 1: (*1) is applied only for scn version 3. Note 2: scn version 3 is recorded under RainMap version 4.0 and later version. - Page 39 SSE-14-0022_17 Range Lower: 0 - 9999 Altitude[cm]= (Upper) x 10000+ (Lower) Antenna Altitude (Lower) unsigned short e.g. 123456[cm]=12 x 10000 +3456 e.g. 10.0 Antenna rotation speed (Azimuth) unsigned short (10 times level of [rpm]) e.g. 1600.0 PRF1 unsigned short (10 times level of [Hz]) e.g.
- Page 40 SSE-14-0022_17 Range: -3.00 - 180.00 Observation 100 times level of [deg] angularity Elevation signed short Horizontal: 0deg, Elevation: +, information Dip: - Observed data size e.g. 5402 [byte] unsigned short Range: 0 - 65535 Calculation formula N is a recording level. Range Rain[mm/h]= (N-32768)/100 Rain (Rainfall intensity)
-
Page 41: Data Size
SSE-14-0022_17 Range: 0 - 65535 Calculation formula N is a recording level. Range W (Doppler velocity width) W[m/s]= (N-1)/100 direction unsigned short data W Range: 0.00 - 655.34m/s mark Resolution: 0.01m/s N=0 is invalid bit0: Signal shading, bit1: Signal extinction, bit2: Clutter reference, Observed bit3 - 5:Ground clutter quantity... - Page 42 Figure 1. Basic volume scan The radar, WR-2100 will output the data files for each elevation angle. When use eight elevation angles, eight data files will be generated that will go up to 15.55784 MB, however it depends on settings.
-
Page 43: Menu Tree
SSE-14-0022_17 9. Menu Tree RainMap Menu [File] [File play] [Snapshot] [Exit] Menu [Disp] [SRHI screen] [90 degrees screen] [180 degrees screen] [Information Indication] Menu [Setting] [Setting menu] [View] [Acquisition] [Antenna] [Scan] Menu [Radar Operation] [Connect] [Disconnect] [TX] [STBY] Menu [Help] [Version] Menu [Emergency Stop] [Stop motor]... - Page 44 SSE-14-0022_17 RainPlay Menu [File] [File Play] [Print] [Main screen] [SRHI screen] [Exit] Menu [Setting] [Model] [Large] [Scale] [Small] [Azimuth Offset] [Rain] Menu [Disp] [Select] [View] [Zhh] [Ratio of transparency] [0%] [Zdr] [25%] [Kdp] [50%] [dp] [75%] [hv] [Map] [100%] [SRHI screen] [90 deg screen] [180 deg screen] [Invalid data area]...
-
Page 45: Dpu Setting
SSE-14-0022_17 10. DPU setting 10.1. TeamViewer access password The process of changing the password of the “Teamviewer” for remote access. Default factory setting is “root”. It is highly recommended to change the default password to reduce a security risk. 1. Open the panel of TeamViewer and click the option mark button on the right center, or Right click to the icon of TeamViewer in task bar and clicked [Option] from dropdown list of TeamViewer. -
Page 46: Trademarks
SSE-14-0022_17 10.2. Trademarks Windows is a registered trademark of Microsoft Corporation in the United States and/or other countries. 10.3. Security export control 1) This device will be applicable to export controlled goods of Japan. 2) Principle, export, sale, and transfer of foreign user list subjects established by the Japanese government, is prohibited. -
Page 47: Appendix
SSE-14-0022_17 APPENDIX 1. System diagram TX IF TX IF Rx IF H Rx IF H Rx IF V Rx IF V Dsub_25pin PXI SIG PXI SIG RJ45 RJ45 Dsub_9pin PXI SIG PXI SIG White POWER Black OUTLET F1 LINE Green Silver AC100~240V : Protective tube... - Page 48 SSE-14-0022_17 Dsub 9pin S-COM Dsub_9pin Dsub_9pin MOTOR CTRL Female Male BLACK ORANGE YELLOW GREEN S-COM BLUE Dsub_9pin ANT ANGLE Female BLACK ORANGE YELLOW GREEN BLUE Dsub 25pin Dsub_9pin RF CTRL Female BLACK ORANGE Dsub_25pin YELLOW Male GREEN SPU-TX-P BLUE SPU-TX-N SPU-RX-P SPU-RX-N Dsub_25pin...
- Page 49 SSE-14-0022_17 ・FURUNO Authorized Distributor/Dealer FURUNO ELECTRIC CO.,LTD 9-52 Ashihara-cho, Nishinomiya, 662-8580, Japan Issued: March 2014 Printed in Japan All rights reserved Last revised: June 2018...
Need help?
Do you have a question about the WR-2100 and is the answer not in the manual?
Questions and answers