Table of Contents
Advertisement
50TCQ 07 units for installation in the United States contain use of Carrier's Staged Air Volume (SAV™) 2-speed
indoor fan control system. This complies with the U.S. Department of Energy (DOE) efficiency standard
of 2018.
50TCQ 07 units for installation outside the United States may or may not contain use of the SAV 2-speed
indoor fan control system, as they are not required to comply with the U.S. Department of Energy (DOE)
efficiency standard of 2018.
For specific details on operation of the Carrier SAV 2-speed indoor fan system, refer to the Variable Frequency
Drive (VFD) Factory-Installed Option 2-Speed Motor Control Installation, Setup and Troubleshooting manual.
NOTE: Read the entire instruction manual before starting the
installation.
CONTENTS
SAFETY CONSIDERATIONS . . . . . . . . . . . . . . . . . . 2
GENERAL . . . . . . . . . . . . . . . . . . . . . . . . . . . . . . . . . . 2
Rated Indoor Airflow (cfm) . . . . . . . . . . . . . . . . . . . . 2
Pre-Installation . . . . . . . . . . . . . . . . . . . . . . . . . . . . . 2
REFRIGERATION SYSTEM COMPONENTS . . . . . . 6
Reversing Valve and Check Valve Position . . . . . . 6
INSTALLATION . . . . . . . . . . . . . . . . . . . . . . . . . . . . . 8
Jobsite Survey . . . . . . . . . . . . . . . . . . . . . . . . . . . . . . 8
Step 1 - Plan for Unit Location . . . . . . . . . . . . . . . 8
Step 3 - Inspect Unit . . . . . . . . . . . . . . . . . . . . . . . . 8
Step 4 - Provide Unit Support . . . . . . . . . . . . . . . . 8
Step 5 - Field Fabricate Ductwork . . . . . . . . . . . . . 10
Step 6 - Rig and Place Unit . . . . . . . . . . . . . . . . . . 10
Ductwork (when required) . . . . . . . . . . . . . . . . . . 11
Step 8 - Install Outside Air Hood . . . . . . . . . . . . . . 12
Step 9 - Units with Hinged Panels Only . . . . . . . . 13
Step 11 - Make Electrical Connections . . . . . . . . . 14
Manufacturer reserves the right to discontinue, or change at any time, specifications or designs without notice and without incurring obligations.
Catalog No. 04-53500215-01
Installation Instructions
Printed in U.S.A.
Form 50TCQ-7-01SI
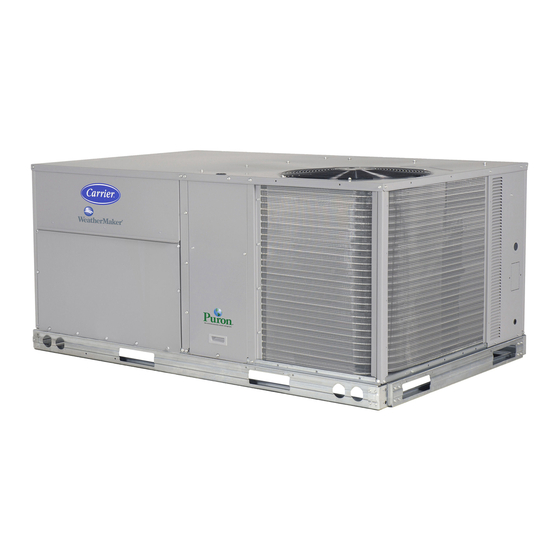
Single Package Rooftop with Heat Pump
with Puron
FUSED DISCONNECT
• ALL UNITS
Central Terminal Board . . . . . . . . . . . . . . . . . . . . . . 20
Commercial Defrost Control . . . . . . . . . . . . . . . . . . 20
Electric Heaters . . . . . . . . . . . . . . . . . . . . . . . . . . . . 21
Economi$er® X (Factory Option) . . . . . . . . . . . . . . 23
PremierLink™ (Factory Option) . . . . . . . . . . . . . . . 37
RTU-Open Controller System (Factory-Installed
Option) . . . . . . . . . . . . . . . . . . . . . . . . . . . . . . . . . 37
Smoke Detectors . . . . . . . . . . . . . . . . . . . . . . . . . . . 37
Step 12 - Adjust Factory-Installed Options . . . . . 39
Step 13 - Install Accessories . . . . . . . . . . . . . . . . 39
Step 14 - Check Belt Tension . . . . . . . . . . . . . . . . 39
START-UP CHECKLIST . . . . . . . . . . . . . . . . . . . . CL-1
Pg 1
WeatherMaker
50TCQ07
®
(R-410A) Refrigerant
12-18
Replaces: 50TCQ-4-7-02SI
®
Advertisement
Table of Contents
Troubleshooting

Related Manuals for Carrier WeatherMaker 50TCQ07


Summary of Contents for Carrier WeatherMaker 50TCQ07
-
Page 1: Table Of Contents
® (R-410A) Refrigerant Installation Instructions 50TCQ 07 units for installation in the United States contain use of Carrier's Staged Air Volume (SAV™) 2-speed indoor fan control system. This complies with the U.S. Department of Energy (DOE) efficiency standard of 2018. -
Page 2: Safety Considerations
SAFETY CONSIDERATIONS WARNING Improper installation, adjustment, alteration, service, maintenance, or use can cause explosion, fire, electrical shock PERSONAL INJURY AND ENVIRONMENTAL HAZARD or other conditions which may cause personal injury or Failure to follow this warning could cause personal injury property damage. - Page 3 9 10 11 12 13 14 15 16 17 18 – C Q A Packaging and Seismic Compliant 0 = Standard 1 = LTL Unit/Series/Model 50TC – Packaged Rooftop Electrical Options A = None C = Non-Fused Disconnect D = Thru-The-Base Connections Q = Heat Pump F = Non-Fused Disconnect and Thru-The-Base Connections...
- Page 4 Fig. 2 — Unit Dimensional Drawing...
- Page 5 Fig. 2 — Unit Dimensional Drawing (cont)
-
Page 6: Refrigeration System Components
LOCATION DIMENSION CONDITION 48-in. (1219 mm) Unit disconnect is mounted on panel 18-in. (457 mm) No disconnect, convenience outlet option 18-in. (457 mm) Recommended service clearance 12-in. (305 mm) Minimum clearance 42-in. (1067 mm) Surface behind servicer is grounded (e.g., metal, masonry wall) 36-in. - Page 7 Table 2 — Cooling Mode (each circuit) Table 4 — Defrost Mode COMPONENT STATUS/POSITION COMPONENT STATUS/POSITION Reversing Valve Energized Defrost Thermostat Closed Check Valve A Closed Outdoor Fan(s) Check Valve B Open Reversing Valve Energized Check Valve C Closed Check Valve A Closed Check Valve D Open...
-
Page 8: Installation
CURB-MOUNTED INSTALLATION Table 5 — Operating Weights Install curb Install field-fabricated ductwork inside curb 50TCQA UNITS LB (KG) Install accessory thru-base service connection package Component (affects curb and unit) (refer to accessory installation Base Unit 630 (286) instructions for details) Economizer Prepare bottom condensate drain connection to suit Vertical... - Page 9 Fig. 6 — Roof Curb Details...
-
Page 10: Slab Mount (Horizontal Units Only)
The curb should be level. This is necessary for unit drain to dimensions for the first 18-in. (458 mm) of duct length from function properly. Unit leveling tolerances are show in Fig. 7. the unit basepan. Refer to Accessory Roof Curb Installation Instructions for ad- Ducts passing through unconditioned spaces must be insulated ditional information as required. -
Page 11: Positioning On Curb
DIMENSIONS MAX WEIGHT UNIT 50TCQA07 74.38 1889 37.25 41.38 1051 NOTES: 1. Dimensions in () are in millimeters. 2. Hook rigging shackles through holes in base rail, as shown in detail “A.” Holes in base rails are centered around the unit’s center of gravity. Use wooden top to prevent rigging straps from damaging unit. -
Page 12: Step 8 - Install Outside Air Hood
NOTCHES NOTCHES FILTER ACCESS PANEL BASEPAN COMPRESSOR ACCESS PANEL OUTDOOR-AIR OPENING AND INDOOR COIL ACCESS PANEL Fig. 10 — Location of Notches Fig. 12 — Typical Access Panel Locations SCREWS Locate the (2) screws holding the metal tray to the basepan and remove. -
Page 13: Step 9 - Units With Hinged Panels Only
PANEL DIVIDER OUTSIDE HOOD CLEANABLE ALUMINUM FILTER FILTER PANEL CAULK HERE BAROMETRIC INDOOR INDOOR RELIEF COIL COIL FILTER ACCESS ACCESS CLIP PANEL PANEL Fig. 16 — Economizer Filter Installation Fig. 14 — Indoor Coil Access Panel Relocation Step 9 — Units with Hinged Panels Only Swing out indoor coil access panel and insert the hood Relocate latch shipped inside the compressor compartment be- hind the hinged compressor door to location shown in Fig. -
Page 14: Step 11 - Make Electrical Connections
Field power wires are connected to the unit at line-side pressure lugs on compressor contactor C and indoor fan contactor IFC (see wiring diagram label for control box component arrange- MINIMUM PITCH ment) or at factory-installed option non-fused disconnect switch. 1˝... - Page 15 Fig. 22 — 50TCQ Control Wiring Diagram...
-
Page 16: Units With Factory-Installed Non-Fused Disconnect
Fig. 23 — Typical 50TCQ 07 Power Wiring Diagram (208/230v-3 Ph-60 Hz Unit Shown) Insert the shaft with the cross pin on the top of the shaft in UNITS WITH FACTORY-INSTALLED NON-FUSED the horizontal position. See Fig. 25. DISCONNECT Measure from the tip of the shaft to the top surface of the The factory-installed option non-fused disconnect (NFD) black pointer;... -
Page 17: Units Without Factory-Installed Non
male terminal on the primary side of the transformer. Refer to unit label diagram for additional information. Field power wires will be connected line-side pressure lugs on the power terminal block or at factory-installed option non-fused disconnect. NOTE: Check all factory and field electrical connections for tightness. -
Page 18: Factory-Option Thru-Base Connections
Non-powered type This type requires the field installation of a general-purpose 125-v 15-A circuit powered from a source elsewhere in the building. Observe national and local codes when selecting wire size, fuse or breaker requirements and disconnect switch size and location. Route 125-v power supply conductors into the bottom of the utility box containing the duplex receptacle. -
Page 19: Units Without Thru-Base Connections
The 50TCQ unit requires an external temperature control de- vice. This device can be a thermostat (field-supplied) or a Pre- mierLink™ controller (available as factory-installed option or as field-installed accessory, for use on a Carrier Comfort Net- LOW VOLTAGE work... -
Page 20: Unit Without Thru-Base Connection Kit
UNIT WITHOUT THRU-BASE CONNECTION KIT Pass the thermostat control wires through the hole provided in the corner post; then feed the wires through the raceway built into the corner post to the control box. Pull the wires over to the terminal strip on the upper-left corner of the Central Termi- nal Board. -
Page 21: Auxiliary (Electric) Heat Control
Table 6 — 50TCQ Defrost Board I/O and Jumper Configurations POINT NAME TYPE OF I/O CONNECTION PIN NUMBER UNIT CONNECTION NOTE INPUTS G Fan DI, 24 vac P2-3 CTB-G Y1 Cool 1 DI, 24 vac P2-5 CTB-Y1 Y2 Cool 2 DI, 24 vac P2-4 CTB-Y2... -
Page 22: Single Point Boxes And Supplementary Fuses
Not all available heater modules may be used in every unit. Use only those heater modules that are UL listed for use in a specific size unit. Refer to the label on the unit cabinet for the list of approved heaters. Unit heaters are marked with heater model numbers. -
Page 23: Single Point Boxes Without Fuses
® Economi$er X (Factory Option) CONTROL The EconoMi$er X system is an expandable economizer con- trol system, which includes a W7220 economizer module (con- BUSHING troller) with an LCD and keypad (See Fig. 41). The W7220 can be configured with optional sensors. SINGLE POINT BOX MOUNTING... -
Page 24: Inputs
User Interface Running: 1.5A maximum Provides status for normal operation, setup parameters, check- Inrush: 7.5A maximum out tests, and alarm and error conditions with a 2-line 16 char- ENVIRONMENTAL acter LCD display and four button keypad. Operating Temperature Electrical –40°F to 150°F (–40°C to 65°C). •... - Page 25 Table 9 — Economizer Module (Left Hand Terminal Blocks) LABEL TYPE DESCRIPTION Top Left Terminal Block 20k NTC Mixed Air Temperature Sensor (Polarity and COM Insensitive Connection) 20k NTC Outdoor Air Temperature Sensor (Polarity and COM Insensitive Connection) S-BUS S-BUS Enthalpy Control Sensor S-BUS (Sylk* Bus)
-
Page 26: Interface Overview
To use the keypad when working with Setpoints, System and SENSOR Advanced Settings, Checkout tests and Alarms: Navigate to the desired menu. (HOT) BLACK Press the (Enter) button to display the first item in the currently displayed menu. YELLOW Use the ▲ and ▼ buttons to scroll to the desired ANALOG BROWN parameter. - Page 27 Table 13 — W7220 Menu Structure* PARAMETER PARAMETER EXPANDED PARAMETER NAME MENU PARAMETER DEFAULT RANGE AND Notes VALUE INCREMENT † FIRST STAGE COOLING DEMAND (Y1–IN) ECON AVAIL YES/NO YES = economizing available; the system can use outside air for free cooling when required FIRST STAGE COOLING RELAY OUTPUT ECONOMIZING YES/NO...
- Page 28 Table 13 — W7220 Menu Structure* (cont) PARAMETER PARAMETER EXPANDED PARAMETER NAME MENU PARAMETER DEFAULT RANGE AND Notes VALUE INCREMENT † EXHAUST STAGE 2 RELAY OUTPUT Output of AUX1 O terminal Displays ON when damper position reaches programmed EXH2 OUT ON/OFF percentage set point.
- Page 29 Table 13 — W7220 Menu Structure* (cont) PARAMETER PARAMETER EXPANDED PARAMETER NAME MENU PARAMETER DEFAULT RANGE AND Notes VALUE INCREMENT † EXHAUST FAN STAGE 1 SETPOINT Set point for OA damper position when exhaust fan 1 is powered 0 to 100%; by the economizer.
- Page 30 Table 13 — W7220 Menu Structure* (cont) PARAMETER PARAMETER EXPANDED PARAMETER NAME MENU PARAMETER DEFAULT RANGE AND Notes VALUE INCREMENT † NONE Used for alarm for when the DA air temperature is too high. Sets 70°F to 180°F DA HI ALM 80°F (27°C) upper range of alarm;...
- Page 31 Table 13 — W7220 Menu Structure* (cont) PARAMETER PARAMETER EXPANDED PARAMETER NAME MENU PARAMETER DEFAULT RANGE AND Notes VALUE INCREMENT † Check if outdoor temperature is below the LOW Temp Lockout on set point menu. Check if Mixed air temperature on STATUS FREEZE ALARM menu is below the Lo Set point on Advanced menu.
- Page 32 Table 15 — Dry Bulb Operation without DCV (CO Sensor) — 1 Speed Fan DEMAND OUTSIDE AIR CONTROLLED GOOD TO Y1-I Y2-I FAN SPEED Y1-O Y2-O OCCUPIED UNOCCUPIED VENTILATION (DCV) ECONOMIZE High 0-v/Off 0-v/Off MIN POS Closed High 24-v/On 0-v/Off MIN POS Closed High...
- Page 33 Table 18 — Enthalpy Operation with DCV (CO Sensor) — 1 Speed Fan DEMAND OUTSIDE AIR CONTROLLED GOOD TO Y1-I Y2-I FAN SPEED Y1-O Y2-O OCCUPIED UNOCCUPIED VENTILATION (DCV) ECONOMIZE High 0-v/Off 0-v/Off Closed VENTMIN High 24-v/On 0-v/Off Closed VENTMIN High 24-v/On 24-v/On...
- Page 34 Table 20 — Dry Bulb Operation with DCV (CO Sensor) — 2 Speed Fan DEMAND OUTSIDE AIR CONTROLLED GOOD TO Y1-I Y2-I Y1-O Y2-O OCCUPIED UNOCCUPIED SPEED VENTILATION (DCV) ECONOMIZE 0v/Off 0v/Off VENTMIN Closed 24v/On 0v/Off VENTMIN Closed HIGH 24v/On 24v/On VENTMIN Closed...
-
Page 35: Enthalpy Settings
Table 22 — Enthalpy Operation with DCV (CO Sensor) — 2 Speed Fan DEMAND OUTSIDE AIR CONTROLLED GOOD TO Y1-I Y2-I Y1-O Y2-O OCCUPIED UNOCCUPIED SPEED VENTILATION (DCV) ECONOMIZE 0v/Off 0v/Off VENTMIN Closed 24v/On 0v/Off VENTMIN Closed HIGH 24v/On 24v/On VENTMIN Closed 0v/Off... -
Page 36: Checkout
ECONOMIZING DUAL ENTHALPY AVAILABLE HIGH LIMIT NOT AVAILABLE SINGLE ENTHALPY P2 (T,RH) (T,RH) TEMPERATURE Fig. 46 — Single Enthalpy Curve Boundaries Table 24 — Single Enthalpy and Dual Enthalpy High Limit Curves POINT P1 POINT P2 ENTHALPY TEMP. DRY TEMP. ENTHALPY HUMIDITY HUMIDITY... -
Page 37: Premierlink™ (Factory Option)
Clearing Alarms NOTE: If the alarm still exists after clearing it, it is redisplayed within 5 seconds. Once the alarm has been identified and the cause has been re- moved (e.g. replaced faulty sensor) the alarm can be cleared PremierLink™ (Factory Option) from the display. -
Page 38: Rtu-Open Controller System
RTU-Open Controller System (Factory-Installed RETURN AIR Option) SMOKE DETECTOR (AS SHIPPED) For details on operating 50TCQ*07 units equipped with the factory-installed RTU Open controller, refer to the “Factory- Installed RTU Open Multi-Protocol Controller Control, Start- Up, Operation and Troubleshooting” manual. Smoke Detectors Smoke detectors are available as factory-installed options on 50TCQ models. -
Page 39: Step 12 - Adjust Factory-Installed Options
2 Position Damper Unit Without Economizer or Economizer 2 Position Damper ® Fig. 50 — EconoMi$er IV Wiring • Programmable setback thermostat Step 12 — Adjust Factory-Installed Options • Electro-mechanical thermostat and subbase SMOKE DETECTORS • Thermidistat™ device Smoke detector(s) will be connected at the Controls Connec- •... -
Page 40: Belt Tension Method
the blower shaft and motor shaft are parallel to each other (pulleys BELT TENSION METHOD aligned). Tighten all bolts securely when finished. Requires belt tension gage that measures tension in belt in units of lbs-force. BLOWER PULLEY V-BELT MOTOR PULLEY MOTOR BELT DEFLECTION FORCE (LBS) BELT... - Page 42 © Carrier Corporation 2018 Manufacturer reserves the right to discontinue, or change at any time, specifications or designs without notice and without incurring obligations. Catalog No. 04-53500215-01 Printed in U.S.A. Form 50TCQ-7-01SI Pg 42 12-18 Replaces: 50TCQ-4-7-02SI...
-
Page 43: Start-Up Checklist
START-UP CHECKLIST (Remove and use for job file) NOTE: To avoid injury to personnel and damage to equipment or property when completing the procedures listed in this start-up checklist, use good judgment, follow safe practices, and adhere to the safety considerations/information as outlined in preceding sec- tions of this Installation Instructions document. - Page 44 10. Restore set-points for thermostat and humidistat (Y/N) _____ REPEAT PROCESS FOR 2 COMPRESSOR SYSTEMS. © Carrier Corporation 2018 Manufacturer reserves the right to discontinue, or change at any time, specifications or designs without notice and without incurring obligations. Catalog No. 04-53500215-01 Printed in U.S.A.
Need help?
Do you have a question about the WeatherMaker 50TCQ07 and is the answer not in the manual?
Questions and answers