Chapters
Table of Contents

Related Manuals for Chamberlain LA350


Summary of Contents for Chamberlain LA350
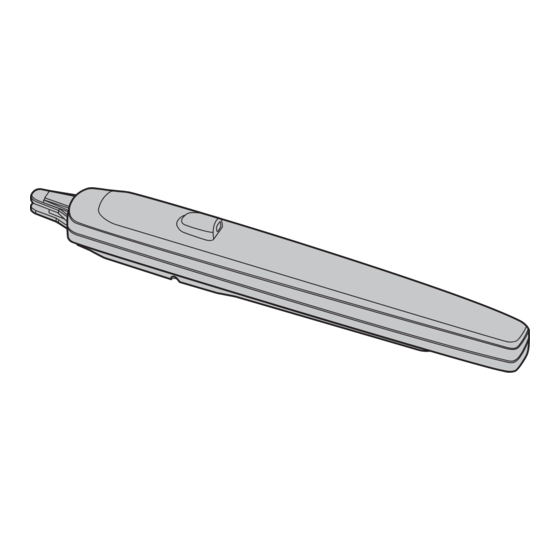
- Page 1 LA350 SWING GATE OPERATOR I N S T A L L A T I O N M A N U A L PLEASE READ THE MANUAL CAREFULLY BEFORE INSTALLATION AND OPERATION THIS PRODUCT TO BE INSTALLED BY A TRAINED GATE SYSTEMS TECHNICIAN ONLY.
-
Page 2: Table Of Contents
TABLE OF CONTENTS SAFETY ..............................3-5 INTRODUCTION Specifications ............................6 Carton Inventory ............................6 Tools Needed ............................7 Overview of Gate Operator and Wiring for Control Box ................7 INSTALLATION Determine the Position of the Post Bracket .....................8 Dimensions of Gate Operator ........................9 Determine the Position of the Gate Bracket ..................10-11 Adjust Travel Distance ...........................11 Clutch Release ............................12 Install the Control Box ...........................12... -
Page 3: Safety
SAFETY When you see these Safety Symbols and Signal Words on the following pages, they will alert you to the possibility of serious injury or death if you do not comply with the warnings MECHANICAL that accompany them. The hazard may come from something mechanical or from electric shock. - Page 4 SAFETY IMPORTANT SAFETY INFORMATION To reduce the risk of SEVERE INJURY or DEATH from an incorrect installation: 1. Vehicular gate systems provide convenience and security. Gate systems are comprised of many component parts. The gate operator is only one component. Each gate system is specifically designed for an individual application.
- Page 5 SAFETY IMPORTANT SAFETY INFORMATION 9. For a gate operator utilizing a non-contact sensor: a. Reference owner’s manual regarding placement of non-contact sensor for each type of application. b. Care shall be exercised to reduce the risk of nuisance tripping, such as when a vehicle trips the sensor while the gate is still moving.
-
Page 6: Introduction
Protection Level: IP 44 Maximum Travel Distance: 350 mm Daily Cycle Rate: Maximum 50 cycles per day Weight per Gate Operator: 6 Kg Carton Inventory Operator Model LA350 (2) Post Mounting Washer and Bolt Gate Mounting Remote Control (2) Bracket (2) -
Page 7: Tools Needed
Cable for Photoelectric Sensor: FA31LM Photoelectric 4 X O.5 mm2 Sensor (optional) or 2 X O.5 mm2 (optional) FA31LM Photoelectric Sensor (optional) LA350 Gate Operator with 1000 mm LA350 cable Gate Operator Cables for with 1000 mm MOTO1 cable & MOTO2: Junction Box 2 X 1.0 mm2... -
Page 8: Installation
INSTALLATION Determine the Position of the Post Bracket 1. Measure the Value C. 2. Value D will depend on the position where the post bracket is mounted. 3. Value A is the total length for both C and D. 4. Value B will depend on Value A and the maximum opening angle of the gate. Refer to Table 1 below. -
Page 9: Dimensions Of Gate Operator
INSTALLATION 6. Using the post bracket as a reference, mark and drill the holes for the post bracket. 7. Attach the post bracket with the M8x60 screws, washers, and nuts. Drill hole M8x60 screw Washers 8. The slots on the post bracket allow for alignment. When the post bracket is level tighten the nuts. Level Dimensions of Gate Operator 95 mm... -
Page 10: Determine The Position Of The Gate Bracket
INSTALLATION Determine the Position of the Gate Bracket 1. Position the gate bracket 730 mm from the post bracket and 38 mm lower than the post bracket. Level ruler 38 mm 730 mm 2. Temporarily secure the gate bracket to the gate with a clamp. When installing the gate bracket, the washer should face downward. -
Page 11: Adjust Travel Distance
INSTALLATION 4. Secure the operator to the gate bracket using the screw and washer (provided) and tighten. Washer Bolt 5. Manually release the operator clutch with the release key, see page 12. 6. Manually open and close the gate. Ensure that the operator does not bind. Adjust Travel Distance 1. -
Page 12: Clutch Release
INSTALLATION Clutch Release To release the clutch: Insert the release key and turn it 180 degrees clockwise. To engage the clutch: Insert the release key and turn it 180 degrees counterclockwise. Release Release Engage Engage The clutch release for the left operator The clutch release for the right operator Install the Control Box 1. -
Page 13: Wiring
WIRING To reduce the risk of SEVERE INJURY or DEATH: • ANY maintenance to the operator or in the area near the operator MUST NOT be performed until disconnecting the electrical power (AC or solar and battery). Upon completion of maintenance the area MUST be cleared and secured, at that time the unit may be returned to service. -
Page 14: Voltage Selection
WIRING 5. Mount a watertight junction box (not provided) that is able to accommodate two watertight connectors (not provided) within 3 feet (0.9 m) of the second operator. 6. Remove the cover from the watertight junction box and set aside. 7. - Page 15 WIRING Brown Blue Brown Blue R100...
-
Page 16: Connect A Battery Backup To The Control Box (Optional)
WIRING Connect a Battery Backup to the Control Box (Optional) The batteries are charged in the circuit by the integrated transformer. Recommended items for a battery backup application (not provided): • Two 12V 4Ah batteries (McNair Model RB-FM-12V-4AH) • Battery box (Attwood Model 9069-1) •... -
Page 17: Wiring Diagram
WIRING Wiring Diagram Brown Blue Brown Blue R100... -
Page 18: Travel Limit Settings
The antenna(s) used for this must be installed to provide a separation distance of at least 20 cm from all persons and must not be collocated or operating TRAVEL LIMIT SETTINGS 1. Release the clutch on both operators with the release key. Open both gates completely, then engage the clutches. -
Page 19: Liftmaster Internet Gateway
PROGRAMMING ® LiftMaster Internet Gateway ® To program the operator to the LiftMaster Internet Gateway: ® 1. Connect the Ethernet cable to the LiftMaster Internet Gateway and the router. ® 2. Connect power to the LiftMaster Internet Gateway. 3. Create an online account by visiting www.myliftmaster.com. 4. -
Page 20: Settings
SETTINGS Opening/Closing Delay Time Setting Factory default is set at 2 seconds. 1 2 3 4 5 6 7 8 The Open/Closing Delay times can be individually set from 1-4 seconds. Opening Delay: 1 OFF and 2 OFF = 1 second Opening Delay set for 4 seconds 1 ON and 2 OFF = 2 seconds 1 OFF and 2 ON = 3 seconds... -
Page 21: Force Adjustment
SETTINGS Force Adjustment Turn the FORCE button clockwise to make the driving force of the gate stronger. Turn the FORCE button TIMER FORCE counterclockwise to make the driving force of the gate Stronger Weaker weaker. Soft Start and Stop Speed Setting Turn the LV button clockwise to increase the speed. -
Page 22: Maglock (Optional)
SETTINGS Maglock (Optional) The LOCK and GND connectors on the board are for the MG1300 MAGLOCK (24V/250 mA). When the maglock is connected, the lock will disengage before the gate opens. Flashing Light (Optional) The DCL and GND connectors on the board are for the FA42LM fl ashing light. The fl ashing light will turn on before the gate opens. -
Page 23: Operation And Maintenance
OPERATION AND MAINTENANCE IMPORTANT SAFETY INSTRUCTIONS • READ AND FOLLOW ALL INSTRUCTIONS. • NEVER let children operate or play with gate controls. Keep the remote control away from children. • ALWAYS keep people and objects away from the gate. NO ONE SHOULD CROSS THE PATH OF THE MOVING GATE. - Page 24 OPERATION AND MAINTENANCE Maintenance To reduce the risk of SEVERE INJURY or DEATH: • Disconnect ALL power BEFORE performing ANY maintenance. • ALL maintenance MUST be performed by a LiftMaster ® professional. • ALWAYS wear protective gloves and eye protection when changing the battery or working around the battery compartment.
- Page 25 OPERATION AND MAINTENANCE Recycling Lead-acid backup battery and some electronic material are harmful substances. In order not to get the environment polluted, they should be recycled or discarded according to requirements of the local law regulation. There are different kinds of materials in a gate operator. Some can be recycled, such as aluminum, iron, plastic, wires etc., not all materials are recyclable.
-
Page 26: Troubleshooting
TROUBLESHOOTING Trouble Cause Solution The operator doesn’t 1. The plug is not securely 1. Have the power supply connected work. connected. securely by a qualifi ed technician. The operator will not 1. The remote control has not 1. Program the Remote, see page 18. work from the remote been programmed. -
Page 27: Service Kits
SERVICE KITS K80-36930 LA350 Bracket Kit K80-36931 LA350 Hardware Kit K2A1832 LA350 Control Board FA70LM LA350 Control Box ACCESSORIES FA42LM Flashing Light FA31LM Photoelectric Sensor MG1300 Maglock TX4UNI 4 Channel EVO Transmitter For support contact: americalatina@chamberlain.com... - Page 28 Notes:...
- Page 29 LA350 OPERADOR DE PORTÓN BATIENTE M A N U A L D E I N S T A L A C I Ó N LEA ATENTAMENTE EL MANUAL ANTES DE PROCEDER CON LA INSTALACIÓN Y EL USO ESTE PRODUCTO DEBE SER INSTALADO POR UN TÉCNICO...
- Page 30 CONTENIDO SEGURIDAD ............................3-5 INTRODUCCIÓN Especificaciones técnicas .........................6 Contenido de la caja ..........................6 Herramientas necesarias ..........................7 Vista general del operador de portón y cableado a la caja de control ............7 INSTALACIÓN Determinar la posición del soporte de columna ..................8 Dimensiones del operador de portón .......................9 Determinar la posición del soporte de portón..................
-
Page 31: Seguridad
SEGURIDAD Estas advertencias y/o símbolos de seguridad que ADVERTENCIA ADVERTENCIA aparecen a lo largo de este manual le alertarán de la existencia de riesgo de una lesión seria o de muerte si no MECÁNICA se siguen las instrucciones correspondientes. El peligro puede ser eléctrico (electrocución) o mecánico. - Page 32 SEGURIDAD INFORMACIÓN IMPORTANTE DE SEGURIDAD ADVE ADVERTENCIA ADVERTENCIA Para reducir el riesgo de LESIONES GRAVES o la MUERTE por defectos de instalación: PRECAUCIÓN 1. Los sistemas de control de paso vehicular son prácticos y seguros. Los sistemas operadores de portones tienen varios componentes. La unidad operadora es uno de esos componentes. Cada sistema está...
- Page 33 SEGURIDAD INFORMACIÓN IMPORTANTE DE SEGURIDAD ADVERTENCIA ADVERTENCIA 9. Para un operador de portón con sensor sin contacto: a. Consultar el manual del instrucciones para determinar el lugar de montaje del sensor para PRECAUCIÓN cada tipo de aplicación. b. Tomar precauciones para reducir el riesgo de tropiezos cuando un vehículo activa un sensor cuando el portón todavía está...
-
Page 34: Especificaciones Técnicas
Distancia máxima de desplazamiento: 350 mm Ciclos diarios de funcionamiento: Máximo de 50 ciclos por día Peso del operador: 6 Kg Contenido de la caja Operador Modelo LA350 (2) Soporte de Arandela y perno Soporte de Control remoto (2) montaje para (fi... -
Page 35: Herramientas Necesarias
FA31LM Sensor 4 X 0.5 mm2 fotoeléctrico (opcional) o 2 X 0.5 mm2 FA31LM Sensor (opcional) fotoeléctrico (opcional) LA350 LA350 Operador de Operador de portón con cable portón con de 1000 mm cable de Cables de 1000 mm... -
Page 36: Instalación
INSTALACIÓN Determinar la posición del soporte de columna 1. Medir la distancia C. 2. La distancia D dependerá del lugar de montaje del soporte de columna. 3. La distancia A es la suma de C y D. 4. La distancia B dependerá de A y del ángulo máximo de apertura del portón. Consultar la Tabla 1 a continuación. -
Page 37: Dimensiones Del Operador De Portón
INSTALACIÓN 6. Usando el mismo soporte como plantilla, marcar los agujeros de montaje. 7. Fijar el soporte de columna con tornillos M8x60, arandelas y tuercas. Agujero Tornillo M8x60 Arandelas Tuerca 8. Las ranuras del soporte ayudan a alinearlo durante el montaje. Ajustar las tuercas una vez que el soporte de columna esté... -
Page 38: Determinar La Posición Del Soporte De Portón
INSTALACIÓN Determinar la posición del soporte del portón 1. Colocar el soporte del portón a 730 mm del soporte de columna y a 38 mm por debajo del mismo. Nivel 38 mm 730 mm 2. Fijar provisoriamente el soporte del portón con una abrazadera. Para instalar el soporte del portón, la arandela debe quedar orientada hacia abajo. -
Page 39: Regular La Distancia De Desplazamiento
INSTALACIÓN 4. Fijar y ajustar con tornillo y arandela (suministrados) el operador al soporte del portón. Arandela Perno 5. Liberar manualmente el embrague del operador con la llave correspondiente. Véase la página 12. 6. Abrir y cerrar el portón manualmente. Verifi car que el portón no se atasque. Regular la distancia de desplazamiento 1. -
Page 40: Liberación Del Embrague
INSTALACIÓN Liberación del embrague Para liberar el embrague: Introducir la llave y hacerla girar 180 grados en sentido horario. Para acoplar el embrague: Introducir la llave y hacerla girar 180 grados en sentido antihorario. Liberación Liberación Acople Acople Liberación del embrague para el operador izquierdo. Liberación del embrague para el operador derecho. -
Page 41: Conexiones
CONEXIONES Para reducir el riesgo de LESIONES GRAVES o la MUERTE: • No realizar mantenimiento en el operador ni en el área cercana al mismo sin cortar la alimentación eléctrica (CA, solar y batería). Al terminar el mantenimiento, limpiar y asegurar el área antes de que el portón vuelva a entrar en servicio. -
Page 42: Elección De Voltaje
ADVERTENCIA CONEXIONES NCIA 4. Ajustar bien la tuerca del conector pasante. 5. Montar una caja de empalmes hermética (no suministrada) apta para dos conectores herméticos CIÓN ADVERTENCIA (no suministrados) a una distancia de 0.9 m del segundo operador. 6. Quitar la tapa de la caja de empalmes. 7. - Page 43 CONEXIONES Marrón Azul Marrón Azul R100...
-
Page 44: Conectar A La Caja De Control La Línea De Reserva De Batería (Opcional)
CONEXIONES Conectar a la caja de control la línea de reserva de batería (opcional) Las baterías se cargan a través del circuito con el transformador. Elementos recomendados para uso con una batería de reserva (no suministrados): • Dos baterías de 12 V, 4 A-H (McNair Modelo RB-FM-12V-4AH) •... -
Page 45: Diagrama De Conexiones
CONEXIONES Diagrama de conexiones Marrón Azul Marrón Azul R100... -
Page 46: Calibración Del Límite De Desplazamiento
CALIBRACIÓN DE LÍMITES DE DESPLAZAMIENTO 1. Liberar el embrague de ambos operadores con la llave correspondiente. Abrir totalmente ambas hojas del portón y acoplar los respectivos embragues. 1 2 3 4 5 6 7 8 2. Poner el microselector N° 8 en la posición ON. 3. -
Page 47: Liftmaster Internet Gateway
PROGRAMACIÓN LiftMaster ® Internet Gateway Para programar el operador con el LiftMaster ® Internet Gateway: ® 1. Conectar el cable de Ethernet al LiftMaster Internet Gateway y al router. ® 2. Conectar la alimentación eléctrica al LiftMaster Internet Gateway. 3. Crear una cuenta por Internet en el sitio www.myliftmaster.com. 4. -
Page 48: Configuración
CONFIGURACIÓN Calibración del retardo de apertura y cierre La calibración de fábrica es de 2 segundos. 1 2 3 4 5 6 7 8 Las demoras de apertura y cierre pueden programarse individualmente entre 1 y 4 segundos. Demora de apertura: 1 OFF y 2 OFF = 1 segundo Demora de apertura 1 ON y 2 OFF = 2 segundos... -
Page 49: Regulación De La Fuerza
CONFIGURACIÓN Regulación de la fuerza Girar el botón de FUERZA en sentido horario para incrementar la fuerza del portón. Girar el botón de TIMER FORCE FUERZA en sentido antihorario para disminuir la fuerza Más Menos del portón. fuerza fuerza Calibración de arranque lento y velocidad de parada TIMER FORCE... -
Page 50: Cerradura Magnética (Opcional)
CONFIGURACIÓN Cerradura magnética (opcional) Los conectores LOCK y GND en la tarjeta corresponden al MG1300 MAGLOCK (24 V/250 mA). Al conectarse la maglock, la cerradura se abrirá antes de que el portón se abra. Luz intermitente (opcional) Los conectores DCL y GND en la tarjeta corresponden a la luz intermitente FA42LM. La luz intermitente se encenderá... -
Page 51: Uso Y Mantenimiento
USO Y MANTENIMIENTO INSTRUCCIONES IMPORTANTES DE SEGURIDAD • LEA Y CUMPLA TODAS LAS INSTRUCCIONES. • NO permita que los niños usen ni jueguen con los controles de un portón. Mantenga el control remoto alejado de los niños. • Mantenga SIEMPRE a la gente y los objetos alejados del portón. NADIE DEBE ATRAVESAR EL RECORRIDO DEL PORTÓN EN MOVIMIENTO. - Page 52 USO Y MANTENIMIENTO Mantenimiento Para reducir el riesgo de LESIONES GRAVES o la MUERTE: • Desconectar la alimentación eléctrica ANTES de hacer mantenimiento. • El mantenimiento DEBE ser realizado por un técnico profesional de LiftMaster ® • Usar SIEMPRE guantes y gafas de seguridad para trabajar con la batería. Cuadro de mantenimiento INSPECCIONAR AL MENOS UNA VEZ CADA DESCRIPCIÓN...
- Page 53 USO Y MANTENIMIENTO Reciclaje Las baterías de plomo-ácido y ciertos materiales de electrónica son materiales perjudiciales. Para evitar la contaminación ambiental deben desecharse y reciclarse según las normas vigentes locales. Un operador de portón tiene diferentes materiales. Algunos de ellos pueden reciclarse, tales como aluminio, hierro, plástico, cables, etc., pero no todos son reciclables.
-
Page 54: Diagnóstico De Fallas
DIAGNÓSTICO DE FALLAS Problema Causa Solución El operador no 1. El enchufe no está bien 1. Pedir a un técnico profesional que funciona. conectado. conecte la alimentación eléctrica. El operador no funciona 1. El control remoto no se ha 1. Programar el control remoto. Véase la con el control remoto. -
Page 55: Juegos De Repuesto
JUEGOS DE REPUESTO K80-36930 Juego de soportes LA350 K80-36931 Ferretería de LA350 K2A1832 Tabla de control LA350 FA70LM Caja de control LA350 ACCESORIOS FA42LM Luz intermitente FA31LM Sensor fotoeléctrico MG1300 Cerradura magnética TX4UNI Transmisor de cuatro canales EVO Apoyo técnico:... - Page 56 © 2014, The Chamberlain Group Inc. All Rights Reserved 01-36883D Todos los Derechos Reservados...
Need help?
Do you have a question about the LA350 and is the answer not in the manual?
Questions and answers