Advertisement
Quick Links
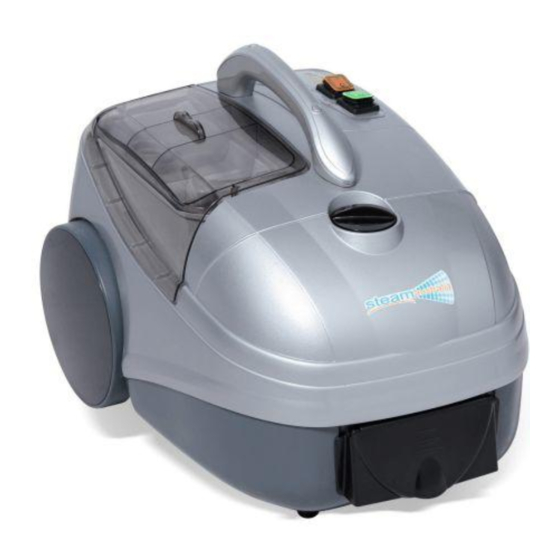
SV6 Quick Start Guide
[i]
[ii]
[iii]
SV6
_______________________________________________________________________________________________
Preparing the SV6
Steam Operation:
1. Plug cable into a wall outlet. NOTE: Do NOT use
multi-outlet power-boards and avoid using low-
quality extension cables.
2. Open water tank filler cap (ii), fill tank with clean
tap water up to the top then close filler cap. NOTE: Do
NOT use de-mineralised water and do NOT fill with
any chemicals.
3. Turn SV6 on using the green ON/OFF switch (g),
making sure the steam level light on the display (e)
lights up after a few seconds.
4. Connect hose into the SV6 by opening the
protective plastic flap located on the front of the
machine (iii) and pushing the plug end of the hose in
with the round red button on the top side of the hose
until it clicks.
If planning to use the SV6 as vacuum only mode (no steam
functions), proceed to "Vacuum Operation" section below.
5. Turn the orange boiler switch on (f) to start the
boiler.
Proceed to "Vacuum Operation" section if you are planning
on using the vacuum together with the steam functions.
Vacuum Operation:
1. Turn the vacuum on from the hose controls by
quick-pressing (V).
The SV6 will make a beeping noise and the vacuum
waste tank light (c) will flash on the display.
2. Open the transparent "smoke-
grey" vacuum cover (i) and
slowly fill clean tap water into
the rectangular hole on top of
the vacuum waste tank until the
vacuum waste tank light (c) stops
flashing.
3. Replace the transparent vacuum cover (i).
Tel: 1300 79 50 50 E-mail:
[c]
[a]
[b]
[d]
[e]
[f]
[g]
SV6 Display
Fill water here
info@steamaustralia.com.au
[V]
[S]
SV6 Hose Controls
NOTE: Filling the tank with excess water may still
cause the vacuum waste tank light (c) to continue
flashing. Empty the tank and slowly re-fill the tank
again with clean tap water (no soap or foaming agents
present) until the vacuum waste tank (c) light stop
flashing. Foam from soapy water may trigger the
sensors that tells the SV6 that the vacuum tank is full
and needs emptying so avoid using soapy water.
Hose Handle Operations
Steam Functions:
1. After 5-6 minutes the 'Steam Ready' light (a) will
light up on the display and the steam function is ready
for use. Make sure the steam level light (e) is on,
otherwise quick-press the
the steam level light turns on to prepare the steam
function for use.
2. If the SV6 makes a beeping noise and the 'Low
Water' light (c) flashes, proceed to Step 2 of
"Preparing the SV6 | Steam Operations".
3. Press and hold the
RED
between 3 steam levels: low, medium or high. The
steam level light (e) display will light up in
correspondence to the different steam levels: 1 =
Low, 2 = Medium and 3 = High.
4. Once you have selected which steam levels you
want, press the trigger located underneath the hose
handle (T) to release steam from the nozzle.
WARNING: Do NOT operate hose with steam nozzle
pointing at persons, animals or electrical machinery
/equipment/outlets/sensors that are sensitive to
water and heat (especially near fire alarm sensors).
Vacuum Functions:
1. Press the BLACK & WHITE vacuum button (V) to
engage the vacuum function. The vacuum will turn on
Web: www.steamaustralia.com.au
[T]
RED
steam button (S) until
steam button (S) to select
1
Advertisement

Related Manuals for Steam Australia SV6


Summary of Contents for Steam Australia SV6
- Page 1 If planning to use the SV6 as vacuum only mode (no steam 2. If the SV6 makes a beeping noise and the ‘Low functions), proceed to “Vacuum Operation” section below.
- Page 2 - A rag Warning Lights - Flathead screwdriver The SV6 will make a beeping noise and a red light will - Supplied socket wrench flash on certain conditions: 1. Ensure the machine isn’t plugged into a power - Water tank low level (c) source and the machine doesn’t feel warm with no...
- Page 3 SV6 Accessories Guide Floor Steam + Vacuum Tool For hard floor surfaces such as: AC8000034 Floor Tool - Tiles S/V 300mm - Marble - Most sealed hardwood - Linoleum & Vinyl AC8000025 Insert Dual Squeegee 300mm - Carpets - Non-slip surfaces...
- Page 4 SV6 Accessories Guide Detailing Extension For cleaning and sanitizing areas such as: - Sinks AC8000024 Nozzle Detail - Toilets w/Extension - Car interior & exterior - Hard to reach nooks & crannies 150mm S/V Head As window squeegee function: Attach the AC8000029 squeegee insert.
- Page 5 SV6 Accessories Guide S/V Detailing Nozzle + Small Nylon Brush For detail cleaning in kitchens, bathrooms and other areas: AC8000023 Nozzle S/V Detail - Tile grouts (walls and floors) - Drains - Cooktops 2 x AE0000011 - Bathtubs Extension Tube S/V...
- Page 6 SV6 Accessories Guide Floor Mop Head + Microfibre Mop Pad (Optional Accessory) AC8000016 Mop Head Floor 390mm For cleaning non-carpeted hard- AC0020002 Microfibre Mop floor surfaces. Pad Floor 390mm Use medium steam flow and move AC8000041 Adapter S/V to forwards and backwards quickly over the floor surface.
Need help?
Do you have a question about the SV6 and is the answer not in the manual?
Questions and answers