Advertisement
Quick Links
We reserve the right to change specification without notice
Manrose is proudly distributed by Simx Limited
PO Box 14 347, Panmure, Auckland, NZ. Technical Support (09) 259 1662
e: sales@simx.co.nz | www.simx.co.nz | www.manrose.com.au
INSTALLATION INSTRUCTIONS
MANROSE 150MM
EXTRACT-A-LITE/EXTRACT-A-LED DIFFUSER
Please read all instructions before commencing installation.
LED models
DCT3208, DCT3209, DCT3211, DCT3212, DCT3640
Electrical
Supply
Replacement
driver
Lamp
Replacement
lamp
Please ensure the corrrect LED lamp and driver OR Halogen lamp and transformer are used for
replacements. The LED model MUST be replaced with an LED lamp and the Halogen model MUST
be replaced with a Halogen lamp. They are not interchangeable.
Diagram 1
INSTALLATION
PUB0164 iss:05 05/15
Halogen models
DCT1169, DCT1171, DCT1521, DCT1522
Driver Input: 220-240 VAC
Electrical
Supply
Driver Output: 12VDC
FAN5342
Replacement
transformer
MR16: 12V / 3W high power LED
Lamp
LHT0221
Replacement
lamp
When screw is tightened fixing
clip fingers secure the fan
Fixing clip
Fan
chassis
Ceiling board
Screw
P R O - S E R I E S
Transformer Input: 220-240 VAC
Output: 12VAC
FAN2101
MR16: 12V / 50W Halogen
FAN0431
Advertisement

Related Manuals for Manrose LED Series


Summary of Contents for Manrose LED Series
- Page 1 Ceiling board Screw We reserve the right to change specification without notice Manrose is proudly distributed by Simx Limited PO Box 14 347, Panmure, Auckland, NZ. Technical Support (09) 259 1662 e: sales@simx.co.nz | www.simx.co.nz | www.manrose.com.au PUB0164 iss:05 05/15...
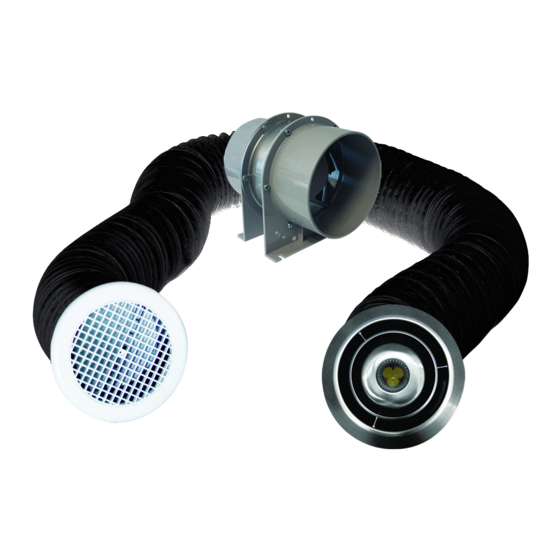
- Page 2 Installation Instructions Diagram 2 TYPICAL INSTALLATION Important: The Halogen model Extract-a-Lite must not work independently of the fan. 1. Cut a 165mm diameter hole in ceiling, (always ensure the hole is cut between ceiling rafters and away from any wiring or plumbing). Fix the chassis using the 4 screws provided. Use the fixing clips to secure the grille (See diagram 1).