Hunter Douglas PowerView Reference Manual
Hide thumbs
Also See for PowerView:
- Installation operation care (36 pages) ,
- User manual (20 pages) ,
- Manual (5 pages)
Table of Contents
Advertisement
MANUAL
PowerView® reference guide
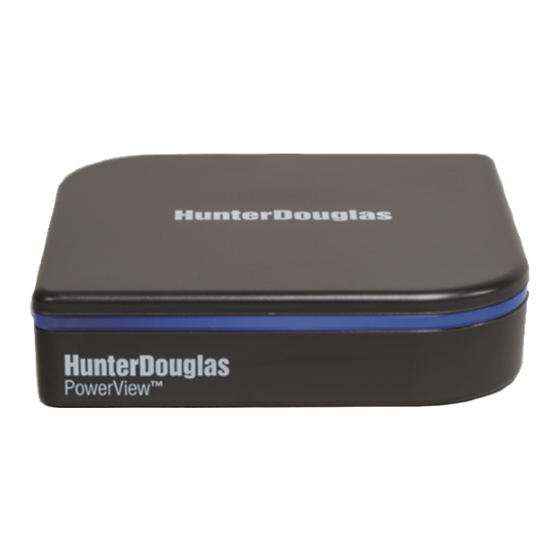
Installing a hub
6.1
Connect the Hub to your home network router
6.2
Connect the Hub to your power outlet
6.3
Check the range of the Hub
Your Hub should be able to reach each shade in the
house.
Use your remote from the same location as your Hub
to
operate
your shades. If some shades do not
respond, add or relocate a repeater and check again.
Page 1 of 22
version: 1.3
Advertisement
Table of Contents

Subscribe to Our Youtube Channel
Related Manuals for Hunter Douglas PowerView


Summary of Contents for Hunter Douglas PowerView
- Page 1 MANUAL PowerView® reference guide Installing a hub Connect the Hub to your home network router Connect the Hub to your power outlet Check the range of the Hub Your Hub should be able to reach each shade in the house.
-
Page 2: Resetting A Repeater
MANUAL Wait approximately 2 minutes and observe the Hub light. • Blue/Red blinking : All ok. Proceed with the installation. • Red blinking : Hub is downloading updates. Please wait. (approx. 5 mins.) • Continuous blue : Hub is already connected to a network. - Page 3 MANUAL This instruction will make use of the following buttons on the Remote: Find the following button/light on the repeater. Assemble the repeater kit and plug it in an outlet (The illuminates green ) repeater light Press for 6 seconds. stop (Keep pressing until the remote lights start blinking.) Hold the remote within 20cm.
-
Page 4: Add A Repeater Using The App
The range of any indoor wireless device is always difficult to determine. Factors like used building materials and presence of other wireless devices can have a big (negative) impact on wireless range. To improve the range of the PowerView® network repeaters can be used. -
Page 5: Check Whether A Repeater Is Part Of The Powerview® Network
The repeater button/light should start blinking. Pairing and Duplicating a remote Out of the box each remote creates its own PowerView® network. In most cases however your remotes need to be on the same "network". Pairing remotes will be necessary. Consider the following scenario: Out of the box you have two remotes. -
Page 6: Pairing A Remote
MANUAL Pairing a remote Take two remotes. Name them and follow the instructions below. original target Locate the following buttons on your remote: Procedure Remove the back cover. target (keep the batteries in place) Page 6 of 22 version: 1.3... -
Page 7: Duplicating A Remote
MANUAL Press the reset button for six seconds. target: (The group buttons will flash on the press of the Reset button, then again at 6 seconds) Close the back cover. target: Press the button for 6 seconds. original: stop (Keep pressing until the remote lights start blinking) Press and hold the ... - Page 8 MANUAL Locate the following buttons on both remotes: target: Remove the back cover. (keep batteries in place) target: Press the reset button for 6 seconds. (The group buttons will flash on the press of the Reset button, then again at 6 seconds) Close the back cover.
-
Page 9: Pairing A Remote To An Existing Hub Network
Pairing a remote to an existing Hub network You have created a PowerView® network with shades and a hub and now want to add a remote. Another scenario could be you want to add a newly purchased remote to the network. - Page 10 MANUAL Remove the back cover. Remote 2: (keep the batteries in place) Press the reset button for 6 seconds. Remote 2: (The group buttons will flash on the press of the Reset button, then again at 6 seconds) Remote 2: Close the back cover.
-
Page 11: Adding A Shade To A Group
MANUAL If remote is still flashing Press and hold the for 6 seconds. stop (Keep pressing until the flashing stops) Adding a shade to a group A remote can control 6 individual groups of shades. To control a shade with the remote it needs to be added to one of those groups. -
Page 12: Remove A Shade From A Group
(Keep pressing until the flashing stops) Remove a shade from a group This will remove a shade from a group on your remote control. It will not remove the shade from the PowerView® network. Locate these buttons on your remote:... - Page 13 MANUAL Duette® shade Pirouette® shade Rollerblind Press and hold the button for 6 seconds. stop (Keep pressing until the remote lights start blinking) Press the group 1 button. (This will activate group 1 on the remote) Press and hold the manual control button Press the ...
-
Page 14: Moving A Blind
MANUAL Moving a blind Locate these buttons on your remote: blinds assigned to Open group 1 Press the button. group 1 (Group 1 will light up) Press the button. open (All shades assigned to group 1 will open) Press the ... -
Page 15: Set A Favorite Position
MANUAL Press the button. group 1 (Group 1 will light up) Press the button. favorite (All shades assigned to group 1 will move to their favorite position) Pressing the instead of button will move all blinds from all 6 groups on the remote to their group 1 favorite position. -
Page 16: Performing A Programming Reset
Release the blind button Your shade is now "disconnected" from the PowerView® network. If you are using the PowerView® APP you should manually delete the blind there too. To reconnect your blind to the PowerView network see adding a blind to a group Performing an end limit calibration An end limit calibration will recalibrate the end limits stored in the shade. -
Page 17: Put Remote In Sleep Mode
MANUAL Put Remote in sleep mode Sleep mode will disable the motion sensor inside the remote. This will prevent the remote lights to turn on when motion is detected (like being picked up). Doing this will increase battery lifetime. Press the button for approximately 6 seconds. -
Page 18: Powerview Reset Actions
MANUAL PowerView reset actions Tables below explain the effect of a reset action on a particular shade. in the table means that information is erased from the blind or not. APP functions The APP functions below can be found in the advanced section of the shade settings. Look here how to find them. -
Page 19: Pv-M25S: Vb / Pleated / Duette / Vvb
MANUAL HUBv1: (x button) HUBv2: (r button) APP Clear shade memory APP Delete shade yes (only hub) Important If you want to do a six second reset on a PV-M25T motor you will need to do an extra power cycle during the reset action (look here for further instructions.) This is done for safety purposes. -
Page 20: Pleated / Duette / Roman Shades / Silhouettes
MANUAL APP Delete shade yes (only hub) Important Identical to the PV-M25T it is possible to do a 6 second reset with power cycle. Motor behaves idential to the PV-M25T Pleated / Duette / Roman Shades / Silhouettes action Endpoints/limits Connection Scene info... -
Page 21: Hub Ip Address
Flashing green No IP address Solid red Hub IP address There are several ways to determine the PowerView hub IP address. From the PowerView app Goto the menu (top left) and select -> Select the hub you're connected to -> click and lookup "IP Adress". -
Page 22: Important Notice
Use of such information may require a license from a third party under the patents or other intellectual property of the third party, or a license from Hunter Douglas under the patents or other intellectual property of Hunter Douglas.
Need help?
Do you have a question about the PowerView and is the answer not in the manual?
Questions and answers