Table of Contents
Advertisement
Advertisement
Table of Contents

Related Manuals for RockShox Reverb AXS 2020


Summary of Contents for RockShox Reverb AXS 2020
- Page 1 Reverb AXS 2020 SERVICE MANUAL GEN.0000000005906 Rev A © 2019 SRAM, LLC...
- Page 2 This warranty does not apply to products that have been incorrectly installed and/or adjusted according to the respective SRAM user manual. The SRAM user manuals can be found online at sram.com, rockshox.com, avidbike.com, truvativ.com, or zipp.com. This warranty does not apply to damage to the product caused by a crash, impact, abuse of the product, non-compliance with manufacturers specifications of usage or any other circumstances in which the product has been subjected to forces or loads beyond its design.
- Page 3 SAFETY FIRST! We care about YOU. Please, always wear your safety glasses and protective gloves when servicing RockShox products. Protect yourself! Wear your safety gear!
-
Page 4: Table Of Contents
BRASS KEY SIZE ................................................6 TORQUE VALUES ................................................6 PARTS, TOOLS, AND SUPPLIES ..........................................7 EXPLODED VIEW - SEATPOST ..................................8 EXPLODED VIEW - ROCKSHOX AXS CONTROLLER .............................9 SEATPOST TROUBLESHOOTING ..................................10 VENT VALVE RESET ..............................................10 SEATPOST SERVICE ......................................13 SEATPOST REMOVAL ..............................................13 50/200/600 Hour Service LOWER POST REMOVAL .............................................. - Page 5 R o c k S h o x S e r v i c e We recommend that you have your RockShox suspension serviced by a qualified bicycle mechanic. Servicing RockShox suspension requires knowledge of suspension components, as well as the use of specialized tools and lubricants/fluids. Failure to follow the procedures outlined in this service manual may cause damage to your component and void the warranty.
-
Page 6: Recommended Service Intervals
R e c o m m e n d e d S e r v i c e I n t e r v a l s Regular service is required to keep your RockShox product working at peak performance. Follow this maintenance schedule and install the service parts included in each service kit that corresponds with the Service Hours Interval recommendation below. -
Page 7: Parts, Tools, And Supplies
SAFET Y IN STRUCTIONS Always wear safety glasses and nitrile gloves when working with grease and Reverb hydraulic fluid. Place an oil pan under the RockShox product during service. ⚠ WARN ING Do not allow Reverb hydraulic fluid to come into contact with disc brake levers, calipers, pads, rotors, or braking surfaces. If hydraulic fluid contacts brake pads, the brake pads must be replaced. -
Page 8: Exploded View - Seatpost
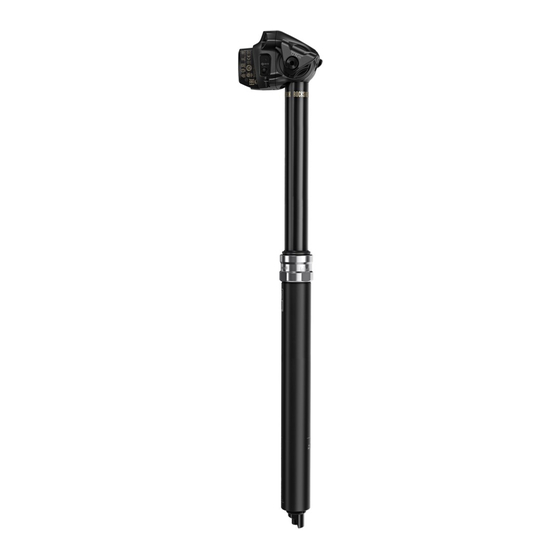
E x p l o d e d V i e w - S e a t p o s t Inner Shaft Assembly Internal Floating Piston Assembly Vent Valve Assembly Saddle Tilt Adjuster Saddle Clamp Assembly Electronics Compartment LED Indicator Reverb AXS Button SRAM Battery IFP Tube... -
Page 9: Exploded View - Rockshox Axs Controller
Pinch Bolt Clamp Bolt MatchMaker X Mount Mount Adjustment Bolt Controller Mount Bolt Controller Mount Bolt Battery Cover Mount Plug Screw Paddle Clamp Mount Battery CR2032 Battery RockShox AXS Controller Button Compartment LED Indicator Exploded View - RockShox AXS Controller... -
Page 10: Seatpost Troubleshooting
S e a t p o s t T r o u b l e s h o o t i n g The Vent Valve is located on the bottom of the seatpost and can be used after extended use if the seatpost develops a 'squish' suspension feel in the fully extended position when the rider is seated. - Page 11 Remove the seatpost from the bicycle. Place the seatpost head on a flat smooth clean surface and position the seatpost upright so the (A) Vent Valve is at the highest point. Depress the Vent Valve with the Vent Valve tool. With the Vent Valve depressed, push the lower post down and slowly compress the seatpost.
- Page 12 Lift the seatpost from the flat surface and press the seatpost AXS button once to fully extend the seatpost. When the seatpost is fully extended, press the AXS button once more to close the internal valve and lock the seatpost in the extended position.
-
Page 13: Seatpost Service
S e a t p o s t S e r v i c e N OTIC E Do not attempt to disassemble the Reverb AXS seatpost or RockShox AXS controller electronics compartment assemblies. Disassembly may cause permanent damage to electronic components. - Page 14 Open the battery latch and remove the SRAM battery. Install the battery cover onto the battery. Install the battery block into the seatpost battery slot and close the battery latch. NOTI CE To avoid damage to the seatpost electronics, do not perform service until the battery block is installed on the seatpost.
-
Page 15: 50/200/600 Hour Service
5 0 / 2 0 0 / 6 0 0 H o u r S e r v i c e L o w e r P o s t R e m o v a l N OTIC E Use bench vise soft jaw inserts to prevent damage to the seatpost or any seatpost components when clamping it into a vise. - Page 16 Remove the air cap. 9 mm Wrap a shop towel around the air valve to absorb any hydraulic fluid that may escape when the Schrader valve is depressed. Depress the Schrader valve and release all air pressure from the air chamber.
- Page 17 Pry the scalloped end of the retaining ring out of the groove. Slide the pick around the rim of the lower post and remove the retaining ring from the lower post. Pick Unthread the seatpost top cap. 34 mm or Adjustable wrench Slide the top cap down.
- Page 18 Unthread and remove the baseplate lockring from the baseplate. 26 mm or Adjustable wrench 11 mm Remove the lower post. Lower Post Removal...
- Page 19 Remove the three brass keys from the upper post. page 6, record the number of lines, which indicate key size, marked on the brass keys for future reference. If worn, the brass keys must be replaced with new brass keys of the same size. 3 lines = size 3 key Clean the upper post and keys.
-
Page 20: 200 Hour Service
2 0 0 H o u r S e r v i c e T o p C a p a n d S e a l H e a d B u s h i n g R e p l a c e m e n t The following steps are to be completed during the A1 200 hour service interval and include replacing parts included in the Reverb AXS A1 Service Kit - 200 hour. - Page 21 Remove the top cap assembly from the upper post and discard it. Clean the upper post and inner shaft assembly. Apply a liberal amount of grease around the inside of a new top cap assembly and onto the seals. Install the new top cap assembly, dust wiper seal end first, onto the upper post assembly over the seal head.
- Page 22 Install a new o-ring and bushing over the baseplate assembly and onto the seal head. Pinch the bushing to secure it around the seal head and o-ring. NOTI CE The seal head bushing may have sharp edges. Do not scratch the inner shaft with the bushing.
-
Page 23: 600 Hour Service
6 0 0 H o u r S e r v i c e I n n e r S h a f t a n d S e a l h e a d R e m o v a l ⚠... - Page 24 Wrap and hold a cloth shop towel tightly over and around the seal head and wrench. A small amount of air pressure may be released when the seal head is completely unthreaded. Do not remove the shop towel from over the seal head until the seal head is completely unthreaded.
- Page 25 Suspension Cleaner or isopropyl alcohol and wipe them with a clean shop towel. The clamping surfaces must be free of oil and grease. Clamp the inner shaft assembly into the 10 mm slot in the RockShox 3-hole vise blocks. Unthread and remove the baseplate and Vent Valve rod assembly from the inner shaft.
- Page 26 Remove the internal seal head assembly from the inner shaft and discard the seal head. Inner Shaft and Sealhead Removal...
-
Page 27: Inner Shaft Assembly
Spray RockShox Suspsension Cleaner or isopropyl alcohol on each part and clean with a clean lint-free shop towel. Apply only RockShox Dynamic Seal Grease to all Reverb parts, seals, and o-rings. Clean the inner shaft/main piston assembly. - Page 28 Apply a liberal amount of grease to the inside of a new internal seal head assembly. Install the internal seal head assembly onto the inner shaft, threaded end first. Install a new bottomout o-ring and a new foam ring onto the inner shaft.
- Page 29 Clamp the inner shaft into the RockShox 3-Hole vise block in the 10 mm slot. Insert the Vent Valve rod into the inner shaft. Press the baseplate down and into the shaft until the Vent Valve rod upper o-ring snaps into place.
-
Page 30: Upper Post Disassembly
6 0 0 H o u r S e r v i c e U p p e r P o s t D i s a s s e m b l y With the electronics compartment positioned outside the edge of the vise clamps, clamp the seatpost head into a bench vise with flat aluminum soft jaw vise inserts on the flat saddle clamp slots. - Page 31 Remove the internal floating piston (IFP) from the upper post. Insert seven to nine plastic cable ties (cable tie size may vary), one at a time, into the upper post and through the center of the IFP. Pull the cable ties out of the upper post and remove the IFP. Discard the IFP.
-
Page 32: Top Cap Installation
6 0 0 H o u r S e r v i c e T o p C a p I n s t a l l a t i o n Apply a liberal amount of grease around the inside of a new top cap assembly and onto the seals. -
Page 33: Internal Floating Piston (Ifp) Installation
600 Hour S e r v i c e I n t e r n a l F l o a t i n g P i s t o n ( I F P ) I n s t a l l a t i o n Fully coat the inside and outside surfaces of the IFP tube with Reverb fluid. - Page 34 Apply a very liberal amount of grease to the new internal floating piston (IFP). Fill the groove on both sides of the IFP, and coat the outer and inner surfaces. NOTI CE The outer and inner surfaces must be coated with grease to prevent stiction.
- Page 35 internal floating piston (IFP) height: Use the chart below to determine the IFP height for your Reverb AXS seatpost. Identify the correct IFP height (H) measurement on the IFP tool. Reverb AXS Travel Seatpost Length IFP Height (H) (mm) (mm) (mm) Reverb IFP Height Tool IFP height is critical to proper function.
- Page 36 Draw excess fluid from the center of the IFP tool with a RockShox bleed Plastic screwdriver handle syringe. Continue to tap the IFP tool and push the IFP into the upper post; remove excess fluid as needed. RockShox bleed syringe Stop when the correct IFP height measurement on the IFP tool is level with the top edge of the upper post.
-
Page 37: Inner Shaft Installation
6 0 0 H o u r S e r v i c e I n n e r S h a f t I n s t a l l a t i o n Apply grease to the main piston o-ring and backup ring on the inner shaft assembly. - Page 38 Remove the seatpost from the vise. Hold and support the inner shaft assembly with one hand and pour all remaining fluid from the upper post into an oil pan. With the electronics compartment positioned outside the edge of the vise clamps, clamp the seatpost head into a bench vise with flat aluminum soft jaw vise inserts on the flat saddle clamp slots.
- Page 39 Tighten the seal head. Use a shop towel to wipe away any excess fluid. NOTI CE Do not scratch the inner shaft with the wrench as this is a critical sealing surface. Surface scratches can cause leaks and reduce performance. Do not compress the inner shaft into the upper post and IFP tube until the seatpost is completely reassembled and pressurized.
-
Page 40: 50/200/600 Hour Service
5 0 / 2 0 0 / 6 0 0 H o u r S e r v i c e L o w e r P o s t I n s t a l l a t i o n Rotate the bushing and align the split seam toward the back of the seatpost, inline with the rear facing brass key slot. -
Page 41: Brass Keys Installation
New brass keys must be of the same size and have the same number of etched lines as the original brass keys for proper function. Refer to the RockShox Spare Parts Catalog at www.sram.com/service for a list of brass key kits available. - Page 42 Align the lower post key slots with the brass keys and ensure the laser etched RockShox logo is aligned with the back of the seatpost head. Key slots Hold each brass key in place and slide the lower post down until it engages the keys.
- Page 43 Thread the baseplate lockring onto the baseplate with the wrench flats oriented outward. Tighten the baseplate lockring to the specified torque. 11 mm 7 N•m (62 in-lb) 26 mm Rotate the baseplate so the open end is facing the back of the seatpost.
- Page 44 Install the retaining ring into the lower post. Insert the flat end into the groove first and use your finger to guide the retaining ring around the end of the lower post. Push the scalloped end of the retaining ring into the groove until it snaps completely into place.
-
Page 45: Pressurize Seatpost
5 0 / 2 0 0 / 6 0 0 H o u r S e r v i c e P r e s s u r i z e S e a t p o s t Pressurize the seatpost to 250 psi (17.2 bar). Shock pump 250 psi (17.2 bar) Reinstall the air cap and tighten until hand tight. -
Page 46: Install Saddle Clamps
5 0 / 2 0 0 / 6 0 0 H o u r S e r v i c e I n s t a l l S a d d l e C l a m p s Insert the left side saddle clamps and bolt nut into the seatpost head with the (A) barrel nut pocket aligned with the (B) barrel nut tilt adjuster. - Page 47 Install the right side outer clamp and the clamp bolt. Thread the bolt into the barrel nut tilt adjuster. Do not tighten. Install Saddle Clamps...
-
Page 48: Seatpost Installation
S e a t p o s t I n s t a l l a t i o n 5 0 / 2 0 0 / 6 0 0 H o u r S e r v i c e I n s t a l l a t i o n a n d T e s t F u n c t i o n Secure the bicycle in an upright position. - Page 49 Press and hold the controller paddle on the RockShox AXS controller and push down on the saddle to test function. This concludes service for the RockShox Reverb AXS adjustable height seatpost. Installation and Test Function...
- Page 50 These are registered trademarks of SRAM, LLC: 1:1®, Accuwatt®, Avid®, Bar®, Blackbox®, BoXXer®, DoubleTap®, Elita®, eTap®, Firecrest®, Firex®, Grip Shift®, GXP®, Hammerschmidt®, Holzfeller®, Hussefelt®, i-Motion®, Judy®, Know Your Powers®, NSW®, Omnium®, Pike®, PowerLock®, Quarq®, Qollector®, RacerMate®, Reba®, Rock Shox®, Ruktion®, Service Course®, ShockWiz®, SID®, Single Digit®, Speed Dial®, Speed Weaponry®, Spinscan®, SRAM®, SRAM APEX®, SRAM EAGLE®, SRAM FORCE®, SRAM RED®, SRAM RIVAL®, SRAM VIA®, Stylo®, Torpedo®, The Power of Bicycles®, Truvativ®, Varicrank®, Velotron®, World Bicycle Relief®, X0®, X01®, X-SYNC®, XX1®, Zed tech®, ZIPP®...
- Page 51 ASIAN HEADQUARTERS WORLD HEADQUARTERS EUROPEAN HEADQUARTERS SRAM Taiwan SRAM LLC SRAM Europe No. 1598-8 Chung Shan Road 1000 W. Fulton Market, 4th Floor Paasbosweg 14-16 Shen Kang Hsiang, Taichung City Chicago, Illinois 60607 3862ZS Nijkerk Taiwan R.O.C. U.S.A. The Netherlands...
Need help?
Do you have a question about the Reverb AXS 2020 and is the answer not in the manual?
Questions and answers