
Related Manuals for SPM U-go


Summary of Contents for SPM U-go
- Page 1 Manuale d’uso e manutenzione Pag.3 Operator’s manual Page 21 Gebrauchs- und Wartungsanleitung S.39 Data di emissione: Marzo, 2016 Revisione: 1 Pag. : 1/58...
- Page 2 Data di emissione: Marzo, 2016 Revisione: 1 Pag. : 2/58...
- Page 3 Revisione: 01 © 2016 – SPM Drink Systems Tutti i diritti di riproduzione del presente manuale sono riservati alla SPM DRINK SYSTEMS, la riproduzione anche parziale è vietata. Le descrizioni e le illustrazioni sono riferite alla specifica macchina/impianto in oggetto. SPM DRINK SYSTEMS si riserva il diritto di apportare in qualsiasi momento tutte le modifiche che riterrà...
-
Page 4: Table Of Contents
INDICE 1. AVVERTENZE E CONSIGLI IMPORTANTI ..............5 2. CORREDO DELL’APPARECCHIO ....5 3. INDICAZIONI UTILI PER IL TRASPORTO5 4. INDICAZIONI UTILI PER IL SOLLEVAMENTO ........5 5. SPECIFICHE TECNICHE ......6 6. POSIZIONAMENTO ........7 7. COLLEGAMENTO ALLA RETE ELETTRICA ..........8 8. OPERAZIONI D’AVVIAMENTO E MODALITA’... -
Page 5: Avvertenze E Consigli Importanti
controllato da personale qualificato. Non posizionare bombole con gas infiammabile 1. AVVERTENZE E CONSIGLI vicino a questa apparecchiatura. IMPORTANTI Questa apparecchiatura è stata progettata per applicazioni quali: Il presente manuale d’uso ed installazione Aree cucina per staff in negozi, uffici è... -
Page 6: Specifiche Tecniche
Per non provocare danni all'apparecchio, le Le dimensioni di ingombro dell’ apparecchio manovre di carico e scarico sono da effettuarsi sono: con particolare cura. E' possibile sollevare l'apparecchio, con carrello elevatore, a motore o manuale, posizionando le pale nella parte Altezza 80 cm. -
Page 7: Posizionamento
Importante La messa a terra è necessaria e obbligatoria a 6. POSIZIONAMENTO termine di legge. Prima di effettuare qualsiasi operazione di pulizia o manutenzione SOLO PER MANUTENTORE straordinaria assicurarsi di aver scollegato L'installazione e le successive operazioni di l’apparecchio dalla rete togliendo la spina di manutenzione, devono essere effettuate da alimentazione. -
Page 8: Collegamento Alla Rete Elettrica
7. COLLEGAMENTO ALLA RETE ELETTRICA SOLO PER MANUTENTORE Prima di inserire la spina nella presa di alimentazione, come già spiegato nel paragrafo precedente, è necessario che per la Vostra sicurezza prendiate attenta visione delle seguenti precauzioni: - Accertarsi che il collegamento sia effettuato ad un impianto dotato di un efficace messa a terra come previsto dalle vigenti normative di sicurezza (fig.3). -
Page 9: Operazioni D'avviamento Emodalita' D'uso
8. OPERAZIONI D’AVVIAMENTO E MODALITA’ D’USO !ATTENZIONE! PRIMA DI EFFETTUARE IL PRIMO AVVIAMENTO DELLA MACCHINA, PROCEDERE ALLE OPERAZIONI DI PULIZIA E SANITIZZAZIONE DESCRITTE AL CAPITOLO 9 - Diluire e miscelare, in un recipiente a parte, lo Fig. 4 sciroppo con acqua secondo le indicazioni del produttore (vedi figura 4);... - Page 10 - Riposizionare il coperchio sulla vasca, inserire la spina ed attivare l’interruttore generale A (fig.7). - Posizionandolo sul fiocco di neve si attiverà l’impianto frigorifero in modalità defrost o in modalità granita a seconda della posizione dell’interruttore B (fig.7 ed 8). - Posizionandolo sul simbolo del lavaggio (wash con le goccioline) verrà...
- Page 11 - Per erogare il prodotto, posizionare il bicchiere sotto al rubinetto e tirare la leva come mostrato in figura 10. !ATTENZIONE! Spingendo il tasto accensione sulla posizione con il fiocco di neve, l’impianto frigorifero entra in funzione; onde evitare che l’apparecchio si danneggi, prima di attivarlo assicurarsi sempre di aver già...
-
Page 12: Operazioni Di Pulizia Esanitizzazione Quotidiana
9. OPERAZIONI DI PULIZIA E SANITIZZAZIONE QUOTIDIANA Al fine di avere sempre un buon funzionamento Né la casa costruttrice della macchina, né il dell’apparecchio e di rispettare le vigenti quella produttrice del preparato alimentare normative sanitarie, è indispensabile effettuare introdotto nella stessa, possono essere ritenute frequentemente e dettagliatamente le responsabili per eventuali danni che possono operazioni di pulizia e sanitizzazione descritte in... - Page 13 - Disattivare l’impianto frigorifero portando il tasto A sulla posizione di lavaggio. - Munirsi di un comune prodotto adatto alla disinfezione di oggetti in acciaio inox, plastica e gomma (AMUCHINA®). IMPORTANTE Attenersi in maniera scrupolosa alle prescrizioni del prodotto utilizzato per quanto riguarda i tempi e le modalità...
- Page 14 Attenzione Onde evitare rischi di shock elettrico o di contatto con parti mobili, durante le operazioni di smontaggio e rimontaggio, assicurarsi che tutti gli interruttori siano nella posizione off e che il cavo di alimentazione sia scollegato dalla rete. - Posizionare l’interruttore generale A sulla posizione neutra e disconnettere il cavo di alimentazione dalla rete.
- Page 15 - Estrarre la spirale di miscelazione (fig.18). - Rimuovere dalla vasca superiore il galleggiate. - Smontare la vaschetta raccogli gocce tirandola leggermente verso l’esterno (fig.19) e lavarla accuratamente con acqua calda e detersivo per stoviglie. - Lavare accuratamente ognuno di questi componenti con acqua calda e detersivo per stoviglie.
- Page 16 Una volta eseguite accuratamente tutte queste operazioni di pulizia e sanificazione, si può procedere al rimontaggio dei componenti. Il corretto assemblaggio della macchina è molto importante per prevenire perdite di prodotto ed il danneggiamento della stessa. Per assemblare la macchina è necessario disporre di un lubrificante approvato (Vaselina).
-
Page 17: Manutenzione Straordinaria
SANITIZZAZIONE 10. MANUTENZIONE STRAORDINARIA Qualora la macchina rimanga ferma per alcuni giorni dopo essere stata pulita e disinfettata accuratamente come descritto nel capitolo 9, al Attenzione momento del riavvio è necessario effettuare le Prima di procedere a qualsiasi operazione di manutenzione, è obbligatorio spegnere operazioni di sanitizzazione descritte in seguito. -
Page 18: Controllo E Sostituzione Delle Guarnizioni
Controllo e sostituzione delle guarnizioni Stoccaggio prodotto GUARNIZIONE FLANGIA FRONTALE La guarnizione sulla flangia frontale va sostituita Poiché la conservazione del prodotto utilizzato ogni 6 mesi a seconda dello stato di usura e del dipende dalla temperature e dalla durata dello livello di manutenzione e lubrificazione. -
Page 19: Guida Alla Risoluzione Dei Problemi
12. GUIDA ALLA RISOLUZIONE DEI NOTA BENE: le seguenti procedure PROBLEMI devono essere eseguite da un tecnico qualificato Problema Possibile causa Soluzione macchina Lo spazio di ventilazione attorno Lasciare almeno 20cm di spazio libero • • raffredda raffredda alla macchina è inadeguato attorno alla macchina e non posizionarla solo parzialmente ed il La macchina sta funzionando in... - Page 20 Date of issue: March 2016 Revision 1 Page 20/58...
- Page 21 (protected in a transparent and waterproof cover to avoid deterioration) and must accompany the machine throughout its life, including any changes of ownership. In case of loss or damage, it is possible to request a copy from SPM DRINK SYSTEMS, reporting the data shown on the identification plate SPM DRINK SYSTEMS declines any responsibility for improper use of the machine/equipment and/or for damage caused by operations not provided for in this manual.
- Page 22 TABLE OF CONTENTS 1. IMPORTANT WARNINGS AND ADVICE23 2. SUPPLIED WITH THE APPLIANCE ..23 3. ADVICE FOR TRANSPORT .....23 4. ADVICE FOR LIFTING ......23 5. TECHNICAL SPECIFICATIONS ....24 6. POSITIONING ..........25 7. CONNECTING TO MAINS POWER SUPPLY .............26 8. START-UP PROCEDURES AND METHOD OF USE ............27 9.
-
Page 23: Supplied With The Appliance
Common areas in hotels, motels and other residential environments 1. IMPORTANT WARNINGS AND Bed and breakfast, catering and ADVICE similar applications This operator's and installation manual is an integral part of the appliance and 2. SUPPLIED WITH THE APPLIANCE should be kept for future consultation. Unless otherwise stated, this manual is At the time it is opened, inside the packaging intended for the operator (staff using the... -
Page 24: Technical Specifications
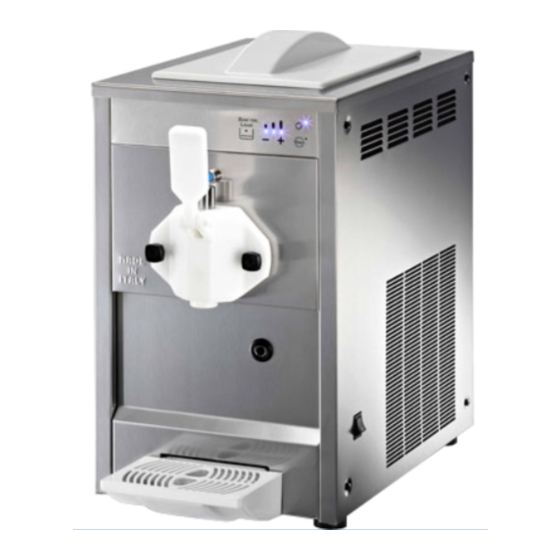
To avoid damage to the appliance, loading and U-go unloading operations should be carried out with Height 80 cm • particular care. It is possible to lift the appliance Width 36 cm • with forklifts, motorised or manual, placing the Depth 70 cm •... -
Page 25: Positioning
6. POSITIONING FOR MAINTENANCE STAFF ONLY Installation and subsequent maintenance operations must be carried out by staff qualified and trained in the use of the appliance in accordance with the regulations in force. a) After removing the packaging, preserve all parts of it for winter storage and ensure the integrity of the appliance (fig. -
Page 26: Connecting To Mains Power Supply
7. CONNECTING TO MAINS POWER SUPPLY FOR MAINTENANCE STAFF ONLY Before inserting the plug into the power socket, as already explained in the previous section, it is necessary that you carefully read the following instructions for your own safety: - Make sure the connection is made to a system with an effective earth as required by current safety standards (fig. -
Page 27: Start-Up Procedures And Method Of Use
8. START-UP PROCEDURES AND METHOD OF USE !ATTENTION! BEFORE STARTING THE APPLIANCE THE FIRST TIME, CARRY OUT THE CLEANING AND SANITISING PROCEDURES DESCRIBED IN CHAPTER 9. - Dilute and mix the product in a separate container according to the manufacturer’s instructions (see fig.4);... - Page 28 - Restore the lid back in place, insert the plug into the main and switch on the main switch A (fig.7). - Switching the button A on the snowflake position the refrigerating system will be activated in freeze or defrost mode depending on the B switch position (fig.7 and 8).
- Page 29 - To dispense, place a glass under the tap and pull the lever as shown in fig. 10. !ATTENTION! On pushing the power button on the snowflake position, the cooling system comes into operation. To prevent the appliance being damaged, always make sure you have already introduced the mix into the tank before activating the cooling system.
-
Page 30: Daily Cleaning And Sanitising
9. DAILY CLEANING AND SANITISING Neither the manufacturer of the appliance, nor In order that the appliance always functions the producer of the food preparation introduced correctly and to comply with the applicable into it, shall be held liable for any damage that hygiene regulations, it is essential to carry out may directly or indirectly occur to persons as a the procedures for cleaning and sanitising... - Page 31 - Switch off the cooling system by switching the power button A on the wash position. - Use a common product suitable for sanitising stainless steel, plastic and rubber objects (such as AMUCHINA® in Italy). IMPORTANT: Carefully follow the instructions of the product used with regard to timing and method of conservation.
- Page 32 Attention To avoid risk of electrical shock or contact with moving parts during dismantling and reassembly, make sure all switches are in the off position and that the power lead is disconnected from the mains. - Turn off the main switch A (neutral position) and disconnect the power lead from the mains.
- Page 33 - Extract the beater and all components mounted on it (fig. 18). - Remove the level float from the upper tank. - Remove the drip tray by pulling it gently outwards (fig. 19). - Wash each of these components thoroughly with hot water and washing-up liquid.
- Page 34 Once you have performed all these cleaning and sanitising operations thoroughly, you can reassemble the components. The correct assembly of the appliance is very important to prevent mix leakage and damage to the appliance. To assemble the appliance you must have an approved lubricant (Vaseline) available.
-
Page 35: Extraordinary Maintenance
10. EXTRAORDINARY MAINTENANCE SANITISATION Attention If the appliance is not used for some days after Before carrying out any maintenance, you being thoroughly cleaned and sanitised as must switch off the appliance and unplug described in Chapter 9, at restart the following the power lead from the socket. -
Page 36: Checking And Replacing The Seals
Checking and replacing the seals Product storage FLANGE SEAL Since the conservation of the product used depends on the temperature and duration of The front side flange seal should be replaced storage, it is absolutely necessary to refer to the every 6 months depending on the state of wear instructions and specifications of the and the level of maintenance and lubrication. -
Page 37: Troubleshooting Guide
NOTE: The following procedures must 12. TROUBLESHOOTING GUIDE be performed by qualified technical staff Problem Possible cause Solution The appliance does not The space around the appliance is Allow at least 20 cm of free space around • • cool, cools only inadequate for ventilation... - Page 38 Ausstellungsdatum: März, 2016 Revision: 1 S. : 38/58...
- Page 39 (in einer transparenten und dichten Schutzhülle) und muss die Maschine während seiner gesamten Lebensdauer, Eigentümerwechsel inbegriffen, begleiten. Im Fall von Verlust oder Beschädigung ist es möglich, eine Kopie bei SPM DRINK SYSTEMS unter Angabe der auf dem Typenschild angegebenen Daten zu beantragen.
- Page 40 INHALT 1. WICHTIGE HINWEISE UND EMPFEHLUNGEN ........41 2. AUSSTATTUNG DES GERÄTES .....41 3. HINWEISE ZUM TRANSPORT ....41 4. NÜTZLICHE INFORMATIONEN ZUM HUB ............41 5. TECHNISCHE SPEZIFIKATIONEN ..42 6. AUFSTELLUNG .........43 7. ANSCHLUSS AN DAS STROMNETZ ..44 8. VORGÄNGE DER INBETRIEBNAHME UND GEBRAUCHSMODALITÄTEN ..45 9.
-
Page 41: Wichtige Hinweise Und Empfehlungen
Dieses Gerät wurde für folgende Anwendungen vorgesehen: 1. WICHTIGE HINWEISE UND Belegschaftsküchen in Geschäften, EMPFEHLUNGEN Büros oder anderen Arbeitsumgebungen; Die vorliegende Gebrauchs- und Gemeinschaftsräume in Hotels, Installationsanleitung ist wesentlicher Motels oder anderen Bestandteil des Geräts und ist für die Wohnumgebungen im Allgemeinen; Konsultation aufzubewahren. -
Page 42: Technische Spezifikationen
Beim Ver- und Entladen immer vorsichtig vorgehen, um Schäden am Gerät zu vermeiden. Es ist möglich, Höhe 80 cm. • das Gerät mit einem Gabelstapler mit Motor oder Breite 36 cm. • manuell durch Einsetzen der Gabeln unter dasselbe Tiefe 70 cm •... -
Page 43: Aufstellung
6. AUFSTELLUNG NUR FÜR WARTUNGSPERSONAL Die Installation und die späteren Wartungsarbeiten dürfen ausschließlich von einer im Gebrauch des Gerätes geschulten Fachkraft unter Beachtung der einschlägigen Vorschriften ausgeführt werden. a) Nach dem Auspacken alle Verpackungsteile für die Winterlagerung aufbewahren und die Unversehrtheit des Geräts sicherstellen (Abb.1). -
Page 44: Anschluss An Das Stromnetz
7. ANSCHLUSS AN DAS STROMNETZ NUR FÜR WARTUNGSPERSONAL Bevor Sie den Stecker an das Stromnetz anschließen (vgl. Beschreibung im vorausgehenden Abschnitt), beachten Sie zu Ihrer Sicherheit folgende Vorsichtsmaßnahmen: - Vergewissern Sie sich, dass die elektrische Anlage, an die das Gerät angeschlossen werden soll, entsprechend den Anforderungen der einschlägigen Sicherheitsbestimmungen geerdet ist (Abb. -
Page 45: Vorgänge Der Inbetriebnahme Und Gebrauchsmodalitäten
8. VORGÄNGE DER INBETRIEBNAHME UND GEBRAUCHSMODALITÄTEN !ACHTUNG! VOR DER ERSTNBETRIEBNAHME DES GERÄTS SIND DIE IN KAPITEL 9 BESCHRIEBENEN VORGÄNGE DER REINIGUNG UND DESINFEKTION AUSZUFÜHREN. Abb. 27 - In einem Behälter getrennt den Sirup mit Wasser nach den Anweisungen des Herstellers (siehe Abbildung 4) verdünnen und mischen;... - Page 46 - Den Deckel wieder auf den Behälter positionieren, den Stecker einsetzen und den Hauptschalter A (Abb.7) betätigen. - Durch seine Positionierung auf die Schneeflocke aktiviert sich die Kühlanlage in Modalität Defrost oder in Modalität Gramolata je nach Position des Schalters B (Abb.7 und 8). - Durch seine Positionierung auf das Symbol der Wäsche (Wash mit den Tröpfchen) wird nur die Drehung des Rührwerks aktiviert und die...
- Page 47 - Um das Produkt auszugeben, den Becher unter den Hahn positionieren und den Hebel wie in Abbildung 10 gezeigt, drücken. !ACHTUNG! Durch Verschieben der Einschalttaste auf die Position der Schneeflocke setzt sich die Kühlanlage in Betrieb; versichern Sie sich immer vor dem Start des Geräts, das Produkt bereits in den Behälter gegeben zu haben um zu vermeiden, dass es beschädigt wird, und...
-
Page 48: Tägliche Reinigung Und Desinfektion
9. TÄGLICHE REINIGUNG UND DESINFEKTION Für einen stets einwandfreien Betrieb unter Weder der Gerätehersteller noch der Hersteller Beachtung der geltenden Gesundheits- und des verwendeten Lebensmittelkonzentrats Hygienevorschriften, ist eine regelmäßige und können für eventuelle direkte oder indirekte sorgfältige Ausführung der nachfolgend Personenschäden haftbar gemacht werden, die beschriebenen Vorgänge der Reinigung und auf eine Nichteinhaltung der Anweisungen des... - Page 49 - Die Kühlanlage deaktivieren, indem man die Taste A auf die Position der Wäsche bringt. - Benutzen Sie ein normales Mittel, das für die Desinfektion von Gegenständen aus Edelstahl, Kunststoff und Gummi geeignet ist (AMUCHINA®). WICHTIG Für die Zeiten und Lagerung des Reinigungs- und Desinfektionsmittels halten Sie sich bitte strikt an die Produktanweisungen.
- Page 50 Achtung Versichern Sie sich, um Stromschlaggefahr und den Kontakt mit beweglichen Teilen während der Vorgänge der Demontage und Montage zu vermeiden, dass alle Schalter auf OFF stehen und der Netzstecker gezogen ist. - Den Hauptschalter A auf die neutrale Position bringen und das Versorgungskabel vom Netz abtrennen.
- Page 51 - Die Mischspirale herausziehen (Abb.18). - Den Schwimmer aus dem oberen Behälter entfernen. - Die Abtropfschale ausbauen, indem man sie leicht nach außen zieht (Abb.19) und sorgfältig mit heißem Wasser und Geschirrspülmittel waschen. - Jedes Teil sorgfältig mit warmem Wasser und Reinigungsmittel säubern.
- Page 52 Nach der gründlichen Reinigung und Desinfektion können die Komponenten wieder eingebaut werden. Die korrekte Montage des Gerätes ist sehr wichtig, um seine Dichtheit zu gewährleisten und Schäden zu verhindern. Für den Zusammenbau des Gerätes ist ein zugelassenes Schmiermittel erforderlich (Vaseline). Vergewissern Sie sich immer, dass alle Teile korrekt gewaschen und desinfiziert wurden, und dass das mit der Montage beauftragte Personal...
-
Page 53: Ausserplanmässige Wartung
DESINFEKTION 10. AUSSERPLANMÄSSIGE WARTUNG Sollte das Gerät nach einer sorgfältigen Reinigung und Desinfektion, wie in Kapitel 9 beschrieben, für einige Tage nicht benutzt Achtung werden, muss es bei seiner Es ist Pflicht, das Gerät vor jeglichem Vorgang der Wartung auszuschalten und Wiederinbetriebnahme erneut wie im Folgenden den Netzstecker aus der Steckdose zu beschrieben desinfiziert werden. -
Page 54: Überprüfung Und Ersatz Der Dichtungen
Überprüfung und Ersatz der Dichtungen Produktlagerung DICHTUNG VORDERER FLANSCH Die Dichtung auf dem vorderen Flansch muss je Die Aufbewahrung des Produkts ist von der nach Verschleiß und Niveau der Wartung und Lagerungstemperatur und -dauer abhängig, Schmierung alle sechs Monate ausgewechselt deshalb ist es zwingend erforderlich, auf die werden. -
Page 55: Leitfaden Zur Problemlösung
ANMERKUNG: Die folgenden Eingriffe 12. LEITFADEN ZUR PROBLEMLÖSUNG müssen von einem qualifizierten Techniker ausgeführt werden. Störung Mögliche Ursache Lösung Das Gerät kühlt nicht Mangelnde Luftzirkulation um das Mindestens 20 cm Freiraum um die • • oder teilweise, Gerät Maschine lassen und nicht in der Nähe obwohl der Kompressor Das Gerät funktioniert in Modalität von anderen Wärmequellen installieren... -
Page 56: Wiring Diagram
13. WIRING DIAGRAM Data di emissione: March, 2016 Revisione: 1 Pag. : 56/58... - Page 57 ASSISTENZA TECNICA ITALIA Mail: info@service-k.it Tel. 059782884 Conforme alla normativa RoHS Questo apparecchio è conforme alla direttiva europea 2002/95/CE e successive modifiche per quanto riguarda la restrizione all’uso di sostanze pericolose nella produzione di apparecchiature elettriche ed elettroniche. Smaltimento Ai sensi della direttiva RAEE 2002/96/CE e successiva modifica 2003/108/CE questa apparecchiatura viene contrassegnata con il seguente simbolo del contenitore di spazzatura con ruote barrato.
- Page 58 INTERNATIONAL CUSTOMER CARE intcustcare@spm-ice.it +39 059781761 Company with certified quality management system UN EN ISO 9001 Data di emissione: March, 2016 Revisione: 1 Pag. : 58/58...
Need help?
Do you have a question about the U-go and is the answer not in the manual?
Questions and answers