
Related Manuals for SPM IPro 2 W


Summary of Contents for SPM IPro 2 W
- Page 1 GRANITORE SLUSH MACHINE IPro WATER MANUALE D’USO E MANUTENZIONE OPERATOR’S MANUAL Data di emissione: Settembre, 2016 Revisione: 1 Pag. : 1/44...
- Page 2 ITALIANO PAG.3 ENGLISH PAGE 21 Data di emissione: Settembre, 2016 Revisione: 1 Pag. : 2/44...
- Page 3 Revisione: 01 © 2016 – SPM Drink Systems Tutti i diritti di riproduzione del presente manuale sono riservati alla SPM DRINK SYSTEMS, la riproduzione anche parziale è vietata. Le descrizioni e le illustrazioni sono riferite alla specifica macchina/impianto in oggetto. SPM DRINK SYSTEMS si riserva il diritto di apportare in qualsiasi momento tutte le modifiche che riterrà...
-
Page 4: Table Of Contents
INDICE 1. AVVERTENZE E CONSIGLI IMPORTANTI ..............5 2. CORREDO DELL’APPARECCHIO ....5 3. INDICAZIONI UTILI PER IL TRASPORTO5 4. INDICAZIONI UTILI PER IL SOLLEVAMENTO ........5 5. SPECIFICHE TECNICHE ......6 6. POSIZIONAMENTO ........7 7. COLLEGAMENTO ALLA RETE ELETTRICA ..........8 8. SPECIFICHE DI CONNESSIONE ....9 9. -
Page 5: Avvertenze E Consigli Importanti
2. CORREDO DELL’APPARECCHIO 1. AVVERTENZE E CONSIGLI IMPORTANTI Al momento dell’apertura all’interno dell’imballo si troveranno i seguenti elementi: - il presente manuale di uso e manutenzione, Il presente manuale d’uso ed installazione - la dichiarazione di conformità CE; è parte integrante dell’apparecchio e dovrà - 1 tubetto di lubrificante (vaselina);... -
Page 6: Specifiche Tecniche
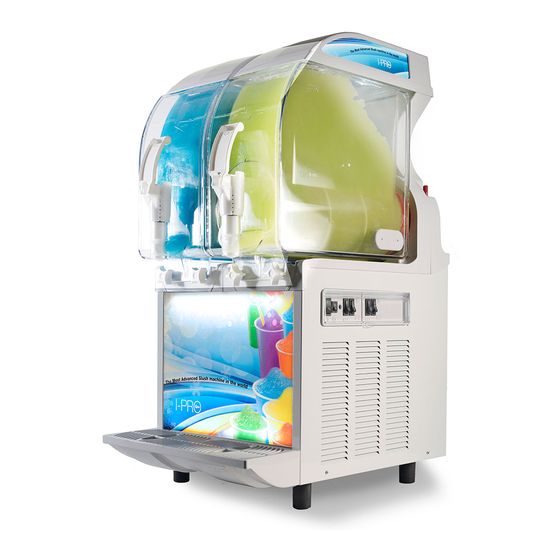
Va, invece, evitato di: IPro 2 W • - rovesciare l’apparecchio; Altezza 87 cm. • - trascinare l’apparecchio con funi od altro; Larghezza 40 cm. • - sollevare l’apparecchio con imbracature o funi Profondità 58 cm. • - scuotere o dare scossoni all’apparecchio ed al Peso 60 kg. -
Page 7: Posizionamento
6. POSIZIONAMENTO SOLO PER MANUTENTORE L'installazione e le successive operazioni di manutenzione, devono essere effettuate da personale specializzato ed addestrato all'uso dell'apparecchio, secondo le norme in vigore. a) Dopo aver tolto l’imballo conservarne tutti gli elementi per lo stoccaggio invernale ed assicurarsi dell’integrità... -
Page 8: Collegamento Alla Rete Elettrica
7. COLLEGAMENTO ALLA RETE ELETTRICA SOLO PER MANUTENTORE Prima di inserire la spina nella presa di alimentazione, come già spiegato nel paragrafo precedente, è necessario che per la Vostra sicurezza prendiate attenta visione delle seguenti precauzioni: - Accertarsi che il collegamento sia effettuato ad un impianto dotato di un efficace messa a terra come previsto dalle vigenti normative di sicurezza (fig.3). -
Page 9: Specifiche Di Connessione
In tal caso, controllare la presenza di acqua sulla linea di entrata ed in seguito andare a 8. SPECIFICHE DI CONNESSIONE pigiare il tasto rosso posto sotto il piano inferiore del granitore, lato porta comandi, si spegne la lampada rossa ed il granitore ritorna Elementi per il collegamento della macchina dati funzionare regolarmente. -
Page 10: Operazioni Di Avviamento
9. OPERAZIONI DI AVVIAMENTO !ATTENZIONE! PRIMA DI EFFETTUARE IL PRIMO AVVIAMENTO DELLA MACCHINA, PROCEDERE ALLE OPERAZIONI DI PULIZIA E SANITIZZAZIONE DESCRITTE NEL CAPITOLO 12 - Diluire e miscelare, in un recipiente a parte, lo sciroppo con acqua secondo le indicazioni del produttore (vedi figura 5);... -
Page 11: Modalita' D'uso
!ATTENZIONE! 10. MODALITA’ D’USO IPRO è dotata di una vasca coibentata ad elevato potere isolante dunque, qualora si desideri operare in modalità a) Attivare l’interruttore generale D; mantenimento, sarà necessario prolungare tale fase per il tempo necessario al b) Ogni vasca è comandata da 2 interruttori che completo scioglimento del prodotto. - Page 12 a) Per erogare il prodotto, posizionare il bicchiere sotto al rubinetto e tirare la leva come mostrato in figura 9. b) Regolazione della consistenza: per variare la consistenza del prodotto, agire sul Fig. 9 pomello di regolazione A collocato nel retro della macchina (fig.
-
Page 13: Operazioni Di Pulizia Esanitizzazione Quotidiana
11. OPERAZIONI DI PULIZIA E SANITIZZAZIONE QUOTIDIANA Né la casa costruttrice della macchina, né il Al fine di avere sempre un buon funzionamento quella produttrice del preparato alimentare dell’apparecchio e di rispettare le vigenti introdotto nella stessa, possono essere ritenute normative sanitarie, è... - Page 14 PULIZIA E SANITIZZAZIONE QUOTIDIANA - Disattivare l’impianto frigorifero (disattivando o il tasto con il fiocco di neve o quello con le onde) e far funzionare la macchina con il solo mescolatore in movimento per una decina di minuti. - Svuotare la vasca dal prodotto rimanente. Attenzione Onde evitare rischi di shock elettrico o di contatto con parti mobili, durante le...
- Page 15 - Svitare il pomello di fissaggio S in senso orario (filettatura sinistra) e procedere all’estrazione del gruppo di miscelazione U e delle guarnizioni di tenuta X e T (vedi fig.15). Attenzione Evitare l’uso di detergenti abrasivi che possono danneggiare la superficie dei componenti.
- Page 16 Una volta eseguite accuratamente tutte queste operazioni di pulizia, si può procedere al rimontaggio dei componenti. Il corretto assemblaggio della macchina è molto importante per prevenire perdite di prodotto ed il danneggiamento della stessa. Per assemblare la macchina è necessario disporre di un lubrificante approvato (Vaselina).
- Page 17 - Rimontare il rubinetto avendo cura di cospargere con grasso di vaselina le guarnizioni J per agevolare lo scorrimento del rubinetto nella propria sede fino a completo inserimento (vedi fig.21). !ATTENZIONE! Il non perfetto scorrimento del rubinetto compromette la tenuta dello stesso. - Smontare la vaschetta raccogli - gocce tirandola verso l’esterno (vedi fig.22).
-
Page 18: Avvertenze
IMPORTANTE Stoccaggio invernale Non lasciare il sanitizzante nella vasca per periodi di tempo superiori a quelli prescritti Per proteggere la macchina durante lunghi dal produttore periodi di inattività come l’inverno, è importante sistemarla correttamente come descritto in - Svuotare la vasca aprendo e chiudendo seguito: almeno 10 volte il rubinetto in modo da sanitizzare anche la zona di passaggio prodotto. -
Page 19: Guida Alla Risoluzione Dei
14. GUIDA ALLA RISOLUZIONE DEI PROBLEMI NOTA BENE: le seguenti procedure devono essere eseguite da un tecnico qualificato Problema Possibile causa Soluzione • • macchina Il flusso di acqua in entrata è Controllare l’afflusso di acqua e risolvere raffredda raffredda scarso eventuali problematiche •... - Page 20 Problema Possibile causa Soluzione • • mescolatore risulta La guarnizione a ventosa è stata Smontare, pulire, sanitizzare e lubrificare rumoroso durante sostituita senza essere lubrificata correttamente la guarnizione • rotazione correttamente Smontare e rimontare correttamente la • La spirale di mescolamento non è spirale e tutto il sistema di mescolamento stata rimontata correttamente •...
- Page 21 All copying rights are reserved to SPM DRINK SYSTEMS; copying, even partial, is illegal. The descriptions and illustrations refer to the specific machine at issue. SPM Drink Systems reserves the right to modify at any time the equipment for mass production.
- Page 22 INDEX 1. IMPORTANT WARNINGS AND ADVICES ..............23 2. EQUIPMENT KIT ........23 3. TRANPORT TIPS ........23 4. LIFTING TIPS ..........23 5. TECHNICAL SPECIFICATIONS ....24 6. POSITIONING ..........25 7. CONNECTION TO THE POWER SUPPLY MAINS ............26 8. CONNECTION SPECIFICATIONS ...27 9. START-UP PROCEDURES .......28 10.
- Page 23 1. IMPORTANT WARNINGS AND 2. EQUIPMENT KIT ADVICES In the packaging of this equipment you will find This installation and operation manual is also: an integral part of the equipment and must - operator’s manual, be kept for future consultation. - 1 tube of Vaseline grease lubricant to be used Unless otherwise stated, this manual is for machine maintenance;...
- Page 24 Dimensions and weight: any potential damage to the environment and to create health risks. IPro 2 W In order to correctly dispose of the device, • Height 87 cm. please contact the distributor from which you •...
- Page 25 6. POSITIONING FOR SERVICEMAN ONLY The installation and subsequent servicing operations must be carried out by skilled members who have been trained to use the device and in compliance with the regulations in force. a) Remove the packing (fig.1), preserve it in order to reuse for winter storage and make sure the machine is in perfect condition.
- Page 26 7. CONNECTION POWER SUPPLY MAINS FOR SERVICEMAN ONLY Before fitting the plug in the power supply socket, your safety, already mentioned in the previous paragraph, please read the following precautions. machine’s electrical safety only guaranteed when it is connected to a suitable earth system, structured as provided by the national safety...
- Page 27 the frame under the control panel and the refrigerating system will start operating again. 8. CONNECTION SPECIFICATIONS - In case of frequent pressure switch interventions , before pushing the red switch in Connection parts supplied together with the order to re-activate it, check for the water machine: presence along the inlet line and for the •...
- Page 28 9. START-UP PROCEDURES !IMPORTANT! BEFORE STARTING THE MACHINE, CARRY OUT THE CLEANING AND SANITISING PROCEDURES DESCRIBED IN CHAPTER 11. - Dilute and mix the product in a separate container according to the manufacturer’s instructions (see fig.5); never pour dry powder, crystals, or concentrate into a dry bowl.
- Page 29 !CAUTION! IPRO is equipped with an insulated bowl 10. OPERATING INSTRUCTIONS that will preserve the product temperature for many hours so once it will be necessary to operate in defrost/chill mode, we a) Activate the general switch (D); recommend to extend the duration of this operating mode until the product complete b) Each bowl is controlled by two switches which melting.
- Page 30 a) To dispense the product, position the cup under the tap and pull the dispensing lever (see figure 9). b) Adjusting the consistency: to alter the consistency of the product, turn the screws located on the back of the machine in the following way: clockwise to make the product Fig.
- Page 31 11. DAILY CLEANING AND SANITIZING PROCEDURES In order to maintain the machine in like-new operating condition and to respect current regulations, it’s absolutely necessary to frequently and carefully perform the cleaning and sanitizing operations as described below. In case of prolonged shutdown (winter storage), the machine must be disassembled, washed and sanitized according to the instructions in this manual before start-up to ensure the best...
- Page 32 - Empty the bowl of any remaining product. - After unlocking the main cover with its key, remove it. - Fill the bowl with lukewarm water to help melt off any sugar residuals and drain this water before proceeding with the next step. Caution To avoid electrical shock or contact with moving parts, before proceeding with the...
- Page 33 - Unscrew the securing bolt (S) in the direction of the arrow (threading on the left), pull off of the mixing unit (U), and remove the sealing washers (X) and (T) (see figure 15). Caution Avoid the use of abrasive cleaners which can damage the finish.
- Page 34 Once performed all these cleaning and sanitizing procedures, it’s possible to reassemble all the components. The correct assembly of the device is essential to prevent leakage of product and damage of the machine. To assemble the machine you will need an approved lubricant (such as Vaseline). Make sure all parts have been washed and sanitized before assembling.
- Page 35 - Reassemble the parts of the dispensing tap, making sure that the gaskets (J) are lubricated with Vaseline grease so that the tap slides smoothly back into its fixed position, until it’s completely inserted (see figure 21). !Important! The not perfect sliding of the tap compromises its own seal.
- Page 36 Winter storage IMPORTANT Never let the sanitizer inside the bowl for more than 15 minutes. To protect the unit during seasonal shutdown, it’s important to properly store the machine - Drain the solution by opening the plunger to using the following procedures: allow the bowl to empty.
- Page 37 14. TROUBLESHOOTING GUIDE NOTE: the following procedures must be performed by a qualified service technician. Problem Possible cause Solution • • The machine does not cool, The inlet water flow is low Check the water flow and solve if • or cools only partially and The refrigeration system is working in not enough...
- Page 38 • • The CUT OUT lights on the There is no water along the inlet line Turn on the water or wait until • right side panel is on The inlet pipe is obstructed and for this the water flow is regularly back reason the water flow is blocked into the water inlet pipe •...
-
Page 39: Schema Elettrico -Wiring Diagram
15. SCHEMA ELETTRICO -WIRING DIAGRAM Data di emissione: Settembre, 2016 Revisione: 1 Pag. : 39/44... - Page 40 Data di emissione: Settembre, 2016 Revisione: 1 Pag. : 40/44...
- Page 41 Data di emissione: Settembre, 2016 Revisione: 1 Pag. : 41/44...
- Page 42 Data di emissione: Settembre, 2016 Revisione: 1 Pag. : 42/44...
- Page 43 ASSISTENZA TECNICA ITALIA Mail: info@service-k.it Tel. 059782884 Conforme alla normativa RoHS Questo apparecchio è conforme alla direttiva europea 2002/95/CE e successive modifiche per quanto riguarda la restrizione all’uso di sostanze pericolose nella produzione di apparecchiature elettriche ed elettroniche. Smaltimento Ai sensi della direttiva RAEE 2002/96/CE e successiva modifica 2003/108/CE questa apparecchiatura viene contrassegnata con il seguente simbolo del contenitore di spazzatura con ruote barrato.
- Page 44 INTERNATIONAL CUSTOMER CARE intcustcare@spm-ice.it +39 059781761 Company with certified quality management system UN EN ISO 9001 Data di emissione: Settembre, 2016 Revisione: 1 Pag. : 44/44...
Need help?
Do you have a question about the IPro 2 W and is the answer not in the manual?
Questions and answers