
Related Manuals for Grundig GWD I854


Summary of Contents for Grundig GWD I854
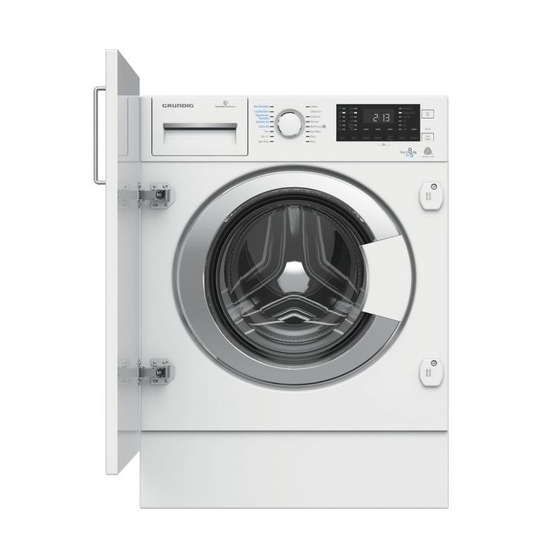
- Page 1 WASHER-DRYER USER‘S MANUAL GWD I854 www.grundig.com Document Number 2820526634_EN/ 19-10-18.(11:01)
- Page 2 Please read these instructions first before using your appliance Dear Customer, Thank you for choosing a Grundig appliance. Please take some time to read this user manual before using your appliance, to ensure you know how to safely operate the controls and functions.
-
Page 3: Table Of Contents
TABLE OF CONTENTS Important instructions for safety and environment General safety ......................5 Electrical safety ..........................5 Product safety ..........................6 Warnings for drying ........................6 Intended use ........................8 Children's safety ......................8 Compliance with WEEE Directive and disposing of the waste product .......9 Package information ....................9 Your washer-dryer Overview ........................10... - Page 4 TABLE OF CONTENTS Operating the product Control panel .......................26 Display symbols ......................26 Preparing the machine ....................27 Selecting the washing programme ................27 Washing programmes ....................27 Temperature selection ....................29 Spin speed selection ....................29 If you want to spin your laundry after the Rinse Hold function: ........... 30 Auxiliary function selection for drying ...................
-
Page 5: Important Instructions For Safety And Environment
Important instructions for safety and environment This section contains safety instructions that will help protect from risk of personal injury or property damage. Failure to follow these instructions shall invalidate any warranty. General safety • This product can be used by children at and above 8 years old and by persons whose physical, sensory or mental capabilities were not fully developed or who lack experience and knowledge provided that they are... -
Page 6: Product Safety
Product safety • Never open the loading door or remove the filter while there is still water in the drum. Otherwise, risk of flooding and injury from hot water will occur. • The water supply and draining hoses must be securely fastened and remain undamaged. - Page 7 • Do not touch loading door glass with bare hands after drying. There is the risk of getting burnt. • In order to maintain laundry in a temperature that will prevent them from getting damaged, a cooling step is performed as a final step. You may be exposed to hot steam if you open the door before cooling is complete.
-
Page 8: Intended Use
• Do not dry unwashed laundry in the machine. • Do not use fabric softeners or static preventers in the machine unless recommended by the manufacturer. • Products such as fabric softeners must be used in accordance with manufacturer‘s instructions. •... -
Page 9: Compliance With Weee Directive And Disposing Of The Waste Product
Compliance with WEEE Directive and disposing of the waste product This product does not contain harmful and forbidden materials described in the "Regulation on the Control of the Waste Electrical and Electronic Equipment". It complies with the WEEE Directive. • This product has been manufactured with high quality parts and materials which can be reused and are suitable for recycling. -
Page 10: Your Washer-Dryer
Your washer-dryer Overview 1- Power cable 2- Top panel 3- Control panel 4- Filter cover 5- Adjustable feet 6- Loading door 7- Detergent drawer 8- Water discharge hose... -
Page 11: Package Contents
Package contents Power cable Water discharge hose Transit bolts Mains water inlet hose User manual Plastic plug group Figures in this manual are schematic and may not match the product exactly. •... -
Page 12: Technical Specifications
Technical specifications Complying Commission Delegated Regulation (EU) No.96/60/EC/1996 Supplier name or trademark GRUNDIG Model name GWDI854 Washer Dryer Energy efficiency class Washing Energy efficiency class (Washing & Drying) Energy Consumption - full load per cycle (kWh) 5.44 Washing Energy Consumption - full load per cycle (kWh) 0.76... -
Page 13: Installation
• Operate the product in a Installation well ventilated and dust free environment. To make the product ready for use, review the information in the user Removing packaging manual and make sure that the reinforcement electricity, tap water supply and water drainage systems are appropriate. -
Page 14: Connecting Water Supply
• Use a tool to loosen all bolts until • Connect the special hose they rotate freely. supplied with the product to the water inlet on the product. • Remove the transit bolts by turning them slightly. Ensure that the cold water connection is made correctly when installing the product. -
Page 15: Connecting To The Drain
• If the hose is run along the floor (or at less than 40 cm above it) and raised later on, water drain becomes difficult and laundry may come out extremely wet. Therefore, observe the heights described in the figure. 90 cm 90 cm Connecting to the drain... -
Page 16: Adjusting The Feet
Adjusting the feet Adjusting Rear Feet Adjust feet so that the product will be balanced in the location it will be used.Balance the machine by adjusting the feet. Check for any play by pressing the product from upper diagonal edges. Otherwise, the product may move from its place and cause crushing, noise and vibration... -
Page 17: Transportation Of The Product
Transportation of the product Important • Unplug the product before Fitting a different plug transporting it. As the colours of the wires in the • Remove water drain and water mains lead of this appliance may not supply connections. correspond with the coloured markings •... -
Page 18: Preparation
Preparation LAUNDRY WASH SYMBOLS Machine Wash Symbols WASH Maximum Water Temperatures Symbol(s) Drying Suitable for No Iron Do not dry- Sensitive / Do not dry Do not dry Symbols dryer clean Delicate dry with dryer DRYING... -
Page 19: Preparing Laundry For Washing
Preparing laundry for washing Laundry that is subjected to • Laundry items with metal heavy deposits of materials such as flour, lime dust, milk attachments such as, underwired powder, etc. Must be shaken off bras, belt buckles or metal before placing into the machine. buttons will damage the machine. -
Page 20: Initial Use
Initial use Laundry type Weight (g) Before starting to use the product Bathrobe 1200 make sure that all preparations Fabric napkin are made in accordance with the Bed sheet “Important safety and environment instructions” and the instructions in Bed sheet the “Installation”... -
Page 21: Using Detergent And Softener
Using detergent and softener Never leave the detergent drawer open while the washing When using detergent, softener, programme is running! starch, fabric dye, bleach and When using a programme descaling agents; read the without prewash, do not put manufacturer‘s instructions any detergent into the prewash written on the package and compartment (compartment... -
Page 22: Liquid Softener Compartment
Liquid Softener Compartment • Wash woollens with special detergent made specifically for Put the suggested amount of liquid woollens. softener into the right compartment with “ ” symbol and dilute it to the maximum Use only detergents filling level line (max. ) with warm manufactured specifically for water. -
Page 23: Using Laundry Starch
used with the detergent; however, Tablet detergents may leave if it is a different consistency, first residues in the detergent put detergent in the compartment compartment. If you notice number “II” in the detergent such residues, place the tablet detergent between the laundry, dispenser and wait for the close to the lower part of the machine to flush the detergent... -
Page 24: Tips For Correct Drying
Clothes Clothes Colours Delicates/Woollens/Silks (Recommended temperature (Recommended temperature range based on soiling level: cold range based on soiling level: cold -30 °C) -40 °C) Prefer liquid detergents Powder and liquid detergents produced for delicate clothes. recommended for colours can be Heavily Woollen and silk clothes must used at dosages recommended... - Page 25 Programmes Programmes Synthetics Drying Wash&Dry It washes and dries Durable Durable consecutively! Bed sheet, Clothes Not recommended! Clothes bedding, baby clothes, t-shirt, with Cotton- with Cotton- sweatshirt, durable knitted Content Content clothes, denim, canvas trousers, It is recommended for the shirts, cotton socks, etc.
-
Page 26: Operating The Product
Operating the product Control panel 1 - Programme selection knob 8 - End Time Adjustment button 2 - Temperature selection lights 9 - Drying Level Adjustment button 3 - Spin speed selection lights 10 - Auxiliary Function buttons 4 - Display 11 - Spin Speed Adjustment button 5 - Drying Programme Lights 12 - Temperature Adjustment button... -
Page 27: Preparing The Machine
Preparing the machine When you will perform washing • Check if the hoses are connected and drying by using the Drying function of your machine, load tightly. maximum 5 kg of laundry • Plug in your machine. into the machine. If you load •... - Page 28 You can dry your laundry after You can dry your laundry after the washing cycle without any the washing cycle without any interruption (automatic or timed interruption (automatic or timed drying can be performed after drying can be performed after washing).
-
Page 29: Temperature Selection
• Rinse If you don‘t want drying to take place after the programme you Use when you want to rinse or starch have selected, press and hold separately. the Drying auxiliary function • Spin+Drain button until the Drying light is Use to drain the water in the machine. -
Page 30: If You Want To Spin Your Laundry After The Rinse Hold Function
Whenever a new programme is You can also change the Spin Speed selected, the spin speed recommended after the washing starts. You can select for the selected programme is spin speed by pressing spin speed displayed on the indicator. adjustment button after washing has Spin Speed started but before the spinning step. -
Page 31: Washing And Drying Programmes
• Mini Wash&Dry • Synthetic Dry Use to wash and dry 0.5 kg laundry (2 Use to dry damp synthetic laundry shirts) in 40 minutes or 1 kg laundry (5 equivalent to 3 kg dry weight. This shirts) in 60 minutes. programme performs drying only. -
Page 32: Programme And Consumption Table
Programme and consumption table (for washing) Auxiliary functions Selectable temperature Programme (°C) range °C 2,40 1400 • • • • 90-Cold Cottons 1,50 1400 • • • • 90-Cold 1,00 1400 • • • • 90-Cold Cottons Eco 60** 0,76 1400 •... - Page 33 Programme and consumption table (for drying) Auxiliary Drying level functions Selectable Programme (°C) temperature range °C Cotton Dry 2.75 1400 • • • • Synthetic Dry 1.70 • • • HygieneCare Wash&Dry 3.80 1400 • • • • 90-30 5 kg Wash&Dry 5.00 1400 •...
-
Page 34: Auxiliary Function Selection
Auxiliary function selection If the selected dampness level (Iron Dry, Wardrobe Dry, Select the desired auxiliary functions Extra Wardrobe Dry) cannot before starting the programme. be reached at the end of the Whenever a programme is selected, drying cycle, your machine will lights of the auxiliary functions that extend the programme duration can be selected together with that... -
Page 35: Drying Steps
Time display • Drying This function enables drying of the Remaining time for the completion laundry after washing. Check with of the programme while it is running which programmes this auxiliary is displayed as “01:30” in hours and function can be selected, from the minutes format. -
Page 36: Starting The Programme
Changing the selections after Do not use liquid detergents when you activate End Time programme has started function! There is the risk of staining of the clothes. Adding laundry after the Malzeme rengi ARC 716 Colour of material is ARC 716 Door keeps locked during the programme has started: 10.5... -
Page 37: Changing The Auxiliary Function, Spin Speed And Temperature
Changing the auxiliary To deactivate the child lock: function, spin speed and temperature Depending on the step the programme has reached, you can cancel or select auxiliary functions. See, "Auxiliary function selection". Also, you can change the spin speed, temperature and drying settings. Press and hold 2nd and 3rd auxiliary See, "Spin speed selection"... -
Page 38: End Of Programme
End of programme Maintenance and cleaning When the programme is over the End of Programme indicator illuminates Service life of product extends and and a buzzer is heard. frequently experienced problems will If you do not press any button for 2 be reduced if it is cleaned at regular minutes, the machine will switch intervals. -
Page 39: Cleaning The Body And Control Panel
Cleaning the body and control Select Additional Water Extra Rinse auxiliary functions. Use Cottons panel without pre-wash. Set programme Wipe the body of the machine with temperature to the level recommended soapy water or non-corrosive mild gel on the drum cleaning agent which can detergents as necessary, and dry with be found in the detergent aisle in... -
Page 40: Draining Remaining Water And Cleaning The Pump Filter
Draining remaining water and • Discharging the water when the product does not have an cleaning the pump filter emergency draining hose: The filter system in your machine prevents solid items such as buttons, coins and fabric fibers clogging the pump impeller during discharge of washing water. -
Page 41: Troubleshooting
Troubleshooting Programmes do not start after the loading door is closed. *Press Start/Pause/Cancel • Start / Pause / Cancel button is not pressed.>>> button. Programme cannot be started or selected. • Washing machine has switched to self protection mode due to a supply Press and hold On/Off button problem (line voltage, water pressure, etc. - Page 42 Loading door cannot be opened. • Loading door lock is activated because of the water level in the machine. >>> Drain the water by running the Pump or Spin programme. Wait until the • Machine is heating up the water or it is at the spinning cycle. >>> programme completes.
- Page 43 Washing performance is poor: Laundry turns grey. (**) • Insufficient amount of detergent has been used over a long period of time. >>> Use the recommended amount of detergent appropriate for water hardness and the laundry. Select • Washing has been performed at low temperatures for a long time. >>> the proper temperature for the laundry to be washed.
- Page 44 Washing machine does not rinse well. • The amount, brand and storage conditions of the detergent used are Use a detergent appropriate for the washing machine and inappropriate. >>> your laundry. Keep detergents closed in an environment free of humidity and do not expose them to excessive temperatures.
- Page 45 Too much foam forms in the machine. (**) Use detergents • Improper detergents for the washing machine is used. >>> appropriate for the washing machine. Use only sufficient amount of • Excessive amount of detergent is used. >>> detergent. Store detergent in a •...
- Page 46 Drying lasts too long. Do not load the machine in excess. • Excessive laundry loaded. >>> Spin at a higher spin speed in washing step in the • Laundry is not spun enough.>>> Dryer-Washing Machine. Turn on the taps. • Tap is turned off. >>> Laundry is still damp after drying.
- Page 47 Accidental damage, misuse or abuse of a product. An attempted repair of a product by anyone other than a Grundig Approved Engineer (the “Engineer”). Installation or use of a product where such installation or use fails to meet the requirements contained in this guarantee or the User Instructions Booklet.
- Page 48 11. Optional extras, where available (i.e. extendable feet) are supplied on a chargeable basis only. Does Grundig offer replacements? This is a repair-only guarantee. On occasion, the Manufacturer may at its sole discretion, replace your product with a new product instead of carrying out a repair.
- Page 49 You can register by first visiting grundig.co.uk/register and by following the online instructions. Grundig Free standing and Built-in appliances come with a 36 month parts and labour guarantee as standard, which can be extended to a 60 months parts and labour guarantee by registering within 90 days of the original purchase date To make a claim against your Grundig Eco Inverter Motor Guarantee (the “Guarantee”), all customer and product details must...
- Page 50 Send us a secure message through our online contact us form. Please visit our website, click Contact Us and choose a product support topic from the list of options. Complete the required details and click send message. Product registrations For UK and Republic of Ireland product registrations please visit grundig.co.uk/register.
-
Page 51: Built-In Installation
BUILT-IN INSTALLATION GUIDE BUILT-IN INSTALLATION 820 mm 153 mm... - Page 55 IF THE CABINET DOOR OPENS TO RIGHT IF THE CABINET DOOR OPENS TO LEFT...
- Page 59 Service Ref. No. Service Ref. No. 1493 1493...
- Page 64 www.grundig.com...
Need help?
Do you have a question about the GWD I854 and is the answer not in the manual?
Questions and answers