Advertisement
ATTENTION: Read carefully this installation Instructions before installing the device!
This manual is subject to change without notice!
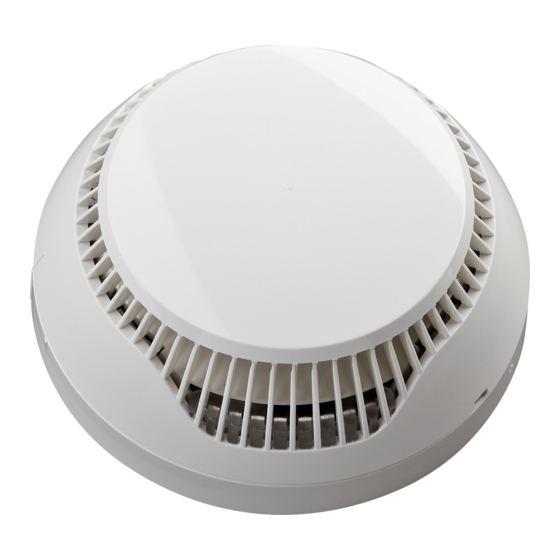
SensoIRIS S130 - Addressable Optical-Smoke Detector
SensoIRIS S130IS - Addressable Optical-Smoke Detector with Isolator
SensoIRIS S130/ SensoIRIS S130IS is аn addressable optical-smoke detector designed for
installing in addressable fire alarm systems supporting TTE communication protocol. The detector is
powered on from the panel and can be controlled via the communication protocol.
The detector SensoIRIS S130IS is with built-in isolator module.
The detector SensoIRIS S130/ SensoIRIS S130IS is compatible with fire base B124.
Installation Instructions
1. Choose the proper place for installation of the fire detector. Refer to the given installation
instructions. Note: Do not install the detector near sources of steam, condensation or smoke, e.g.
SensoIRIS S130/
from cigarettes.
SensoIRIS S130 IS
2. If you want to "lock" the detector to the base remove the little "tooth" on the top of the locking
mechanism (located in the narrow part).
EN54-7
3. Mount the fire base on the ceiling of the protected premises using fixings according the
mounting surface.
4. Connect the detector base to the fire panel using the wiring diagram.
ATTENTION: Disconnect the loop power before installing the detector!
5. Insert the detector into the base and rotate clockwise until it drops into place - the short mark
on the base fits with that on the detector body. Continue to rotate the detector until the detector
mark coincides with the long mark on the base - a click is heard.
6. Test the detector for proper operation and LED indication.
0832-CPD-2200
ATTENTION: The blinking of the two LEDs can be managed from the control panel (ON/ OFF).To
turn the blinking on/ off you have to be a User with Access control level 3.
1139b/01
Choose in consecutiveness from the control panel: System - Programming - Devices - Loop. Find
the installed detector, as enter address, loop and zone number - the panel automatically will
recognize the type of the detector. Choose the button MORE to enter in the additional settings
Dimentions / Размери
!
menu. The blinking of LEDs is turned on/ off with pressing the ON/OFF button in the "Led Blink"
field.
7. If the detector has been locked to the base, when open it for a service schedule maintenance
and cleaning you have to use a plain screw-driver. Light press with the screw-driver into the base
opening and at the same time rotate the detector head counter-clockwise.
Warranty
All detectors carry on a warranty valid from the date of manufacture. The date of manufacture can
be checked by the code sticker label on the back of the detector. The date is printed with white
numbers into a black area -
month. For example: The date code "12 07", means the detector is manufactured in July, 2012.
To return goods for warranty service, please contact with your local distributer for details.
TECHNICAL SPECIFICATIONS / ТЕХНИЧЕСКИ ХАРАКТЕРИСТИКИ
Operating Voltage Range . . . . . . . . . . . . . . . . . . . . . . . . Захранващо напрежение. . . . . . . . . . . . . . . . . . . . . . . . . . . . . 15 - 30VDC (Nom. 27VDC)
Consumption in quiescent state, no communication: . . . Консумация в незадействано състояние, без комуникация:
!
Installation / Инсталиране
Consumption in quiescent state, with communication: . . Консумация в незадействано състояние, с комуникация:
IP30
Consumption in alarm state, with communication . . . . . . Консумация в алармено състояние, с комуникация . . . . . . . 6.5mA
Sensitivity level: . . . . . . . . . . . . . . . . . . . . . . . . . . . . . . . Ниво на чувствителност:
Indoor use
-10°C ÷ +60°C
Вътрешен монтаж
Protected area (in accordance with EN54-7) . . . . . . . . . Зона на покритие (в съотвествие с EN54-7) . . . . . . . . . . . . . up 120m²/ до 120m²
Installation height (in accordance with EN54-7) . . . . . . . Височина на монтаж (в съотвествие с EN54-7) . . . . . . . . . . . up 16m/ до 16m
Output in alarm state at terminal RI (terminals 4/ 1) . . . . Ток в алармено състояние на клема RI (клеми 4/ 1) . . . . . . . 7.5 mA (max)/ 7.5V
~125g
Wire Gauge for terminals . . . . . . . . . . . . . . . . . . . . . . . . Сечение на използвания проводник. . . . . . . . . . . . . . . . . . . . 0.4mm ё 2.0mm
Outdoor use
Външен монтаж
Relative humidity resistance . . . . . . . . . . . . . . . . . . . . . . Устойчивост на относителна влажност . . . . . . . . . . . . . . . . . (93 ± 3)% @ 40°C
English
Installation Instruction
YY MM
. The first two numbers represent the year and the last two - the
- S130. . . . . . . . . . . . . . . . . . . . . . . . . . . . . . . . . . . . .
- S130IS . . . . . . . . . . . . . . . . . . . . . . . . . . . . . . . . . . .
- S130. . . . . . . . . . . . . . . . . . . . . . . . . . . . . . . . . . . . .
- S130IS . . . . . . . . . . . . . . . . . . . . . . . . . . . . . . . . . . .
- Low/ Medium/ Normal*/ High . . . . . . . . . . . . . . . . . .
Български
ВНИМАНИЕ: Прочетете внимателно инструкцията преди да пристъпите към инсталиране
на детектора! Производителят си запазва правото за промени без предисвестие!
SensoIRIS S130 - Адресируем оптично-димен детектор
SensoIRIS S130IS - Адресируем оптично-димен детектор с изолатор
SensoIRIS S130/ SensoIRIS S130IS е адресируем оптично-димен детектор предназначен
за използване в адресируеми пожароизвестителни алармени системи, поддържащи
комуникационен протокол TTE. Детекторът получава захранване от панела и може да
бъде контролиран чрез комуникационния протокол.
Детектор SensoIRIS S130IS съдържа вграден изолатор.
Детектор SensoIRIS S130/ SensoIRIS S130IS е съвместим с основа B124.
Инструкция за инсталиране
1. Изберете подходящо място за монтаж на детектора. Следвайте дадените инструкции за
инсталиране. Забележка: Не инсталирайте детектора в близост до източници на пара,
дим или прах, например цигарен дим.
2. Ако желаете да "заключвате" детектора към основата отстранете зъбчето на върха на
заключващия механизъм (в стеснената част).
3. Монтирайте основата на тавана на помещението, като подберете винтове и дюбели
според монтажната повърхност.
4. Извършете електрически монтаж съгласно приложената схема.
ВНИМАНИЕ: Изключете захранването на контура преди да монтирате детектора!
5. Поставете детектора в основата и го завъртете по посока на часовниковата стрелка до
попадане в направляващите канали - късият маркер на основата съвпада с този на детектора.
Продължете да въртите докато маркера на детектора съвпадне с дългия маркер на основата -
чува се щракване.
6. Тествайте детектора за правилна работа и светлинна индикация.
ВНИМАНИЕ: Мигането на светодиодите на детектора може да се включва и изключва от
контролния панел. За да включите/ изключите мигането на светодиодите трябва да сте
Потребител с Ниво на достъп 3.
Изберете последователно от панела: Система - Програмиране - Устройства - Кръгови.
Намерете инсталирания детектор, като зададете адрес, номер на кръг и зона - панела
разпознава автоматично типа на устройството. Изберете бутон Друго, за да влезете в менюто
за допълнителни настройки. Мигането на светодиода се включва/ изключва с натискане на
бутон ВКЛ./ИЗКЛ. в поле "Мигане на светодиода".
7. Ако детекторът е заключен към основата, за да го отворите за почистване и поддръжка
трябва да използвате подходяща отвертка. Леко натиснете с отвертката в отвора на основата
и едновременно с това завъртете детектора обратно на часовниковата стрелка.
Гаранция
Всички детектори притежават гаранция валидна от датата на производство. Датата на
производство е изписана върху стикера, залепен на гърба на детектора, с бели цифри на
черен фон -
на производство. Пример: "12 07", означава дата на производство Юли 2012.
За да върнете изделия за гаранционен сервиз се обръщайте към вашия регионален
дистрибутор.
- S130 . . . . . . . . . . . . . . . . . . . . . . . . . . . . . . . . . . . . . . . . . . < 160μA@27VDC
- S130IS . . . . . . . . . . . . . . . . . . . . . . . . . . . . . . . . . . . . . . . . < 190μA@27VDC
- S130 . . . . . . . . . . . . . . . . . . . . . . . . . . . . . . . . . . . . . . . . . . < 200μA@27VDC
- S130IS . . . . . . . . . . . . . . . . . . . . . . . . . . . . . . . . . . . . . . . . < 310μA@27VDC
- Ниска/ Средна/ Нормална*/ Висока . . . . . . . . . . . . . . . . *in accordance with EN54-7/ *в съотвествие с EN54-7
Инструкция за инсталиране
ГГ MM
. Първите две цифри представляват годината, а последните две - месеца
http://www.teletek-electronics.com
2
2
Teletek Electronics JSC;
Address: 14A Srebarna Str,
1407 Sofia, Bulgaria;
18020724, RevB, 04/ 2013
Advertisement
Table of Contents

Related Manuals for Teletek electronics SensoIRIS S130


Summary of Contents for Teletek electronics SensoIRIS S130
- Page 1 бъде контролиран чрез комуникационния протокол. The detector SensoIRIS S130IS is with built-in isolator module. Детектор SensoIRIS S130IS съдържа вграден изолатор. The detector SensoIRIS S130/ SensoIRIS S130IS is compatible with fire base B124. Детектор SensoIRIS S130/ SensoIRIS S130IS е съвместим с основа B124. Installation Instructions Инструкция...
- Page 2 <5m - SensoIRIS T110 (IS), 4. Clean the smoke chamber. SensoIRIS S130 (IS) 5. Mount the PCB back to the detector’s body - as a reference point use the side with a cut-out (3). Rotate the PCB until the cut-out coincides with the pin on the inner part from the detector body. Gently press the PCB down to fix in place.
Need help?
Do you have a question about the SensoIRIS S130 and is the answer not in the manual?
Questions and answers