Advertisement
ATTENTION: Read carefully this installation Instructions before installing the device!
This manual is subject to change without notice!
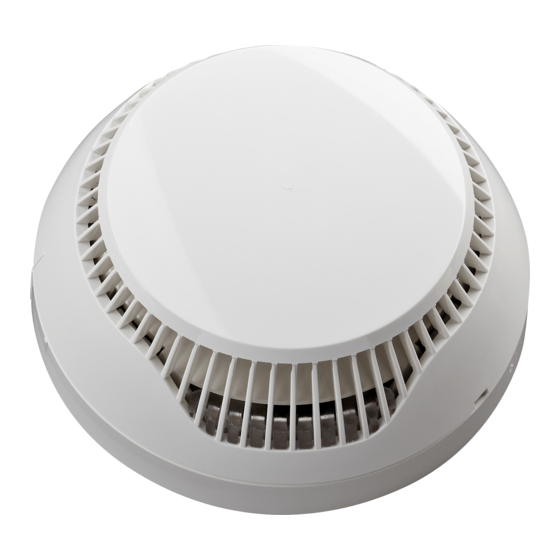
SensoIRIS S130 is аn addressable optical-smoke detector designed for installing in
addressable fire alarm systems supporting TTE communication protocol. The detector is
powered on from the panel and can be controlled via the communication protocol.
The detector SensoIRIS S130 is compatible with fire base B124.
ATTENTION: SensoIRIS S130 must be connected only to fire
panels, which support TTE communication protocol!
SensoIRIS S130
Installation Instructions
1. Choose the proper place for installation of the fire detector. Refer to the given
Intelligent analogue addressable
installation instructions. Note: Do not install the detector near sources of steam, condensation
fire alarm optical smoke detector
or smoke, e.g. from cigarettes.
2. If you want to "lock" the detector to the base remove the little "tooth" on the top of the
locking mechanism (located in the narrow part).
3. Mount the fire base on the ceiling of the protected premises using fixings according the
15
mounting surface.
1293
4. Connect the detector base to the fire panel using the wiring diagram.
DoP No: 023
ATTENTION: Disconnect the loop power before installing the detector!
1293-CPR-0452
5. Insert the detector into the base and rotate clockwise until it drops into place - the short
1139b/01
mark on the base fits with that on the detector body. Continue to rotate the detector until the
Teletek Electronics JSC
detector mark coincides with the long mark on the base - a click is heard.
Address: 14A Srebarna Str,
6. Test the detector for proper operation and LED indication.
1407 Sofia, Bulgaria
ATTENTION: The blinking of the two LEDs can be managed from the control panel (ON/
OFF).To turn the blinking on/ off you have to be a User with Access control level 3.
EN 54-7:2000/ A2:2006
Choose in consecutiveness from the control panel: INSTALLER menu - DEVICE SETUP
menu. Find the installed detector, as enter address, loop and zone number - the panel
Essential characteristics
Performance
automatically will recognize the type of the detector. Choose the button MORE to enter in the
Performance under fire
additional settings menu. The blinking of LEDs is turned on/ off with pressing the ON/OFF
Pass
conditions
button in the "Led Blink" field.
Operational reliability
Pass
7. If the detector has been locked to the base, when open it for a service schedule
Durability:
Maintenance and cleaning you have to use a plain screw-driver. Light press with the screw-
Temperature resistance
Pass
driver into the base opening and at the same time rotate the detector head counter-clockwise.
Humidity resistance
Pass
Warranty
Shock and vibration
All detectors carry on a warranty valid from the date of manufacture. The date of manufacture
Pass
resistance
can be checked by the code sticker label on the back of the detector. The date is printed with
Corrosion resistance
Pass
white numbers into a black area.
Resistance to ingress
Pass
The first two numbers represent the year and the last two - the month.
For example: The date code "15 07", means the detector is manufactured in July, 2015.
ביצועים
מאפיינים מהותיים
To return goods for warranty service, please contact with your local distributer for details.
עבר
אמינות תפעולית
עבר
ביצועים בתנאי אש
TECHNICAL SPECIFICATIONS
עמידות של אמינות תפעולית ועיכוב
עבר
תגובה: התנגדות טמפרטורה
Operating Voltage Range . . . . . . . . . . . . . . . . . . . . . . . . 15 - 32VDC (Nom. 27VDC)
:עמידות של אמינות תפעולית
עבר
Consumption in quiescent state, no communication . . . < 160μA@27VDC
התנגדות הלם ורטט
Consumption in quiescent state, with communication . . < 200μA@27VDC
:עמידות של אמינות תפעולית
עבר
עמידות לחות
Consumption in alarm state, with communication . . . . . 6.5mA
:עמידות של אמינות תפעולית
Sensitivity level (in accordance with EN54-7*) . . . . . . . . High/ *Normal/ Middle/ Low
עבר
עמידות בפני קורוזיה
Output in alarm state at terminal RI (terminals 4/ 1). . . . 7.5 mA (max)/ 7.5V
:עמידות של אמינות תפעולית
Wire Gauge for terminals . . . . . . . . . . . . . . . . . . . . . . . . 0.4mm ё 2.0mm
עבר
התנגדות לחדירה
Relative humidity resistance. . . . . . . . . . . . . . . . . . . . . . (93 ± 3)% @ 40°C
Material. . . . . . . . . . . . . . . . . . . . . . . . . . . . . . . . . . . . . . flame retardant ABS
18020913, RevA, 10/ 2017
English
Installation Instructions
!
Installation / התקנה
IP30
Indoor use /
בתוך מבנה
– פנימית
-10°C ÷ +60°C
~125g
Outdoor use /
מחוץ למבנה
– חיצונית
.הזן את הכתובת, לולאה ומספר אזור - הלוח באופן אוטומטי יזהה את סוג הגלאי
מהבהבת/כבויה
2
2
!
Dimensions /
מידות
הוראות הרכבה
– גלאי עשן אופטיSensoIRIS S130
.TTE הגלאי מיועד להתקנה במערכות אש כתובתית התומכת בפרוטוקול תקשורת
.הגלאי מופעל ונשלט ע"י מערכת האש
.שים לב: התקנת האביזר תתבצע, כאשר הלולאה לא מחוברת לרכזת
. הערה: אין להתקין את הגלאי בקרבת מקורות אדים או עשן
"אם ברצונך "לנעול" את הגלאי לבסיס, הסר את ה "שן
(הקטנה על החלק העליון של מנגנון נעילה )הממוקם בחלק הצר
.
.הרכב את בסיס האש על התקרה וחבר את הבסיס ללולאה בהתאם לשרטוט
.שים לב: התקנת האביזר תתבצע, כאשר הלולאה לא מחוברת לרכזת
.1-250הגדר את כתובת המודול ע"י התכנת או ע"י הרכזת. הכתובת תוגדר בין
.תכנות כתובת )בתכנת( – השתמש בכבל 5 הדקי פינים
הכנס את הגלאי לבסיס וסובב את כיוון השעון, עד שיינעל
.במקומו - הסימן הקצר על הבסיס, מתאים לגוף הגלאי
הכנס את הגלאי לבסיס וסובב את כיוון השעון, עד שיינעל
.במקומו - הסימן הקצר על הבסיס, מתאים לגוף הגלאי
.בדוק תקינות תפקוד הגלאי – נורית הגלאי
יכולה להיות מנוהלת מלוח הבקרה
,LED
-שים לב: הבהוב של שתי נוריות ה
.3 כדי להפעיל הבהוב, עליך להיות משתמש עם רמת בקרת גישה
.בחר ברצף מלוח הבקרה: הגדרת התקנים , חיפוש מספר התקן
- בחר בלחצן 'עוד' לקבלת תפריט הגדרות נוספות. נורית ה
LED
."LED Blink" בשדהON/OFF באמצעות לחיצה על כפתור
אם הגלאי נעול על הבסיס, צריך להשתמש במברג שטוח רגיל. קלה על המברג
לתוך פתח הבסיס ובאותו זמן לסובב את ראש הגלאי נגד כיוון השעון
כל הגלאים נושאים אחריות תקפה, ממועד הייצור. תאריך הייצור ניתן לבדוק על ידי
התווית מדבקת-קוד על גב הגלאי. התאריך מודפס עם מספרים לבנים על שטח
- . שני המספרים הראשונים מייצגים את השנה ושני האחרוניםYY MM - שחור
.2015 החודש. לדוגמה: קוד התאריך " 51 70", פירושו שהגלאי מיוצר בחודש יולי
כדי להחזיר את הסחורה לשירות האחריות, אנא צור קשר עם המפיץ המקומי
15÷32 VDC (Nom. 27VDC) . . . . . . . . . . . . . . . . . . . תחום מתחי עבודה
< 160µА@27VDC. . . . . . . . . . . צריכת במצב שקט, אין תקשורת
< 200µА@27VDC . . . . . . . . . . . צריכת במצב שקט, יש תקשורת
6.5mA . . . . . . . . . צריכת במצב אזעקה, יש תקשורת
(EN54-7 רמת רגישות . . . . . . . . . . . . . . . . . . . . . . . . גבוהה/נורמלית/אמצע/נמוכ )לפי
7.5 mA (max)/ 7.5V . . . . (1/4 )הדקיםRI מוצא מצב אזעקה בהדקי
2
2
0.4mm ÷ 2.0mm . . . . . . . . . . . . . . . . . . . . . . . חוטי קו הגילוי
≤93% @ +40°C . . . . . . . . . . . . . . . . . . . . . . . . . . . . לחות
ABS חומר)פלסטיק . . . . . . . . . . . . . . . . . . . . . . . מעכב בעירה
ִ עב ִ רית
תיאור כללי
.B124 הגלאי מתאים לבסיס
בחר מקום ראוי להתקנת האביזר
.1
.2
.3
.4
.5
.6
.(ON/OFF)
.7
אחריות
.לקבלת פרטים
פרטים טכניים
Advertisement
Table of Contents

Related Manuals for Teletek electronics SensoIRIS S130


Summary of Contents for Teletek electronics SensoIRIS S130
- Page 1 This manual is subject to change without notice! תיאור כללי SensoIRIS S130 is аn addressable optical-smoke detector designed for installing in .TTE הגלאי מיועד להתקנה במערכות אש כתובתית התומכת בפרוטוקול תקשורת addressable fire alarm systems supporting TTE communication protocol. The detector is .הגלאי...
- Page 2 Base B124 / B124 בסיס Address Programming/ Test תכנות הכתובות 1. Apply power to the detector. 2. Wait for 30 sec. 3. Еxert influence on the fire detector by smoke generator (Aerosol Dispenser) or another device with aerosol simulator of smoke.
Need help?
Do you have a question about the SensoIRIS S130 and is the answer not in the manual?
Questions and answers