Table of Contents
Advertisement
Advertisement
Table of Contents

Subscribe to Our Youtube Channel
Related Manuals for Acteon Mini LED


Summary of Contents for Acteon Mini LED
- Page 1 User Manual Mini LED™...
- Page 2 This document is an English translation of the original French version. Reference J02540 version V5 and drawing number NG13FR010E...
-
Page 3: Table Of Contents
6 Monitoring and general maintenance of the medical device 7 Maintenance 7.1 Checking the lamp power level 7.2 Identifying incorrect operation 7.2.1 Not working 7.3 The power of the Mini LED is not as expected 7.4 Other malfunctions 8 Technical specifications of the medical device... - Page 4 8.1 Identification 8.2 Mains Adapter 8.3 Optical Guide 8.4 Mini LED handpiece 8.5 Technical specifications of the battery 8.6 Charging base 8.7 Environmental characteristics 8.8 Environmental restrictions 8.9 Main performance characteristics 9 Regulations and standards 9.1 Official Texts 9.2 Medical class of the device 9.3 Symbols...
- Page 5 To ensure optimum safety for yourself and your patients, comfort in your daily practice and to benefit fully from your medical device's technology, please read the documentation provided carefully. Please refer to the instructions for the entire range of SATELEC ® Mini LED for information about the following: documentation format;...
-
Page 7: Documentation
General instructions relating to the SATELEC complete range of table curing lamps J02921 Consulting electronic user instructions J00000 Mini LED™ User Manual J02541 User Manual • Mini LED™ • J02541 • V5 • 07 • 01/2015 • NG13EN010E - Page... - Page 8 Page - User Manual • Mini LED™ • J02541 • V5 • 07 • 01/2015 • NG13EN010E...
-
Page 9: Required Information
This medical device is used with an optical guide and a rigid protection shield. 2.2 Operating principle Designed to light-cure dental materials, the Mini LED is fitted with electroluminescent diodes (LED) that emit a visible blue light in a spectrum of wavelengths between 440 nm - 460 nm. A removable optical guide is attached to the end of the medical device. - Page 10 Page - User Manual • Mini LED™ • J02541 • V5 • 07 • 01/2015 • NG13EN010E...
-
Page 11: Removal From Packaging, Installation, Connections
Lithium-ion battery; a rigid protection shield; a mains adapter. User Manual • Mini LED™ • J02541 • V5 • 07 • 01/2015 • NG13EN010E - Page... -
Page 12: Installing The Medical Device
Do not install your medical device near or on another device. Install the charging base of your Mini LED on a flat surface with a slope of less than 5°. 3.3 Connecting the medical device to the electrical network Check that the mains voltage is compatible with that indicated on the medical device or its mains adapter. -
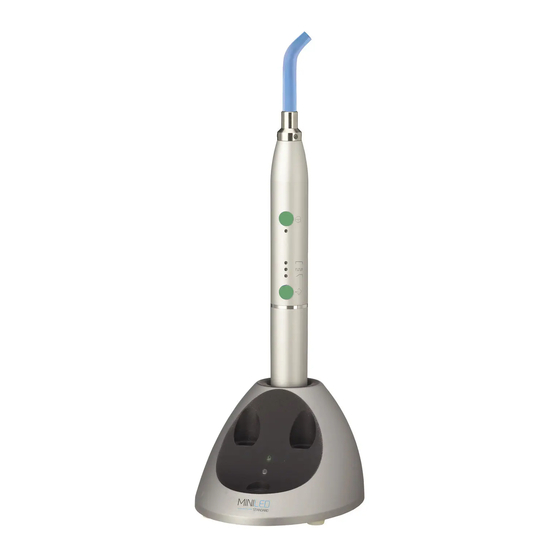
Page 13: Medical Device Description
Mini LED on its charging base; the Mini LED is correctly installed when two beeps are heard and the green indicator light on the base starts flashing; leave the Mini LED to fully charge;... -
Page 14: Connecting And Disconnecting Accessories During Use
4.7 Base The Mini LED charging base comprises a power tester. This is used to test correct operation of the Mini LED. 4.8 Mains Adapter The mains adapter is part of the medical device and helps to ensure its electrical safety. It must be installed near the medical device and must be readily accessible. -
Page 15: Operating Modes
4.9 Operating modes Rapid mode activates maximum power of the Mini LED for ten seconds. Pulsed mode activates maximum power of the Mini LED in ten successive bursts lasting one second, each separated by 250 ms. Progressive mode initiates a gradual rise in power lasting ten seconds followed by ten seconds at full power. -
Page 16: Switching Off The Medical Device
Before a long absence or when not in use, the medical device must be cleaned, its battery must be removed and the charging base must be disconnected from the mains power. Page - User Manual • Mini LED™ • J02541 • V5 • 07 • 01/2015 • NG13EN010E... -
Page 17: Cleaning, Disinfecting And Sterilising
SATELEC ® . 5.1 Cleaning and disinfecting the Mini LED The Mini LED must be OFF during cleaning and disinfecting procedures. It must also be disconnected from its electricity supply. Avoid using cleaning and disinfection products that contain flammable agents. Otherwise, ensure that the product has completely evaporated or that there is no fuel left on the medical device and its accessories before switching it on. - Page 18 Page - User Manual • Mini LED™ • J02541 • V5 • 07 • 01/2015 • NG13EN010E...
-
Page 19: Monitoring And General Maintenance Of The Medical Device
Check the handpiece electrical connectors. These must be clean, smooth and corrosion-free. The battery must be able to be screwed in easily. User Manual • Mini LED™ • J02541 • V5 • 07 • 01/2015 • NG13EN010E - Page... - Page 20 Page - User Manual • Mini LED™ • J02541 • V5 • 07 • 01/2015 • NG13EN010E...
-
Page 21: Maintenance
Cure composite residue remains on the optical Check that the surface of the optical guide is intact. guide Change the optical guide if necessary. User Manual • Mini LED™ • J02541 • V5 • 07 • 01/2015 • NG13EN010E - Page... -
Page 22: Other Malfunctions
If the Mini LED™ is not working for any other reason, contact the SATELEC ® Customer Services Team. If you need to return your Mini LED, please ensure the optical guide and battery are packaged to prevent any impact damage during transportation. -
Page 23: Technical Specifications Of The Medical Device
- 2400 mW / cm 785 mW / cm 2 - 1680 mW / cm 2 Irradiance with amber-coloured optical guide Operating mode Continuous User Manual • Mini LED™ • J02541 • V5 • 07 • 01/2015 • NG13EN010E - Page... - Page 24 Designed for use in all medical establishments, the medical device cannot be used Usage premises outside. Use in gas-filled atmosphere The Mini LED is not designed to be used in an AP or APG gas-filled atmosphere. Immersion The Mini LED must not be immersed.
- Page 25 Always wear safety goggles Always wear protective gloves Sterilisation at 134°C in an autoclave Sterilisation at 132°C in an autoclave Washer-disinfector for thermal disinfection User Manual • Mini LED™ • J02541 • V5 • 07 • 01/2015 • NG13EN010E - Page...
- Page 26 A Company of ACTEON Group 17, avenue Gustave Eiffel BP 30216 33708 MERIGNAC cedex FRANCE Tel. +33 (0) 556.34.06.07 Fax. +33 (0) 556.34.92.92 E.mail: satelec@acteongroup.com. www.acteongroup.com Page - User Manual • Mini LED™ • J02541 • V5 • 07 • 01/2015 • NG13EN010E...
- Page 27 Tel. +86 10 646 570 11/2/3 Fax. +86 10 646 580 15 beijing@cn.acteongroup.com THAILAND ACTEON (THAILAND) LTD 23/45 Sorachai Building 16th floor - Sukumvit 63 User Manual • Mini LED™ • J02541 • V5 • 07 • 01/2015 • NG13EN010E - Page...
- Page 28 When your medical device has reached the end of its service life, contact your nearest dental equipment dealer, or ACTEON GROUP head office or one of the company branches to find out how to proceed. The relevant contact details are given in the chapter Branch addresses page 25.
- Page 29 EC marking 7 repairer 7 restorative 7 gas-filled atmosphere 22 general instructions relating to the complete range Temperature 22 of Mini LED 3 User Manual • Mini LED™ • J02541 • V5 • 07 • 01/2015 • NG13EN010E - Page...
- Page 30 Index: – update update update 7 Page - User Manual • Mini LED™ • J02541 • V5 • 07 • 01/2015 • NG13EN010E...
- Page 31 Optical guide light conductor fitted to the handpiece nozzle and transmitting light to the cure site. Is cleaned and is suitable for autoclaving User Manual • Mini LED™ • J02541 • V5 • 07 • 01/2015 • NG13EN010E -Page...
- Page 32 Ref: J02541 • V5 • 07 • 01/2015 • NG13EN010E A Company of ACTEON Group • 17 av. Gustave Eiffel • BP 30216 • 33708 MERIGNAC cedex • France Tel. +33 (0) 556 34 06 07 • Fax. +33 (0) 556 34 92 92...
Need help?
Do you have a question about the Mini LED and is the answer not in the manual?
Questions and answers