Table of Contents
Advertisement
Advertisement
Table of Contents
Troubleshooting

Related Manuals for Bushranger BRV2601


Summary of Contents for Bushranger BRV2601
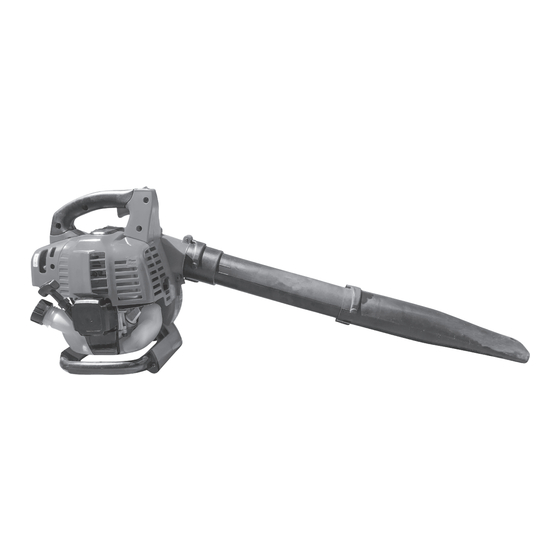
- Page 1 OPERATOR’S MANUAL BLOWER VAC BRV2601...
- Page 2 IMPORTANT NOTES Thank you for purchasing your Bushranger Hand Blower ® This instruction manual will aid in the assembly, safe operation and maintenance of your Hand Blower. Please read the following warnings to ensure safety and the long life of your product.
-
Page 3: Table Of Contents
TABLE OF CONTENTS Safety & Handling Safety Instructions 04 - 06 Hazards Personal Safety Equipment Features & Definitions Feature Definitions Assembly Procedures When Blowing 07 -08 When Vacuuming Operating Instructions Fuelling / Oil Procedures 09-10 Choke Control Starting / Stopping The Blower Use Of Blower Maintenance &... -
Page 4: Safety Instructions
SAFETY & HANDLING Safety Instructions Do not operate the Hand Blower before reading all Instructions & reading all Safety & Handling sections. Operator Safety • Wear the necessary safety equipment, as listed on page (6), in the Personal Safety Equipment Section. •... - Page 5 SAFETY & HANDLING Fuel Safety Continued • Move at least 3 metres away from the fuelling site before starting the engine. • Wipe all traces of fuel on the unit before starting the engine. • Change your clothes before starting the unit if fuel has been spilt on them. Starting Safety •...
-
Page 6: Hazards
SAFETY & HANDLING Transporting and Storage • Hand carry the unit with the engine stopped and the muffler away from your body. • Allow the engine to cool, empty the fuel tank and secure the unit before storing or transporting in a vehicle. •... -
Page 7: Feature Definitions
FEATURES & DEFINITIONS Hand Blower Throttle Trigger Rubber Grip Handle Motor Straight Tube Nozzle Tube Recoil Starter Petrol Cap Spark plug Primer Air Filter Cover Muffler On-Off Switch Tube Locking Screw Fuel Tank Choke Air Filter Cover Retaining Screw Fill Bottle Allen Wrench Nut Driver Spark Plug Wrench... -
Page 8: When Vacuuming
ASSEMBLY PROCEDURES When Blowing (continued) Fitting The Handle 3. Rotate the nozzle tube clockwise locking it into place. (See Fig. 2) 4. Remove the tube locking screw. (See Fig. 3._ 3. Rotate the nozzle tube clockwise locking it into place. Fig. -
Page 9: Fuelling / Oil Procedures
OPERATING INSTRUCTIONS Fuel Filling The Fuel Tank Warning • Always shut off the engine before fuelling. Never add fuel to a machine with a running or hot engine. Move at least 3m away from the re-fuelling site before starting engine. Do not smoke when re-fuelling or operating the blower. •... -
Page 10: Choke Control
OPERATING INSTRUCTIONS ·If the oil is dirty, it needs to be Warning replaced. The engine oil should be classification API, class SAE 10W-40 in -15°C ~ 40°C.The oil viscosity is shown in Fig. 13. Warning!The engine oil should be Fig. 13 classification API, class SAE 10W-30 10W - 40 in -15℃... -
Page 11: Starting / Stopping The Blower
OPERATING INSTRUCTIONS Fig. 16 Starting The Blower To start the engine, proceed as follows: 1. Press the primer 10 times until there are no air bubbles are visible in the fuel discharge line. Note: This is not necessary if the engine is warm. 2. -
Page 12: Use Of Blower
OPERATING INSTRUCTIONS Use Of The Petrol Blower • The blower can efficiently move a wide variety of debris ranging from grass clippings to gravel. As a general rule try to operate the blower at the lowers throttle setting necesssary to get the job done. •... -
Page 13: Oil
MAINTENANCE & CARE Maintenance - Oil Maintenance of Oil • Check oil level before every use. • Replace oil after the first 4 hours of operation. • Refill oil when level reaches lower indicator on oil guage. • Do not fill beyond upper indicator on oil guage. •... -
Page 14: Storage
MAINTENANCE & CARE Storage If you fail to follow these instructions correctly before storing the machine, deposits may form on the interior of the carburettor & may result in the engine being more difficult to start or the machine suffering permanent damage. Storage Preparation 1. -
Page 15: Maintenance Chart
Never repair cutting attachments by welding, straightening or custom reworking of parts. This may result in product failure or serious injury. Never attempt maintenance that is not outlined in this manual. All repair work must be carried out by an Authorised Bushranger Power Equipment Dealer. ®... -
Page 16: Troubleshooting
® Contact Bushranger Service Centre ® Clogged fuel line ContactBushranger Service Centre ® Plugged air vent in fuel tank Clean vent/Contact Bushranger ® Service Centre Insufficient power Clogged air lterClean Valve lash out of spec Contact Bushranger Service Centre ®... -
Page 17: Troubleshooting
Line inside bump head Replace the residual line with when head is bumped is nearly nished. the new line ("Fitting trimmer line - bump head" on page 16) If running difficulties continue, please contact your closest Authorised Bushranger Power ™ Equipment Dealer. - Page 18 NOTES...
- Page 19 NOTES...
- Page 20 Copyright © Roy Gripske and Sons Pty. Ltd. 2018. All rights reserved. 939. Images are for illustrative purposes only. Bushranger™ is a trademark of Roy Gripske & Sons Pty Ltd. PLP shall not be liable for technical or editorial errors or omissions contained herein, nor for incidental or consequential damages resulting from furnishing this material.
Need help?
Do you have a question about the BRV2601 and is the answer not in the manual?
Questions and answers