Advertisement
Quick Links
Advertisement

Related Manuals for Midea 24DMS4G109


Summary of Contents for Midea 24DMS4G109
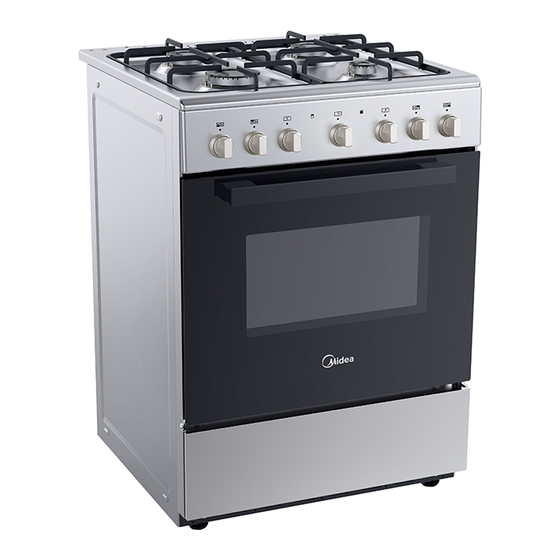
- Page 1 Free-standing gas hotplates and electrical oven Instruction Manual 24DMS4G109...
- Page 3 Thank you for choosing us! Please read all instructions before using this appliance. This book contains valuable information about operation, care and service. Keep it in a safe place for future reference. Should the appliance be sold or transferred to another owner, or should you move house and leave the appliance, always ensure that the book is supplied with the appliance so that the new owner can be acquainted with the functioning of the appliance and...
- Page 4 efficient if you have any doubts call in a qualified electrician to check the system. The manufacturer declines all responsibility for damage resulting from a system which has not been earthed. 7. Check that the electrical capacity of the system and sockets will support the maximum power of the hob, as indicated on the rating label.
- Page 5 19. Never use flammable liquids such as alcohol or gasoline, etc. near the appliance when it is in use. 20. When using small electrical appliances near the hob, keep the supply cord away from the hot parts. 21. Make sure the knobs are in its “OFF” position when the appliance is not in use.
- Page 6 Care with food and cookware 1. To handle or remove food, please use the cooking gloves. 2. Never leave clothes or flammable materials near the burner when the range is in use. When using frying oil or butter additional care must be taken since these products are flammable.
-
Page 7: Anti-Tilt Bracket
To prevent tipping Anti-tilt Bracket of the cooker. Free-standing gas hotplates and electrical oven 24DMS4G109 Pressure test Test gas pressure connector (For ULPG) For grill, dishes, cake pan with items Wire shelf for roasting and grilling. - Page 8 For ovenware, cake tins, Baking and roasts, grilling and frozen roasting shelf meals. For cooking large quantities of food such as moist cakes, pastries, frozen food Univeral pan etc,or for collecting fat/ spillage and meat juices. These shelf support rails on the right and Slider bracket left sides of the oven can be removed for...
-
Page 9: Installing Instruction
Installing instruction Before installing Read the following information about the appliance and the guidelines for ventilation. Appliance Unpacking Check the condition of the appliance after unpacking it. Do not connect the appliance if it has been damaged in transport. Dispose of packaging in an environmentally-friendly manner. Guideline for ventilation This appliance may only be set up in a sufficiently ventilated room and according to the applicable regulations and ventilation requirements. - Page 10 Fitting the adjustable feet Before hand: • Remove all parts that are not permanently fixed, especially the pan supports and burners. • Remove the accessories from the oven.Proceed as follows: • Tilt the appliance by raising one side slightly from the floor. •...
- Page 11 Gas appliance installation 1> Leave at least 80 to 85cm between the top of the gas appliance and any cabinet or appliance hood install above 80 to 85cm prepared to be installed built in. 2>Leave at least 5cm in the back and 2cm each side of the gas appliance to allow the heat to get out.
- Page 12 Gas connection The appliance must be connected in accordance with the currently applicable regulations. Before installing the appliance, check that the local conditions (type of gas and pressure) are compatible with the appliance settings. The permissible appliance settings can be found on the rating plate.Connection to the gas lines and seal fitting must be carried out professionally according to the currently applicable standards.
- Page 13 4 burner models: set the burner pressure to 2.75kPa for ULPG, set the burner pressure to 1kPa for Natural Gas. For commissioning of the appliance with the regulator for Natural Gas, the test point pressure should be 1.00kPa with all burners operating on HIGH. Apply a manometer to the test nipple and reset the regulator if necessary.
- Page 14 Safety valve The installation of a safety valve for opening and closing the gas supply is a compulsory requirement. Fit the safety valve between the gas connecting line to the appropriate room and the hob. Ensure unhindered access to this valve. Checking for leaks After connecting the gas line, check the connections for leaks using soapy water.
- Page 15 Replacing the nozzles (Hotplate burners) 1. Remove the burner caps (A)and burner(B)from the burners(C). 2. Remove the nozzle (D) and replace it with an appropriate nozzle for the new type of gas. 3. Replace the gas label with the new gas label that was supplied with the nozzle set. 4.
- Page 16 Positioning and leveling Positioning the appliance When installing the appliance, make sure that there is enough space in the final installation location to pull the appliance forwards for cleaning and maintenance work. The ground underneath must be hard and stable. The wall immediately behind the appliance must be made from non-flammable material, e.g.
-
Page 17: Using Instruction
Using instruction Your new appliance Get to know your appliance. You will find information about the control panel and hob, as well as the oven, types of heating and accessories. 1. Pot rack 2. Burners knobs 3. Timer knob 4. Function knob 5. - Page 18 The control panel Control knobs Control knobs Gas burners Electricigniter-burners Timer Oven function (for some models are auto-ignition) Control knobs Oven temperature The hob Control knobs for gas burners Adjust the heat setting of the gas burners using the control knobs. The symbol above the control knob shows you to which gas burner the control knob belongs.
- Page 19 Operating gas burners Make sure that the burner lid always sits exactly on top of the burner cup. The slots on the burner cup must be open. All parts must be dry. Switching on the gas burner 1. Press the control knob for the required burner and turn it to position .
- Page 20 Symbol Function Power The lamp work The lamp and circulation motor work The top heating element ,grill heating element, 2600 circulation motor ,lamp work The top heating element ,grill heating element, 2580 circulation motor ,lamp work The grill heating element, lamp work 1629 The top heating element, bottom heating 2108...
- Page 21 Switching on the oven lighting Press down the function button for the oven lighting until it locks into place.The oven lighting switches on. Switching off the oven lighting Press down the function button for the oven lighting until it releases.The oven lighting switches off. The minute minder The minute minder is a countdown timer which emits an audible signal when the cooking time has elapsed.
- Page 22 Accessories The accessories can be inserted in the oven in 5 different shelf positions. You can pull the accessories two-thirds of the way out without them tipping. This allows meals to be removed easily. You can buy accessories from the after-sales service or from specialist retailers.
- Page 23 The storage compartment (for some models) Open the storage compartment by folding down the fascia panel.This compartment can be used to store food or other things. Risk of fire. Never leave combustible items in the storage compartment. Before using for the first time Please read the following instructions before using your appliance for the first time.
- Page 24 Cleaning the burner lids and cups Proceed as follows: 1. Clean the burner lids (A) and cups (B) with water and washing-up liquid. 2. Dry the parts off well. 3. Place the burner sprayer (B) on the burner (C). 4. Place the burner lid (A) exactly on top of the burner cup (B). Cleaning accessories Before using the accessories, clean them thoroughly using a cloth and warm soapy water.
- Page 25 Warning Never use high-pressure cleaners or steam jets. Risk of short circuit. Never use caustic or abrasive cleaning agents. These could damage the surface. If such an agent gets on the front of the appliance, wipe it off immediately with water. Do not clean any surfaces of the appliance while they are hot.
- Page 26 2. Lift up the locking levers on both sides. 3. Close the appliance door until you feel resistance at an angle of around 15° (in relation to the closed appliance door). 4. Grip the door on either side with both hands. 5.
- Page 27 Removing and inserting the hook-in racks You can remove the hook-in racks in order to clean them separately.The hook-in racks are all fixed to the walls of the cooking compartment at four points. Removing the hook-in racks To remove the hook-in racks, proceed as follows: 1.
- Page 28 6. Screw on the glass cover again. 7. Remove the tea towel and switch the circuit breaker back on. Press the function button the oven lighting until it locks into place in order to check whether the oven lighting is working properly. Switch Switch Aftersales service...
-
Page 29: Technical Data
Technical data PRODUCT GAS/ELECTRIC COOKER MODEL NO. 24DMS4G109 VOLTAGE/FREQUENCY 220-240V,50/60Hz ELECTRIC POWER 3.0kW TYPES OF GAS Natural Gas GAS PRESSURE 1.0 kPa TOTAL HEAT INPUT 29.2MJ/h 772l/h(hotplate burners) A:1.2mm 7.1MJ/h B: 1.2mm 7.1MJ/h INJECTOR SIZE C: 1.5mm 11.0MJ/h D: 0.9mm 4.0MJ/h... -
Page 30: Problem Solver
<Destination country warning > These instructions are only valid if the country symbol appears on the appliance. If the symbol does not appear on the appliance, it is necessary to refer to the technical instructions which will provide the necessary instructions concerning modification of the appliance to the conditions of use of the country Container table (use flat-buttom saucepans) Burner... - Page 31 THINGS TO TRY BEFORE CALLING FOR SERVICE Burner does not burn well Is the burner dirty or damp? Try cleaning and/or drying the burner. Appliance not suitable for your gas type? Check the identification plate on the hotplate base. Burner does not ignite Do the burners spark when you press the ignition button? If not is the power on? See 'Checking the power supply' section further on.
- Page 32 OVEN DOES NOT WORK AT ALL First, when the oven is equipped with timer, check appliance is not programmed to turn on later. If it is, turn to manual setting (i.e. hand symbol). If the button or scale on the timer remains in the automatic position after use, the power supply to the oven will be interrupted.
Need help?
Do you have a question about the 24DMS4G109 and is the answer not in the manual?
Questions and answers