Table of Contents
Advertisement
Advertisement
Table of Contents

Related Manuals for Quantel Medical AXIS NANO


Summary of Contents for Quantel Medical AXIS NANO
- Page 1 SERVICE MANUAL APRIL 2015...
- Page 2 (even partially), modified or repaired in any way by persons who are not authorized by QUANTEL MEDICAL. Any question regarding the installation or the use of the AXIS NANO system should be directed to the QUANTEL MEDICAL Service Department or to a local distributor: International U.S.A.
-
Page 3: Table Of Contents
10.3. Upgrade procedure ......................16 10.3.1. Uninstalling previous software version .............. 16 10.3.2. In case the axis nano software version 1.04 cannot be uninstalled ....17 10.4. Installation procedure ......................17 Hardware installation ........................20 USB driver installation ......................... 21 AXIS NANO software display &... - Page 4 Operating System reinstallation procedure ................. 34 Care of the unit ..........................37 Care of the different probes ......................37 Computer battery exchange ......................37 HIPAA compliance ........................38 22.1. Security awareness and training ..................38 22.2. Contingency plan ......................39 22.3.
-
Page 5: Introduction
Any faulty part should/will be replaced by a strictly identical one provided by QUANTEL MEDICAL. · For safety reasons, QUANTEL MEDICAL considers any electronic board as a whole partial assembly : Defective boards must be returned to QUANTEL MEDICAL for replacement. - Page 6 To avoid risk of electric shock, this equipment must only be connected to supply mains with protective earth. The AXIS NANO IOL calculator will calculate negative IOL values if such is predicted by the entered data. These are displayed with a minus sign (-). Do not ignore this sign.
- Page 7 AXIS NANO unit and thus reduce the system performances. The acquisition in real time by the AXIS NANO system might be altered: risk of delays, saccades, image interruption… It is up to the person who would install this type of software to set the appropriate parameters and validate that the software does not disrupt the normal functioning of the AXIS NANO system.
-
Page 8: Technical Specifications
NANO works if the computer is supplied by the mains or by its battery). AXIS NANO power supply 400mA A green LED (under the test block) is switched on when the AXIS NANO is supplied. WARNING Only use the power supply module delivered with the computer. -
Page 9: Dimensions
AXIS NANO SERVICE MANUAL 4.4. Dimensions Dimensions AXIS NANO Width 15cm (5.91in) Depth 7cm (2.76in) Height 2cm (0.79in) Weight 125g (0.28lbs) 4.5. Environmental conditions The room temperature where the device is operated must be within the following range: 10°C < T° < 35°C (50°F < T° < 95°F) The relative humidity must not exceed 95% without condensation. -
Page 10: Block Diagram
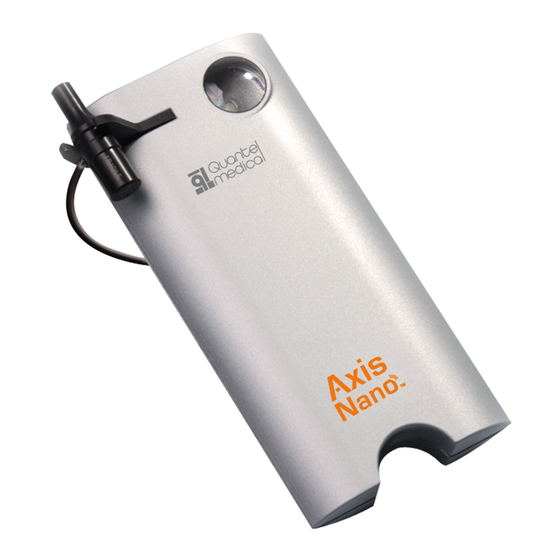
AXIS NANO SERVICE MANUAL 4.7. Block diagram 5. ACCESSORIES AND SPARE PARTS 5.1. External view Probe holder Biometry test block Biometry probe Green led (under test block): indicates when the Nano is power supplied. XE_AXN_MT_AN_150428... -
Page 11: Spare Parts
AXIS NANO SERVICE MANUAL 5.2. Spare parts The following items may be ordered independently from Quantel Medical: PART LIST REFERENCE DESCRIPTION XEAXNBOIT Complete housing XEAXNPSD Probe holder XEAX2TESTBLOCK Test block XEAXNERM Acquisition board ACCESSORIES / OPTIONS LIST REFERENCE DESCRIPTION XEAX2PRBBIO... -
Page 12: Markings
6. MARKINGS Label Description Identification label: Displays all information: - Quantel Medical (address and telephone); - The unit: serial number, Electric security Class (EN 60 601-1 standard). The protection standard degree of the AXIS NANO is IP20: protection from solid substances (diameter >12.5). -
Page 13: Disassembling
7. DISASSEMBLING 7.1. Probe holder removal 1 – Pivot the probe holder 2 – Pull out the probe holder 7.2. Cover removal Turn over the AXIS NANO to see the back side and remove all five screws (see below) : XE_AXN_MT_AN_150428... -
Page 14: Acquisition Board
AXIS NANO SERVICE MANUAL Remove the top cover from the lower cover: 7.3. Acquisition board Remove the 4 screws (see below) holding the acquisition board in the inferior cover: Screws to remove Screws to remove NOTE Position the cable before placing the acquisition board in the bottom cover. -
Page 15: Location And Connector Pin Description
AXIS NANO SERVICE MANUAL 8. LOCATION AND CONNECTOR PIN DESCRIPTION XE_AXN_MT_AN_150428... -
Page 16: Database Information And Backup
9.1. Automatic backup (only available from version over 1.03) Before upgrading the AXIS NANO to the latest available software version 2.00, carry out a backup of the AXIS NANO database on an external USB storage device: In the General Setup screen, select “Save all data”: A window will open up that allows the user to select a backup folder location and name. -
Page 17: Manual Database Backup And Restoration
It is highly recommended that the user select the “EMR directory” on the unit’s hard disk to export the EMR files because the “EMR” data are used by the AXIS NANO to visualize the reports. If the “EMR directory” is saved on an external key or network (for example), make sure the external key or the network is still connected to the unit to visualize the reports and saved exams. -
Page 18: Software Installation
* Compatible with the UAC (User Account Control) activated or not. 10.1.2. Software upgrade and compatibilities NOTE To upgrade the AXIS NANO software: it is mandatory to install intermediary software versions. V 1.02 => V1.03 => V1.04 => V2.00 10.1.3. -
Page 19: Axis Nano Software Behavior With Uac On Or Uac Off
In the following case, only one database is created. This database is the same for every Windows session. By default, the AXIS NANO unit is set with the UAC ON and the USER GROUP (called AXIS NANO) is set on ADMINISTRATOR. -
Page 20: Installation Warnings And Cautions
Then, follow Section 10.4: Installation procedure to install the new software version (2.00). If the AXIS NANO module is not detected, re-install the driver as explained in Section 12: USB driver installation. 10.3.1. Uninstalling previous software version... -
Page 21: In Case The Axis Nano Software Version 1.04 Cannot Be Uninstalled
PC manufacturer (PC user’s manual) until the setup is complete. 2. Connect the Quantel Medical USB key (provided in the AXIS NANO packaging) to the computer. Under the USB location, in the “Software Installation” folder, double click on the “setup”... - Page 22 AXIS NANO SERVICE MANUAL The AXIS NANO software installation is going through different processes. a. DirectX software installation process: The following screen is displayed, select “Accept”: Select “I accept the agreement” and select Then, select “Install”: “Next”: Select “Next”: Wait for the end of the installation process: Select “Finish”:...
- Page 23 AXIS NANO SERVICE MANUAL b. AXIS NANO installation process: Select “Next”: Select “I Agree” and then “Next”: Make sure the AXIS NANO module is disconnected and select “Next”: Select “Next”: A Windows security box is opening to confirm the driver software installation. Select the checkbox “Always trust software from...
-
Page 24: Hardware Installation
In case error messages appear during installation: contact QUANTEL MEDICAL Service Department or your local distributor. 11. HARDWARE INSTALLATION Connect the AXIS NANO USB cord to the computer: To computer Connect the biometry probe to the AXIS NANO: Connect the USB footswitch to the computer. NOTE... -
Page 25: Usb Driver Installation
AXIS NANO SERVICE MANUAL 12. USB DRIVER INSTALLATION On a first use, when connecting the AXIS NANO module to the computer, the following window is displayed at the bottom right of the screen: Right click on the Windows icon and select “Control Panel”... -
Page 26: Axis Nano Software Display & Adustments
To ease the use of the AXIS NANO application, it is necessary to customize Windows ® Eight naviguation properties to: a. Display the Desktop with the AXIS NANO background by default instead of the regular Windows ® Eight start up screen. -
Page 27: Adjust Magnifier Tool
13.3. Suppressing the access to switch « User Account » It is not advised to create several User Accounts on the AXIS NANO computer. Indeed, before a user will want to log on to his own account, he will then have to close the current AXIS NANO application and log off the current account. - Page 28 It is very important to calibrate the biometry probe on a first installation, or to check probe calibration after an upgrade. All other setups are explained in the: AXIS NANO user manual – III – Using the AXIS NANO To create a new patient Section 4: Patient Setup screen...
-
Page 29: Hidden Screen
AXIS NANO SERVICE MANUAL 15. HIDDEN SCREEN 15.1. Accessing the hidden screen 1) From the Startup screen, select the “General Setup” button (F1): 2) In the General Setup screen, select the language pull down menu and press the footswitch or select “SHIFT P” with the keyboard (or CTRL + F12):... -
Page 30: Hidden Screen Functions
AXIS NANO SERVICE MANUAL 3) The hidden screen will then be displayed: 15.2. Hidden screen functions “ZERO” field and “Position of marker #1 in contact” Adjusting the Zero value in the hidden screen table allows the engineer to reset the “Position of Marker#1 in contact”... -
Page 31: Biometry Default Mode
Gain value (as specified in the Physician setup). e. Keycode No keycode is necessary on the AXIS NANO unit. Main icons displayed by default When this checkbox is checked, the bottom bar containing the main icons is... -
Page 32: Probes Calibration
AXIS NANO SERVICE MANUAL 16. PROBES CALIBRATION If the biometry probe needs to be exchanged on the AXIS NANO unit, it is necessary to re-calibrate the unit with the new probe: The thickness of the biometry probe membrane (located at the tip of the probe) is varying slightly from a biometry probe to another. - Page 33 AXIS NANO SERVICE MANUAL 4) Put a drop of water on the Test-Block and adjust the probe’s position on the test block to be as much perpendicular and well centered as possible. The Test-Block has a rounded shape that slightly matches the concave tip of the probe: 5) A tracking starts: the purpose is to record the measurement that has the highest posterior face echo.
-
Page 34: Calibration Adjustment
AXIS NANO SERVICE MANUAL 16.2. Calibration adjustment In case the measurement is not comprised between 10.00 and 10.11, the marker has to be modified to get the correct value: The “Best” is not comprised between: 10.00 < Best < 10.11 1. - Page 35 AXIS NANO SERVICE MANUAL 3. Press “OK” to validate, save the calibration and close the window. The “Position of Marker#1 in contact” value is then corrected in the General Setup screen From now on, the biometry measurements when using the contact technique are correct.
-
Page 36: Using The Hidden Screen To Reset The " Position Of Marker #1 In Contact " To Zero
AXIS NANO SERVICE MANUAL 16.3. Using the hidden screen to reset the “ Position of Marker #1 in contact ” to zero It is possible to reset the “Position of Marker#1 in contact” value to zero using the “Hidden screen”: 1) Access the hidden screen as described in Section 9.4.1 Accessing the hidden screen:... -
Page 37: Axis Nano - No Top Most Mode
17. AXIS NANO – NO TOP MOST mode When the AXIS NANO is opened with the “no top most” shortcut, the user is then able to naviguate between Windows and the AXIS NANO application with the “ALT” + TAB”... -
Page 38: Operating System Reinstallation Procedure
CAUTION: The hard drive will reset (with factory parameters) and all data will be definitively lost. This procedure is only available for computers delivered by Quantel Medical. STEP 1: Swich on the laptop and press F1 while the system is starting up. The following window is displayed: Select “Suivant”... - Page 39 AXIS NANO SERVICE MANUAL STEP 4: “QM Recovery Tool V1.00” window is diplayed: Select “Backup data” if needed and press “Enter”. The window that allows the user to select the backup location opens up: Once the backup location selected, data can be saved.
- Page 40 AXIS NANO SERVICE MANUAL STEP 5: The following executable file is running: “X:\windows\system32\cmd.exe”. Confirm: “YES” to the following message: And select “Enter”. The system recovery begins. Wait for the end of the recovery process. CAUTION: In case of errors on the disk part (check with the scroll), confirm: No and restart the recovery process.
-
Page 41: Care Of The Unit
Examine the cable and the body of the probe for cracks which would allow penetration of conductive liquids. In case of doubt about the probe, do not use it. Instead, contact Quantel Medical Service Department or your local distributor. WARNING Do not autoclave the probe. -
Page 42: Hipaa Compliance
22. HIPAA compliance The Health Insurance Portability and Accountability Act (HIPAA) regulations include elements that focus on securing medical records in order to ensure patient privacy. QUANTEL MEDICAL has implemented the following technical measures to be compliant with the HIPAA regulations: 22.1. -
Page 43: Contingency Plan
GENERAL SETUP screen of procedures to create and drive, by using the dedicated 164.308(a)(7)(ii)(A) the AXIS NANO software as maintain retrievable exact function; which is located in the described in this Service copies of electronic software. -
Page 44: Audit Controls
The covered entity must A dedicated user account may be created and set by the IT “establish (and implement person; when the QUANTEL MEDICAL unit is installed and set. 164.312(a)(2)(ii) as needed) procedures for This is the responsibility of the IT person to decide the emergency... -
Page 45: Integrity
AXIS NANO SERVICE MANUAL 22.5. Integrity Implementation Regulation Features implemented Implementation information specification Mechanism to Authenticate Electronic Protected Health Information The covered entity must A checksum is used to check that the data and images are not “implement electronic 164.312(c)(2) corrupted, modified, altered or destroyed.
Need help?
Do you have a question about the AXIS NANO and is the answer not in the manual?
Questions and answers