
Related Manuals for Chamberlain LM750EVGB


Summary of Contents for Chamberlain LM750EVGB
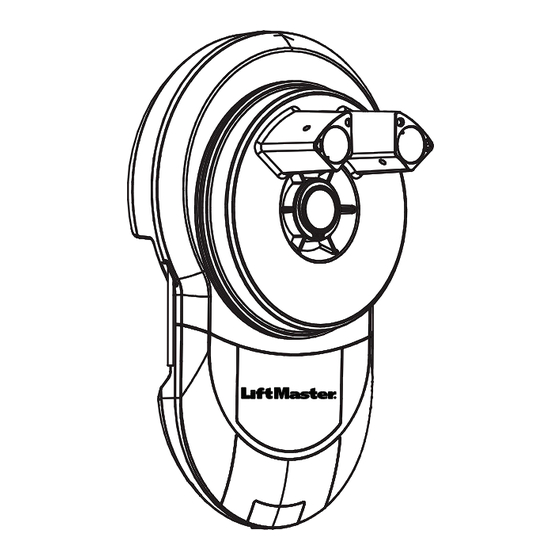
- Page 1 LM750EVGB Rolling Garage Door Opener Installation and Operating Instructions Chamberlain GmbH Keep these instructions Alfred-Nobel-Strasse 4 for future reference 66793 Saarwellingen Germany www.liftmaster.eu...
- Page 2 WARNING! Start by Reading These Important Safety Instructions General safety guidelines Before you begin the installation: Please read the operating instructions and especially the precautions. Keep the manual for future reference and pass it on to a possible subsequent owner. The following symbols are placed in front of instructions to avoid personal injury or property damage.
-
Page 3: Table Of Contents
CONTENTS PAGE SAFETY INSTRUCTIONS ..1 CARTON INVENTORY ..2 TOOLS REQUIRED ... .2 DOOR REQUIREMENTS ..2 CONTROL PANEL . -
Page 4: Carton Inventory
9. Door stand (not shown) 13 mm, 10 mm, 8 mm 5.5 mm DOOR REQUIREMENTS The LM750EVGB is suitable for spring balanced Residential single skin rolling garage doors with: Minimum distance from edge of curtain to edge of door bracket 45 mm •... -
Page 5: Control Panel
CONTROL PANEL 1. Terminal Block: used for external accessories (see chart below). Colour Polarity Comment Ref Function Push button Dry contact input for push button wired wall controls White Common Common terminal for push button, obstruction detection beams & accessory power 3 Common White Common terminal for push button, obstruction... -
Page 6: Prepare & Test The Door
TESTING THE DOOR Complete the following test to ensure your door is well balanced, and not sticking or binding: • Disable all locks and remove any ropes connected to the garage door. • Lift the door to about halfway and then release it. The door should remain spring balanced. -
Page 7: Pinning The Door
PINNING THE DOOR Note: A ballooning door may delay the safety reversal response and can compromise garage door security. Free curtain Ballooning Add fasteners here • To remedy any ballooning, insert the supplied self tapping metal screws into where the curtain leaves the roll. Secure these through the curtain into the drum wheel at each end of the roll. - Page 8 ATTACHING EXTENSION POLES (IF REQUIRED) Extension pole • Insert the extension poles into the drive legs. • Align the holes on the extension poles with the holes on the drive legs • Using the screws provided, secure the extension poles •...
-
Page 9: Installation Procedure
INSTALLATION PROCEDURE Do not allow people to walk under or around the door during the installation process as serious injury can occur. NOTE: The opener can be installed on either side of the door. The following instructions are for Rope RIGHT HAND INSTALLATIONS (as illustrated i.e. -
Page 10: Adjustment & Testing
Courtesy light: During the programming sequence, the courtesy light will flash at half strength NOTE: The LM750EVGB opener is factory configured for right hand installation. The opener will operate during this procedure. Make sure the door is clear of obstruction. -
Page 11: System
TESTING THE SAFETY REVERSE SYSTEM After installing the operator on the door, the force measurement of the operator must be checked according to EN13241/EN12543 with a force measurement device and an obstacle 40 mm detection test must be performed. Operate the door in the down direction. The door must reverse upon contact with the obstacle. - Page 12 INSTALL THE OBSTRUCTION DETECTION BEAMS/ THE PROTECTOR SYSTEM (OPTIONAL ACCESSORY) After installing and adjusting the door opener, photocells can be installed. The installation instructions are included with the photocells. The optional photocells ensure that the door is open, or remains open, if people, especially young children, are in the door area.
-
Page 13: Audible Beep
AUDIBLE BEEP (OPTIONAL) The LM750EVGB has been factory set for an audible “BEEP”. The Audible beep can be turned OFF by using the following method. • Start with the door fully CLOSED. Flash x 2 • Press and Hold both “S” and “DN” buttons... -
Page 14: Wireless Programming
WIRELESS PROGRAMMING (REMOTE ACCESSORIES) NOTE: The transmitters supplied with your opener are preprogrammed by the factory. Activate the opener only when door is in full view, free of obstruction and properly adjusted. No one should enter or leave the garage while the door is in motion. Do not allow children to operate push buttons or remotes. - Page 15 WIRELESS PROGRAMMING (REMOTE ACCESSORIES) CONTINUED Activate the opener only when door is in full view, free of obstruction and properly adjusted. No one should enter or leave Locate the “S” the garage while the door is in motion. button Do not allow children to operate push buttons or remotes.
-
Page 16: Standby Mode (Optional)
STANDBY MODE (OPTIONAL) The LM750EVGB has been factory set for low standby mode (sub 1 watt usage). Flash x 10 This will deliver the lowest possible standby power. The External Accessory Power is turned OFF in this mode, NORMAL so if this output is required, Normal Standby mode will STANDBY need to be activated (eg. -
Page 17: Operating Your Opener
It is STRONGLY RECOMMENDED Set the limits and/or force if necessary. for homeowners with young children or pets. Opening the door manually: SPECIFICATIONS LM750EVGB Input Voltage: 220-240 VAC, 50-60 Hz, 140 W When releasing the door, the door should... -
Page 18: Accessories
Battery of the remote control: REPLACE BATTERIES IN REMOTES The batteries in the remote have a long life. If the transmission range decreases, the batteries should be replaced. Batteries are not covered by the warranty. To prevent SERIOUS INJURY OR DEATH: observe the following instructions for the battery - NEVER allow small children near batteries. -
Page 19: Troubleshooting
TROUBLESHOOTING 1. The opener will not operate from either the 8. The door opens but will not close (or reverses UP/DOWN activation button or the transmitters : while closing): • Does the opener have electric power? Plug a lamp into •... -
Page 20: Diagnostic Chart
If door is not binding or sticking, reset the limits (refer to “Program the Travel Limits and Force” section). DECLARATION OF CONFORMITY The manual consists of the operating instructions and the declaration of conformity. Trademark of Chamberlain Group ® Registered Trademark of Chamberlain Group © 2018 Chamberlain Group 114A5144A...
Need help?
Do you have a question about the LM750EVGB and is the answer not in the manual?
Questions and answers