Table of Contents
Advertisement
Available languages
Available languages
Operation Manual and Safety Instructions
Manual de operación e Instrucciones de seguridad
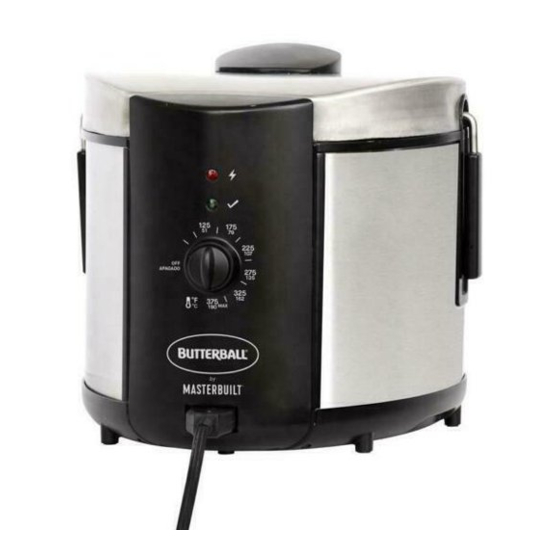
BUTTERBALL® ELECTRIC FRYER
FREIDORA ELÉCTRICA BUTTERBALL®
MB23015018, MB23015118
Your model number | Su número de modelo
Mfg. Date - Serial Number | Fecha Fabricado - Número de serie
These numbers are located on the back of the fryer.
Estos números se ubican en la parte posterior de la freidora.
FOR INDOOR HOUSEHOLD USE ONLY
SOLO PARA USO CASERO INTERNO
Manual Code: 9801180014 180925-GSB
Advertisement
Table of Contents

Related Manuals for Masterbuilt BUTTERBALL MB23015018


Summary of Contents for Masterbuilt BUTTERBALL MB23015018
- Page 1 Operation Manual and Safety Instructions Manual de operación e Instrucciones de seguridad BUTTERBALL® ELECTRIC FRYER FREIDORA ELÉCTRICA BUTTERBALL® MB23015018, MB23015118 Your model number | Su número de modelo Mfg. Date - Serial Number | Fecha Fabricado - Número de serie These numbers are located on the back of the fryer.
- Page 2 • Do NOT operate the appliance with a damaged cord, plug, or after appliance malfunctions or has been damaged in any manner. Contact Masterbuilt Customer Service for assistance at 1-800-489-1581. • Accessory attachments not supplied by Masterbuilt Manufacturing, LLC are not recommended and may cause injury.
- Page 3 Structural Proximity and Safe Usage Recommendations Maintain a minimum distance of 18 inches from rear and 40 Inches sides and 40 inches from top of appliance to combustible material. 18 Inches 18 Inches...
-
Page 4: Lea Todas Las Instrucciones
• NO opere el artefacto con un cable o enchufe dañado, o si el artefacto se malogra o se ha dañado de alguna manera. Contacte al Servicio de atención al cliente de Masterbuilt al: 1-800-489-1581. • No se recomienda usar accesorios adicionales no suministrados por Masterbuilt Manufacturing, LLC;... - Page 5 Recomendaciones de proximidad estructural y uso seguro Mantenga una distancia mínima de 18 pulgadas (45.72 40 pulgadas (45.72 cm) cm) de la parte trasera y lateral, y de 40 pulgadas (101.6 cm) de la parte superior del artefacto con respecto al material combustible.
- Page 6 Contacte al Servicio al cliente de MASTERBUILT al 1-800- PARE 489-1581 o en support.masterbuilt.com. Tenga a la mano el número de modelo y el número de serie. Estos números se encuentran en la etiqueta plateada de clasificación en la parte posterior...
- Page 7 Assembly | Ensamblaje Clean the appliance prior to use. See CLEANING AND STORAGE on page 13. Limpie el artefacto antes de su uso. Consulte LIMPIEZA Y ALMACENAMIENTO en la página 16. Insert inner pot (4) into outer shell (1). Inserte la olla interna (4) en la carcasa exterior (1).
- Page 8 Assembly | Ensamblaje Place basket (3) inside of inner pot (4). Coloque el cesto (3) dentro de la olla interna (4). Place lid (2) onto fryer and insert breakaway power cord (8) into the connection on the control panel (6). Make sure “This Side Up” is shown on top for proper connection.
-
Page 9: Getting Started
Getting Started • FOR BEST RESULTS, read the following start-up tips before using this appliance. Remember this is an ELECTRIC appliance and has different characteristics than a gas appliance. • FOR SAFETY, the heating element only heats up when properly attached to the mounting bracket. This is a powerful heating element and may cause a circuit breaker to trip. - Page 10 Inicio • PARA MEJORES RESULTADOS, lea los siguientes consejos iniciales antes de usar este artefacto. Recuerde que se trata de una artefacto ELÉCTRICO y que tiene características distintas de un artefacto a gas. • POR SEGURIDAD, el elemento calefactor sólo se calienta cuando está correctamente fijado a la abrazadera de montaje.
- Page 11 Operating Instructions 1. Mount the control panel and element onto the bracket on the outer shell. See step 2 on page 7. NOTE: The control panel is correctly attached when the heating element is positioned inside of the inner pot and fully submerged in oil or water during use.
-
Page 12: How To Steam
Operating Instructions HOW TO STEAM • Make sure the basket is in place and add water to the middle of MAX fill line. REAR VIEW OF INNER POT Do not add water above this line. Do not allow water to completely evaporate. This will cause the element to overheat and damage the appliance. -
Page 13: Cleaning And Storage
Operating Instructions CLEANING AND STORAGE • Clean fryer prior to first use. • After use, turn appliance off, unplug and let cool for 2 hours if using water or 5 hours if using oil before cleaning and storing. • Clean lid, inner pot, and basket/handles with a damp cloth or sponge using a mild detergent. Rinse and dry thoroughly. -
Page 14: Instrucciones De Operación
Instrucciones de operación 1. Monte el panel de control y el elemento en la abrazadera en la carcasa exterior. Ver Paso 2 en la página 7. NOTA: El panel de control está correctamente fijado cuando el elemento calefactor está posicionado dentro de la olla interna y completamente sumergido en aceite o agua durante el uso. -
Page 15: Función De Reinicio
Instrucciones de operación CÓMO COCER AL VAPOR • Asegúrese de que la cesta esté en su lugar y agregue agua al centro de la línea VISTA POSTERIOR DE LA OLLA INTERNA de llenado máximo. No añada agua por encima de esta línea. No deje que el agua se evapore completamente. -
Page 16: Limpieza Y Almacenamiento
Instrucciones de operación LIMPIEZA Y ALMACENAMIENTO • Limpie la freidora antes del primer uso. • Luego del uso, apague el artefacto, desenchúfelo y déjelo enfriar por 2 horas si está usando agua y por 5 horas si está usando aceite antes de limpiar y almacenar. •... -
Page 17: Troubleshooting
1-800-489-1581. off. No oil or water in pot. Fill pot and reset control panel. See RESET FUNCTION on page 12. If symptom is not listed here OR in the Frequently Asked Questions section, please contact Masterbuilt at 1-800-489-1581. -
Page 18: Detección Y Solución De Problemas
15. Si el artefacto aún no funciona, El panel de control no está fijado Retírelo y vuélvalo a instalar. contacte a Masterbuilt al 1-800-489- correctamente a la carcasa exterior. Asegúrese que el panel de control 1581. esté montado en la abrazadera de la carcasa exterior para enganchar el interruptor de seguridad. -
Page 19: Frequently Asked Questions
Frequently Asked Questions Why won’t my fryer turn on? The control panel features a “safety switch” that must be mounted properly on the mounting bracket of the outer shell for the appliance to power on. See step 2 on page 7. The power light will illuminate when the control panel is mounted properly and the breakaway power cord is properly attached. -
Page 20: Preguntas Frecuentes
Preguntas frecuentes ¿Por qué no enciende mi freidora? El panel de control incluye un “interruptor de seguridad” que debe montarse apropiadamente en la abrazadera de montaje de la carcasa exterior para que el artefacto puede encenderse. Ver Paso 2 en la página 7. - Page 21 Turkey Preparation PEANUT OIL A. Butterball® Electric Fryer. Rinse thoroughly with warm water or soak in a B. 1.5 gallons (6 qts.) of oil. Peanut oil is warm water bath for no more than 30 minutes to recommended because of the great taste and ensure cavities are free of ice.
- Page 22 Preparación del pavo ACEITE DE CACAHUATE O MANÍ MARINADA ADEREZO A. Freidora eléctrica Butterball®. Enjuague el pavo exhaustivamente con agua tibia B. 1.5 galones (6 cts.) de aceite. Se recomienda o remójelo en un baño de agua tibia por no más de usar aceite de cacahuate o maní...
-
Page 23: Deep Fried Turkey Breast
How to Fry a Turkey in the Butterball® Electric Fryer DEEP FRIED WHOLE TURKEY An 8-10 lb. (3.63-4.54 kgs.) turkey is recommended. However, you can deep fry up to a Figure A 12 lb. (5.44 kgs.) turkey. DO NOT EXCEED 12 lbs. (5.44 kgs.). Frozen turkeys should be thoroughly defrosted to 35°- 40°F (1.6°- 4.4°C). - Page 24 Cómo freír un pavo en la freidora eléctrica Butterball® PAVO ENTERO FRITO EN ABUNDANTE ACEITE Se recomienda un pavo de 8 a 10 lb. (3.63 a 4.54 kgs.). Sin embargo, puede freír en Figura A abundante aceite un pavo de hasta 12 lb. (5.44 kgs.). NO EXCEDA LAS 12 lbs. (5.44 kgs.). Los pavos congelados se deben descongelar exhaustivamente a 35°- 40°F (1.6°- 4.4°C).
-
Page 25: Cooking Chart
Cooking Chart FRYING NON-FROZEN FOODS (Oil may take up to 30 minutes to reach desired temperature) Food Maximum Qty. Temperature Time French Fries 1 lb. (0.45 kgs.) 375°F (191°C) 10-12 min. Fried Chicken 3 pieces 350°F (177°C) 14-18 min. Mushrooms 1 lb. - Page 26 Tabla de cocción FREÍR ALIMENTOS NO CONGELADOS (El aceite puede tomar hasta 30 minutos en alcanzar la temperatura deseada) Alimentos Cant. máxima Temperatura Tiempo Papas fritas 1 lb. (0.45 kgs.) 375°F (191°C) 10-12 min. Pollo frito 3 piezas 350°F (177°C) 14-18 min.
-
Page 27: Fried Catfish
Ready. Set. Craft your Masterpiece. Steamed Chicken Breasts and Vegetables • 2 (12 oz.) whole chicken breasts, split and boned • 1 tsp salt • 1 tsp dried tarragon leaves, crushed • 1 cup cold water • 2 large carrots, peeled and sliced •... - Page 28 En sus marcas. Listos. Cree su obra maestra. Pechugas de pollo y vegetales al vapor • 2 pechugas de pollo enteras (12 oz.), cortadas en mitad y con hueso • 1 cucharadita de sal • 1 cucharadita de hojas de estragón seco, triturado •...
- Page 29 This express warranty is the sole warranty given by Masterbuilt and is in lieu of all other warranties, expressed or implied including implied warranty, merchantability, or fitness for a particular purpose.
- Page 30 1 año a partir de la fecha de compra original. La garantía de Masterbuilt no cubre el acabado de la pintura ya que puede salirse durante el uso normal. La garantía de Masterbuilt no cubre la oxidación. Masterbuilt requiere el comprobante de compra para hacer un reclamo de la garantía, como por ejemplo, un recibo.
- Page 32 Rest assured, we’re here to help. Tenga por seguro, que estamos aquí para ayudarle. Customer Service masterbuilt.com/contact Servicio de atención al cliente Masterbuilt Manufacturing, LLC 1 Masterbuilt Court | Columbus, GA | 31907 @masterbuilt 1-800-489-1581 masterbuilt.com...
Need help?
Do you have a question about the BUTTERBALL MB23015018 and is the answer not in the manual?
Questions and answers