Table of Contents
Advertisement
Quick Links
OPERATION MANUAL
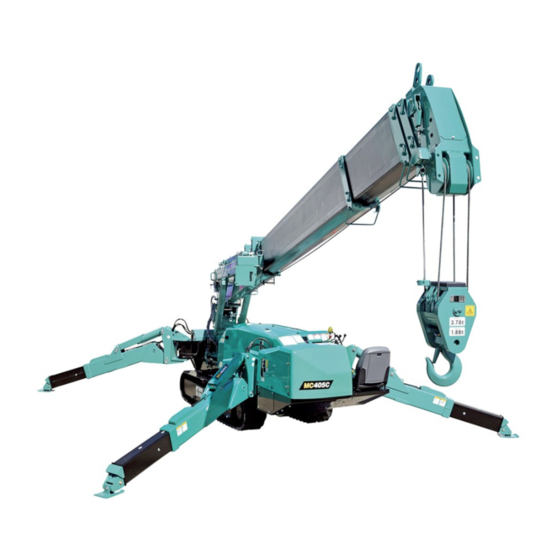
MINI-CRAWLER CRANE
Serial No. M01736 and up
Unsafe use of this machine may cause serious injury or death. Operators
must read this manual before operating this machine. This manual should
be kept near the machine for reference and periodically reviewed by all
personnel who will come into contact with it.
MAEDA has Operation & Maintenance Manuals written in some other
languages. If a foreign language manual is necessary, contact your local
distributor for availability.
NOTICE
350E-OM0912-03
Advertisement
Table of Contents

Subscribe to Our Youtube Channel
Related Manuals for Maeda MC-104C-2


Summary of Contents for Maeda MC-104C-2
- Page 1 NOTICE MAEDA has Operation & Maintenance Manuals written in some other languages. If a foreign language manual is necessary, contact your local distributor for availability.
-
Page 3: Table Of Contents
CONTENTS Item Page INTRODUCTION 1- 1 1. FOREWARD 1- 2 2. SAFETY INFORMATION 1- 3 3. OUTLINE OF THE MACHINE 1- 4 3.1 DESIGNATED TYPE OF WORK 1- 4 3.2 CONFIGURATION OF THE MACHINE 1- 4 3.3 FUNCTIONS THIS MACHINE IS PROVIDED WITH 1- 5 4. -
Page 4: Item Page
Item Page 2. OPERATION CONTROL 3-15 2.1 INSPECTION PRIOR TO STARTING UP THE ENGINE 3-15 2.1.1 VISUAL CHECK 3-15 2.1.2 INSPECTION BEFORE STARTING YOUR WORK 3-17 2.2 STARTING UP THE ENGINE 3-23 2.2.1 STARTING UP THE ENGINE WITH MAIN STARTER SWITCH 3-23 2.2.2 STARTING UP THE ENGINE WITH AUXILIARY STARTER SWITCH 3-24... - Page 5 Item Page 6. HANDLINE IN COLD CLIMATE 3-62 6.1 PREPARATION FOR LOW AMBIENT TEMPERATURE 3-62 7. LONG TERM STARAGE 3-63 7.1 TREATMENT PRIOR TO STORAGE 3-63 7.2 DURING STORAGE 3-63 7.3 AFTER STORAGE 3-63 3-64 8. HANDLING OF BATTERY 8.1 RULES FOR HANDLING THE BATTERY 3-64 8.2 DE-MOUNTING AND MOUNTING THE BATTERY 3-65...
-
Page 7: Introduction
INTRODUCTION 1. FOREWORD 2. SAFETY INFORMATION 3. OUTLINE OF THE MACHINE 4. QUALIFICATION FOR OPERATING THE MACHINE 5. GLOSSARY... -
Page 8: Foreward
1. FOREWORD We thank you for selecting Maeda Mini-Crawler Crane MC-104C. This manual is the guide book for your safe and efficient use of this machine. This manual describes procedures for operation and service of this machine as well as matters to be strictly observed while performing them. -
Page 9: Safety Information
2. SAFETY INFORMATION For better understanding of this manual and caution plates on the machine, safety related messages are classified as follows: Indicates a pressing danger that may result in death or serious injury. Also indicated DANGER is the method to avoid such risk. Indicates a type of danger which is highly probable to result in death or serious injury. -
Page 10: Outline Of The Machine
3. OUTLINE OF THE MACHINE 3.1 DESIGNATED TYPE OF WORK This machine should be used mainly for the following work: ・Crane work This machine is a mobile crane with a boom type crane mounted on rubber tracked undercarriage. It is capable of self propelled movement on job sites and crane work within total rated load. -
Page 11: Functions This Machine Is Provided With
・For operation of this machine, be sure to observe safety rules shown in this manual. 4.1 QUALIFICATION REQUIRE FOR OPERATING CRANES Qualification for operation of this type machine is provided in local laws and regulations. Check with the competent authority or your Maeda dealer for detail. -
Page 12: Glossary
5. GLOSSARY 5.1 DEFINITIONS OF WORDS [1] TOTAL RATED LOAD Means the maximum load that can be lifted in accordance with length and angle of the boom. Such load includes mass (weight) of hook and rope. [2] RATED LOAD Means the load with the mass (weight) of hook and rope subtracted from total rated load, which is the load that can be lifted. -
Page 13: How To Read Working Radius / Lifting Height Diagram
5.2 HOW TO READ WORKING RADIUS/LIFTING HEIGHT DIAGRAM WARNING The working radius/lifting height diagram indicates the relation between the working radius, boom angle and lifting height above ground of this machine, without any load suspended. 1. Point A in the sketch to the right represents boom angle while point B represents the lifting height above ground. -
Page 14: How To Rated Total Load Chart
5.3 HOW TO READ TOTAL RATED LOAD CHART CAUTION ・Total rated load chart is based on level, hard ground. Depending on the outrigger setting or ground conditions, machine may tip over. ・Total rated load chart is based on working radius with bending of boom and lifted load taken into consideration. - Page 15 2. "3.00m boom": Boom extended to such extent that the first mark of the boom (2) is exposed. When the boom (2) is extended by any amount, however, work should be carried out according to the performance shown in this column. 3.
- Page 16 [2] OUTRIGGERS EXTENDED TO THE MAXIMUM WARNING ・For crane work, be sure to extend all the outriggers. Never perform any crane work without setting up outrigger. Machine may tip over causing serious injury otherwise. ・Outriggers should be extended while watching leveling instrument so that the machine is set horizontally.
- Page 17 [3] ZONES WHERE CRANE WORK IS PROHIBITED ACCORDING TO THE PATTERN OF OUTRIGGER PLACEMENT. WARNING ・ Sketches below indicate the zones where crane work is prohibited according to the pattern of outrigger placement (Shadowed area in the sketch). Within such zones, tipping-over of machine may take place to result in serious personal accident.
-
Page 18: How To Read Load Indicator
5.4 HOW TO READ LOAD INDICATOR WARNING ・For reading Total rated load with load indicator in use, be sure to observe following rules. Serious accident including tipping over and damaging of the crane may be incurred otherwise: 1. Set up outrigger horizontally over hard ground. 2. -
Page 19: Safety
SAFETY 1. BASIC RULES 2- 2 2. RULES FOR OPERATION 2- 7 3. RULES FOR TRANSPORTING A CRANE 2-18 4. RULES FOR HANDLING THE BATTERY 2-20 5. RULES TO OBSERVE IN CONNECTION WITH SERVICE 2-22 6. LOCATION FOR AFFIXING CAUTION PLATES 2-29 WARNING Read and observe these safety related rules thoroughly. -
Page 20: Basic Rules
1. BASIC RULES FOLLOW THE INSTRUCTION MANUAL AND CAUTION PLATES • Read and understand this manual and caution plates affixed to the machine. Operating the machine without fully understanding them may lead to improper operation resulting in an accident involving personal injury or damage to the machine. - Page 21 BEFORE OPERATING A MACHINE THAT HAS BEEN LEASED TO OR DRIVEN BY OTHERS Before operating any machine which has been on rental or use by others, make sure of the following in writing. Check the past services including voluntary periodical inspection, based on the inspection record as well: 1.
- Page 22 Do not make any modification to your machine without our written consent. Any modification involves an issue of safety and should be discussed with your Maeda dealer. We can not be responsible for any injury or other trouble due to modification without our consent.
- Page 23 SAFETY DURING REFUELING ・This machine operates using gasoline. Make sure to use fuel of proper type. Wrong fuel will cause damage to engine. ・Be sure to shutdown engine for refueling. Refueling with engine running may cause inflammation of spilled fuel at heated muffler. ・Over-refueling is dangerous with spilling.
- Page 24 TO AVOID INJURY DUE TO CRANE To avoid accident resulting in serious injury or death, do not place any part or whole of your body in clearances such as follows: ・Between boom and undercarriage ・Between outrigger float and ground ・Between boom or post and hoist cylinder ・Between winch drum and wire rope ・Between sheave and wire rope ・Between track and ground...
-
Page 25: Rules For Operation
2. RULES FOR OPERATION 2.1 BEFORE STARTING UP ENGINE SECURING SAFETY IN JOB SITE ・Make sure that there is no danger in job site before starting your work. ・Check ground and surface conditions of job site to select the most suitable work method. -
Page 26: After The Engine Has Started
2.2 AFTER THE ENGINE HAS STARTED INSPECTION AFTER STARTING THE ENGINE Negligence of inspection after starting engine will delay detection of trouble in machine resulting in personal injury or damage of machine. Inspection should be carried out in a wide area without obstacles. Do not allow anyone to approach the machine. ・Check actuation and travel of the machine, function of outrigger, and function of crane including winching and hoisting, telescoping, and swinging of boom. - Page 27 RULES FOR TRAVELING In order to avoid serious injury or death, be sure to observe following rules whenever you travel the machine. ・While traveling, pay attention. ・Avoid speeding and making jerky start or stop motions of sudden turns. Avoid zigzag travel. ・When any abnormality is detected during operation such as abnormal noise, vibration, smell, error in instrument or leak of fuel or oil, stop the machine immediately at appropriate location to check for the cause.
- Page 28 BE CAREFUL ABOUT TIPPING OVER ON UNSTEADY GROUND In order to avoid serious injury or death, be sure to observe following rules whenever you have to travel over unsteady ground: When traveling on a slope, operator should always stand on upper side of the machine.
- Page 29 RULES FOR COLD CLIMATE ・After finishing work, wipe any water, snow or mud off the wire harness, connector (1), switches and sensors before covering them. Freezing of ingreassed water may cause the machine to malfunction, resulting in unexpected accident. ・Remove or defrost snow or ice around swing gear, boom or winch and make sure that they function properly.
-
Page 30: During Crane Operation
2.3 DURING CRANE OPERATION INSPECTION BEFORE STARTING YOUR WORK Make sure that function of safety system and crane is normal. ・Operate control levers and switches at no-load and make sure that they function normally. If any abnormality is detected, correct it immediately. ・Make sure that safety systems including over-hoist warning system function normally. - Page 31 CAUTIONS HIGH TEMPERATURE OIL WHEN WORKING WITH CRANE When hydraulic oil temperature exceeds 80 degrees, high pressure hoses and seals can be damaged by heat, and it may cause burn by spouted oil. If temperature of hydraulic oil becomes over 80 degrees, stop operation and wait until the oil cools down.
- Page 32 PAY ATTENTION TO WEATHER INFORMATION ・When there is any possibility of lightning, discontinue crane work, ground the load immediately and retract the boom. ・ When load sways due to wind, the machine becomes unstable. If such is the case, ground the load immediately and retract the boom.
- Page 33 STANDARD OF WIRE ROPE REPLACEMENT Be sure to observe the ISO 4309: 1990 (E) and the regulation to the area where operations are conducted when replacing wire rope. RULES FOR CRANE OPERATION ・Any work beyond the capability of machine will be a cause for serious accident including tipping over or breakage or any other trouble.
- Page 34 RULES FOR OPERATING THE WINCH ・Do not allow any person to enter under a lifted load. ・When lifting a load, be sure to stop it at a point where the load is off the ground to check for stability of the load and safety of weight before continuing to lift.
- Page 35 RULES FOR MAKING SWING MOTION ・Before swinging, check for safety of surrounding and sound horn. ・Swing lever should be operated as slowly as possible. Start smoothly and swing at low speed before stopping softly. Rapid lever operation with a load lifted will cause the load to sway and the balance of machine to be lost, which may result in damage to or tipping over of the crane.
-
Page 36: Rules For Transporting A Crane
3. RULES FOR TRANSPORTING A CRANE RULES FOR LOADING TO AND UNLOADING FROM TRUCK OR TRAILER ・Loading and unloading involves a lot of danger. Particular care should be used. ・Select level and hard ground for loading and unloading. Secure plenty of distance from shoulder. - Page 37 RULES FOR LOADING AND UNLOADING BY MEANS OF A CRANE Observe following rules for loading and unloading the machine with a crane in use: ・For lifting up the machine, either engage the hook (2) of the lifting crane to the hanger bracket provided on top surface of the boom or use a hanging device (1) for engaging such hook (2).
-
Page 38: Rules For Handling The Battery
4. RULES FOR HANDLING THE BATTERY RULES FOR HANDLING THE BATTERY Electrolyte contains dilute sulfuric acid and it generates hydrogen gas as well. Its improper handling may result in injury or fire. Observe following rules: ・Do not allow any fire including lighted cigarette to approach battery. ・For handling battery, be sure to wear goggles and rubber gloves. - Page 39 RULES FOR CHARGING THE BATTERY Battery can explode with its improper handling for charging. Follow the direction provided in this manual as well as battery manual and observe the rules shown below: * See “OPERATION, 8.3 RULES FOR CHARGING THE BATTERY”, for detail.
-
Page 40: Rules To Observe In Connection With Services
5. RULES TO OBSERVE IN CONNECTION WITH SERVICES 5.1 PRIOR TO CONDUCTING SERVICES NOTIFICATION ON TROUBLE Conducting any service that is not described in this manual may result in unexpected trouble. Notify your dealer about it. PROCEED WITH INSPECTION AND SERVICE ONLY AFTER CLEANING THE MACHINE ・Before conducting inspection and service, clean the machine to prevent dust from entering and so that you can service safely. - Page 41 LIGHTING SYSTEM ・For checking fuel, oil or electrolyte, use lighting system of explosion proof type. If not, an explosion may result. ・Working in dark area without flood light may lead to accident. Be sure to use lighting properly. Just because it is dark, do not use fire of cigarette lighter or the like in place of lighting.
-
Page 42: During Service Work
5.2 DURING SERVICE WORK UNAUTHORIZED ENTRY PROHIBITED During service work, do not allow any unauthorized person to enter. Place a guard as required. Use particular care during grinding, welding or driving work. ACTION TO TAKE WHEN ABNORMALITY IS FOUND DURING INSPECTION ・During inspection, if abnormality is found, be sure to correct it. - Page 43 CARE TO BE TAKEN WHEN WORKING ON THE MACHINE ・For service work on the machine, tidy up your foothold for prevention of falling down and observe following: ・Do not spill oil or grease. ・Do not scatter tools around. ・Watch your steps when walking. ・Do not jump off the machine.
- Page 44 CARE TO BE TAKEN DURING WELDING REPAIR WORK Welding work should be performed at well equipped place by qualified person. Welding work may cause generation of gas, fire or electrification. Non-qualified person should absolutely refrain from doing it. Qualified welding personnel should observe following: ・For prevention of battery explosion, disconnect battery terminal.
- Page 45 CARE TO BE TAKEN IN CONNECTION WITH HIGH PRESSURE OIL When inspecting or replacing high pressure piping or hose, unless you make sure that the pressure has been released, serious accident may result. Strictly observe following: ・Do not proceed with inspection or replacement work before pressure is eliminated.
- Page 46 CARE TO BE TAKEN ABOUT WASTE TREATMENT In order to avoid polluting the environment of area where people and animals live, observe following strictly: ・Do not dispose waste oil to sewerage system or river. ・Be sure to dispose oil from machine to container. Do not dispose it directly to ground.
-
Page 47: Location For Affixing Caution Plates
6. LOCATION FOR AFFIXING CAUTION PLATES Keep these labels always clean. If it comes off, affix it again or replace with new one. There are other plates than those shown below. Take care of them in the same manner. XAM04642E 2-29... - Page 48 (1) Note for crane performance and outrigger. (350-2063300) 2-30...
- Page 49 (2) Note for exhaust gas (349-4427400) (3) Note for engine cover (349-4427900) (4) Precautions when open-close the cover (553-4268600) (5) Warning for electric shock (553-4267300) (6) Watch for crane approach (349-4422000) (7) Minimum lifting load (350-4431200) (8) Machine weight display (350-4431100) (9) Note for over-hoist alarm system (350-4431300) (10) Crane load (350-4395300) 2-31...
- Page 50 (11) Note for crane tipping-over (349-4427100) (12) Note for keeping away from fire (350-4433100) (13) Note for refilling fuel amount (350-4514200) (14) Note for muffler (349-4427800) (15) Note for crane work prohibited zone (350-3252200) (16) Note for inserting plug (300-4214000) (17) Note for welding grounding wire (300-4214200) 2-32...
- Page 51 (18) Precautions for rotating parts (553-4267400) (19) Note for out-rigger pin hole. (349-4426900) (20) Note for outrigger (349-4427000) (21) Note for traveling on slope (350-4515600) (22) Note for over-hoist alarm buzzer (350-4432100) (23) Note for operation and service work (893-4239100) (24) Note for main switch (349-4421400) (25) Fuel tank cap caution (103-4604900) (26) High temperature...
- Page 52 (27) General rules for use (Card type) (350-2098500) 2-34...
-
Page 53: Operation
OPERATION 1. NOMENCLATURE OF COMPONENTS 3- 2 2. OPERATION CONTROL 3-15 3. HANDLING OF RUBBER TRACK 3-53 4. HANDLING OF WIRE ROPE 3-57 5. TRANSPORT 3-59 6. HANDLING IN COLD CLIMATE 3-62 7. LONG TERM STORAGE 3-63 8. HANDLING OF BATTERY 3-64 9. -
Page 54: Nomenclature Of Components
1. NOMENCLATURE OF COMPONENTS 1.1 NOMENCLATURE OF MACHINE COMPONENTS ① Boom ⑬ Flood light ② Boom telescope cylinder ⑭ Hook hanger ③ Load indicator ⑮ Crane control ④ Boom derrick cylinder ⑯ Outrigger mode indicator lamp ⑤ Winch ⑰ Hook block ⑥... -
Page 55: Nomenclature Of Travel Control Components
1.2 NOMENCLATURE OF TRAVEL CONTROL COMPONENTS ① accelerator lever ⑦ Fuse (15A) ② L.H. travel lever ⑧ Battery charge lamp ③ R.H. travel lever ⑨ Flood light switch ④ Travel stand lock lever ⑩ Horn switch ⑤ Hour meter ⑪ Main starter switch ⑥... -
Page 56: Control Levers
1.2.1 CONTROL LEVERS [1] ACCELERATOR LEVER This lever is to be used for adjusting engine speed or output. ・Low idling: Push the lever forward. ・Full speed: Pull back the lever. NOTES ・At the desired engine speed for your work, release the lever. It will stop at that position. - Page 57 [3] TRAVEL LEVER STAND WARNING ・Before setting the travel lever stand to "Travel Position", be sure to stow the crane and let the machine assume travel position. Traveling with the crane not in travel position, may cause it to tip over and serious accident be incurred.
-
Page 58: Switches
1.2.2 SWITCHES [1] MAIN STARTER SWITCH CAUTION When you finish your work, be sure to turn the main starter switch to OFF position. Used for starting and stopping the engine. ・OFF: At this position, key can be inserted or removed and switches of all the electric systems go off and engine comes to stop. -
Page 59: Meter, Lamp And Fuses
1.2.3 METER, LAMP AND FUSES [1] HOUR METER This meter indicates total working hours of the machine. When the main starter switch remains at ON position, the meter progresses even if the machine were in action. Use this meter as the standard for servicing intervals. [2] BATTERY CHARGE LAMP The lamp notifies you of any trouble on charging system. -
Page 60: Nomenclature Of Crane Control Components
1.3 NOMENCLATURE OF CRANE CONTROL COMPONENTS ① Accelerator ⑨ Boom derrick lever ② Swing lever ⑩ Auxiliary starter switch ③ Boom telescope lever ⑪ Horn switch ④ Outrigger mode indicator lamp ⑫ Outrigger switch ⑤ Load meter (a) Outrigger ① control switch ⑥... -
Page 61: Control Levers
1.3.1 CONTROL LEVERS [1] ACCELERATOR LEVER This lever is to be used for adjustment of engine speed or output. ・Low idling: Push the lever forward. ・Full speed: Pull back the lever. NOTES ・At the desired engine speed for your work, release the lever. It will stop at that position. -
Page 62: Switches
1.3.2 SWITCHES [1] OUTRIGGER CONTROL SWITCH Used for setting and stowing away the outrigger. This machine has 4 outriggers ( ①~④), which can be controlled individually or simultaneously. ・To retract: Push the switch upward. Outrigger cylinder will be retracted and the outrigger can be stowed. ・Neutral: Take your finger away from the switch, which will return to Neutral position and telescoping of the cylinder will discontinue. -
Page 63: Meters And Lamps
1.3.3 METERS AND LAMPS [1] LOAD METER WARNING ・Load meter indicates the mass (weight) of load being hoisted with winch. Hoisting any load in excess of rated load of the crane can cause tipping over or other damage. Crane work should always be carried out while making sure that the pointer of this meter remains within safety range. - Page 64 1.4 OVER-HOIST PREVENTIVE SYSTEM WARNING Before conducting pre-work inspection or starting your crane work, be sure to turn the switch ② of the over-hoist preventive system ① to ON position. If the switch ① remains at OFF position, the alarm system ② will not actuate, causing not merely the lifted load to hit various part of the crane causing damage, but the load to fall down and result in an accident.
-
Page 65: Emo Switch (Emergency Stop Switch)
・ABNORMAL OPERATION If you have stopped the engine (machine) besause of an abnormal operation, explain the problem to your Maeda agent and request repair. When starting the engine again after stopping it with the EMO switch, firstly make sure that the cause of the problem has been cleared (the locking lever of the travel lever stand is at the traveling position.) -
Page 66: Machinery Cover
1.7 MACHINERY COVER WARNING ・Before taking off the machinery cover, be sure to shutdown the engine and remove the key. ・Do not remove the machinery cover while engine is still hot such as immediately after completion of work [1] REMOVING THE MACHINERY COVER For servicing the machinery cover internals, remove the machinery cover in the following manner: 1. -
Page 67: Operation Control
2.OPERATION CONTROL 2.1 INSPECTION PRIOR TO STARTING UP THE ENGINE 2.1.1 VISUAL CHECK WARNING ・This machine has a gasoline engine installed. If you smell gasoline around the engine, it is possible that it is leaking. Thoroughly check gasoline hose for any crack and its connections for tightness. ・Deposit of inflammable matter or oil leakage around high temperature zone including engine, muffler or battery may cause fire on the machine. - Page 68 ③ INSPECTION OF UNDERCARRIAGE (rubber track, track roller, sprocket and idler) Check for damage, wear, loosened track roller and repair any abnormality. Check for loosened or missing bolt and retighten as necessary. For details, see “OPERATION, 3. HANDLING OF RUBBER TRACK”. ④...
-
Page 69: Inspection Before Starting Your Work
2.1.2 INSPECTION BEFORE STARTING YOUR WORK Inspections described in this section should be conducted before the first engine start-up of the day. [1] ENGINE OIL LEVEL CHECK AND REPLENISHMENT WARNING After oil level check and replenishment, install oil level gauge properly to prevent the gauge from falling off during operation, which may cause scalding due to shooting hot oil. - Page 70 [2] FUEL LEVEL CHECK AND REPLENISHMENT DANGER ・Fuel in use is gasoline (Octane number: 89~92). ・Be careful about fire including that of lit cigarette. ・For replenishment of fuel, be sure to shutdown the engine. Feeding fuel with engine running, may cause inflammation due to spilled fuel on heated muffler.
- Page 71 [3] HYDRAULIC OIL TANK LEVEL CHECK AND REPLENISHMENT WARNING ・Removing the hydraulic oil tank cap may cause oil to gush out. Turn the cap slowly and let internal pressure escape before removing it. ・After replenishment, close the tank cap securely. The cap may drop off during operation otherwise, causing serious scalding with hot oil gushing out.
- Page 72 [4] WINCH SPEED REDUCER CASE OIL LEVEL CHECK AND REPLESHMENT CAUTION ・For the type of oil to use, see “INSPECTION AND MAINTENANCE, 5.1 APPLICATION OF LUBRICANTS BY AMBIENT TEMPERATURE”. ・After checking the level of and replenishing with oil, use seal tape or the like at thread portion of level check plug and filler plug to prevent leakage before tightening them securely.
- Page 73 [7] INSPECTION AND CLEANING OF FUEL FILTER POT WARNING ・Filter pot contains gasoline. When you clean it, be careful about fire including lit cigarette. ・If fuel is spilled, be sure to wipe it off. CAUTION Water or trash remaining in the filter pot constitutes a cause for engine trouble. Check the filter pot internals and remove them.
- Page 74 [8] INSPECTION OF HORN AND OVER-HOIST PREVENTIVE DEVICE 1. Insert key to main starter switch and turn it to ON position to conduct following check: 2. Make sure that warning buzzer sounds at over-hoist preventive system ①. Push down the lever ② of over-hoist preventive system ① and make sure that the buzzer stops sounding.
-
Page 75: Starting Up The Engine
2.2 STARTING UP THE ENGINE WARNING Before starting up your engine, make sure that there in no person or obstacle around and sound horn. 2.2.1 STARTING UP THE ENGINE WITH MAIN STARTER SWITCH CAUTION ・Do not keep the starter turning for more than 5 seconds. It accelerates discharge of battery. If the engine fails to start, wait for about 2 minutes before attempting again. -
Page 76: Starting Up The Engine With Auxiliary Starter Switch
2.2.2 STARTING THE ENGINE WITH AUXILIARY STARTER SWITCH CAUTION ・For starting the engine with auxiliary starter switch in use, have the main starter switch placed in ON position. ・Do not continue to turn the starter for more than 5 seconds. It will accelerate the discharging of the battery. If the engine fails to start, wait for about 2 minutes before giving it a try again. -
Page 77: Starting Up The Engine With Recoil Starter In Use
2.2.3 STARTING THE ENGINE WITH RECOIL STARTER IN USE CAUTION ・Recoil starter is for emergency use such as in case of electric system deficiency including starter failure, battery rundown due to discharging or the like. Do not use this starter unless defect is found in connection with electric system. -
Page 78: Operation And Checking After Engine Has Started
2.3 OPERATION AND CHECKING AFTER ENGINE HAS STARTED DANGER While engine is running, never replenish with fuel (gasoline). Gasoline is a very inflammable type of fuel. Be sure to stop the engine for refueling. WARNING ・If any trouble develops during warm-up run, promptly turn the main starter switch to OFF position for an emergency stop. - Page 79 6. Pull back the accelerator lever on the crane control side to place the engine at medium speed (midway). 7. Slowly operate the boom derrick lever back and forth so that derrick cylinder extends and retracts to its stroke end to check that its function is normal.
-
Page 80: Break-In Operation
2.4 BREAK-IN OPERATION CAUTION Perform break-in operation with this machine during the first 20 hours on service meter. Overloading the machine before various part of machine adapts to operation, may shorten its useful life. While this machine is shipped after having gone through sufficient adjustment and inspection, forcible operation during early stage of usage invites pre-matured deterioration in engine or crane performance, resulting in their shortened useful life. -
Page 81: Starting The Machine
2.6 STARTING THE MACHINE WARNING ・Do not allow any person to approach the machine. ・Remove any obstacle in its traveling path. Particularly, make sure that the path for traveling backward is free from any hump that may cause stumbling or any ditch, and improve the terrain. ・This machine is designed so that, simultaneously with starting of the machine, operator is to move along. -
Page 82: Changing Travel Direction Of The Machine
2.7 CHANGING TRAVEL DIRECTION OF THE MACHINE WARNING ・Rapidly changing travel direction at high speed or unnecessary spin turn not only damages rubber track or hydraulic system, may cause collision with other object. Before making spin turn, bring the machine to a complete stop and adjust engine to low speed. ・Changing travel direction on slope should be avoided as it is likely to cause a side skidding. -
Page 83: Stopping And Parking The Machine
[3] CHANGING TRAVEL DIRECTION WHILE TRAVELING FORWARD OR BACKWARD: ・FOR MAKING LEFT TURN WHILE TRAVELING FORWARD: With the right travel lever pushed forward, return only the left travel lever to Neutral. ・FOR MAKING LEFT TURN WHILE TRAVELING BACKWARD: With the right travel lever pulled back, return only the left travel lever to Neutral. -
Page 84: Stopping The Engine
2.9 STOPPING THE ENGINE CAUTION ・Stopping the engine before it is sufficiently cooled may shorten useful life of its various part. Do not stop it abruptly except for emergency. ・ When your engine is overheated, do not stop it immediately but run it at medium speed to gradually cool it before shutting it down. -
Page 85: Rules For Traveling
2.11 RULES FOR TRAVELING WARNING Neglecting these rules for traveling will result in serious accident. [1] RULES FOR TRAVELING Climbing over obstacle such as boulder or stump gives the machine (undercarriage in particular) a great impact and creates the cause for damage. -
Page 86: Setting Up The Outrigger
2.12 SETTING UP THE OUTRIGGER WARNING ・For setting up the outrigger, select hard and level ground where possible. If you must set the outrigger inevitably on soft ground, place hard plates under the outrigger floats so that the outrigger does not sink during crane work. - Page 87 [1] COMPONENTS OF OUTRIGGER ① Linkage bracket ⑧ Inner box position pin ② Outrigger cylinder ⑨ Outrigger top box ③ Rotary ⑩ Inner box ④ Rotary position pin ⑪ Float ⑤ Outrigger base box ⑫ Snap pin ⑥ Stay (Damper type) ⑬...
- Page 88 2. Turn the rotary ③ so that the sticker "Standard" affixed to its side and the sticker "Standard" affixed to the side of frame are aligned. 3. Insert positioning pin ④ to the hole where the stickers “Standard” are aligned. NOTES ・Positioning pin ④...
- Page 89 8. Pull out the inner box ⑧ from top box ⑨ and align the hole on top box ⑨ with the position of innermost hole on the inner box ⑩. NOTES The position of innermost hole on inner box, means the one that meets the top box hole when the sticker "Maximum Extension"...
- Page 90 [3] WORKS TO BE DONE AFTER STARTING ENGINE 1. Start the engine. For details, see “OPERATION, 2.2 STARTING UP THE ENGINE”. 2. Push down the travel lever stand and place the locking lever ① in Crane Work position. 3. Check the number on instruction plate of outrigger switch and decide the outrigger you desire to actuate.
-
Page 91: Matters To Be Known Before Starting Crane Work
2.13 MATTERS TO BE KNOWN BEFORE STARTING CRANE WORK WARNING Negligence of following matters may lead to serious accident. ・Place the switch ② of over-hoist preventive system ① at ON position. If this switch is in OFF position, the alarm will not sound even when the hook block is over-hoisted. -
Page 92: Operations Prior To Starting Crane Work
2.14 OPERATIONS PRIOR TO STARTING CRANE WORK WARNING ・When operating the crane or the outriggers setting the travel lever stand to the “CRANE POSITION”, do not touch the travel lever since the undercarriage will move if you touch the travel lever and it will be very dangerous. -
Page 93: Crane Work Position
2.15 CRANE WORK POSITION Upon completion of “OPERATIONS PRIOR TO STARTING CRANE WORK” in preceding section 2.14, let the machine assume “CRANE WORK POSITION” in the following manner: 1. Operate the winch lever downward to Lower position and lower the hook block to the extent that it is not grounded. -
Page 94: Hoisting And Lowering Operation
2.16 HOISTING AND LOWERING OPERATION WARNING ・When lifting a load, the load will move slightly forward due to bending of the boom. Wiring personnel should be aware of this. ・Over-hoisting the hook block causes the over-hoist alarm buzzer to sound. If the buzzer sounds, immediately place the winch lever in Neutral to stop hoisting. -
Page 95: Boom Telescoping Operation
2.18 BOOM TELESCOPING OPERATION WARNING ・Operate the boom telescoping boom as slowly as possible. Rapid lever operation particularly with a load lifted, will cause the load to sway and machine to incur big shock, resulting in damaging the crane or tipping it over. ・Do not use boom telescoping action for dragging a load laterally or pulling it in. -
Page 96: Swing Operation
2.19 SWING OPERATION WARNING ・Before making swing motion, be sure to ascertain the safety of surrounding by sounding the horn. ・Swing lever should be operated as slowly as possible. ・Always to try to start smoothly, swing at low speed and stop gently. -
Page 97: How To Use Load Indicator And Load Meter
2.21 HOW TO USE LOAD INDICATOR AND LOAD METER WARNING ・Understand how to use the load indicator and load meter so you can perform your crane work safely, not exceeding total rated load. ・When you lift a load, if the pointer of load meter should exceed such total rated load as is read on load indicator, the load should be grounded immediately. - Page 98 5. While watching the lifting load and load meter, read the value on the load meter immediately after the load lifts off the ground (lift off). The load should be detected in the following manner: (1) Operate the winch lever to lift the hook block with no load engaged (no-load).
-
Page 99: Stowing The Crane
2.22 STOWING THE CRANE CAUTION ・Before lowering and engaging the hook block to its hanger, stop the swaying of the block. ・Before engaging the hook block to its hanger, do not loosen the wire rope excessively to avoid the whole hook block to lie down on the ground. -
Page 100: Stowing The Outrigger
2.23 STOWING THE OUTRIGGER WARNING ・When stowing the outrigger, do now allow anyone to approach. Serious accident may result, such as being caught between the outrigger and basic machine. ・ Any work other than outrigger cylinder extension and grounding, should be carried out with the engine shutdown. - Page 101 4. After both tracks are completely grounded, continue to push up the outrigger switch, one at a time or 2 simultaneously to IN position. When, with the outrigger telescoping cylinder having retracted completely, the outer box 9 has reached upper limit, take your finger off the outrigger set up switch.
- Page 102 5. Lower the top box ⑨ and align the hole of top box ⑨ with innermost hole position of the linkage bracket ①. 6. Insert the positioning pin ⑦ to the innermost hole of linkage bracket ① and retain it with snap pin ⑫ at its end. 7.
-
Page 103: Matters Prohibited In Connection With Crane Operation
2.24 MATTERS PROHIBITED IN CONNECTION WITH CRANE OPERATION WARNING ・Before starting your crane work, be sure to set outriggers on level and hard ground. ・Never attempt to let your crane travel with a load lifted or to perform crane work without placing outriggers. - Page 104 [5] PROHIBITION OF ENTERING INSIDE WORKING RADIUS Do not allow any one to approach inside working radius such as allowing to enter underneath a lifted load. [6] PROHIBITION OF USE FOR OTHER THAN PRIMARY PURPOSE Do not use crane as a lifter for personnel or the like. [7] PROHIBITION OF UNREASONABLE WORK Any work beyond the capability or the machine leads to trouble.
-
Page 105: Handling Of Rubber Track
3. HANDLING OF RUBBER TRACK 3.1 SMART WAY OF USING IT Rubber track is provided with excellent features which steel track lacks. However, when used similarly with steel track, such feature can not be fully utilized. Proceed with your work within its capability according to job site conditions or type of work. -
Page 106: Prohibited Types Of Work
3.3 PROHIBITED TYPES OF WORK Following works are prohibited: ・Working and making turn on crushed stone sub-grade, hard jagged rock-bed, steel reinforcement member, steel scrap or near steel plate edge, will damage the rubber track. ・At such job site as river location where great deal of boulders of various sizes are in existence, pebbles are likely to lodged and damage rubber track or to cause the track to come off. -
Page 107: Rule For Using It
3.4 RULE FOR USING IT WARNING Unless following rules for using rubber track are observed, serious accident or damage to the rubber track may result. Perform your work while observing or paying attention to the following: ・Avoid making spin turn on concrete road surface. Rapidly changing travel direction will result in premature wear or damage of rubber track. - Page 108 ・Avoid the use of this machine depending on material to which it is exposed. After inevitable use, wash it clean with water. ・Working on such material that produces a oily compound when crushed (soybeans, corn, rape cake or the like) should be avoided. ・...
-
Page 109: Handling Of Wire Rope
4. HANDLING of WIRE ROPE 4.1 STANDARD FOR WIRE ROPE REPLACEMENT CAUTION ・Standard for wire rope replacement is to be regarded common for all the ropes including those for winch, boom telescoping and wiring a load. ・Diameter of wire rope should be measured at the point where it passes sheave repeatedly and its mean value should be taken after measuring it from 3 directions. -
Page 110: Measures To Take When Winch Wire Rope Is Twisted
4.2 MEASURES TO TAKE WHEN WINCH WIRE ROPE IS TWISTED CAUTION Occasionally alternate the take-up of wire rope so that hook block end and winch drum end are exchanged, which will extend its service life. In case wire rope is twisted, correct it in the following manner: 1. -
Page 111: Transport
5. TRANSPORT For transporting the machine, observe local laws and regulations. 5.1 LOADING AND UNLOADING WARNING ・Ramp board should be used with less than 15 degrees of inclination. Set the distance between the boards to align them to the track gauge of the machine. ・For loading or unloading, let the machine assume Transport Position. -
Page 112: How To Lift The Machine
5.2 HOW TO LIFT THE MACHINE WARNING ・Wire rope and hanging device such as shackle should have enough strength for the mass (weight) of the machine. ・For lifting, the machine should assume Travel Position. Location of center of gravity of the machine is designed with the machine in Travel Position. -
Page 113: Rules For Loading
5.3 RULES FOR LOADING WARNING For loading or unloading of the machine, select level and hard ground. Also, have sufficient room from the road shoulder. After loading the machine at designated location on truck bed, lock it in the following manner: 1. -
Page 114: Handline In Cold Climate
6.HANDLING IN COLD CLIMATE 6.1 PREPARATION FOR LOW AMBIENT TEMPERATURE When temperature drops, starting deficiency, frozen coolant or the like develops. Take following measures: [1] LUBRICANT Replace lubricant for various components with low viscosity type. For specified viscosity, see “INSPECTION AND MAINTENANCE, 5.1 APPLICABLE LUBRICANTS BY AMBIENT TEMPERATURE”, for detail. -
Page 115: Long Term Starage
7. LONG TERM STORAGE 7.1 TREATMENT PRIOR TO STORAGE CAUTION During long term storage, for protection of cylinder rods, let the machine assume Travel Position. See “OPERATION, 2.5 TRAVEL POSITION of THE MACHINE”. (Prevention of corrosion on cylinder rod) For long term storage, take following measures: ・Clean every portion before storing it indoors. -
Page 116: Handling Of Battery
8. HANDLING OF BATTERY For handling the battery, observe following rules: WARNING ・ Inspection or other handling of your battery should be performed with engine shutdown and main starter switch key placed in OFF position. ・Electrolyte generates hydrogen gas which can explode. Do not allow lighted cigarette to approach and avoid any action that may cause spark. -
Page 117: De-Mounting And Mounting The Battery
8.2 DE-MOUNTING AND MOUNTING THE BATTERY CAUTION After installing your battery, make sure that it does not move. If it does, lock it again. [1] DE-MOUNTING 1. Remove the machinery cover. For details, see “OPERATION, 1.7 MACHINERY COVER”. 2. Battery cables should be removed with (-) terminal ①, which is ground connection end, first, followed by removal of (+) terminal ②. -
Page 118: Starting With Booster Cable In Use
8.4 STARTING WITH BOOSTER CABLES IN USE For starting your engine with booster cables in use, follow the instruction below: [1] RULES FOR CONNECTING AND DISCONNECTING BOOSTER CABLES WARNING ・When connecting cables, absolutely do not allow (+) and (-) terminals to contact each other. ・For starting with booster cables in use, wear protector goggles and rubber gloves. - Page 119 [3] STARTING UP THE ENGINE CAUTION Make sure that levers of normal and troubled machine are all in Neutral position. 1. Make sure that clips are firmly connected to battery terminals. 2. Start up the engine of normal machine and bring it to maximum rotation. 3.
-
Page 120: Measures To Be Taken In Case Of Abnormality
9. MEASURES TO BE TAKEN IN CASE OF ABNORMALITY 9.1 IN CONNECTION WITH ELECTRICAL COMPONENTS ・For the measures marked with “ * ” in the Measure column below, contact your dealer. ・In case any abnormality or cause other than shown hereunder is suspected, contact your dealer. Abnormality Major Measures to be taken... -
Page 121: In Connection With Engine
9.3 IN CONNECTION WITH ENGINE ・For the measures marked with “ * ” in the Measure column below, contact your dealer. ・In case any abnormality or cause other than shown hereunder is suspected, contact your dealer. Abnormality Major Measures to be taken ・... - Page 122 3-70...
-
Page 123: Inspection And Maintenance
INSPECTION AND MAINTENANCE 1. RULES FOR CONDUCTING SERVICE 4- 2 2. BASICS OF SERVICE 4- 4 3. LEGALLY REQUIRED INSPECTION 4- 6 4. CONSUMABLE PARTS 4- 6 5. LUBRICATION OIL AND GREASE 4- 7 6. STANDARD TOOLS AND STANDARD TIGHTENING TORQUE 4- 8 7. -
Page 124: Rules For Conducting Service
1. RULES FOR CONDUCTING SERVICE In order to use this machine safely and without incurring trouble, fully understand the inspection and service items and method thereof described in this manual and perform your inspection and service accordingly. WARNING ・Do not perform any inspection or service other than those described in this manual. Doing it under personal judgment may result in serious accident or trouble. - Page 125 [12] CARE TO BE TAKEN CONCERNING WELDING REPAIR WORK ・Disconnect power supply (Turn off the main starter switch.) ・Install ground connection within one meter of welding location. ・Use care not to allow any seal or bearing to enter between welding location and ground connection. Spark may damage sealing.
-
Page 126: Basics Of Service
2. BASICS OF SERVICE [1] HANDLING OF OIL ・ Oil being used under extremely severe conditions (high temperature and high pressure) by engine and attachment, its deterioration progresses along with operating time. Be sure to use oil that meets such grade and temperature as described in the manual. - Page 127 [5] HANDLING ELECTRICAL COMPONENTS AND PARTS ・When it gets wet or its cover is broken, electrical component or parts is very dangerous because, due to resultant power leakage, the machine may go out of order or malfunction. ・Inspection and service includes the check of belt for proper tension or damage, and that of electrolyte level. ・Do not remove or disassemble any electric component mounted to the machine.
-
Page 128: Legally Required Inspection
3. LEGALLY REQUIRED INSPECTION 3.1 SAFETY REGULATION ON CRANE Check you local authority for the legal requirement. Generally however, following procedure is required for the purpose of such inspection: 1. Check safety systems for proper function. 2. Check hanging devices such as hook block for any abnormality. 3. -
Page 129: Lubrication Oil And Grease
5. LUBRICATION OIL AND GREASE 5.1 APPLICABLE LUBRICANTS BY AMBIENT TEMPERATURE In accordance with ambient temperature, use lubricant in the following manner: ・”Specified oil capacity” means total capacity including the oil which fills piping for various systems, while “Volume to replace”... -
Page 130: Standard Tools And Standard Tightening Torque
6. STANDARD TOOLS AND STANDARD TIGHTENING TORQUE 6.1 INQUIRY ON STANDARD TOOLS Following tools come with this machine: Remarks Tool Applicable width across flats (S1-S2): 10 - Wrench 12mm Box wrench for spark plug Width across flats: 21mm Handle for box wrench If any of above tools should fail, order the replacement with your dealer. - Page 131 [2] BOLT MARKED [10.9] (strength classification) ON ITS HEAD: Tightening torque {N-m (kgf-m) Nominal With across a (mm) flat b (mm) Target value Allowance 11.0 (1.1) 9.4 - 12.7 (0.93 - 1.26) 27.0 (2.7) 23.0 - 31.1 (2.3 - 3.10) 53.0 (5.4) 45.0 - 61.0 (4.6 - 6.21) 93.0 (9.5)
- Page 132 [4] OTHER BOLTS Tightening torque {N-m (kgf-m) Nominal With across a (mm) flat b (mm) Target value Allowance 3.0 (0.30) 2.6 - 3.5 (0.26 - 0.35) 7.5 (0.75) 6.5 - 8.6 (0.65 - 0.85) 14.5 (1.45) 12.6 - 16.7 (1.25 - 1.65) 25.0 (2.55) 21.7 - 28.8 (2.20 - 2.95) 40.0 (4.10)
-
Page 133: List Of Inspection And Service
7. LIST OF INSPECTION AND SERVICE Item of inspection and maintenance Page 8.1 FIRST 10 HOUR SERVICE 4-13 [1] GREASING VARIOUS PART OF THE CRANE 4-33 8.2 FIRST 20 HOUR SERVICE 4-13 [1] REPLACING THE ENGINE LUBRICATION OIL 4-29 8.3 FIRST 200 HOUR SERVICE 4-13 [1] REPLACING THE OIL IN HYDRAULIC OIL TANK AND RETURN FILTER 4-35... - Page 134 Item of inspection and maintenance Page 8.9 SERVICE IN EVERY 500 HOURS 4-35 [1] REPLACING THE OIL IN HYDRAULIC OIL TANK AND RETURN FILTER 4-35 [2] CHECKING AND ADJUSTING THE ENGINE CARBURETOR 4-37 [3] CHECKING AND FITTING THE ENGINE INTAKE AND EXHAUST VALVE SEAT 4-37 [4] RETIGHTENING THE ENGINE HEAD BOLTS 4-37...
-
Page 135: Working Procedure
8. WORKING PROCEDURE 8.1 FIRST 10 HOUR SERVICE For the first time of new machine only, perform following service after 10 hours of operation: [1] GREASING VARIOUS PART OF THE CRANE For the location and method, see “8.8 SERVICE IN EVERY 200 HOURS”. 8.2 FIRST 20 HOUR SERVICE For the first time of new machine only, perform following service after 20 hours of operation: [1] REPLACING THE ENGINE LUBRICATION OIL... -
Page 136: Irregular Service
8.5 IRREGULAR SERVICE [1] CHECKING, CLEANING AND REPLACING THE AIR CLEANER WARNING Do not clean or replace air cleaner while engine is running. CAUTION ・Air cleaner should be cleaned with the interval of 20 to 30 hours as a guide. If the machine was used in dusty area, clean the air cleaner after such work or at the next pre-work inspection. -
Page 137: Checking The Electrolyte Level
[2] CHECKING THE ELECTROLYTE LEVEL WARNING ・Battery generates inflammable gas which may explode. Do not allow any fire to approach. ・Electrolyte is dangerous. Do not allow it to get in your eyes or on skin. If it has got on, wash it off with plenty of water and see doctor for treatment. -
Page 138: Checking And Adjusting The Rubber Track Tension
[3] CHECKING AND ADJUSTING THE RUBBER TRACK TENSION CAUTION ・For performing rubber track check and adjustment, set up outrigger and lift the machine so that its tracks are about 50mm off the ground. ・Tension of rubber track is normal, if the clearance between bottom of track roller and shoulder of track is 5 to 10mm at midway. - Page 139 [TENSION ADJUSTMENT] If, as the result of rubber track tension check, the tension is weaker than standard, make adjustment in the following manner: Working with the track slackened (bend of rubber track being 15mm or greater), will cause the track to go off the rollers or pre-matured wear of core metal to develop.
- Page 140 ・IN CASE THE TENSION IS STRONG (to reduce tension) WARNING Grease is packed inside the rubber track tension adjust system, and the grease is at high pressure due to tension of the track. By making adjustment without observing following instruction, grease valve may spring out, to cause serious accident.
-
Page 141: Checking The Rubber Track For Damage And Wear
[4] CHECKING THE RUBBER TRACK FOR DAMAGE AND WEAR CAUTION For making judgment whether to replace, repair or continue to use the existing track, contact your dealer. Your track needs to be repaired or replaced when it falls in the following condition. -
Page 142: Replacing The Rubber Track
[5] REPLACING THE RUBBER TRACK WARNING ・Grease is packed inside the rubber track tension adjust system, and such grease is at high pressure due to tension of the track. By making adjustment without observing following instruction, grease valve may spring out, to cause serious accident. ・Tension adjustment grease valve should not turned out by more than one turn. - Page 143 [REINSTALLING THE RUBBER TRACK] ・Have a grease gun ready. ・Have a piece of steel pipe ready. 1. Set up outrigger and lift the undercarriage off the ground by about 50mm. For details of outrigger setting up method, see “OPERATION, 2.12 SETTING UP THE OUTRIGGER”. 2.
-
Page 144: Replacing The Winch Wire Rope
[6] REPLACING THE WINCH WIRE ROPE WARNING For replacing the wire rope, be sure to wear heavy working gloves. CAUTION ・Diameter of wire rope should be measured at its portion that goes over sheave repeatedly and mean value of measurements taken from 3 directions should be adopted. ・Even if it has not been in use, any wire rope that has become aged should not be used. - Page 145 [INSTALLING THE WIRE ROPE] WARNING Rope wedge for attaching the wire rope should be installed correctly and firmly. Otherwise, there is a risk of wire rope coming off during crane work, resulting in serious accident. CAUTION ・When taking up wire rope, use care to prevent it from being taken up disorderly on the drum. ・Immediately after installing new wire rope, lift a load (300~500kg) with boom extended and hoisted to maximum and repeat hoisting and lowering of hook block a few times for breaking-in the rope.
- Page 146 5. In the following manner, attach the end of wire rope ⑤ to the wire socket ③. NOTES Thread the wire rope ⑤ to wire socket ② as shown in the sketch, and place rope wedge ⑦ into position “a” before pulling it hard in the direction of arrow.
-
Page 147: Checking And Adjusting The Boom Telescoping Wire Rope
[7] CHECKING AND ADJUSTING THE BOOM TELESCOPING WIRE ROPE WARNING For performing the check and adjustment of wire rope, be sure to wear heavy working gloves. [CHECKING THE WIRE ROPE] Adjustment is required in case the wire rope for pulling out boom falls on such condition as shown below:. 1. - Page 148 [WIRE ROPE ADJUSTMENT] CAUTION When making adjustment of each wire rope, be careful not to give any excessive tension. Four boom pull-out wire ropes are in use. There is a sequence such as follows for making adjustment of these wire ropes, which should always be observed: 1.
- Page 149 4. Adjusting the No. 3 boom pull-out wire rope ⑥ (1) With the lock nut ⑪ loosened, tighten the right and left side adjust nuts ⑫ evenly in the direction wherein the No. 3 boom pull-out wire rope ⑥ is tightened, to the point immediately before the No. 3 boom starts to be extended.
- Page 150 [8] REPLACING THE BATTERY FOR OVER-HOIST PREVENTIVE DEVICE WARNING With the over-hoist preventive device switch placed in ON position and the winch over-hoisted, if the buzzer does not sound or the sound is low in volume, useful life of the dry battery has expired. Replace the dry battery promptly.
-
Page 151: Service In Every 50 Hours
8.6 SERVICE IN EVERY 50 HOURS [1] REPLACING THE ENGINE LUBRICATING OIL WARNING ・After oil check and replacement, tighten the oil level gauge securely. It may fall out during operation, causing you to incur scalding due to hot oil that gushes out. ・Engine parts are hot immediately after operation. -
Page 152: Checking And Adjusting The Alternator Belt Tension
[2] CHECKING AND ADJUSTING THE ALTERNATOR BELT TENSION ・Remove the machinery cover. For details, see “OPERATION, 1.7 MACHINERY COVER”. [TENSION CHECK] ・ Tension is normal if the belt ② bends by 8-10mm when depressed with finger at midway between drive pulley and alternator ① pulley. [TENSION ADJUSTMENT] ・Have a wooden bar ready. -
Page 153: Service In Every 100 Hours
8.7 SERVICE IN EVERY 100 HOURS [1] CHECKING AND CLEANING THE ENGINE SPARK PLUG CAUTION Make sure that the specified plug is used. Those other than specified may cause deficiency in or shorten the useful life of engine. ・Specified spark plug: NGK BPR6HS ・Have a box wrench and a handle for spark plug ready. -
Page 154: Service In Every 200 Hours
8.8 SERVICE IN EVERY 200 HOURS [1] CHECKING AND REPLENISHING THE TRAVEL MOTOR SPEED REDUCER CASE OIL LEVEL CAUTION ・For the type of oil to be used, see “INSPECTION AND MEINTENANCE, 5.1 APPLICATION OF LUBRICANTS BY AMBIENT TEMPERATURE”. ・After the oil level check and replenishment, apply seal tape or the like to thread portion of oil level check plug for prevention of leakage before tightening it securely. -
Page 155: Greasing Various Part Of The Machine
[3] GREASING VARIOUS PART OF THE MACHINE CAUTION ・Type of grease will vary depending on the location to use. Use of improper grease can even shorten the useful life of the machine. ・During the first 100 hours when the initial break-in takes place, carry out greasing service every 10 hours. ・Use suitable type of grease for particular location in accordance with the chart below: Location of greasing Type of grease... - Page 156 4-34...
-
Page 157: Service In Every 500 Hours
8.9 SERVICE IN EVERY 500 HOURS [1] REPLACING THE HYDRAULIC TANK OIL AND RETURN FILTER WARNING ・ After checking or replenishing the oil, tighten oil level gauge securely. It can come off during operation, causing hot oil to gush and you to incur scalding. ・Removing the hydraulic oil tank cap may cause oil to gush out. - Page 158 9. Take off the strainer ② from the hydraulic oil tank oil filler. 10. Clean the strainer ② thoroughly with clean kerosene or the like. NOTES If the strainer ② screen is damaged or clogged with dust and can not be cleaned, replace it with new one.
- Page 159 [2] CHECKING AND ADJUSTING THE ENGINE CARBURETOR For this check and adjustment, special tools are required. Contact your dealer. Even before reaching 500 hours, in case fluctuation of engine speed becomes pronounced, idling can not be continued or fuel leaks from carburetor ①, contact your dealer for diagnoses.
-
Page 160: Service In Every 1000 Hours
8.10 SERVICE IN EVERY 1000 HOURS [1] REPLACING THE OIL IN WINCH SPEED REDUCER CASE CAUTION ・For the type of oil to be used, see “INSPECTION AND MEINTENANCE, 5.1 APPLICATION OF LUBRICANTS BY AMBIENT TEMPERATURE”. ・ When changing oil, apply seal tape or the like to thread portion of oil level check plug and filler plug for prevention of later leakage, and tighten them securely. - Page 161 [2] REPLACING THE OIL IN SWING MACHINERY WARNING Drain plug of the swing machinery case is located at directly bottom of the machine. For draining the oil, set up the outrigger and lift the machine to the maximum so you can enter underneath. CAUTION ・For the type of oil to be used, see “INSPECTION AND MEINTENANCE, 5.1 APPLICATION OF LUBRICANTS BY AMBIENT TEMPERATURE”.
- Page 162 [3] REPLACING THE OIL IN TRAVEL MOTOR SPEED REDUCER CASE CAUTION ・For the type of oil to be used, see “INSPECTION AND MEINTENANCE, 5.1 APPLICATION OF LUBRICANTS BY AMBIENT TEMPERATURE”. ・When replacing the oil, apply seal tape or the like to thread portion of drain plug and filler port plug for prevention of leakage before tightening them securely.
-
Page 163: Specifications
SPECIFICATIONS 1. SPECIFICATIONS 2. OVERALL DIMENSIONS 3. TOTAL RATED LOAD CHART 4. WORKING RANGE... -
Page 164: Specifications
1. SPECIFICATIONS System and items MC-104CR Mass of machine 1050kg Overall length x overall width 1980 mm x 600 mm x 1325 mm x overall height Mass and Distance between sprocket and 1044 mm dimensions idler shaft centers Track gage 420 mm Track width 180 mm... -
Page 165: Overall Dimensions
2. OVERALL DIMENSIONS * Above sketch represents the machine with the travel lever stowed for Transport Position. -
Page 166: Total Rated Load Chart
3. TOTAL RATED LOAD CHART 4. WORKING RANGE... - Page 168 MAEDA MINI-CRAWLER CRANE MC-104C OPERATION MANUAL Document No.: 350E-OM0912-03 Fourth edition : December 15, 2009 Issued by Maeda Seisakusyo Co., Ltd. 1095 Onbegawa, Shinonoi Nagano, Nagano 388-8522, Japan No part of this manual can be reproduced in any from without permission...
Need help?
Do you have a question about the MC-104C-2 and is the answer not in the manual?
Questions and answers