Table of Contents
Advertisement
Quick Links
Making cooking as much fun as eating
Please read this instruction manual. This will ensure that you
make full use of all the technical benefits your compact oven
has to offer.
It will provide you with important safety information. You will
be familiarised with the individual components of your new
appliance. And we will show you how to make settings step
by step. It is quite simple.
The tables list the settings and shelf positions for numerous
well known dishes. All these dishes are tested in our cooking
studio.
In the unlikely event of a malfunction, look here for
information on how to rectify minor faults yourself.
A detailed table of contents will help you to find your way
around quickly.
Enjoy your meal!
Instructions for use
3HB469X
en
890924
All manuals and user guides at all-guides.com
9000 328 221
Advertisement
Table of Contents

Related Manuals for BALAY 3HB469X


Summary of Contents for BALAY 3HB469X
- Page 1 In the unlikely event of a malfunction, look here for information on how to rectify minor faults yourself. A detailed table of contents will help you to find your way around quickly. Enjoy your meal! Instructions for use 3HB469X 9000 328 221 890924...
-
Page 2: Table Of Contents
All manuals and user guides at all-guides.com Table of contents Safety information ......Before installation . - Page 3 All manuals and user guides at all-guides.com Table of contents Memory ........Saving the settings in the memory .
- Page 4 All manuals and user guides at all-guides.com Table of contents Energy and environment tips ....Saving energy ....... Environmentally friendly disposal .
-
Page 5: Safety Information
All manuals and user guides at all-guides.com d Safety information Read this instruction manual carefully. Please keep the instruction and installation manuals in a safe place. Please pass on these manuals to the new owner if you sell the appliance. Before installation Transport damage Check the appliance for damage after unpacking it. - Page 6 All manuals and user guides at all-guides.com There is a risk of fire. Never store combustible items in the cooking compartment. Never open the appliance door if there is smoke inside. Switch off the appliance. Pull out the mains plug or switch off the appliance by the fuse in the fuse box.
-
Page 7: Causes Of Damage
All manuals and user guides at all-guides.com There is a risk of fire. Never hang flammable items, such as tea towels, on the door handle. The appliance will become very hot on the outside during the self cleaning cycle. Keep children at a safe distance. -
Page 8: Your New Appliance
All manuals and user guides at all-guides.com Appliance door used as a Do not sit or place anything on the open appliance seat or storage space door. Do not place ovenware or accessories on the appliance door. Transporting the appliance Do not carry or hold the appliance by the door handle. -
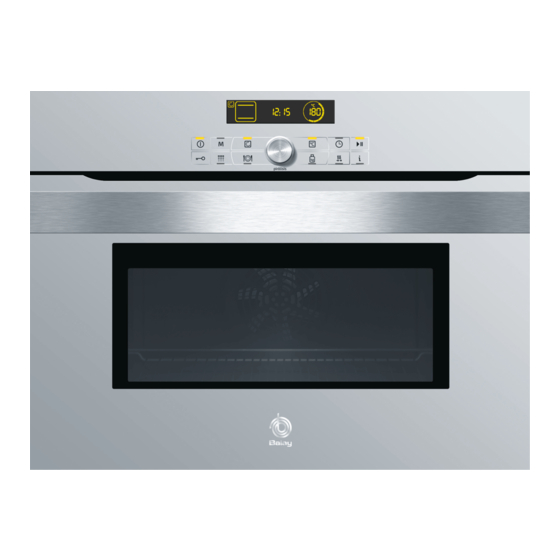
Page 9: Buttons
All manuals and user guides at all-guides.com Buttons Sensors are located under the individual buttons. They respond when you touch them gently with your finger. Symbol Button function Switches the oven on and off Short press = selects memory Long press = stores memory ‚... -
Page 10: Cooking Compartment
All manuals and user guides at all-guides.com Heating phases After the oven starts, the temperature is enclosed in a circle. The bars inside the ring indicate the heating temperature. The temperature has been reached once the inside of the circle is completely filled with bars. -
Page 11: Accessories
All manuals and user guides at all-guides.com Accessories The accessories can be inserted into the oven at 3 different levels. The accessories can become deformed when they become hot. As soon as they have cooled down, the deformation disappears with no effect on the function. You can buy accessories from the after sales service, from specialist retailers or online. - Page 12 All manuals and user guides at all-guides.com Universal pan For large roasts, dry and moist cakes, bakes and gratins. It can also act as a splashguard if you are grilling meat directly on the wire rack. To do this, insert the universal pan at level 1. Insert the universal pan into the oven with the tapered edge facing the oven door.
-
Page 13: Before Using For The First Time
All manuals and user guides at all-guides.com Before using for the first time This section tells you everything you need to do before using the appliance for the first time. Set the clock Heat up the cooking compartment Clean the accessories Read the safety information at the start of the instructions for use. -
Page 14: Cleaning The Accessories Before Use
All manuals and user guides at all-guides.com 4. Using the rotary selector, change the temperature to 240 ºC. 5. Press the @ button. 6. After 60 minutes, switch off the oven with the # button. The residual heat in the cooking compartment is displayed. -
Page 15: Setting The Oven
All manuals and user guides at all-guides.com Setting the oven In this section, you will find information about which types of heating are available in your oven how you set a type of heating and a temperature and how you set rapid heating. Types of heating Your oven offers you a wide variety of types of heating. -
Page 16: Setting The Type Of Heating And Temperature
All manuals and user guides at all-guides.com Type of heating and Application temperature range $ Grill, large area For grilling steaks, sausages, toast and pieces of fish. Grill settings: The whole area below the grill heating element becomes hot. 1 (low), 2 (medium), 3 (high) % Grill, small area For grilling small quantities of steaks, sausages, toast and Grill settings:... -
Page 17: Setting Rapid Heating
All manuals and user guides at all-guides.com 4. Press the @ button to start the appliance. 5. When the meal is ready, switch off the oven using the # button or select a new function and set it. After the microwave has started, you can change the Changing the temperature or grill setting temperature or grill setting at any time. -
Page 18: Automatic Programmes
All manuals and user guides at all-guides.com Suitable temperatures The rapid heating function will not work if the temperature setting is below 100 ºC. Rapid heating is not necessary if the temperature in the cooking compartment is only slightly lower than the temperature set. -
Page 19: Setting The Programme
All manuals and user guides at all-guides.com Setting the programme Example in fig.: To prepare 1.3 kg meat loaf = Programme 9. 1. Press the # button to switch on the appliance. 2. Press the = button. In the display, the first programme ˜‹‚ appears together with a suggested weight. -
Page 20: Ovenware
All manuals and user guides at all-guides.com When the duration has A signal sounds. Press the 0 button to cancel the elapsed signal before it sounds. Open the appliance door and carefully remove the cookware with oven gloves. Press the # button to switch off the appliance. Cancelling the programme Press the # button to cancel operation and switch off the appliance. -
Page 21: Preparing The Meal
All manuals and user guides at all-guides.com Preparing the meal Choose a suitable dish. Weigh the meat, fish or, for vegetarian stews, the vegetables. You need to know the weight to make the setting. Cover the dish with a lid. Place it on the wire rack at level 1. -
Page 22: Memory
All manuals and user guides at all-guides.com Suitable foodstuffs Weight range Add liquid in kg Pot roasted beef, fresh e.g. boned chuck back rib, 0.50 2.00 shoulder, top/silverside, marinated pot roast Roast beef, medium 5 to 6 cm thick piece of sirloin 0.50 2.00 Roast beef, rare 5 to 6 cm thick piece of sirloin... -
Page 23: Saving The Settings In The Memory
All manuals and user guides at all-guides.com Saving the settings in the memory Exception: the self cleaning function and rapid heating cannot be saved. 1. Set the required operating mode. Do not start. 2. Briefly press the i button and use the rotary selector to select the memory location. -
Page 24: Time Settings
All manuals and user guides at all-guides.com Time settings Call up the time settings using the 0 button. You have the following options: When the oven is switched off Q = Set timer 0 = Set clock When the oven is switched on Q = Set timer x = Set the duration, if necessary y = Set a later end time, if necessary... -
Page 25: Setting The Duration
All manuals and user guides at all-guides.com Cancelling the timer time Press the 0 button and turn the time back to 00:00. The timer time is cancelled after a few seconds. Changing the timer time Press the 0 button. Change the time for the timer using the rotary selector. -
Page 26: Setting A Later End Time
All manuals and user guides at all-guides.com The duration has elapsed A signal sounds. Heating does not continue. Press the 0 button to cancel the signal before it sounds. Open the appliance door and carefully remove the cookware with oven gloves. Press the # button to switch off the appliance. -
Page 27: Setting The Clock
All manuals and user guides at all-guides.com 2. Use the rotary selector to set a later end time. 3. Confirm with the @ button. The setting is adopted. The appliance is on standby, the end time yO is displayed. Operation starts at the right time automatically. In the example, operation begins at 12.00. -
Page 28: Childproof Lock
All manuals and user guides at all-guides.com Changing the clock Example: changing from summer to winter time. 1. Press the 0 button twice. The arrow is pointing to the 0O clock symbol. 2. Change the time using the rotary selector. 3. -
Page 29: Basic Settings
All manuals and user guides at all-guides.com Basic settings Your appliance has a variety of basic settings that you can adjust at any time to suit your requirements. Refer to the table for all basic settings and the Note corresponding change options. Only the basic settings that correspond to the features of your specific appliance are displayed. -
Page 30: Changing The Basic Settings
All manuals and user guides at all-guides.com Changing the basic settings In the table above you can see which basic settings can be changed. Example in fig.: Set the basic setting for the audible signal duration to long. 1. Press the # button to switch on the appliance. 2. -
Page 31: Automatic Switch Off
All manuals and user guides at all-guides.com Automatic switch off Your oven has an automatic switch off function. It is only activated if the settings have not been changed for a long time. When the switch off function is activated depends on the temperature or grill setting which has been set. -
Page 32: Important Notes
All manuals and user guides at all-guides.com Risk of fire. Loose food residue, grease and meat juices are flammable. Wipe the oven floor, the inside of the oven door and the edges around the front of the oven with a damp cloth. -
Page 33: Setting The Self Cleaning
All manuals and user guides at all-guides.com Do not attempt to open the appliance door while self cleaning is in operation. The cleaning process may be cancelled. The cooking compartment light remains off during self cleaning. The temperature control bars do not appear. -
Page 34: Care And Cleaning
All manuals and user guides at all-guides.com Care and cleaning With good care and cleaning, your oven will remain clean and fully functioning for a long time to come. Here we will explain how to maintain and clean your oven correctly. Danger of short circuiting. -
Page 35: Cleaning Agents
All manuals and user guides at all-guides.com Cleaning agents Damage to the various different surfaces caused by using the wrong cleaning agent can be avoided by observing the information in the table below. Do not use sharp or abrasive cleaning agents, metal or glass scrapers to clean the glass in the appliance door, metal or glass scrapers to clean the door seal,... -
Page 36: Cleaning The Glass Panel
All manuals and user guides at all-guides.com Area Cleaning agents Seal Hot soapy water: Clean with a dish cloth, do not scour. Do not use a metal or glass scraper to clean. Accessories Hot soapy water: Soak and clean with a dish cloth or a brush. Cleaning the glass The glass panel can be removed from the oven door panel... - Page 37 All manuals and user guides at all-guides.com Clean the glass panels using glass cleaner and a soft cloth. Do not use any caustic or abrasive agents. The glass scraper is not suitable. The glass could be damaged. 1. Insert the panel and push it downwards until it Installation engages.
-
Page 38: Troubleshooting
All manuals and user guides at all-guides.com 7. Tighten the screws until hand tight using a slotted screwdriver (blade width 8 11 mm), then close the door. (fig. G). The oven may only be used again when the panels are correctly installed. Troubleshooting Malfunctions often have simple explanations. -
Page 39: Malfunction Table
All manuals and user guides at all-guides.com Malfunction table Problem Possible cause Remedial action/notes The appliance does not work. Blown fuse Look in the fuse box and check that the fuse is in working order. ‹‹:‹‹ flashes in the clock Power interruption Set the current time using the rotary display. -
Page 40: Replacing The Oven Light
All manuals and user guides at all-guides.com Error messages with E If an error message with E is shown in the display, turn the rotary selector. This clears the error message. It is possible that you may have to set the clock again. If the error is shown again, call the after sales service. - Page 41 All manuals and user guides at all-guides.com Method 1. Switch off the circuit breaker in the fuse box. 2. Place a tea towel in the cold oven to avoid damage. 3. Remove the glass cover. To do this open the glass cover downwards by hand.
-
Page 42: Replacing The Door Seal
All manuals and user guides at all-guides.com Replacing the door seal If the door seal is defective, it must be replaced. Replacement seals for your appliance can be obtained from the after sales service. Please supply your appliance's E number and FD number. 1. -
Page 43: After Sales Service
All manuals and user guides at all-guides.com After sales service Our after sales service is there for you if your appliance should need to be repaired. You will find the address and telephone number of your nearest after sales service point in the phone book. The listed after sales service centres will also be pleased to give you the details of an after sales service point near you. -
Page 44: Energy And Environment Tips
All manuals and user guides at all-guides.com Energy and environment tips Here you can find tips on how to save energy when baking and roasting and how to dispose of your appliance properly. Saving energy Only preheat the oven if this is specified in the recipe or in the tables in the instruction manual. -
Page 45: Tested For You In Our Cooking Studio
All manuals and user guides at all-guides.com Tested for you in our cooking studio Here you will find a selection of dishes and the ideal settings for them. We will show you which type of heating and which temperature are ideal for your dish. You can find information about suitable accessories and the height at which they should be inserted. -
Page 46: Cakes And Pastries
All manuals and user guides at all-guides.com Cakes and pastries About the tables The times given apply to dishes placed in a cold oven. The temperature and baking time depend on the consistency and amount of the mixture. This is why temperature ranges are given in the tables. - Page 47 All manuals and user guides at all-guides.com Cakes in tins Cookware Level Type of Tempera Duration heating ture ºC minutes Swiss flan Dark springform & 190 200 40 60 cake tin Ring cake Ring cake tin " 150 170 35 45 Nut cake Dark springform "...
- Page 48 All manuals and user guides at all-guides.com Cakes on trays Accessories Level Type of Tempera Duration heating ture ºC minutes Shortcrust pastry with dry topping Universal pan and › 160 180 30 40 enamel baking tray* Shortcrust pastry with moist Universal pan 160 180 50 60 topping (fruit)
- Page 49 All manuals and user guides at all-guides.com Small baked items Accessories Level Type of Tempera Duration heating ture ºC minutes Muffins Muffin tray on wire 160 180 35 45 rack Muffins 1 muffin tray each on universal pan and › 140 160 50 60 enamel baking tray* Choux pastry...
-
Page 50: Baking Tips
All manuals and user guides at all-guides.com Baking tips You want to bake following your Refer to instructions for similar items in the baking tables own recipe. as a guide. Use baking tins made of silicone, The baking tin must be heat resistant up to 250 ºC. glass, plastic or ceramic Cakes in these baking tins will be less brown. -
Page 51: Roasting And Grilling
All manuals and user guides at all-guides.com Roasting and grilling About the tables The temperature and roasting time depend on the type and amount of food being cooked. This is why temperature ranges are given in the tables. Begin with the lower temperature and, if necessary, use a higher setting the next time, For more information, see the section entitled "Tips for... - Page 52 All manuals and user guides at all-guides.com Use tongs to turn the pieces of food you are grilling. If you pierce the meat with a fork, the juices will run out and it will become dry. Dark meat, e.g. beef, browns more quickly than lighter coloured meat such as veal or pork.
- Page 53 All manuals and user guides at all-guides.com Weight Accessories Level Type of Temperature Duration in heating in C, minutes grill setting Roast beef, medium ca. 1 kg Ovenware without 280 300 40 50 lid, wire rack Steaks medium, Universal pan and 1st side: 3 cm thick wire rack...
- Page 54 All manuals and user guides at all-guides.com Pork Turn lean pork joints and meat with no rind halfway through the cooking time. Leave to stand for approximately 10 minutes after cooking. Place the joint in the dish rind side up. Make a cut in the rind.
- Page 55 All manuals and user guides at all-guides.com Lamb and game Turn lamb and game halfway through the cooking time. Circulated air grilling = # Top/bottom heat Weight Accessories Level Type of Temperature Duration heating in C, in minutes grill setting Saddle of lamb on the ca.
- Page 56 All manuals and user guides at all-guides.com Miscellaneous Allow meat loaf to stand for approximately 10 minutes after cooking. Turn the sausages after Z of the cooking time. Circulated air grilling = # Grill, large area Weight Accessories Level Type of Temperature Duration in heating...
- Page 57 All manuals and user guides at all-guides.com Circulated air grilling = # Grill, large area Hot air = " Top/bottom heat Weight Accessories Level Type of Temperature Duration heating in C, grill setting minutes Chicken, whole ca. 1.2 kg Ovenware with lid, 230 250 70 80 wire rack...
- Page 58 All manuals and user guides at all-guides.com Fish For braised fish, cook the whole fish in its swimming position. Grill, small area Grill, large area Top/bottom heat Weight Accessories Level Type of Tempera Duration in heating ture in C, minutes grill setting Fish...
-
Page 59: Tips For Roasting And Grilling
All manuals and user guides at all-guides.com Tips for roasting and grilling The table does not contain For small roasts, select a higher temperature and a shorter information for the weight of cooking time. For larger roasts, select a lower temperature and a the roast. - Page 60 All manuals and user guides at all-guides.com Hot air = " Top/bottom heat Circulated air grilling = # Grill, large area Grill, small area Bakes, gratins, toast Weight Accessories Level Type of Temperature Duration heating in C, grill setting minutes Bake, sweet ca.
-
Page 61: Frozen Ready Made Meals
All manuals and user guides at all-guides.com Frozen ready made meals Please observe the instructions on the packaging. The values in the table apply to dishes placed in a cold oven. Do not allow chips, croquettes, and rösti to overlap. Turn fish fingers, chicken goujons, nuggets and veggie burgers halfway through the cooking time. -
Page 62: Acrylamide In Foodstuffs
All manuals and user guides at all-guides.com Acrylamide in foodstuffs Acrylamide is mainly produced in grain and potato Which foods are affected? products heated at high temperatures, such as potato crisps, chips, toast, rolls, bread, fine baked goods (biscuits, gingerbread, cookies). Tips for keeping acrylamide to a minimum when preparing food General... -
Page 63: Test Dishes
All manuals and user guides at all-guides.com Test dishes The quality and performance of the appliances is tested by test institutes using the following dishes. In accordance with DIN 44547 and EN 60350 Baking The values in the table apply to dishes placed in a cold oven. - Page 64 All manuals and user guides at all-guides.com Grilling Grill, large area Meal Accessories Level Type of Grill Duration in heating setting minutes Toasting bread* Wire rack Beefburgers, 12 pieces** Wire rack + universal pan * Preheat for 5 minutes. ** Turn halfway through the cooking time.
Need help?
Do you have a question about the 3HB469X and is the answer not in the manual?
Questions and answers