
Related Manuals for Blackweb Sound Charge


Summary of Contents for Blackweb Sound Charge
- Page 1 BWA18AA002C USER GUIDE GUIDE DE L’UTILISATEUR TM/MC SOUND CHARGE CHARGEUR PAR ALIMENTATION SONORE...
-
Page 2: Table Of Contents
CONTENTS Important Safety Instructions ............2 Safety . -
Page 3: Important Safety Instructions
IMPORTANT SAFETY INSTRUCTIONS This lightning ash with arrowhead symbol within an equilateral triangle is intended to alert the user to the presence of non-insulated dangerous voltage within the product’s enclosure that may be of su cient magnitude to constitute a risk of electric shock. The exclamation point within an equilateral triangle is intended to alert the user to the presence of important operating and maintenance instructions in the literature accompanying the appliance. -
Page 4: Warning
19. No naked ame sources, such as lighted candles, should be placed on the apparatus. 20. Batteries should be recycled or disposed of as per state and local guidelines. 21. The use of apparatus in moderate or tropical climates. Caution: - Use of controls or adjustments or performance of procedures other than those described herein, may result in hazardous radiation exposure or other unsafe operation. -
Page 5: Identifying The Parts
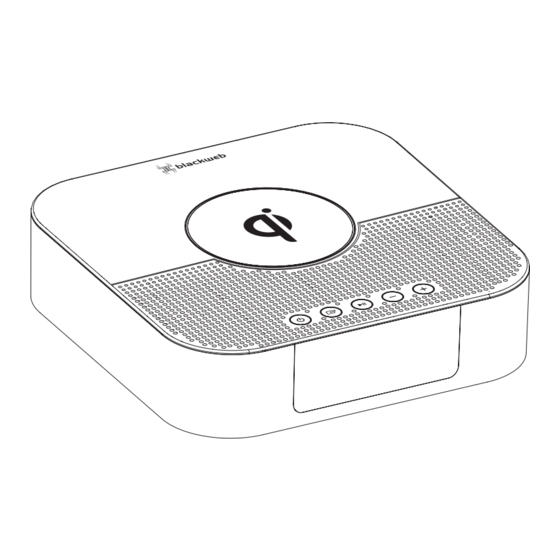
IDENTIFYING THE PARTS Main Unit (Qi) Charging 2. Display Panel/Remote Control Sensor Show the current status. Receive the signal from the remote control. button Turn on or turn off the unit. button Select the play function. button In BT mode, start or pause play. Press and hold to activate the pairing function in Bluetooth mode and disconnect the existing paired Bluetooth device. -
Page 6: Preparations
PREPARATIONS Prepare the Remote Control The provided Remote Control allows the unit to be operated from a distance. • Even if the Remote Control is operated within the effective range (19.7 feet), remote control operation may be impossible if there are any obstacles between the unit and the remote control. •... -
Page 7: Connect To Fm Antenna
AUX OPERATION Connect to FM Antenna - Connect the supplied FM wire antenna to the FM Antenna socket on the unit. Connect to Power - Risk of product damage! Ensure that the power supply voltage corresponds to the voltage printed on the rating label on the back or the underside of the unit. -
Page 8: Set The Alarm Timer
Important: - If no button is pressed for 15 seconds, the settings will be lost and you will need to start again. • To display the clock time - When you press the button, the clock time is displayed. Wait for a few seconds until the display returns to the original display. -
Page 9: Adjust Display Brightness
• When the sleep timer is activated, the display will show [ Zz ] and the volume will gradually decrease before the unit powers off. 2. Press the button on remote control repeatedly until [00] is displayed. • When the sleep timer is deactivated, [ Zz ] disappears from the display. Adjust Display Brightness Press the DIMMER button on remote control repeatedly to select different levels of display brightness. -
Page 10: Presetting Stations Manually
Presetting Stations Manually You can preset up to 20 FM stations. 1. Tune in the desired station, then press the PROG button on the remote control. 2. Press the buttons on the remote control to select the preset number. 3. Press the PROG button on the remote control to store the station. 4. -
Page 11: Listen To Music From Bluetooth Device
• The player will also be disconnected when your device is moved beyond the operational range. • If you want to reconnect your device to this player, place it within the operational range. • If the device is moved beyond the operational range, when it is brought back, please check if the device is still connected to the player. -
Page 12: Speci Cations
This is a 15 minute power off function, one of the ERPII standard requirement for saving power - When the unit's external input signal level is too low, the unit will be turned off automatically in 15 minutes. Please increase the volume level of your external device. SPECIFICATIONS General Power Supply ............................ -
Page 13: Warranty
WARRANTY ONE-YEAR LIMITED WARRANTY This product carries a warranty that it will be free from defects in material and workmanship for a period of one year from the date of purchase. This warranty is valid for the original retail purchaser from the date of initial retail purchase and is not transferable.
Need help?
Do you have a question about the Sound Charge and is the answer not in the manual?
Questions and answers