
Subscribe to Our Youtube Channel
Related Manuals for DriSteem CRUV 4


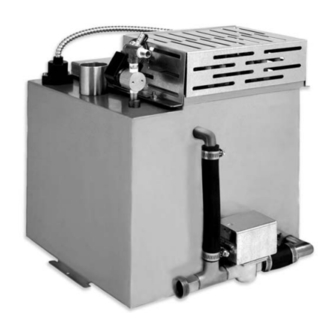
Summary of Contents for DriSteem CRUV 4
- Page 1 READ AND SAVE THESE INSTRUCTIONS CRUV ® Elect r ic Hu mi di fier Installation, Operation, and Maintenance Manual...
- Page 2 HVAC and electrical contractors and in compliance with local, state, federal, and governing codes. Improper installation can cause property damage, severe personal injury, or death as a result of electric shock, burns, or fi re. DriSteem Technical Support: 800-328-4447 Read all warnings and instructions Read this manual before performing service or maintenance procedures on any part of the system.
- Page 3 To prevent such damage from humidifi ers without water tempering, allow the tank to cool before draining. Humidifi ers equipped with a water tempering device such as a DriSteem Drane-kooler need fresh make-up water in order to function properly. Make sure the water supply to the water tempering device remains open during draining.
-
Page 4: Table Of Contents
RO/DI water option ........9 • DriSteem Design Guide (includes steam Supply water and drain piping . - Page 5 MAINTENANCE ............Most DriSteem product manuals can be downloaded, printed, and ordered from our Tap/softened water .
-
Page 6: Overview
CRUV tap/softened water humidifi ers can be converted in the fi eld for use with RO/DI water, and CRUV RO/DI water humidifi ers can be converted in the mc_071912_1545 fi eld for use with tap/softened water. Contact your DriSteem representative or distributor for parts and instructions. mc_061610_1640-CRUV... -
Page 7: Dispersion Options
OVERVIEW Product overview DISPERSION OPTIONS Dispersion options shown on this page are available for CRUV humidifi ers. See the installation instructions beginning on Page 6. FIGURE 3-1: ULTRA-SORB DISPERSION FIGURE 3-2: WATER LEVEL CONTROL FOR TAP/SOFTENED WATER HUMIDIFIER OM-7475 VLC-OM-030 Fill valve closes when water level rises to this probe. -
Page 8: Capacities, Electrical Specifications, And Weights
If total humidifi er load is more than the humidifi er’s maximum capacity, design conditions will not be met. For steam loss data see the DriSteem Design Guide available for downloading and printing at www.dristeem.com *** Depending on confi guration, add up to 28 lbs (13 kg) for weight of control cabinet, subpanel, and other electrical control components. -
Page 9: Dimensions
OVERVIEW Dimensions FIGURE 5-1: CRUV DIMENSIONS Tap/softened water CRUV shown Top view Electrical conduit knockouts Electrical conduit knockouts: • CRUV Models 2 and 4 have combination knockout for ½" and ¾" conduit connectors; knockout diameters are 22.3 mm and 28.6 mm. •... -
Page 10: Installation
INSTALLATION Selecting a location FIGURE 6-1: INSTALLATION IN AN AIR Locate the CRUV humidifi er near an electric power source, a water supply, CONDITIONING UNIT and a drain. Verify that suffi cient room is provided for a water seal in the drain piping. -
Page 11: Humidifier
INSTALLATION Selecting a location HUMIDIFIER FIGURE 7-1: RAPID-SORB DISPERSION When selecting a location for the humidifi er, consider the following: Duct • Proximity to the duct Install the humidifi er near the air duct system where the dispersion assembly will be located. The maximum recommended length for steam hose connecting a single humidifi... -
Page 12: Piping
• The water supply inlet is more than 1" (25 mm) above the skim/overfl ow port, eliminating the pos si bil i ty of backfl ow or si phon ing from the tank. No additional backfl ow prevention is required; however, governing codes prevail. • Damage caused by chloride corrosion is not covered by your DriSteem warranty. mc_071210_1603... -
Page 13: Ro/Di Water Option
• The water supply inlet is more than 1" (25 mm) above the skim/overfl ow port, eliminating the pos si bil i ty of backfl ow or si phon ing from the tank. No additional backfl ow prevention is required; however, governing codes prevail. • Damage caused by chloride corrosion is not covered by your DriSteem warranty. mc_071210_1604... -
Page 14: Supply Water And Drain Piping
Humidifi ers equipped with a water piping. tempering device such as a DriSteem Drane-kooler need fresh make-up Drain piping may be of any code-approved material (copper, steel, or plastic water in order to function properly. -
Page 15: Drane-Kooler
DC-1117 Condensate pump Note: Use a condensate pump rated for your application. Pumps are rated by fl uid temperature, head (pressure), and fl ow (gpm). Contact your local DriSteem representative for pump selection. mc_022410_1155 CRUV INSTALLATION, OPERATION, AND MAINTENANCE MANUAL... -
Page 16: Wiring
INSTALLATION Wiring HUMIDIFIER FIELD WIRING WARNING All wiring must be in accordance with all governing codes, and with the humidifi er wiring diagrams. The diagrams are located inside the removable Electric shock hazard subpanel cover on the right side of the humidifi er cabinet. Power supply wiring Only qualifi... -
Page 17: Sensor Placement
Note: DriSteem recommends that you do not interchange room and duct humidity devices. Room humidity devices are calibrated with zero or • Size of humidifi cation system relative to load •... -
Page 18: Dispersion
Dispersion: Selecting the dispersion assembly location FIGURE 14-1: ULTRA-SORB WITH THE DriSteem humidifi ers operate with several types of dispersion assemblies for HIGH-EFFICIENCY TUBE OPTION open spaces and for ducts and air handling units. Dispersion assemblies in ducts and air handling units must be positioned where the water vapor being discharged is carried off with the airstream and is absorbed before it can cause condensation or dripping. -
Page 19: Drip Tee Installation
Insulate tubing and hard pipe to DC-7548 reduce steam loss Tubing or pipe drip tee, by installer. To dispersion assembly DriSteem part numbers for 304 stainless steel inline tees: • 1½" (DN40): No. 162710 6" (150 mm) recommended • 2" (DN50): No. 162712 ¾"... -
Page 20: Interconnecting Piping Requirements
1½ 1½ 1. When using steam hose, use DriSteem steam hose for best 3. Insulate tubing to minimize loss of capacity and effi ciency. results. Field-supplied hose may have shorter life and may cause 4. Developed length of tubing equals measured length plus 50% of measured foaming in the evaporating chamber resulting in condensate length, to account for fi... - Page 21 WARNING minimum pitch of 2"/ft (15%) back to the humidifi er. Excessive moisture hazard • Use DriSteem steam hose. Other manufacturers of steam hose may use DriSteem strongly recommends unacceptable release agents or material mixes that can affect humidifi er installing a duct airfl...
-
Page 22: Single Tube
Dashed lines indicate provided by installer. mc_062810_0720-CRUV INSTALLATION NOTES • Use DriSteem’s hard pipe adapter kit to connect the steam outlet to hard WARNING pipe. Use a hose clamp to connect the steam outlet to steam hose. Use a Hot surface and steam hazard hose cuff and clamps to connect the steam outlet to tubing. - Page 23 Single dispersion tube available with face width between 6" (152 mm) up to 120" (3048 mm) in 1" (25 mm) increments. * If face width is <19" (483 mm), tube capacity may be reduced. Consult DriSteem or see DriCalc for the correct capacity.
- Page 24 Hot surface and steam hazard • Unpack shipment and verify receipt of all Rapid-sorb components Dispersion tube, steam hose, tubing, with packing list. Report any shortages to DriSteem immediately. The or hard pipe can contain steam, and components typically include the following: surfaces can be hot.
-
Page 25: Rapid-Sorb
1301-2100 592-955 increase to compensate for reduced capacity of short tubes. Consult mc_060210_0936 DriSteem or see DriCalc for the correct calculation. Table 21-3: Pitch of interconnecting piping, dispersion tubes, and headers for Rapid-sorb evaporative dispersion units Type of Diameter of... - Page 26 – 1/8"/ft (1%) when using tubing or pipe Dispersion tube escutcheon plates 2 Use DriSteem’s hard pipe adapter kit to connect steam outlet to hard Dimension A: pipe. Use a hose clamp to connect steam outlet to steam hose. Use a •...
- Page 27 INSTALLATION Dispersion: Rapid-sorb 4. Position the flange of the L-bracket so it is upstream of the tubes when the Note: See Page 26 for steam supply and condensate assembly is raised and fastened into po si tion. Fasten the L-bracket to the drain line connection instructions.
- Page 28 INSTALLATION Dispersion: Rapid-sorb FIGURE 24-1: RAPID-SORB IN A HORIZONTAL AIRFLOW WITH HEADER INSIDE THE DUCT Position L-bracket so that fl ange is upstream of dispersion tubes. This drawing shows the L-bracket positioned for airfl ow back to front Dispersion tube Point tubelets (steam orifi...
- Page 29 INSTALLATION Dispersion: Rapid-sorb 5. Mount the dispersion tubes on the header with the slip couplings or hose Note: See Page 26 for steam supply and condensate cuffs: drain line connection instructions. • When installing slip couplings for 1½" (DN40) dispersion tubes, take care not to shear O-rings.
-
Page 30: Ultra-Sorb
INSTALLATION Dispersion: Rapid-sorb STEAM SUPPLY CONNECTIONS TO RAPID-SORB HEADER CAUTION Connect the steam supply interconnecting piping from the humidifi er to the Rapid-sorb. The steam supply piping requires a minimum of 1/8"/ft (1%) pitch Operate Rapid-sorb within rated steam capacity toward the header. -
Page 31: Operation
Adjust the amount of skim by increasing or decreasing the skim time. See "Skim duration" on Page 33. At start-up, DriSteem recommends initially running the humidifi er with the factory default setting for skim time. Continue reading this section before proceeding to “Maintenance” beginning on Page 34. -
Page 32: Start-Up Checklist
OPERATION Start-up checklist: LW series controller TAP/SOFTENED WATER ☐ Adjust humidistat setting to create a call for humidity. ☐ Open shut-off valve on water supply line, and confi rm that drain valve is closed. Tank should begin fi lling with water through fi ll valve. ☐... -
Page 33: Vapor-Logic Controller
☐ Check the amp draw of the heaters. Refer to the humidifi er wiring diagram for the proper rating. ☐ If you experience diffi culties, have the keypad/display information available along with the serial number and humidifi er Model, and call DriSteem Technical Support at 800-328-4447. mc_060210_1355-CRUV CRUV INSTALLATION, OPERATION, AND MAINTENANCE MANUAL... -
Page 34: Start-Up And Operation
LW series controller Important: The LW series controller is a custom microprocessor-based water level controller for DriSteem humidifi ers. The features of this controller are: Timer logic input wire (see Figure 32-1) must be connected per wiring diagram for proper •... - Page 35 OPERATION Start-up and operation: LW series controller AUTOMATIC DRAIN AND FLUSH (TAP/SOFTENED WATER) End-of-season drain The LW series controller employs an electronic timer that tracks the humidifying The end-of-season drain option drains the tank after 72 hours of no call for humidity time of the unit.
-
Page 36: Vapor-Logic Controller
• Alarm screens and fault messages with humidifi er. The manual is shipped with CRUV humidifi ers equipped with the optional Vapor-logic controller. It is also available at our Web site: www.dristeem.com FIGURE 32-1: LW SERIES CONTROLLER BOARD Ready water light... -
Page 37: Maintenance
Both humidifi er cleaning and heated water fl owing to the drain are operational Option 3 seconds costs. DriSteem recommends that the user observe and adjust the skim duration Option 9 seconds to achieve a balance between reducing mineral buildup and conserving Factory heated water. -
Page 38: Cool Down Humidifier (Lw Series Controller)
The fi ll valve to a water tempering device such as a eventually opens. DriSteem Drane-kooler ™ – Let the fi ll water run until the tank is cooled, then shut off the fi eld- mc_060110_1640 installed manual supply water shut-off valve. -
Page 39: Inspection And Maintenance
MAINTENANCE Tap/softened water INSPECTION AND MAINTENANCE WARNING 1. Annually (also recommended when maintenance is performed) • Inspect tank and gaskets for leaks. Electric shock hazard Do not remove humidifi er electrical • Measure current draw of heaters and verify amp values per stage by panel cover, heater terminal cover, or comparing to the wiring diagram located inside the subpanel cover. - Page 40 fl ow slot directly faces tank wall at back end of bracket. DriSteem's Humidifi er De-scaling Solution is the only approved cleaner/de-scaler for use with • Secure the chamber cover, making sure the cover gasket is seated and DriSteem humidifi...
-
Page 41: Off-Season Shut-Down Procedure
MAINTENANCE Tap/softened water OFF-SEASON SHUT-DOWN PROCEDURE WARNING 1. Switch off electrical power. Electric shock hazard 2. Remove the enclosure. Do not remove humidifi er electrical 3. Shut off the water supply to the makeup valve. panel cover, heater terminal cover, or subpanel access panels until electrical 4. -
Page 42: Ro/Di Water Option
Damage caused by chloride corrosion is not covered by your DriSteem warranty. COOL DOWN HUMIDIFIER If the tank is hot, cool it down by opening the manual ball valve on the side of the tank. -
Page 43: Off-Season Shut-Down Procedure
MAINTENANCE RO/DI water option 5. Check the operation of the float valve and the condition of the float seat. 6. Check the low water switch to make sure the float slides freely on the stem. 7. Secure the chamber cover making sure the cover gasket is seated and the chamber is sealed. -
Page 44: Troubleshooting
MAINTENANCE Troubleshooting: LW series controller Table 40-1: CRUV troubleshooting guide (tap/softened water) Module indicating lights Problem Possible cause Recommended action Ready Full Drain water Verify control voltage across secondary leads of transformer. Reset Control transformer transformer circuit breaker. Humidistat is not calling Set humidistat to call. -
Page 45: Lw Series Controller And Ro/Di Water
MAINTENANCE Troubleshooting: LW series controller and RO/DI water Table 41-1: CRUV troubleshooting guide (RO/DI water option) Problem Possible cause Recommended action Verify control voltage across secondary leads of transformer. Reset transformer Control transformer circuit breaker. Humidistat is not calling Set humidistat to call. Inspect for faulty humidistat. Humidifi... -
Page 46: Replacement Parts
MAINTENANCE Replacement parts: Humidifier FIGURE 42-1: CRUV REPLACEMENT PARTS OM-779-A RO/DI water CRUV Tap/softened water CRUV CRUV INSTALLATION, OPERATION, AND MAINTENANCE MANUAL... - Page 47 MAINTENANCE Replacement parts: Humidifi er Table 43-1: Replacement parts Item Description Part No. Item Description Part No. Phillips head screw, #8-32 x 1/2" 700170-007 Hose clamp, 3/4" 700560-075 Heater terminal cover Hose, 3/4" ID 307020-002 Thermo cut-out 409560-001 Electric valve, 24V 3/4" 505400-001 Tank cover Solenoid valve, 24V with fl...
-
Page 48: Subpanel With Lw Series Controller
MAINTENANCE Replacement parts: Subpanel with LW series controller FIGURE 44-1: CRUV SUBPANEL WITH LW SERIES CONTROLLER (TAP/SOFTENED WATER) OM-7613 CRUV INSTALLATION, OPERATION, AND MAINTENANCE MANUAL... - Page 49 MAINTENANCE Replacement parts: Subpanel with LW series controller Table 45-1: CRUV subpanel with LW series controller (tap/softened water) Item Description Part No. Board, level control, 24V, LW-417 408632 Standoff, metal 1/4” x 3/8” (#8) 409592 Transformer, 600V, 24 VAC, Sec, 75 VA * 408986 Transformer, 277V, 24 VAC, Sec, 75 VA * 408982...
-
Page 50: Subpanel With Time Delay And Relay
MAINTENANCE Replacement parts: Subpanel with time delay and relay FIGURE 46-1: CRUV SUBPANEL WITH TIME DELAY AND RELAY (RO/DI WATER OPTION) OM-7612 CRUV INSTALLATION, OPERATION, AND MAINTENANCE MANUAL... - Page 51 MAINTENANCE Replacement parts: Subpanel with time delay and relay Table 47-1: CRUV subpanel with time delay and relay (RO/DI water option) Item Description Part No. Transformer, 600V, 24 VAC Sec 75 VA * 408986 Transformer, 277V, 24V Sec, 75 VA * 408982 Transformer, 120/208/240/480V 24V Sec * 408965-001...
-
Page 52: Subpanel With Vapor-Logic Option
MAINTENANCE Replacement parts: Subpanel with Vapor-logic option FIGURE 48-1: CRUV SUBPANEL WITH VAPOR-LOGIC OPTION OM-7610 CRUV INSTALLATION, OPERATION, AND MAINTENANCE MANUAL... - Page 53 MAINTENANCE Replacement parts: Subpanel with Vapor-logic option Table 49-1: CRUV subpanel with Vapor-logic option Item Description Part No. Main controller, Vapor-logic 408496-006 PC board support, locking 409591-004 Transformer, 600V, 24 VAC Sec, 75 VA * 408986 Transformer, 277V, 24 VAC Sec, 75 VA * 408982 Transformer, 120/208/240/480V 24V Sec * 408965-001...
-
Page 54: Subpanel With Vapor-Logic And Ssr Options
MAINTENANCE Replacement parts: Subpanel with Vapor-logic and SSR options FIGURE 50-1: CRUV SUBPANEL WITH VAPOR-LOGIC AND SSR OPTION OM-7611 CRUV INSTALLATION, OPERATION, AND MAINTENANCE MANUAL... - Page 55 MAINTENANCE Replacement parts: Subpanel with Vapor-logic and SSR options Table 51-1: CRUV subpanel with Vapor-logic and SSR option Item Description Part No. Main controller, Vapor-logic 408496-006 PC board support, locking 409591-004 Transformer, 600V, 24 VAC Sec, 75 VA * 408986 Transformer, 277V, 24V Sec 75 VA * 408982 Transformer, 120/208/240/480V 24V Sec *...
-
Page 56: Warranty
DriSteem, or if the products have been For the most recent product information modifi ed or altered without the written consent of DriSteem, or if such products have been subject visit our Web site: www.dristeem.com to accident, misuse, mishandling, tampering, negligence or improper maintenance.
Need help?
Do you have a question about the CRUV 4 and is the answer not in the manual?
Questions and answers