Advertisement
Quick Links
Advertisement

Related Manuals for Hyundai HYU-561


Summary of Contents for Hyundai HYU-561
- Page 1 WI-FI VIDEO DOORBELL (HYU-561) User Manual...
-
Page 2: Regulatory Information
User Manual This manual is intended for users of the Wi-Fi video doorbell. Disclaimer REGARDING TO THE PRODUCT WITH INTERNET ACCESS, THE USE OF PRODUCT SHALL BE WHOLLY AT YOUR OWN RISKS. OUR COMPANY SHALL NOT TAKE ANY RESPONSIBILITES FOR ABNORMAL OPERATION, PRIVACY LEAKAGE OR OTHER DAMAGES RESULTING FROM CYBER ATTACK, HACKER ATTACK, VIRUS INSPECTION, OR OTHER INTERNET SECURITY RISKS;... - Page 3 2012/19/EU (WEEE directive): Products marked with this symbol cannot be disposed of as unsorted municipal waste in the European Union. For proper recycling, return this product to your local supplier upon the purchase of equivalent new equipment, or dispose of it at designated collection points.
- Page 4 Symbol Conventions The symbols that may be found in this document are defined as follows. Symbol Description Indicates a hazardous situation which, if not avoided, will or could result in death or serious injury. Indicates a potentially hazardous situation which, if not avoided, could result in equipment damage, data loss, performance degradation, or unexpected results.
- Page 5 Do not aim the device at the sun or extra bright places. A blooming or smear may occur otherwise (which is not a malfunction however), and affecting the endurance of sensor at the same time. Please use the provided glove when open up the device cover, avoid direct contact with the device cover, because the acidic sweat of the fingers may erode the surface coating of the device cover.
- Page 6 ELECTRONIC CO.,LTD 1.5A MOSO POWER SUPPLY MSA-C1500IC12.0-18P-A TECHNOLOGY CO.,LTD 1.5A SHENZHEN HONOR ADS-25FSG-1212018GPSA ELECTRONIC CO.,LTD MOSO POWER SUPPLY MSA-C2000IC12.0-24P-A TECHNOLOGY CO.,LTD 1.5A MOSO POWER SUPPLY MSA-C1500IC12.0-18P-BR TECHNOLOGY CO.,LTD ADS-25FSG-12 SHENZHEN HONOR 1.5A ELECTRONIC CO.,LTD 12018GPBR MOSO POWER SUPPLY MSA-C2000IC12.0-24P-BR TECHNOLOGY CO.,LTD SHENZHEN HONOR ADS-24S-12 1224GPBR ELECTRONIC CO.,LTD...
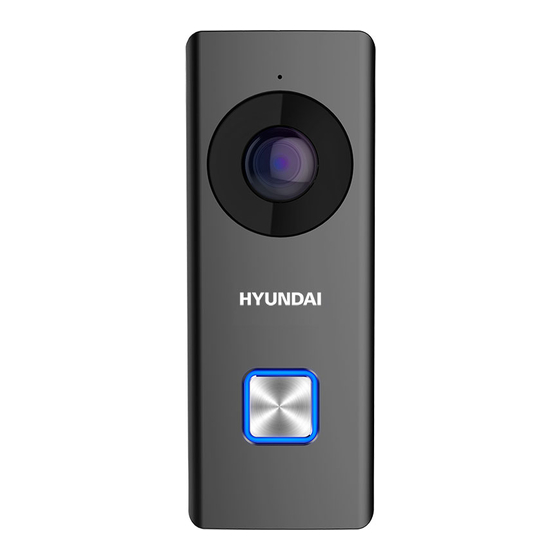
- Page 7 Doorbell Appearance Doorbell Appearance Doorbell Appearance Front and Rear Panels Front and Rear Panels Front and Rear Panels You can see the camera, call button, and crews for wiring on the doorbell on the front panel and the rear panel. Figure 1-1 Front Panel and Rear Panel Table 1-1 Components Description Name...
- Page 8 Figure 1-2 Side Panel and Bottom Panel Table 1-2 Components Description Name Description For TF card. If a TF card is used, video files will be stored in the TF TF Card Slot card. Hold the button for 15 seconds to restore the factory settings, and RESET then enter the Wi-Fi connection mode.
- Page 9 Doorbell Installation Doorbell Appearance Doorbell Appearance 2.1 Attach Mounting Template 2.1 Attach Mounting Template 2.1 Attach Mounting Template Mounting template is included in the box content, and it is an auxiliary help for you to install the doorbell. 1. Determine the installation height of doorbell. Figure 2-1 Suggested Installation Height 2.
-
Page 10: Connect Power Cables
2.2 Connect Power Cables 2.2 Connect Power Cables 2.2 Connect Power Cables Make sure you have powered off the main power switch of your home. 1. Loosen the screws on the rear panel of the doorbell, put loops of power cables (included in the box content) into the screws, and then tighten them. - Page 11 1. Remove the faceplate attached on the doorbell to view the front panel and side panel of the doorbell. 2. Remove the card slot cover. 3. Insert the TF card into the card slot on the side of the doorbell. 4.
- Page 12 Figure 2-6 Insert Expansion Tube 2. Route the cables and insert cables and power connector into the drilled cable hole. 3. Align the screw holes on the doorbell body with drilled holes on the wall. 4. Fix the doorbell body to the wall tightly with 2 screws. Figure 2-7 Install Doorbell 5.
-
Page 13: Getting Started
Getting Started 3 Getting Started 3 Getting Started Getting Started section provides the quick usage guide to the doorbell and its related application. 3.1 Set up Hyu-Connect app 3.1 Set up Hyu-Connect app Hyu-Connect app is necessary for the doorbell configuration and operation. Make sure your mobile device has been connected to Wi-Fi. - Page 14 The mobile phone, which the App is installed in, has accessed to the Wi-Fi. 1. In the Home page of the App, tap More -> Settings -> Wi-Fi Settings to enter the Wi-Fi settings page. 2. Input the wireless network name and password that your mobile phone has connected to.
- Page 15 Figure 3-3 Scan the Doorbell QR Code 3. Scan the QR code or input the serial No. on the front panel of the doorbell body. Activation page pops up after finishing the Wi-Fi connection. The suggested scanning distance is 5 to 10 cm. The doorbell gives a beep for success. 4.
-
Page 16: Doorbell Operation
Doorbell Operation Doorbell Operation Doorbell Operation Via the Hyu-Connect app, you can realize some certain functions of the doorbell (including, but not limited to, live view, and remote playback). Video Intercom Video Intercom Video Intercom Press Call Button on the doorbell. You can accept the call via the Hyu-Connect app, get the live view of the doorbell, and capture the snapshots. - Page 17 Licensed by HYUNDAI Corporation, Korea...
Need help?
Do you have a question about the HYU-561 and is the answer not in the manual?
Questions and answers