Itronix GoBook II Getting Started
Hide thumbs
Also See for GoBook II:
- Product support bulletin (2 pages) ,
- Operation instruction (1 page) ,
- Technical bulletin (7 pages)
Table of Contents
Advertisement
Quick Links
GoBook II Help
Page 1 of 74
Getting Started
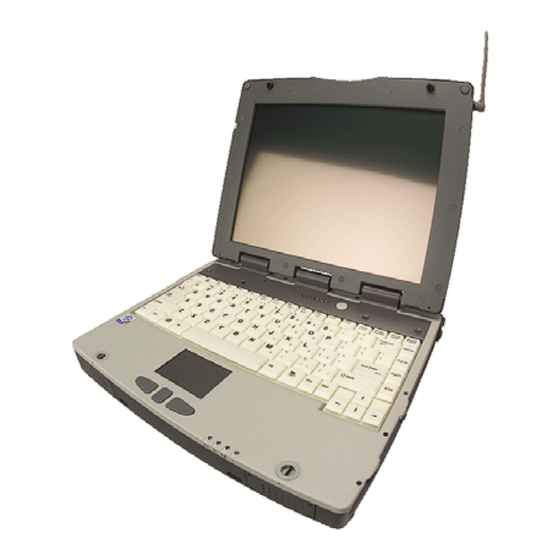
Congratulations on your purchase of the Itronix GoBook II computer! Your new GoBook II features the most
innovative advances in portable computing technology. It combines state-of-the-art ergonomics with a rugged, durable
architecture to provide you with a notebook computer that is compact, powerful, rugged and easy to use. Designed for a
wide range of business and personal productivity applications, the GoBook II is an ideal choice for use in applications
that require durability and performance.
For maximum expandability without compromising portability, the GoBook II has a USB interface and a
PC card
slot.
The high capacity
hard disk
drive provides you with plenty of storage space for multimedia files and applications.
The GoBook II features a standard 87-key Nitevue® keyboard (89-key international). The high-resolution 12.1-inch
touch screen LCD panel provides clear and crisp viewing with the convenience of a touch screen.
This online document, GoBook II Help, contains all the information you need to set up and use your new GoBook II. It
describes all the features of the GoBook II in an easy-to-read yet thorough manner. For information on printing,
navigating or otherwise using GoBook II Help see
How to Use This Help
System.
GoBook II™ Help
Checklists
file://C:\Documents%20and%20Settings\harwoodm.ITRXNT1\Local%20Settings\Temp\~hhDDD5.htm
9/30/2003
Advertisement
Table of Contents

Subscribe to Our Youtube Channel
Related Manuals for Itronix GoBook II


Summary of Contents for Itronix GoBook II
-
Page 1: Getting Started
LCD panel provides clear and crisp viewing with the convenience of a touch screen. This online document, GoBook II Help, contains all the information you need to set up and use your new GoBook II. It describes all the features of the GoBook II in an easy-to-read yet thorough manner. For information on printing,... - Page 2 Page 2 of 74 After opening the package, carefully inspect the contents. Contact your dealer if any items are missing or appear damaged. The shipping carton should contain the following: STANDARD The Itronix GoBook II computer Battery ADP-90AB or ADP-75FB AC adapter with power cord ...
- Page 3 For more extensive information and help about Windows go to Help and Support, found on the Start Menu. Go to Start, Programs, Accessories to open , an online orientation of Windows XP. 72_0103_003 10 December 2002 © 2002 Itronix Corporation. All rights reserved. GoBook II™ Help file://C:\Documents%20and%20Settings\harwoodm.ITRXNT1\Local%20Settings\Temp\~hhDDD5.htm 9/30/2003...
- Page 4 system could overheat On the bottom of the GoBook II, there is a label with information on the power requirements of this system. These requirements must be followed. If you are unsure of your local power supply, consult your dealer or local...
-
Page 5: Installing The Battery
GoBook II Help Page 5 of 74 The First Time. . . Using your computer for the first time involves: Installing the battery Connecting the AC adapter to the computer Turning the Computer On and Off Adjusting the Volume ... -
Page 6: Adjusting The Volume
GoBook II Help Page 6 of 74 You can operate the computer while the battery is charging, while on external power , or on battery power only. To turn on the computer Press the Power Button button once, and then give the system time to respond. -
Page 7: Calibrating The Touch Screen
© 2002 Itronix Corporation. All rights reserved. GoBook II™ Help Calibrating the Touch Screen Your GoBook II computer has a touch screen display. Follow the guidelines below to calibrate the touch screen for optimum use. CAUTION Always use an approved stylus or your finger. - Page 8 GoBook II Help Page 8 of 74 NOTE If you cannot select objects accurately with the stylus you may need to re-calibrate the touch screen. This can be accomplished by revisiting the procedure above. Adjusting the Screen You can adjust the display brightness for better viewing.
-
Page 9: Startup Problems
NOTE The Power LED on the AC adapter should be lit as well as the External Power Indicator on the GoBook II if the AC adapter is connected and functioning properly. Additionally, one of the power icons should appear in the task tray. -
Page 10: Individual Parts
GoBook II Help Page 10 of 74 Individual Parts The following diagrams and descriptions provide an overview of your GoBook II computer. Hover the mouse over each number on the picture to see a description. Front View 1. Touch Screen Display 2. - Page 11 GoBook II Help Page 11 of 74 Back View Cooling Fan Power Jack 15-Pin VGA Port 60-Pin Multi-IO Port 9-Pin Serial Port 6. PS2 Port 7. RJ-11 Modem Jack 8. RJ-45 Network Jack 9. USB Port 10.
- Page 12 GoBook II Help Page 12 of 74 Left Side View 1. PC Card Slot 2. Microphone Jack 3. Audio Jack 4. Stylus Right Side View 1.Antenna 2. Media Bay - CDROM, DVD, Floppy Disk, CDRW, or Media Bay Battery 3. Radio Bay 4.
-
Page 13: Led Activity Indicators
GoBook II Help Page 13 of 74 Display with Stylus LED Activity Indicators The activity indicators, located above the keyboard, light up when a particular function of the computer is active. Each indicator is marked with a corresponding symbol and is visible when the lid is open or closed. LED numbers are from left to right. - Page 14 GoBook II Help Page 14 of 74 LED #2 Disk Status (HW) LED #3 Media Drive LED #4 Number Lock LED #5 Caps Lock LED #6 Scroll Lock LED #7 LED Power / Wireless Modem Indicators The case front LED’s indicate external power, unit ON/OFF, battery status, and wireless modem ON/OFF.
-
Page 15: Keyboard Basics
Keyboard Basics keyboard on the GoBook II computer looks much like the keyboard of a typewriter and operates in almost the same way. While typewriter keys put characters on paper, the keys on the laptop enter characters in the computer and... -
Page 16: Function Keys
GoBook II Help Page 16 of 74 The arrow keys are defined by the software application. The UP ARROW key usually moves the cursor up one line. In some cases, you can use the up arrow to make selections from menus and scrollable list boxes. -
Page 17: General Guidelines
GoBook II Help Page 17 of 74 NOTE The touchpad on your GoBook II computer is electrically sensitive to finger touch. It will not respond if touched by anything other than your fingers, such as a stylus or pencil. 3. The touchpad offers another method of making selections in a software program. It is called double-tapping. This function corresponds to double-clicking with a mouse. -
Page 18: Display Basics
You can use your GoBook II computer with an optional external keyboard, numeric keypad, or IBM PS/2 compatible mouse. These devices are "hot swap" capable, which means you do not have to power down the GoBook II to connect them to the PS/2 connection located on the back of the unit. -
Page 19: Disk Drives
CDs, including audio or video CDs. The DVD drive can read both DVD and CD disks. Your GoBook II identifies the drive with the letter following the hard drive letter. If you hard drive is C, then the CD0-ROM drive will be D. - Page 20 GoBook II Help Page 20 of 74 accessible by sliding the two bay door latches, which release and open the door. Inserting a CD-ROM or DVD-ROM Disk 1. Press the button on the front of the drive to open the disk tray and pull the tray open.
-
Page 21: The Pc Card Slot
CD/DVD disc, stretch a paper clip (or use a pin or a thin metal rod) and insert it into the emergency eject hole located on the front panel. The CD/DVD disk tray should eject immediately. This procedure can also be used to remove a CD-DVD from the drive when the GoBook II is powered off. 72_0103_003 10 December 2002 ©... - Page 22 4. Press the eject button on the PC Card slot to release the eject button (it is spring loaded and remains hidden until it is pressed). 5. Press the eject button again to release the PC Card. 72_0103_003 10 December 2002 © 2002 Itronix Corporation. All rights reserved. Making Connections file://C:\Documents%20and%20Settings\harwoodm.ITRXNT1\Local%20Settings\Temp\~hhDDD5.htm 9/30/2003...
-
Page 23: Rear Connectors
The 15-pin monitor can connect your computer to an external monitor. 3 Multi-I/O Port The 60-pin Multi-IO port is provided so you can connect the GoBook II to an optional cradle or office dock. 4 Serial Port The 9-pin serial port can be used to connect your computer to serial devices such a a fax/modem or a serial mouse. -
Page 24: Left Side Connectors
USB is 1.1 compliant. 72_0103_003 10 December 2002 © 2002 Itronix Corporation. All rights reserved. GoBook II™ Help Left Side Connectors Hover the mouse over each number on the picture to see a description file://C:\Documents%20and%20Settings\harwoodm.ITRXNT1\Local%20Settings\Temp\~hhDDD5.htm... - Page 25 Connect external speakers or a stereo headset to this jack to listen to multimedia. 72_0103_003 10 December 2002 © 2002 Itronix Corporation. All rights reserved. GoBook II™ Help Right Side Connector Hover the mouse over the number on the picture to see a description.
- Page 26 Your computer has a Security Slot that can be used with a standard laptop locking device, such as a Kennsington Lock. You can connect the GoBook II to a large object with the lock to prevent theft of your GoBook. See the documentation that comes with your lock for more information.
- Page 27 WAN (Wide Area Network) wireless communication. LAN radios are local and therefore span a small area such as a building or small group of buildings. The GoBook II's LAN radios include the Cisco Mini-PCI slot WLAN (Wireless Local Area Network) .
- Page 28 Even with the low power, the walls in your house won’t stop a Bluetooth signal, making the standard useful for controlling several devices in different rooms. 72_0103_003 10 December 2002 © 2002 Itronix Corporation. All rights reserved. file://C:\Documents%20and%20Settings\harwoodm.ITRXNT1\Local%20Settings\Temp\~hhDDD5.htm 9/30/2003...
- Page 29 © 2002 Itronix Corporation. All rights reserved. Power Management The GoBook II has power management capability so you can reduce the amount of energy used, especially during periods of inactivity. Effective use of power management options can greatly conserve and extend your battery life.
-
Page 30: Battery Calibration
GoBook II Help Page 30 of 74 Battery Calibration BIOS Level Battery Calibration The first time you use a battery, you should calibrate it. The calibration process empties and charges the battery. This allows the Windows battery gauge to accurately monitor battery status. To calibrate a battery, follow these steps: 1. -
Page 31: Using The Battery
GoBook II Help Page 31 of 74 72_0103_003 10 December 2002 © 2002 Itronix Corporation. All rights reserved. GoBook II™ Help Using the Battery Monitoring Battery Power There are two ways to monitor how much power the battery has left: 1. -
Page 32: Battery Charging
4 hours — NOTE a fully charged Li-Ion battery can run the GoBook II for approximately 3 hours or more. Power Saving Modes Adjust the default power management settings in the Power Management (Power Options) dialog box in the Control Panel. -
Page 33: Power Button Settings
GoBook II Help Page 33 of 74 Suspend to RAM In a suspend to RAM, the contents of your computer’s memory are held intact, while most of the components in your computer either turn off completely, or reduce power consumption to a minimum. In a Suspend to RAM, your computer remains active but with the minimum possible power consumption. -
Page 34: Heat Considerations
The GoBook II is configured with a set of default values. You may be able to increase system performance by changing file://C:\Documents%20and%20Settings\harwoodm.ITRXNT1\Local%20Settings\Temp\~hhDDD5.htm... -
Page 35: Using The Setup Utility
GoBook II Help Page 35 of 74 some of the timing values in the Setup Utility, but this can be limited by the kind of hardware you are using. In certain circumstances, the system may generate an error message that asks you to make changes to the CMOS settings using the Setup Utility. -
Page 36: The Main Menu
GoBook II Help Page 36 of 74 72_0103_003 10 December 2002 © 2002 Itronix Corporation. All rights reserved. GoBook II™ Help The Main Menu The Setup Utility main menu has seven main submenu options: Standard CMOS Setup Advanced CMOS Setup ... -
Page 37: Standard Cmos Setup
Saves changes, then exits 72_0103_003 10 December 2002 © 2002 Itronix Corporation. All rights reserved. GoBook II™ Help Standard CMOS Setup The Standard CMOS Setup page of the Setup Utility has a list of fields that describe the basic configuration of your computer. - Page 38 GoBook II Help Page 38 of 74 Standard Feature Description Field Setting Function System Use these fields to set the time and date. The time is displayed in 24 hour Time format. The date can be set from January 1, 1980 to December 31, 2099. The values set in these two fields take effect immediately.
-
Page 39: Advanced Cmos Setup
Incorrect settings can result in your system not recognizing the installed hard disk. 72_0103_003 10 December 2002 © 2002 Itronix Corporation. All rights reserved. GoBook II™ Help Advanced CMOS Setup file://C:\Documents%20and%20Settings\harwoodm.ITRXNT1\Local%20Settings\Temp\~hhDDD5.htm 9/30/2003... - Page 40 Bootup Num- Use this field to initially disable the Num-Lock feature of the internal keyboard Lock when the GoBook II starts The default is Off. Display Enabled If you are using DOS or a 640 x 480 resolution to run windows, the display will not...
-
Page 41: Power Management Setup
GoBook II Help Page 41 of 74 © 2002 Itronix Corporation. All rights reserved. GoBook II™ Help Power Management Setup This section of the Setup Utility manages power settings. To save power, you may select the time the computer may idle before going into standby, or a low power state, then into suspend mode. -
Page 42: Peripheral Setup
GoBook II Help Page 42 of 74 72_0103_003 10 December 2002 © 2002 Itronix Corporation. All rights reserved. GoBook II™ Help Peripheral Setup Settings on this page allow you to change port configurations. Field Setting Function Internal Auto Default is disabled. -
Page 43: Stealth Mode Setup
Stealth Mode Setup Stealth mode is a feature that allows the GoBook II to be used in an environment where sound and light could be dangerous to the users, such as a military user. If Stealth mode is disabled the LEDs, Fan, system beeps, audio, and display brightness operate normally. - Page 44 GoBook II Help Page 44 of 74 When Stealth mode is enabled the various options have the following effect. NOTE The off setting means that option is in Stealth Mode. Field Setting Function LEDs LEDs function normally LEDs are disabled The fan functions normally The Fan is disabled.
-
Page 45: Auto-Detect Hard Disks
GoBook II Help Page 45 of 74 72_0103_003 10 December 2002 © 2002 Itronix Corporation. All rights reserved. GoBook II™ Help Auto-Detect Hard Disks When the Auto-Detect Hard Disks option is selected, the BIOS will automatically detect Primary Master and Secondary Slave settings. -
Page 46: Auto Configuration With Optimal Settings
Setup Utility and change or remove the Supervisor password. You also cannot enable diskette access if it has been disabled. 72_0103_003 10 December 2002 © 2002 Itronix Corporation. All rights reserved. GoBook II™ Help Auto Configuration with Optimal Settings The Auto Configuration menu resets the computer to default values. The Auto Detect Hard Disks likewise helps users to configure their systems quickly. -
Page 47: Selecting The Right Surge Protection
AC power line surge suppressors advertising high performance surge protection; only a few of them actually provide adequate protection. This section provides guidelines for selecting a quality surge suppressor to be used with your GoBook II, and it helps identify a few sources for products with acceptable performance. -
Page 48: Selecting The Right Equipment
Consider obtaining a protected equipment coverage policy which insures the equipment in the event of surge ¡ damage. The devices that will be attached to the computer also need to be surge protected. ¡ 72_0103_003 10 December 2002 © 2002 Itronix Corporation. All rights reserved. GoBook II™ Help file://C:\Documents%20and%20Settings\harwoodm.ITRXNT1\Local%20Settings\Temp\~hhDDD5.htm 9/30/2003... -
Page 49: Vehicle Adapter
(up to 16 hours). 72_0103_003 10 December 2002 © 2002 Itronix Corporation. All rights reserved. GoBook II™ Help Vehicle Cradle The vehicle cradle is a vehicle-based docking station designed to safely secure the computer in the vehicle. A standard key lock located on the front of the cradle locks the computer onto the cradle for security purposes. -
Page 50: Charging Batteries
GoBook II Help Page 50 of 74 PRECAUTIONS There are no user-replaceable parts within the vehicle cradle, so do not open the cradle case. The vehicle ¢ cradle is internally protected; it resets automatically if there is a power fault. -
Page 51: Communicating With Other Devices
Communicating with Other Devices Connect the external device to either of the USB ports on the back of the cradle, and then place the GoBook II onto the vehicle cradle. You can install or remove the computer from the vehicle cradle without connecting or disconnecting the cables. -
Page 52: Hard Disk Drive Heater
Hard Disk Drive Heater Your GoBook II has a hard disk drive (HDD) heater option to warm the HDD before spinning up in temperatures below 5°C,the minimum safe operating temperature of the HDD. The heater is built into the removable HDD module and operates as needed when the computer is turned on or is in an operational state. -
Page 53: Battery Maintenance And Storage
Avoid exposing batteries to extremely hot or cold temperatures for long periods. To prevent possible ¢ damage to the battery, the GoBook II does not allow the battery to charge if the internal temperature of the battery gets too low (< 5°C or < 41°F) or too high (> 50°C or > 122°F). -
Page 54: Maintaining Your Computer
GoBook II Help Page 54 of 74 © 2002 Itronix Corporation. All rights reserved. GoBook II™ Help Computer Maintenance and Storage Maintaining Your Computer Follow these guidelines to help maintain the condition and performance of your computer. Turn off the computer when you are not using it. -
Page 55: Storing Your Computer
GoBook II Help Page 55 of 74 External Power Connector The external power connector may sometimes be exposed to moisture and/or contamination causing an unreliable connection to the external power source. Clean the connector using a cotton swab dipped in isopropyl alcohol. - Page 56 To reduce exposure to high operating shocks, the GoBook II uses power modes for the hard drive that prevent the read/write heads from being positioned over the disk when it is not being used: idle mode and standby mode.
-
Page 57: Internal Hard Drives
GoBook II Help Page 57 of 74 3. On the left side of the hard drive cassette you will see a small black release lever. Pull the lever towards you (away from the direction of the RTC hatch) and slide the cassette out into the battery storage area. - Page 58 Error-checking and click check now. In other Windows operating systems you can run SCANDISK by going to Start, Programs, Accessories, System Tools. Then select SCANDISK. 72_0103_003 10 December 2002 © 2002 Itronix Corporation. All rights reserved. GoBook II™ Help file://C:\Documents%20and%20Settings\harwoodm.ITRXNT1\Local%20Settings\Temp\~hhDDD5.htm 9/30/2003...
-
Page 59: Touch Screen Care
© 2002 Itronix Corporation. All rights reserved. Error Messages The following are possible error and warning messages you may encounter while operating the GoBook II computer. The messages described in this section are listed below. Error and warning messages are generated by several different sources including: Power On Self Test (POST) ¢... - Page 60 GoBook II Help Page 60 of 74 Test (POST) . If the system finds an error during this test, it displays an error message. Some POST errors can occur before anything can be displayed on the screen. In this case, the computer issues a series of beeps, then stops working.
- Page 61 The temperature is less than 5°C and the HDD heater is operating. The unit will continue booting when the HDD temperature is warm enough for safe operation. 72_0103_003 10 December 2002 © 2002 Itronix Corporation. All rights reserved. GoBook II™ Help file://C:\Documents%20and%20Settings\harwoodm.ITRXNT1\Local%20Settings\Temp\~hhDDD5.htm 9/30/2003...
- Page 62 Not ready reading drive X (where X is any drive letter) Abort, Retry, Fail? Make sure that the media is inserted fully into the card socket, then press r to retry. 72_0103_003 10 December 2002 © 2002 Itronix Corporation. All rights reserved. GoBook II™ Help file://C:\Documents%20and%20Settings\harwoodm.ITRXNT1\Local%20Settings\Temp\~hhDDD5.htm 9/30/2003...
-
Page 63: Application Messages
© 2002 Itronix Corporation. All rights reserved. Troubleshooting This section is designed to help you determine and fix problems you might encounter while operating the GoBook II computer. Try the following things in order: First look through the categories in this section for a solution. ¡... - Page 64 Answer “Yes” to this question and follow the instructions on the screen to install it. 72_0103_003 10 December 2002 © 2002 Itronix Corporation. All rights reserved. GoBook II™ Help Batteries The battery does not charge To prevent possible damage to the battery, the system will not allow a charge if the battery temperature is ¢...
- Page 65 GoBook II Help Page 65 of 74 3. Connect the AC adapter to the computer and an AC wall outlet, and then turn on the computer by pressing the Power Button. 4. Let the computer complete the boot process. Then reinstall the battery and replace the battery door..
- Page 66 GoBook II Help Page 66 of 74 72_0103_003 10 December 2002 © 2002 Itronix Corporation. All rights reserved. GoBook II™ Help Display The display performance is slow The temperature may be too cold. Move the computer to a warmer operating environment.
-
Page 67: Hard Disk
GoBook II Help Page 67 of 74 72_0103_003 10 December 2002 © 2002 Itronix Corporation. All rights reserved. GoBook II™ Help Hard Disk The hard disk will not spin up so the computer can’t boot up This occurs if the unit is exposed to extreme low temperatures. This is not a hardware failure associated ¢... - Page 68 ¢ application. 72_0103_003 10 December 2002 © 2002 Itronix Corporation. All rights reserved. GoBook II™ Help Keyboard Something unexpected happens when I press a key You may have pressed a key combination that performs a Windows function. Make sure you are pressing ¢...
- Page 69 GoBook II Help Page 69 of 74 Landline Modems The modem doesn’t work When you first try to use HyperTerminal or similar application , the system responds with a message ¢ asking if you want to install the modem. Answer “Yes” to this question and follow the instructions on the screen to install it.
- Page 70 , check the electrical outlet you are using to make sure it is working ¢ properly. If the GoBook II computer does not turn on, restart the computer by holding down the Power Button for at ¢ least 10 seconds and then release it.
- Page 71 You may have enabled Stealth mode in the Setup Utility. Go to CMOS Setup and disable Stealth mode. The fan stopped running. You may have enabled Stealth mode in the Setup Utility. Go to CMOS Setup and disable Stealth mode. 72_0103_003 10 December 2002 © 2002 Itronix Corporation. All rights reserved. file://C:\Documents%20and%20Settings\harwoodm.ITRXNT1\Local%20Settings\Temp\~hhDDD5.htm 9/30/2003...
- Page 72 From the Start Menu, select Settings, Control Panel, and then choose Mouse. The Motion tab contains ¢ settings for the mouse speed and mouse trails. 72_0103_003 10 December 2002 © 2002 Itronix Corporation. All rights reserved. GoBook II™ Help PC Cards I can’t remove the PC card Press the ejector button located inside the PC card door on the side of the computer.
- Page 73 “Stop [card name] card.” The computer locks up when inserting a PC card Because of the combination media bay configuration on the GoBook II, the computer may not be locked ¢ up. Instead, it may be taking a couple of minutes before the system recognizes the PC card slot.
- Page 74 The touch screen doesn’t respond after a suspend The touch screen needs a few seconds to work after a suspend. Wait a moment and try again. ¢ 72_0103_003 10 December 2002 © 2002 Itronix Corporation. All rights reserved. file://C:\Documents%20and%20Settings\harwoodm.ITRXNT1\Local%20Settings\Temp\~hhDDD5.htm 9/30/2003...
Need help?
Do you have a question about the GoBook II and is the answer not in the manual?
Questions and answers