Table of Contents
Advertisement
Quick Links
Advertisement
Table of Contents

Related Manuals for Itronix GoBook IX250


Summary of Contents for Itronix GoBook IX250
- Page 2 This document is printed in the U.S.A. Itronix Corporation reserves the right to revise the manual and make periodic changes to the content without a direct or inferred obligation to Itronix to notify any person of such revision or changes. Itronix Corporation does not assume responsibility for the use of this manual, nor for any patent infringements or other rights or third parties who may use the manual.
- Page 3 Compliance Statements The GoBook (IX250) computer has been tested and found to comply with the limits for a Class B digital device, pursuant to Part 15 of the FCC Rules. These limits are designed to provide reasonable protection against harmful interference in a residential installation.
- Page 4 If this equipment causes harm to the telephone network, the telephone company will notify you in advance that temporary discontinuance of service may be required. If advance notice isn’t practical, the telephone company will notify the customer as soon as possible. Also, you will be advised of your right to file a complaint with the FCC if you believe it is necessary.
- Page 5 CAUTION! Users should not attempt to make such connections themselves, but should contact the appropriate electric inspection authority, or electrician, as appropriate. The Ringer Equivalence Numbers (REN) are: GoBook (IX250) non-radio: 0.5B GoBook (IX250) ARDIS: 0.5B GoBook (IX250) RAM: 0.5B GoBook (IX250) CDPD: 1.3B NOTICE: The Ringer Equivalence Number (REN) assigned to each terminal device provides an indication of the maximum number of terminals allowed to be connected to a telephone interface.
- Page 6 Warnings and Cautions WARNING It is important that only authorized Itronix personnel attempt repairs on Itronix equipment as this might void any maintenance contract with your company. Unauthorized service personnel might be subject to shock hazard on some Itronix equipment if removal of protective covers is attempted.
- Page 7 Safety Information The following safety symbols are used in this manual to indicate potentially dangerous situations. Do not proceed beyond a WARNING or CAUTION symbol until the indicated conditions are fully understood and met.
-
Page 8: Table Of Contents
Contents Unpacking Your System 2 Features 5 Installing the Battery 6 Connecting the AC Adapter 7 Turning the Computer On and Off 8 Adjusting the Volume 9 LED Activity Indicators 19 LED Power / Wireless Modem Indicators 20... - Page 9 Restarting the Computer 21 Primary Keys 21 Arrow Keys 23 Function Keys 24 Numeric Keypad 24 Touchpad 24 General Guidelines 26 Scrolling Buttons 27 Connecting an External Keyboard or Mouse 27 Rear Connectors 35 Left Side Connectors 37 Right Side Connectors 38 Registering Your Wireless Modem 40...
- Page 10 Battery Calibration 50 Monitoring Battery Power 51 Low Battery Alarms 51 Power Saving Modes 52 Suspend Mode 53 Initiating Suspend Mode 54 Power Button Settings 54 When to Replace the Battery 55 Heat Considerations 56 BIOS Setup Menu 58 Starting the BIOS Setup Utility 58 Navigating and Entering Information in BIOS 60...
- Page 11 PRECAUTIONS 76 Charging Batteries Communicating with Other Devices Selecting the Right Surge Protection 81 Selecting the Right Equipment 82...
- Page 12 Internal Hard Drives 85 External PC Card Hard Drives 86 Maintaining Batteries 87 Storing Batteries 87 Maintaining Your Computer 88 Storing Your Computer 90...
- Page 13 For More Help Applications Display Hard Disk I/O Ports Keyboard Landline Modems Miscellaneous Mouse PC Cards Wireless Modems...
-
Page 15: Unpacking Your System
S E C T I O N 1 Getting Started Unpacking Your System 2 Features 5 Installing the Battery 6 Connecting the AC Adapter 7 Turning the Computer On and Off 8 Adjusting the Volume 9... -
Page 16: Features
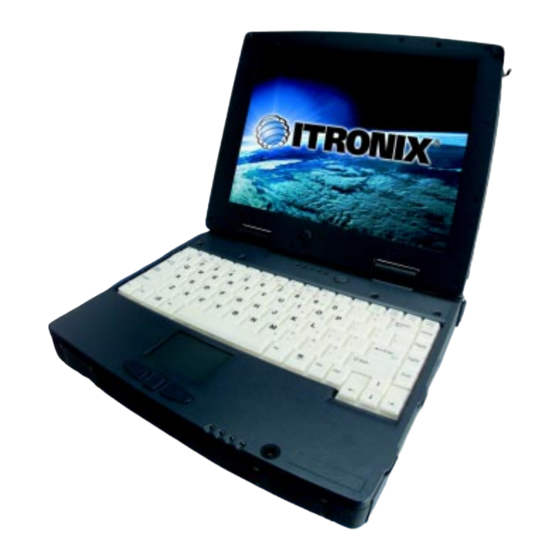
Congratulations on your purchase of the Itronix GoBook computer! Your new GoBook features the most innovative advances in portable computing technology. It combines state-of-the-art ergonomics with a rugged, durable architec- ture to provide you with a notebook computer that is compact, powerful, rugged and easy to use. Designed for a wide range of general, business, and personal productivity applications, the GoBook is an ideal choice for use in the office, or on the road. - Page 17 You may have additional components or peripherals if you ordered these items separately. Check your packing slip for a complete list of items included in your package. You can use your computer under a wide range of environmental conditions. However, to ensure long use and continued high performance, consider the following factors when setting up your computer: •...
- Page 18 After opening the package, carefully inspect the contents. Contact your dealer if any items are missing or appear damaged. The shipping carton should contain the following: • A GoBook computer • An internal battery • An AC adapter with power cord •...
- Page 19 approved accessories. If you use items that are not approved for use with this computer, you may cause your com- puter to malfunction, or to emit or receive electro-magnetic radiation in excess of local regulations. For non-propri- etary accessories such as PC Cards or printers, ensure that the accessory functions properly in your computer before making the purchase.
-
Page 20: Installing The Battery
This User’s Manual describes the key elements of your computer. New users can find a simple step-by-step orienta- tion in the Quick Start section of this chapter. The Windows Online Help, found on the Start menu, offers extensive Windows assistance. Welcome to Windows offers an online orientation for new Windows users. -
Page 21: Connecting The Ac Adapter
1 Remove the battery door. 2 Align the battery connectors and place the battery in the computer. 3 Replace the battery door and rotate the door latches to secure the door. NOTE When the battery is installed and the computer is connected to AC power, see Connecting the AC Adapter below, it starts charging automatically. - Page 22 You can operate the computer while the battery is charging, while on external power, or on battery power only. • Press the button once, and then give the system time to respond. 1 From the Start menu, click Shut Down. 2 Select the Shut Down from the Shut Down Windows screen, then click OK.
-
Page 23: Adjusting The Volume
Volume for the computer is adjusted by using function key combinations. • FN + F8 decreases the volume • FN + F9 increases the volume • FN + F10 mutes the volume You can also adjust the volume with the Windows volume control applet, which is located on the taskbar and looks like this NOTE Adjusting the volume using the function keys produces only a slight change with each press. - Page 24 To calibrate the touch screen click the Start menu, select Programs, UPDD or Touch screen, and then select “Cali- brate”, which opens the touch screen calibration program. Calibrating the touch screen involves touching and releasing on the X with the stylus on your screen. This action aligns the background image with the screen.
- Page 25 If your computer does not operate, try these solutions. • Connect the AC adapter to charge the battery if it is not charged. • If the AC adapter is connected, make sure the electrical outlet you are using works. • Check to make sure the battery is installed and charged properly.
-
Page 27: Restarting The Computer 21
S E C T I O N 2 Getting .amiliar with Your Computer LED Activity Indicators 19 LED Power / Wireless Modem Indicators 20 Restarting the Computer 21 Primary Keys 21 Arrow Keys 23 Function Keys 24 Numeric Keypad 24 Touchpad 24 General Guidelines 26 Scrolling Buttons 27... - Page 28 The GoBook computer is a ruggedized, weather-sealed laptop computer system built for the demanding environment of the mobile worker. Designed for use by mobile workforces, this computer is one of the most practical work tools for collecting, managing, and communicating information in the field. The following pages describe the external and internal features of your GoBook computer.
-
Page 29: Touchpad
The following diagrams and descriptions provide an overview of your GoBook computer. Activity indicators 1 Touch screen display 2 Touchpad buttons 3 Scrolling button 4 Speakers 5 Power / wireless modem indicators 6 Touchpad 7 Nitevue™ Keyboard 8 Internal Microphone 9 Activity indicators 10 On / Off power button Power / wireless modem... - Page 30 1 Cooling fan 2 Power jack 3 15-Pin VGA port 4 25-Pin parallel port 5 9-Pin serial port 6 PS2 port 7 RJ-11 modem jack 8 RJ-45 network jack 9 USB port 10 D-Rings...
- Page 31 1 PC Card door 2 Microphone jack 3 Audio jack 1 Media bay – CD, DVD, Floppy disk, or extra battery 2 Radio bay – CRMA (under media bay) 3 Cooling fan 4 Security slot...
- Page 32 1 Battery Access Panel 2 Memory / mini-PCI modem / Lan CTO panel 3 RF adapter CTO panel 4 BIOS / Real Time Clock battery CTO panel 5 Cradle contact CTO panel 6 ID / Serial Number / FCC label CRMA Battery...
- Page 33 The activity indicators, located between the keyboard and the touch screen, light up when a particular function of the computer is active. Each indicator is marked with a corresponding symbol. Icon Function Description The computer is accessing the hard disk. Media Bay drive The computer is accessing the CD-ROM, the DVD-ROM, or the Floppy drive.
- Page 34 The case front LED’s indicate external power, unit ON/OFF, battery status, and wireless modem ON/OFF. These indicators remain active and viewable even when the LCD panel is closed. Icon Light Description Green External power is connected to the unit. LED off External power is not connected to the unit.
- Page 35 The keyboard on the GoBook computer looks much like the keyboard of a typewriter and operates in almost the same way. While typewriter keys put characters on paper, the keys on the laptop enter characters in the computer and perform certain functions, depending on the application or program. The GoBook computer features: 87-key US / UK keyboard;...
- Page 36 ALT GR The ALT GR key, a special function key found on the 89-key international keyboard, when pressed and held, allows you to use characters in the bottom right of a three character key. BACKSPACE The BACKSPACE key, sometimes represented on the keyboard as a left arrow, moves the cursor one position to the left.
- Page 37 SHIFT The SHIFT key changes the keys A through Z to the UPPER CASE position. When you press an alphabetic key, the character appears as a capital letter. When you press SHIFT with other keys, the characters on the upper part of the keys appear. For example, pressing SHIFT+7 displays an ampersand (&).
- Page 38 Hold the FN key while pressing the numbered function key. Function key Description FN+F1 Toggles display on/off FN+F2 Toggles between LCD/CRT displays FN+F3 Suspend to RAM/HDD FN+F6 Decreases LCD brightness FN+F7 Increases LCD brightness FN+F8 Decrease volume FN+F9 Increase volume FN+F10 Mutes the audio The numeric keypad is embedded in the keyboard area.
- Page 39 1 First, place your fingers on the keyboard in the normal typing position. The touchpad is easily accessible by moving either your left or right thumb off the space bar and on to the touchpad. 2 Gently move your thumb across the pressure-sensitive touchpad in the direction you want the cursor to move. The pad detects the change in pressure and moves the cursor in the corresponding direction.
- Page 40 • Move the pointer to the desired location. Tap the touchpad twice quickly as if you were double-clicking, however do not remove your finger after the second tap. Move the cursor to the desired location. Lift your finger to finish dragging. Adjust the touchpad settings by selecting Settings/Control Panel/Mouse/Buttons.
- Page 41 If you are scrolling through a document, you may find that using the scrolling button is more restful to your hand than holding down a mouse button. The scrolling button is located between the touchpad buttons. Push the top of the button to scroll up in a document or Web page;...
- Page 42 Your computer may come with a floppy disk drive. The floppy disk drive accepts 3.5-inch floppy disks, and is read and write capable. The CD-ROM drive is a read-only drive. It cannot be used to write data to a recordable compact disk. The CD- ROM drive can read data from CDs, including audio or video CDs.
- Page 43 1 Make sure the computer is not accessing the CD-ROM/DVD-ROM drive. 2 Press the button on the front of the drive and pull the tray all the way out. 3 Pick up the CD/DVD by the edges and remove the CD-ROM/DVD-ROM from the tray. Push the tray into the computer until it closes fully.
- Page 44 CAUTION Do not insert any foreign objects into the disc tray. Do not force the tray to open or close manually. When not in use, keep the tray closed to prevent dust or dirt from entering the drive unit. If you experience difficulty when removing a CD/DVD disc, stretch a paper clip (or use a pin or a thin metal rod) and insert it into the emergency eject hole located on the front panel.
- Page 45 1 The top side of a PC Card is usually identified with a label. Insert the card into the slot with the top up and the edge with pinhole contacts going in first. You will feel some resistance as the card slides into the back of the slot. 2 PC Cards require drivers, or a program that allows the operating system to use a specific device.
- Page 46 The GoBook has a 15-Pin VGA monitor port to connect your computer to an external monitor. You may use an external monitor simultaneously with your GoBook’s LCD. You may also use the external monitor only and disable the LCD, or use the LCD Only. 1 Locate the 15-pin VGA monitor port on the rear panel of your GoBook and connect the video signal cable from the external monitor to the monitor port.
-
Page 47: Rear Connectors 35
S E C T I O N 3 Making Connections Rear Connectors 35 Left Side Connectors 37 Right Side Connectors 38... - Page 48 Your computer is equipped with a full array of ports and connectors, including standard input/output (I/O) ports for quickly and easily adding peripheral devices such as printers and monitors. Refer to documentation included with individual devices for details on connecting these devices to your computer. Along with the standard ports found on most computers, your computer may also include modem and LAN (optional) ports, offering advanced communica- tions technology.
- Page 49 You will find the serial, parallel, and VGA ports under the port cover at the back of the computer. Connect the DC power cable from the AC adapter to this jack. The 15-pin monitor port can connect your computer to an external monitor.
- Page 50 Use the 25-pin parallel port to connect your computer to a parallel device such as a printer, or set up a direct connec- tion between two computers. The parallel port supports the faster EPP (Enhanced Parallel Port) and ECP (Extended Capabilities Port) specifications, which can be enabled using the BIOS Setup Utility.
- Page 51 With the built-in Ethernet LAN combo, you can make LAN connections without installing PC cards. Connection speed is 10/100 Mbps. The Universal Serial Bus (USB) is the latest standard for attaching input devices, scanners, and other devices to a PC. USB devices can be chained together on a single cable. USB is 1.1 compliant. Use this slot to connect PCMCIA-card devices.
- Page 52 Connect a microphone to this jack to record audio. Connect external speakers or a stereo headset to this jack to listen to multimedia. Your computer has a Security Slot that can be used with a standard laptop locking device, such as a Kennsington Lock.
-
Page 53: Registering Your Wireless Modem 40
S E C T I O N 4 If You Have a Wireless Modem Registering Your Wireless Modem 40... - Page 54 If your GoBook computer is equipped with a wireless modem, you must first register it with the appropriate network provider. Before using your wireless modem you must sign up for service with a wireless network provider. When you register, you will need to furnish the network provider with your modem ID and the computer’s serial number. This informa- tion is printed on a label located on the bottom of your GoBook computer.
- Page 55 When the computer is booting, you may be asked if you want to make the Sierra Wireless AirCard 300 your primary network interface card. For this procedure, click Yes and run Wireless Expert. NOTE Wireless Expert should start automatically. Call your preferred cellular data provider and tell them the AirCard EID displayed on the first screen. Then follow the on-screen procedures.
- Page 56 Contact your local area network administrator to setup your computer for your network. Contact your local area network administrator to setup your computer for your network. CAUTION Your modem generates radio frequency (RF) signals. Do not operate the radio modem before you have registered it with a network provider. The network will not accept a signal from an unregistered device.
- Page 57 The wireless modem is powered on when the modem card is inserted (after the SIM card has been inserted). The GSM application automatically starts when the modem card is inserted. To stop the application you must manually stop the card in the system tray using the PC Card icon (or applicable Windows 2000 icon). The GSM application will close when stopped.
- Page 58 The wireless modem is powered ON after initial boot, reboot, or resume as indicated by the wireless modem LED being solid green. It can be turned off by right clicking the PC Card icon in the system task tray, then selecting “Stop Cisco Systems 340 Series Wireless LAN Adapter”.
- Page 59 1 To verify the radio is installed and functioning correctly, a hyperterminal session can be used to access RIM’s built in diagnostic program. 2 To access this diagnostic program, create a hyterterminal session direct to COM4 with 8 data bits, no parity, 1stop bit, and hardware handshaking.
- Page 60 Following are the procedures for using your wireless modem. • Run Watcher from the desktop, or from the Start, Programs, SierraWireless, Aircard3xx menu. • Verify signal strength is green and radio LED in ON. • Run Watcher from the desktop, or from the Start, Programs, SierraWireless, Aircard3xx menu. •...
- Page 61 • With the exception of the built-in diagnostic program of the RIM radio, there are no standard applications shipped that allow the RIM 802D radio to be used for communication. The RIM 802D radio understands two protocols: Native Control Language (NCL) and; RIM access protocol (RAP).
-
Page 63: Battery Calibration
S E C T I O N 5 Power Management Battery Calibration 50 Monitoring Battery Power 51 Low Battery Alarms 51 Power Saving Modes 52 Suspend Mode 53 Initiating Suspend Mode 54 Power Button Settings 54 When to Replace the Battery 55 Heat Considerations 56... - Page 64 The first time you use a battery, you should calibrate it. The calibration process empties and charges the battery. This allows the Windows battery gauge to accurately monitor battery status. To calibrate a battery, follow these steps: 1 Plug in the AC adapter. 2 Restart the computer.
-
Page 65: Low Battery Alarms
There are two ways to monitor how much power the battery has left. 1 Click Start, Settings, Control Panel, Power Management (Power Options); then click the Power Meter tab. 2 Moving the cursor to the battery icon on the taskbar, without selecting anything, is the simplest way to check on battery power status. -
Page 66: Suspend Mode
NOTE Do not restart the computer until you have connected to an AC adapter, or replaced the discharged battery with a charged battery. When you use the AC adapter to connect your GoBook to a power outlet, the internal battery will automatically begin to recharge. - Page 67 There are several possible settings for suspend mode, which can be selected in the Power Management (Power Options) dialog box: You may suspend to RAM, suspend to disk (Hibernate), or disable suspend altogether, which is not recommended. In a suspend to RAM, the contents of your computer’s memory are held intact, while practically all the rest of the components in your computer either turn off completely, or reduce power consumption to a minimum.
- Page 68 There are four ways to initiate suspend mode. The settings can be adjusted in the Power Management dialog box: • The computer will automatically enter suspend mode when not used for a set period of time • Selecting the Stand by button in the Shut Down Windows dialog box •...
- Page 69 Over time, the battery’s capacity gradually decreases. We recommend that you replace your battery when you notice that it begins to store significantly less charge. Change the main battery pack as follows: 1 Turn off the computer. 2 Disconnect external power. 3 Close the display and turn the computer over.
- Page 70 The computer’s processor has been specially designed to consume little power, and generates very little heat. However, working in a hot environment, or working for long periods may raise the temperature. Your computer takes the following steps to lower temperature: 1 The cooling fan is turned on.
-
Page 71: Bios Setup Menu
S E C T I O N 6 Customizing Your Bios Settings BIOS Setup Menu 58 Starting the BIOS Setup Utility 58 Navigating and Entering Information in BIOS 60... - Page 72 This chapter explains how to use the Setup Utility to modify the BIOS settings. The Setup Utility displays and allows modification of the GoBook components and the configuration of devices that are connected to it. This information is used to test and initialize components at start-up time and to make sure everything runs properly when the system is operating.
- Page 73 The Setup Utility main menu has seven main submenu options: Standard CMOS Setup, Advanced CMOS Setup, Power Management Setup, and Peripheral Setup, Auto-Detect Hard Disks, Change User Password and Change Supervisor Password. Save Settings and Exit, and Exit Without Saving are used to exit the Setup Utility. AMIBIOS HIFLEX SETUP UTILITY - VERSION 1.23 AMIBIOS HIFLEX SETUP UTILITY - VERSION 1.23 AMIBIOS HIFLEX SETUP UTILITY - VERSION 1.23...
- Page 74 Use the following keys to move between fields and to enter information: Function Starts the BIOS utility after turning on the computer. Exits any submenu. If you wish to exit the BIOS utility without saving changes, go to the main menu, then press Esc. Up, down arrow keys Moves among selections.
- Page 75 The Standard CMOS Setup page of the Setup Utility has a list of fields that describe the basic configuration of your computer. CMOS is simply a type of random access memory, or RAM, used to store the basic configuration of the computer.
- Page 76 .ield Setting .unction System Time Use these fields to set the time and date. The time is displayed in 24- hour format. The date can be set from January 1, 1901 to December 31, 2099. The values set in these two fields take effect immediately. Floppy Drive A Not Installed Indicates if a floppy disk drive is installed.
- Page 77 Size Displays the hard disk capacity. Cylinders Displays the number of cylinders on the hard disk drive. Heads Displays the number of heads per cylinder on the hard disk drive. LBA Mode LBA (Logical Block Addressing) mode is used to support IDE hard disks larger than 504 MB. LBA support is required for compatibility with the FAT32 system.
- Page 78 AMIBIOS SETUP AMIBIOS SETUP AMIBIOS SETUP - ADVANCED CMOS SETUP - ADVANCED CMOS SETUP - ADVANCED CMOS SETUP AMIBIOS SETUP AMIBIOS SETUP - ADVANCED CMOS SETUP - ADVANCED CMOS SETUP (C) 2000 American Megatrends, Inc. All rights Reserved BootUp Sequence C:, A:, CDROM C:, A:, CDROM C:, A:, CDROM...
- Page 79 .ield Setting .unction Bootup Sequence A; C; CDROM Use this field to set the devices from which the system should boot in order of priority. The default value is C; A; CDROM, which means that the computer will attempt to boot from the hard disk drive, then the floppy drive, then the CD-ROM.
- Page 80 This section of the BIOS manages power settings in operating systems other than Windows 98 or above, or operating systems using ACPI power management. In Windows 98 or above, power management is controlled through the Power Management window in My Computer, and BIOS power management settings have NO effect. In other operating systems that use ACPI power management, BIOS settings likewise have no effect.
- Page 81 .ield Setting .unction Geyserville Geyserville Optimized Speed enables the system Optimized Speed to reduce the CPU speed when the battery is in use to conserve power. Battery The computer will utilize Geyserville Optimized Speed Technology when the battery is in use. This technology lowers the CPU clock speed to save power.
- Page 82 Settings on this page allow you to change port configurations. AMIBIOS SETUP AMIBIOS SETUP AMIBIOS SETUP AMIBIOS SETUP AMIBIOS SETUP - PERIPHERAL SETUP - PERIPHERAL SETUP - PERIPHERAL SETUP - PERIPHERAL SETUP - PERIPHERAL SETUP (C) 2000 American Megatrends, Inc. All rights Reserved Available Options: Available Options: Auto...
- Page 83 .ield Setting .unction COM 1 Port Auto COM 1 is assigned to the serial port located at the rear of your GoBook. Set this field to Auto to enable the system to automatically assign an I/O address and interrupt to the port. Disabled Disables COM 1.
- Page 84 Field Setting Function LPT Extended Mode Normal This field makes the parallel port comply with one of the different kinds of parallel communications: Normal, Extended Capabilities Port (ECP), and Enhanced Parallel Port (EPP). Normal , ECP and EPP are bi-directional modes, allowing both data input and output.ECP and EPP modes are only supported with EPP and ECP aware peripherals.
- Page 85 A supervisor password must be set before a lower-level user password can be set. After selecting Change Supervisor Password, press Enter. You will be prompted for the new password, and then again to verify it. Type in six or fewer keystrokes.
- Page 86 Select this option to save changes to the field values, and restart the computer using the new values. (Pressing F10 from any of the menu screens also allows you to save settings and exit.) Select this option to discard any changes you have made to the field values, and restart the computer using the old values.
-
Page 87: Precautions
S E C T I O N 7 Optional Equipment and Accessories PRECAUTIONS 76 Charging Batteries Communicating with Other Devices Selecting the Right Surge Protection 81 Selecting the Right Equipment 82... - Page 88 The Vehicle Adapter is an optional device that supplies power from the vehicle battery to operate the computer and charge the battery installed in the unit. It typically connects to the vehicle battery using the cigarette lighter socket. To prevent possible damage to the battery, the system will not allow the battery to charge at extreme temperatures. Be aware of the following charging characteristics, especially if the computer is left unattended in a closed vehicle.
- Page 89 The vehicle cradle is a vehicle-based docking station designed to safely secure the computer in the vehicle. A standard key lock located on the front of the cradle locks the computer onto the cradle for security purposes. You can use the vehicle cradle to: •...
- Page 90 • There are no user-replaceable parts within the vehicle cradle, so do not open the cradle case. The vehicle cradle is internally protected. It resets automatically if there is a power fault. • Do not use the vehicle cradle to charge the computer battery overnight. Turn off the vehicle cradle at the end of each work day to prevent draining the voltage in your vehicle’s battery below starting levels.
- Page 91 Important • A temperature of 0ºC to +60ºC (32ºF to +140ºF) is recommended when charging batteries with the vehicle cradle. Batteries may not charge successfully outside this temperature range. • If you charge your battery daily, rely on the gas gauge reading to determine battery capacity.
- Page 92 An external RF antenna also can be connected to the cradle using the TNC RF connector on the back of the vehicle cradle. FCC regulations require that users of vehicle-mounted antennas must use only antennas authorized for use with the GoBook in order to meet FCC RF exposure limits. Please contact your organizations’s help desk for a list of approved vehicle-mounted antennas.
- Page 93 1 Measure and identify an area 20 cm (8 inches) in from the edges of the vehicle roof (see diagram below). 2 Place the antenna within that area. To maximize RF performance, position the antenna in the center of the vehicle roof. Side View Front View The contact pins on the vehicle cradle are exposed to contamination and stress when the computer is installed and...
- Page 94 1 Hold down the protective plastic cover. 2 Grasp a pin and pull straight up, being careful not to bend it. 3 Clean the pin with electrical contact cleaner and reinstall it into the cradle contact assembly. If a pin is bent or cannot be cleaned, contact your support desk to obtain a replacement pin. NOTE Pin 8 is not user replaceable.
- Page 95 Consider the level of quality you need when selecting a surge suppressor. This depends on factors such as surge environment, the type of equipment to be protected, and the quality of the electrical wiring and service. Surge environment refers to the damage potential from electrical surges in a particular geographical area. A high quality suppressor should be used if there is frequent lightening activity in the area and the location service is fed by overhead utility poles.
- Page 96 There are a number of companies that sell quality surge suppressors such as Sutton Designs, APC, and Panamax. When you are looking for a surge suppressor, consider these things. • Expect to pay at least $50 for a good quality surge suppressor. •...
-
Page 97: Internal Hard Drives
S E C T I O N 8 Maintenance and Storage Internal Hard Drives 85 External PC Card Hard Drives 86 Maintaining Batteries 87 Storing Batteries 87 Maintaining Your Computer 88 Storing Your Computer 90... - Page 98 The GoBook is ruggedized and weather resistant. Handle it with the normal care required by any sophisticated electronic equipment, and the computer will provide reliable service even under harsh field conditions. Follow the guidelines below to care for your unit. CAUTION Always use an approved stylus.
- Page 99 There are two hard drive options for the GoBook: a shock-mounted 2.5-inch hard drive and a PC Card Type III hard drive. All hard drives contain media for data storage in the form of a rotating disk, read/write head(s), a motor, and electronics for interfacing and control.
- Page 100 • Maintain the environmental seal of the computer by keeping all the external access doors closed and latched. Also avoid exposing the unit to extreme temperatures or moisture when the doors are open. • Periodically backup or archive important files and data. Each PC Card hard drive manufacturer provides specific guidelines for the care and handling of the product.
- Page 101 Follow these guidelines to maintain performance of Lithium-Ion (Li-on) batteries. • Avoid exposing batteries to extremely hot or cold temperatures for long periods. To prevent possible damage to the battery, the GoBook does not allow the battery to charge if the internal temperature of the battery gets too low (<...
- Page 102 Follow these guidelines to help maintain the condition and performance of your computer. • Turn off the computer when you are not using it. • Charge the batteries daily or whenever their capacity is low. • Operate the computer within the recommended temperature ranges of 0°C to +60°C (32°F to +140°F). Periodically inspect the computer and accessories for wear, damage, loose or missing parts.
- Page 103 Display Periodically inspect the display to make sure the contrast and brightness functions are operating properly and that all pixels are operational. To clean the display assembly, use the same cleaning solution and procedure described earlier for the outside case. In some cases, you can use a small amount of isopropyl alcohol to remove streaks or smears.
- Page 104 You can store the GoBook for approximately 7 - 10 days without losing data as long as the battery is fully charged to begin with. If you plan to store the computer for more than 7 - 10 days, follow these storage guidelines. 1 Files and data should be saved before storing the computer.
-
Page 105: Error Messages
APPENDIX A Error Messages... - Page 106 The following are possible error and warning messages you may encounter while operating the GoBook computer. The messages described 1in this section are listed below. Error and warning messages are generated by several different sources including: • Power On Self Test (POST) •...
- Page 107 BIOS ROM bad checksum An expansion card has a bad ROM checksum. The expansion card may need to be replaced. Contact your supervisor or your organization’s help desk. -Disk not found -FATAL: CMOS RAM test failed -FATAL: DMA controller faulty -FATAL: Faulty DMA page registers -FATAL: Faulty refresh circuit -FATAL: Interrupt controller failed...
- Page 108 Floppy disk fault - insert valid boot disk and press any key If no floppy drive is present, run the System Configuration Utility (SCU) and disable the floppy disk controller. (See Section 6 Customizing Your Bios Settings, for more information about the SCU.) Gate A20 failure Hardware failure.
-
Page 109: No Timer Tick Interrupt
-Memory failure at AAAAAAAA, read XX expected YY Restart the computer by pressing the power button for at least eight seconds. If the problem persists, contact your supervisor or your organization’s help desk. No boot device available — press to retry boot Reboot the computer by pressing CTRL+ALT+DEL. - Page 110 Shutdown failure Reboot the computer by pressing CTRL+ALT+DEL. If the message persists, contact your supervisor or your organization’s help desk. Unexpected interrupt in protected mode Reboot the computer by pressing CTRL+ALT+DEL. If the message persists, contact your supervisor or your organization’s help desk.
- Page 111 WARNING: Floppy information invalid Run the System Configuration Utility (SCU) to set the system configuration. If the problem persists, contact your organization’s help desk. (See Section 6 Customizing Your BIOS Settings, for more information about the BIOS Setup Utility). -WARNING: Keyboard controller failure -WARNING: Keyboard failure Reboot the computer by pressing CTRL+ALT+DEL.
- Page 112 xxxxxh Option ROM checksum failure where xxxxxh is the starting address of the option An expansion board contains a defective ROM. Try restarting the computer by pressing CTRL+ALT+DEL. If the problem persists, the expansion board may need to be replaced. Report this error to your supervisor or your organization’s help desk.
- Page 113 Non-System disk or disk error Replace and press any key when ready This can occur if media is in the card socket and you restart the computer. Remove the media, and then press any key. Not ready reading drive X (where X is any drive letter) Abort, Retry, Fail? Make sure that the media is inserted fully into the card socket, then press R to retry.
-
Page 115: For More Help
APPENDIX B Troubleshooting For More Help Applications Display Hard Disk I/O Ports Keyboard Landline Modems Miscellaneous Mouse PC Cards Wireless Modems... -
Page 116: Applications
This section is designed to help you determine and fix problems you might encounter while operating the GoBook computer. Try the following things in order: • First look through the categories in this section for a solution. • If you don’t find a solution for your situation here, try one of the resources listed below. •... -
Page 117: Display
Solutions to some common problems are listed on the following pages under these categories: • Applications • Batteries • Display • Hard Disk • I/O Ports • Keyboard • Landline Modem • Miscellaneous • Mouse • PC Cards • Pen/Touch screen •... -
Page 118: Hard Disk
My application locks up, acts strangely, or produces a General Protection Fault (GPF) error • If you’ve tried to resolve the problem and your application still doesn’t respond, you may need to restart your computer as described below. To reboot your computer, select Start, Shut Down, Restart, or press CTRL+ALT+DEL. If the computer does not restart, the keyboard may be locked up. -
Page 119: The Battery Does Not Charge
The battery does not charge • To prevent possible damage to the battery, the system will not allow a charge if the battery temperature is extremely hot or cold (such as in a closed, unattended vehicle). If possible, charge the battery in a location with a moderate temperature of around 20°C (68°F). - Page 120 The batteries don’t last very long • Calibrate the battery using the Battery Calibration selection in Power Management (see Section 6 Customiz- ing Your Bios Settings for additional information). If your battery is new or has not been used for several weeks, calibrating the battery over a weekend may substantially increase its capacity.
- Page 121 The display performance is slow • The temperature may be too cold. Move the computer to a warmer operating environment. I can’t read the display • Adjust the backlight. • The automatic power-saving mode may have shut off (suspended) the computer. Press any key to resume. The underlined, inverse, and hypertext characters are difficult to read on the screen •...
-
Page 122: Diskette Read Error
The hard disk will not spin up so the computer can’t boot up • This occurs if the unit is exposed to extreme low temperatures. This is not a hardware failure associated with the hard disk. Allow the computer to warm to room temperature. I can’t save files because the disk is full •... - Page 123 Something unexpected happens when I press a key • You may have pressed a key combination that performs a Windows function. Make sure you are pressing the correct keys for the application you are running. Incorrect characters appear on the screen when I press certain keys •...
- Page 124 The modem dials and receives an answer but does not establish a connection • You may have incorrect parameters selected for your application to talk with the remote modem. Refer to the online Help for your application. • You may need to adjust your modem’s baud rate or protocol selection. Communications programs such as HyperTerminal or Procomm Plus don’t seem to work or they lock Windows •...
-
Page 125: The Computer Shuts Off Unexpectedly
The computer shuts off unexpectedly • The computer has entered suspend mode. Press a key to turn it back on. • The battery capacity may be low. Connect external power to charge the battery, or replace the battery with a fully charged one. - Page 126 The computer doesn’t automatically suspend • Check to make sure the COM ports are off. For example, exit any application that uses COM ports. • Make sure external power is not connected. Some systems will not suspend automatically when they are connected to external power.
- Page 127 I have difficulty double-clicking the mouse fast enough • From the Start Menu, select Settings, Control Panel, and then choose Mouse. The Buttons tab contains the setting for the double-click speed. I can’t see the mouse pointer • The mouse pointer may be off the screen. Move the mouse until it reappears on the screen. •...
- Page 128 The computer locks up when I remove the PC card • Before you remove the card, select the PC card icon in the system “tray” area of the screen (near the clock in the lower right corner), and choose “Stop [card name] card.” The computer locks up when inserting a PC card •...
- Page 129 How can I tell if my CDPD radio is working? Try the following procedure: 1 From the Start Menu, select Programs, then “Sierra Wireless”, then “Aircard3XX”, then “WirelessExpert” 2 Press the Next Button 3 If you encounter an error message, follow the on screen instructions. 4 Verify or enter the correct NEI (Network IP address) and DNS (Domain Name Server IP address) for your CDPD network registration 5 Press the Next Button.
- Page 130 How can I tell if my ARDIS/MOTIENT or RAM/BSWD radio is working? • Enable a RIM Radio communication session 1 From the Start Menu, select Programs, Communications, then Terminal. 2 Double-click the “Make a new session” icon to bring up the Session Properties dialogue box. On the Communications Tab, enter a name for the session, select modem “RIM Radio on COM4”, then click the configure button.
- Page 131 Q – Quit the diagnostic and reset the radio. (ARDIS/MOTIENT & RAM/BSWD) H – Displays RF Modem firmware and date. (ARDIS/MOTIENT & RAM/BSWD) I – Toggle interactive Serial Mode Enabled. (RAM/BSWD) B – Displays RF Modem battery level (Displayed as a percentage - inaccurate). (ARDIS/ MOTIENT &...
- Page 132 Monitoring Receive Signal Strength Indicator (RSSI) level establishes connectivity within the coverage area. Entering “R” will result in a display similar to the one below: Updating RSSI Level RSSI=21% -94 dBuV Pinging a unit by sending a message to itself through the network confirms the network connectivity. Entering “P”...
- Page 133 APPENDIX C Glossary AC adapter The standard charging device shipped with the GoBook computer that supplies power from an AC wall outlet to operate the computer and charge the battery installed in the unit. antenna If you have a wireless modem installed in your computer, this device sends and receives radio waves for this modem.
-
Page 134: Keyboard
external power Any of the approved devices used to supply power to the GoBook computer including the AC adapter, the vehicle adapter, and the vehicle cradle. external power light The first light from the left on the power indicator LED panel, this light illuminates when the computer is operating on external power. -
Page 135: Pc Cards
Microsoft Windows 98 An operating environment for MS-DOS used on IBM-compatible computers that provides users with graphical windows in which to do their work. All Windows applications have consistent features such as command menus, windows, and dialog boxes. Microsoft Windows 2000 An operating environment based on the previously release Windows NT 5.0 Operating System (OS), and designed for IBM-compatible computers. - Page 136 Random Access Memory (RAM) The computer’s primary working memory in which program instructions and data are stored so they are accessible directly to the central processing unit (CPU). RJ-11 connector A port used by the internal modem to communicate over standard voice grade telephone lines.
- Page 137 System Configuration Utility (SCU) A utility that allows you to change default settings for your hardware options and power management. Taskbar In Windows 98, the area along the bottom of the screen that contains the Start button and buttons for windows, documents, or applications that are open. utility A program that helps you maintain and improve the efficiency of the computer system.
- Page 139 Index...
- Page 141 See indicator lights...
- Page 142 See also See display...
- Page 143 Itronix Corporation P.O. Box 179 Spokane, WA 99210-0179 www.itronix.com 77-0100-003...
Need help?
Do you have a question about the GoBook IX250 and is the answer not in the manual?
Questions and answers