Table of Contents
Advertisement
Available languages
Available languages
Quick Links
Advertisement
Table of Contents

Related Manuals for PRESIDENT Walker 2


Summary of Contents for PRESIDENT Walker 2
- Page 1 Manuel d’utilisation / Owner’s manual Manual del usuario / Instrukcja obsługi...
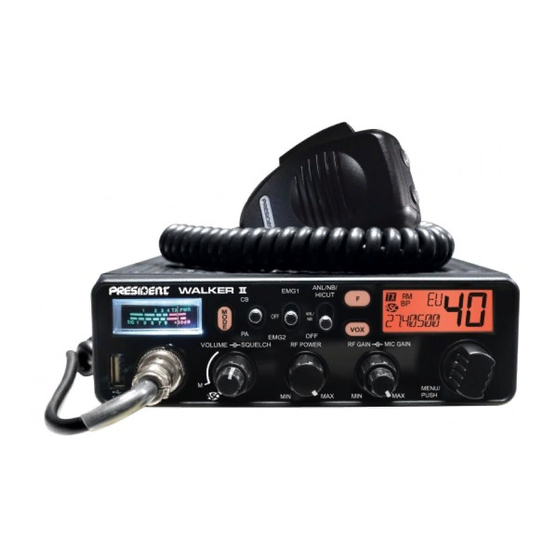
- Page 2 Votre PRESIDENT WALKER II en un coup d'œil Your PRESIDENT WALKER II at a glance Un vistazo a vuestro PRESIDENT WALKER II Twój PRESIDENT WALKER II...
-
Page 3: Table Of Contents
SOMMAIRE SUMARIO INSTALLATION ....................5 INSTALACIÓN ..................19 UTILIZACIÓN ................... 21 UTILISATION ....................7 FUNCIÓN AL ENCENDER LA EMISORA ..........24 FONCTION À L’ALLUMAGE DU POSTE ..........10 MENUS .....................10 MENÚS ....................24 FUNCIONES CON LA PALANCA DE EMISIÓN PTT ........ 27 FONCTIONS AVEC LA PÉDALE D’ÉMISSION PTT ........13 CARACTERÍSTICAS TÉCNICAS ............... - Page 4 ATTENTION ! Avant toute utilisation, prenez garde de ne jamais émettre sans avoir branché l’antenne (connecteur B situé sur la face arrière de l’appareil), ni réglé le TOS (Taux d’Ondes Stationnaires)! Sinon, vous risquez de détruire l’amplificateur de puissance, ce qui n’est pas couvert par la garantie.
-
Page 5: Installation
électronique la plus performante. Grâce à l’utilisation de technologies de pointe garantissant des qualités sans précédent, votre PRESIDENT WALKER II est un nouveau jalon dans la convivialité et la solution par excellence pour le pro de la CB le plus exigeant. Pour tirer le meilleur parti de toutes ses possibilités, nous vous conseillons de lire attentivement ce mode... - Page 6 3) CONNEXION DE L’ALIMENTATION Amener le poste sur le canal 20 à l’aide du rotateur PUSH (6) ou des touches Votre PRESIDENT WALKER II est muni d’une protection contre les inversions UP/DN (18) du microphone. de polarité. Néanmoins, avant tout branchement, vérifier vos connexions.
-
Page 7: Utilisation
Remarque : Afin d’éviter les pertes et atténuations dans les câbles de sortie AM/FM; dans le sens des aiguilles d’une montre pour augmenter connexion entre la radio et ses accessoires, PRESIDENT recommande une puissance, dans le sens inverse des aiguilles d’une montre pour diminuer longueur de câble inférieure à... - Page 8 8) VOX ~ AJUSTEMENT DU VOX En mode MENUS [une pression longue de 3 secondes environ sur le rotateur PUSH (6) permet ce mode (voir § MENUS page 10)]. d’activer (pression brève) Tourner le rotateur PUSH (6) pour sélectionner la fonction à paramétrer. Appuyer brièvement sur le bouton PUSH (6) pour valider.
- Page 9 10) FILTRES ANL/NB - HI-CUT En configuration U uniquement : le bouton MODE (13) permet de sélectionner la bande de fréquence ENG ou CEPT. “UK” s’affiche lorsque la bande de Commutateur 3 positions : Position basse : aucun filtre n’est activé. Position fréquence ENG est sélectionnée.
-
Page 10: Fonction À L'allumage Du Poste
SCAN D) MENUS (pression longue) Appuyer et maintenir appuyer une des touches UP ou DN (18) du micro- L’ordre des 11 fonctions est celui décrit dans ce manuel. Toutefois, la fonction phone durant ± 7 secondes ou jusqu’à ce qu’un bip soit émis pour activer affichée en entrant dans les MENUS sera la dernière fonction modifiée par la fonction SCAN. - Page 11 2) BIP DE TOUCHES 4) RÉGLAGE DE LA TONALITÉ La fonction TONE permet de changer la tonalité en réception. 11 niveaux retentit Quand la fonction est active, un bip sonore lorsqu’une touche est de -5 à +5. enfoncée, lors d’un changement de canal, etc. «BP» apparaît sur l’afficheur. Appuyer pendant 3 secondes sur le bouton PUSH (6) pour accéder Appuyer pendant 3 secondes sur le bouton PUSH (6) pour...
- Page 12 Appuyer sur la pédale PTT (17) pour valider et sortir Le PRESIDENT WALKER II peut-être utilisé tant avec un microphone électret MENUS. disparaît de l’afficheur. que dynamique 6 broches PRESIDENT (voir câblage du microphone page...
-
Page 13: Fonctions Avec La Pédale D'émission Ptt
1) TALKBACK Une nouvelle pression sur le bouton PUSH (6) permet de valider le choix. Le paramètre cesse de clignoter. a) Repartir au point 1 pour régler Cette fonction permet d’entendre votre propre modulation dans le haut- autre fonction ou b) Appuyer sur la pédale PTT (10) pour valider et sortir parleur interne ou externe optionnel connecté... -
Page 14: Guide De Dépannage
H) COMMENT ÉMETTRE OU RECEVOIR UN MESSAGE ? 3) RÉCEPTION - Sensibilité maxi à 20 dB sinad : 0,5 μV -113 dBm (AM) 0,35 μV -116 dBm (FM) Maintenant que vous avez lu la notice, assurez-vous que votre poste est - Réponse en fréquence : 300 Hz à... - Page 15 Short waves listening (écoute en ondes courtes) : Grosses bises Short waves (ondes courtes) : Dégager la fréquence Taux d’ondes stationnaires : Polarisation horizontale, aller se Transceiver. Désigne un poste émetteur-récepteur coucher CB. Indique aussi l’émission. : Pipi Ultra-haute fréquence 600 ohms : le téléphone Up Side Band (bande latérale supérieure)
-
Page 16: Déclaration De Conformité Eu Simplifiée
EU SIMPLIFIÉE : Voulez-vous écouter sur... : Dégagement de fréquence : Position de station : Heure locale Par la présente, Groupe President Electronics, déclare que CANAUX D’APPEL l’équipement radio CB: 27 AM : appel général en zone urbaine 19 AM... -
Page 17: Conditions Générales De Garantie
3 ans est proposée systématiquement pour l’achat et l’utilisation d’une c’est très important pour vous car cela permet d’identifier votre appareil lors de son passage antenne de la marque PRESIDENT, amenant la durée totale de la garantie à 5 ans, et sur justi- éventuel dans nos ateliers. - Page 18 President Electronics Ibérica S.A.U. Declara bajo su responsabilidad, que este aparato cumple con lo dispuesto en la Directiva 2014/53/UE del Parlamento Europeo y del Consejo de 16 de Abril de 2014. ¡ ATENCIÓN ! Antes de la utilización tengan cuidado de nunca emitir sin haber previamente conec- tado la antena (conector “B”...
-
Page 19: Instalación
Gracias a la utilización de tecnología punta que garantiza una calidad sin precedentes, su PRESIDENT WALKER II ASC representa un nuevo hito en la facilidad de uso y la solución por excelencia para el usuario más exigente de CB. - Page 20 Dirija la estación al canal 20 con ayuda del conmutador rotativo PUSH (6) 3) CONEXIÓN DEL ALIMENTADOR o de los botones UP/DN (3) del micrófono. Su PRESIDENT WALKER II ASC está provista de una protección contra las 5) AJUSTE DE LA ROE (Relación de Ondas Estacionarias) inversiones de polaridad.
-
Page 21: Utilización
En modo TX, gire el botón RF POWER (3) para ajustar la potencia de salida cables de conexión entre la radio y sus accesorios, PRESIDENT recomienda de AM / FM; en el sentido de las agujas del reloj para aumentar la potencia, una longitud de cable inferior a 3 m. - Page 22 8) VOX ~ AJUSTE DEL VOX En el modo MENÚS [una presión de aproximadamente 3 segundos en el botón PUSH (6) activa este modo (ver § MENÚS página 24)]. (presión breve) Gire el botón rotativo PUSH (6) para seleccionar la función que se va a configurar.
- Page 23 14) BARGRAPH NB: Noise Blanker / ANL: imitador de ruido automático. Estos filtros reducen el ruido de fondo y algunos parásitos de recepción. HI-CUT: elimina las interferencias de alta frecuencia y se debe utilizar de acuerdo con las condiciones de recepción. Nota: El filtro ANL solo funciona en modo AM.
-
Page 24: Función Al Encender La Emisora
D) MENÚS El barrido de los canales se detiene tan pronto como un canal está activo. El escaneo comienza automáticamente 3 segundos después del final del programa si no se presiona ninguna tecla durante este tiempo. En modo El orden de las 11 funciones es como se describe en este manual. Sin em- SCANNING, gire el conmutador rotativo PUSH (6) o presione los botones bargo, la función mostrada al ingresar en los MENÚS será... - Page 25 2) PITIDO DE TECLADO 4) TONO La función TONE se utiliza para cambiar el tono en la recepción. 11 niveles Pulse durante 3 segundos el conmutador PUSH (6) para entrar en los MENÚS. de -5 A +5. aparece. Pulse durante 3 segundos el conmutador PUSH (6) para entrar en los MENÚS.
- Page 26 El parámetro deja de parpadear. a) Comience nuevamente 9) TIPO DE MICRÓFONO en el punto 1 para configurar otra función o b) Presione la palanca PTT (17) El PRESIDENT WALKER II se puede utilizar tanto con un micrófono electret para confirmar salir de los MENÚS.
-
Page 27: Funciones Con La Palanca De Emisión Ptt
Una nueva pulsación en el conmutador PUSH (6) permite validar el valor. Pulse y mantenga presionado la tecla de emisión PTT (17) y presione bre- El parámetro deja de parpadear. a) Comience nuevamente en el punto 1 vemente en la tecla F(9) para activar/desactivar la función TALKBACK. -
Page 28: Guía De Problemas
I) LÉXICO - Tasa de rechazo frec. imagen : 60 dB - Tasa de rechazo frec. inter. : 70 dB - Consumo : 180 ~ 500 mA max. ALFABETO FONÉTICO INTERNACIONAL A Alpha H Hotel O Oscar V Victor G) GUÍA DE PROBLEMAS B Bravo India P Papa... -
Page 29: Declaración De Conformidad Eu Simplificada
: Nombre de estación u operador : Distancia aproximada en línea recta entre dos estaciones Por este medio, Groupe President Electronics, declara que el : Frecuencia exacta : Tonalidad de una emisión valorada de 1 a 3 equipo de radio CB: : Legibilidad, comprensibilidad de una señal. -
Page 30: Condiciones Generales De Garantía
Este aparato tiene una garantía de 2 años de piezas y mano de obra. La garantía ampara la Ud. ha confiado en la experiencia y calidad de PRESIDENT y se lo agradecemos. Para que quede reparación totalmente gratuita de cualquier vicio o defecto de fabricación que sea reconocido totalmente satisfecho de su compra, aconsejamos leer atentamente este manual. - Page 31 WARNING ! Before using, be careful never to transmit without first having connected the antenna (connection “B” situated on the back panel of the equip- ment) or without having set the SWR (Standing Wave Ratio) ! Failure to do so may result in destruction of the power amplifier, which is not covered by the guarantee.
-
Page 32: Installation
Welcome to the world of the new generation of CB radios. The new PRESIDENT range gives you access to top performance transceiver equipment. With the use of up-to-date technology, which guarantees unprecedented quality, your PRESIDENT WALKER II is a new step in personal communication and is the surest choice for the most demanding of professional CB radio users. - Page 33 3) POWER CONNECTION 5) HOW TO ADJUST SWR (Standing Wave Ratio) Your PRESIDENT WALKER II is protected against an inversion of polarities. However, before switching it on, you are advised to check all the connec- Warning: This must be carried out when you use your radio for the first time tions.
-
Page 34: How To Use Your Transceiver
Connect the SWR meter between the CB radio and the antenna as close on LCD. No repetitive manual adjustment and a permanent improvement as possible to the CB (use a maximum of 40 cm cable, type President CA between the sensitivity and the listening comfort when ASC is active. This 2C). - Page 35 7) LCD VOX SET (long press) Press the VOX key (8) for 2 seconds in order to activate the VOX Adjustment mode. Three adjustments are possible: Sensitivity SET L / Anti-vox level SET A / Vox delay time SET T (over and over). change a setting other than the one displayed, press the VOX key (8) to select the next setting or...
- Page 36 15) 6 PIN MICROPHONE PLUG channel 2 is activated. OFF / No priority channel is activated. The default priority channels are channel 9/AM (EMG1) and channel 19/ The plug is located on the front panel of the transceiver and makes the AM (EMG2).
-
Page 37: Function Turning On The Unit
A) DC-POWER TERMINAL (13,2 V) stops blinking and if the function has more than one parameter, the next parameter blinks. B) ANTENNA CONNECTOR (SO-239) If no key is pressed, the unit exits MENU after 10 seconds. disappears from C) JACK FOR EXTERNAL OPTIONAL SPEAKER (8 Ω, Ø 3.5 mm) the display. - Page 38 3) ROGER BEEP Press PUSH knob (6) for 3 seconds to enter MENU. is displayed. Turn the rotary PUSH knob (6) or use UP/DN buttons (18) on the microphone When the function is active, the icon appears on the display. select the DIMMER function.
-
Page 39: Functions With Ptt Switch
9) MIC TYPE Default PA setting is: I n. The PRESIDENT WALKER II can be used with an electret microphone as well See § PA (Public Address) page 36. as with the dynamic one, 6-pin PRESIDENT (see the cabling diagram page 11) RESET 60). -
Page 40: Technical Characteristics
2) TALKBACK LEVEL G) TROUBLE SHOOTING This function allows to adjust the volume level of the TALKBACK. 1) YOUR RADIO WILL NOT TRANSMIT OR YOUR TRANSMISSION Activate the TALKBACK function. Press and hold the PTT switch (17) then turn the rotary PUSH knob (6) to IS OF POOR QUALITY increase decrease... -
Page 41: Glossary
I) GLOSSARY Big 10-4 : Absolutely Bleeding : Signal from an adjacent chan- nel interfering with the trans- INTERNATIONAL PHONETIC ALPHABET mission A Alpha H Hotel O Oscar V Victor Blocking the channel : Pressing the PTT switch without talking B Bravo India P Papa... -
Page 42: Simplified Eu Declaration Of Conformity
: Go up one channel Wall to wall : All over/everywhere What am I putting to you? : Please give me an S-meter Hereby, Groupe President Electronics, declares that the CB reading radio equipment : Brand: PRESIDENT Type: TXPR500 Commercial Name: WALKER II is in compliance with Directive 2014/53/EU. -
Page 43: General Warranty Conditions
• In case of an intervention not covered by the warranty, an estimate will be established before distributed by PRESIDENT, and if said antenna is at the origin of the breakdown. An extension of 3 any repair. - Page 44 UWAGA ! Przed użyciem należy zwrócić uwagę, aby nigdy nie rozpoczynać transmisji bez uprzedniego pod- łączenia anteny (połączenie „B” znajdujące się na tylnym panelu urządzenia) lub bez ustawiania SWR (współczynnik fali stojącej) ! Nieprzestrzeganie tego może spowodować zniszczenie wzmacniacza mocy, który nie jest objęty gwarancją.
-
Page 45: Instalacja
Witamy w świecie nowej generacji radia CB. Nowa gama urządzeń firmy PRESIDENT zapewnia dostęp do najwyższej jakości urządzeń nadawczo-odbiorczych. Dzięki za- stosowaniu nowoczesnej technologii, która gwarantuje bezprecedensową jakość. Twój PRESIDENT WALKER II stanowi nowy krok w osobistej komunikacji i jest najpewniejszym wyborem dla najbardziej wymagających profesjonalnych użytkowników radia CB. - Page 46 Regulacja za pomocą wewnętrznego miernika SWR tryczną o napięciu 24 V. W takim przypadku konieczne będzie umieszczenie w obwodzie elektrycznym przetwornicy 24/12 V (CV 24/12 PRESIDENT). Poniższe NOWY, ŁATWY I BARDZO WYGODNY – Regulacja miernika SWR za pomocą etapy połączenia należy wykonać po odłączeniu kabla zasilającego od zestawu: sygnałów dźwiękowych...
-
Page 47: Jak Używać Cb Radio
Podłączyć miernik SWR pomiędzy urządzeniem a anteną, jak najbliżej zestawu komfortu słuchania. (należy użyć przewodu o maksymalnej długości 40 cm typu CA-2C PRESIDENT). a) ASC: AUTOMATYCZNA BLOKADA SZUMÓW b) Regulacja miernika SWR Rozwiązanie chronione jest patentem na całym świecie. - Page 48 6) POKRĘTŁO OBROTOWO-NASTAWCZE „PUSH” Wskazuje wybrane pasmo (cyfry po prawej) Podczas normalnej pracy obrócić pokrętło PUSH (6), aby nastawić kanał. Zgodnie z ruchem wskazówek zegara, aby zwiększyć; w przeciwną stronę, aby zmniejszyć Wskazuje częstotliwość, menu i wartości menu kanał. W trybie MENU [długie naciśnięcie pokrętła PUSH (6) przez 3 sekundy włącza 8) FUNKCJE: VOX ~ VOX SET ten tryb (patrz §...
- Page 49 10) FILTRY NB/ANL - HI-CUT ENG lub CEPT. „UK” jest wyświetlane, gdy wybrane jest pasmo częstotliwości ENG. Po wybraniu pasma częstotliwości CEPT, „UK” znika z wyświetlacza (patrz Przełącznik 3-pozycyjny: Pozycja dolna: filtr nie jest aktywny. Pozycja środkowa: tabela na stronie 57). włączone są...
-
Page 50: Funkcja Włączanie Urządzenia
SCAN D) MENU (długie naciśnięcie) Nacisnąć i przytrzymać przycisk UP lub DN (18) przez ± 7 sekund lub do momentu Kolejność 11 funkcji jest taka, jak opisano w niniejszej instrukcji. Jednak funkcja usłyszenia sygnału dźwiękowego (beep), aby włączyć funkcję SCAN. Kropka wyświetlana po wejściu do MENU będzie ostatnią... - Page 51 2) PRZYCISK BEEP (sygnał dźwiękowy) Jeśli żaden przycisk nie zostanie naciśnięty, urządzenie wyjdzie z MENU po 10 sekundach, a symbol zniknie z wyświetlacza. Kiedy funkcja jest aktywna, rozlega się sygnał dźwiękowy beep po naciśnięciu Domyślnie ROGER BEEP jest wyłączony (OF). przycisku, zmianie kanału itp.
- Page 52 AM, FM lub FM UK (tylko w konfiguracji U). Ponowne nacisnąć pokrętło PUSH (6), aby zatwierdzić dokonany wybór. Tryb CB radio PRESIDENT WALKER II może być używane zarówno z mikrofonem przestaje migać. a) Przejść do punktu 1, aby ustawić inną funkcję lub b) Naci- elektretowym, jak i z mikrofonem dynamicznym, 6-pinowym PRESIDENT (patrz snąć...
-
Page 53: Funkcje Przełącznika Ptt
Obrócić pokrętło PUSH (6) lub użyć przycisków UP/DN (18) na mikrofonie, aby Nacisnąć i przytrzymać przycisk PTT (17), a następnie nacisnąć klawisz F (9), aby wybrać tryb pracy PA: I n, OF lub PA. włączyć/wyłączyć funkcję TALKBACK. Gdy funkcja jest aktywna, wyświetlany jest Ponowne naciśnięcie pokrętła PUSH (6) zatwierdza dokonany wybór koloru. -
Page 54: Charakterystyka Techniczna
F) CHARAKTERYSTYKA TECHNICZNA Sprawdzić, czy mikrofon jest właściwie podłączony. Sprawdzić, czy wartość RF POWER jest ustawiona na maksimum (zobacz § MOC NADAWANIA, strona 47). 1) OGÓLNE Sprawdzić, czy wartość MIC GAIN jest ustawiona na maksimum (zobacz § MIC - Liczba kanalów : 40 GAIN, strona 47). -
Page 55: Słowniczek
V Victor B Bravo P Papa W Whiskey India C Charlie J Juliett Q Quebec X X-ray Niniejszym Groupe President Electronics oświadcza, że D Delta K Kilo R Romeo Y Yankee sprzęt radiowy: E Echo L Lima S Sierra Z Zulu... -
Page 56: Ogólne Warunki Gwarancji
Oferuje się przedłużenie gwarancji o 3 lata przy równoczesnym cyjnego, a po ewentualnej odsprzedaży urządzenia, przekazane nowemu właścicielowi w celu zakupie i używaniu anteny PRESIDENT, co wydłuża całkowity czas trwania gwarancji do 5 lat. W umożliwienia identyfikacji sprzętu. -
Page 57: Tableaux Des Fréquences
TABLEAU DES FRÉQUENCES pour EU / EC / U (CEPT) TABLEAU DES FRÉQUENCES pour U (ENG) TABLA DE FRECUENCIAS para EU / EC / U (CEPT) TABLA DE FRECUENCIAS para U (ENG) FREQUENCY TABLE for EU / EC / U (CEPT) FREQUENCY TABLE for U (ENG) TABELA CZĘSTOTLIWOŚCI dla EU / EC / U (CEPT) TABELA CZĘSTOTLIWOŚCI dla U (ENG) -
Page 58: Tabela Częstotliwości
TABLEAU DES FRÉQUENCES pour d TABLA DE FRECUENCIAS para d FREQUENCY TABLE for d TABELA CZĘSTOTLIWOŚCI dla d N° du canal Fréquences N° du canal Fréquences N° du canal Fréquences N° du canal Fréquences Nº Canal Frecuencia Nº Canal Frecuencia Nº... - Page 59 TABLEAU DES FRÉQUENCES pour PL TABLEAU DES FRÉQUENCES pour In TABLA DE FRECUENCIAS para PL TABLA DE FRECUENCIAS para In FREQUENCY TABLE for PL FREQUENCY TABLE for In TABELA CZĘSTOTLIWOŚCI dla PL TABELA CZĘSTOTLIWOŚCI dla In N° du canal Fréquences N°...
- Page 60 PRISE MICRO À 6 BROCHES • CONEXIÓN DEL MICRO 6 PINS 6-PIN MICROPHONE PLUG • WTYK MIKROFONU 6-PIN Modulation Modulación Modulation Modulacja TX - UP/DOWN TX - UP/DOWN TX - UP/DOWN TX - UP/DOWN Masse Masa Ground Masa Alimentation Alimentación Power Supply Zasilanie...
-
Page 61: Normes - F
NORMES • F - NORMAS • F - NORMS • F - NORMY • F Remarque : Dans la configuration U : Pour sélectionner la bande de fréquences ENG, appuyer plusieurs fois sur la touche MODE (13) jusqu’à ce que «UK» apparaisse dans l’afficheur. Pour sélectionner la bande de fréquences CEPT, appuyer plusieurs fois sur la touche MODE (13) jusqu’à... - Page 62 Dernière mise à jour de ce tableau sur le site : www.president-electronics.com, rubrique «les Postes Radio-CB» puis, «La CB PRESIDENT et l’Europe». Le rogamos encontrar la última versión de esta información en nuestro sitio web www.president-electronics.com en la página «Emisoras de radio-cb» / «PRESIDENT y la reglamentación en Europa».
- Page 64 SIEGE SOCIAL/HEAD OFFICE - FRANCE Route de Sète - BP 100 - 34540 BALARUC Site Internet : http://www.president-electronics.com E-mail : groupe@president-electronics.com...
Need help?
Do you have a question about the Walker 2 and is the answer not in the manual?
Questions and answers