Table of Contents
Advertisement
CHAPTER ONE
Common instruction -----------------------------------------------------------------------------------
Main Specification ( NAC12 )
●
●
Torque
standard value
●
Chasis
●
Tools
●
Lubricated parts breakdow
●
CHAPTER TWO
NAC12 Inspection & Adjustment------------------------------------------------------------------ 10
Methods of inspection & adjustment
●
CHAPTER THREE
Engine---------------------------------------------------------------------------------------------------- 18
Maintain notice
●
●
Torque
●
1. carburator
Engine Maintain
●
Engine Overhauling
●
Knock down of the engine
Installation of engine
CHAPTER FOUR
Electric Device ----------------------------------------------------------------------------------------
Maintain notice
●
Faults Diagnose
●
voltage low
un steady electric current
poor connection of charging system
no spark by spark plug
start motor does not work
start motor poor power
engine does not work while start motor is okay pointer of fuel gauge unsteady
Battery
●
Charge
●
CONTENTS
●
Eninge unusal after starting few minutes
No power, no speed under high speed status
Idle speed running, bad in low speed
Generator no good when medium,high speed running
No spark
No good charge (battery out of eletricity or over charge)
Engine
9.shift gears installation and dissamble
10.crankshaft installation and remove
engine runs unnormaly
ignition system second loop
igination time
light dim
1
31
Advertisement
Table of Contents

Related Manuals for Regal Raptor NAC12

Summary of Contents for Regal Raptor NAC12
- Page 1 CONTENTS CHAPTER ONE Common instruction ----------------------------------------------------------------------------------- Main specification ( NAC12 ) Failure Diagnose: ● ● Operation notice items Eninge unusal after starting few minutes ● Torque standard value No power, no speed under high speed status ● Chasis Idle speed running, bad in low speed ●...
- Page 2 CHAPTER FIVE Cooling system----------------------------------------------------------------------------------------- Maintain notice ● Failure diagnose ● water temperatur rises too high water temperature no up or difficulty in rising leakage Maintain standard ● Radiator ● Thermostat ● CHAPTER SIX Front wheel, front suspension device, steering device --------------------------------------------- Maintain notice ●...
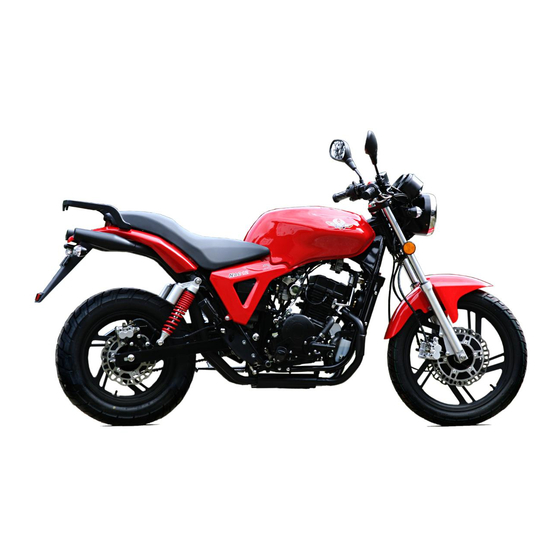
- Page 3 Common instruction Serial locations Engine number chasis number Main specification ( NAC12 ) Model name NAC12 min. wheel radius length (mm) 2180 5130mm cooling water width(mm) height(mm) 1090 start electric wheel base 1510 engine type 4 stroke cylinder style Engine type...
- Page 4 item standard limit front, rear wheel wheel rim jump radial 2.mm horizontal 2.0mm 0.2mm wheel axle bent tire air pressure front wheel 0.225PMa 0.225MPa rear wheel size front wheel 90/90-8 130/90-15 rear wheel brake DOT3 or DOT4 brake ignition loop 0.36-0.4Ω...
- Page 5 the wires. please check the ends is bent, broken before connecting the plug. the ends are over long or fallen off. The connection plug must be connected tightly. please check if the lock up is totally fixed because connection plug is with lock up. please check if the wires are fallen off.
- Page 6 Chasis item number screw thread diameter(mm) torque(N.m) Remark handle mounting bolt steering shank mounting nut 25.4 roundness top washer 25.4 front axle nut rear axle nut disc brake bolt torque shank bolt torque shank nut(side fork legs) exhaust pipe clip hoop bolt brake tube bolt rear brake arm bolt front transmission top bolt...
- Page 7 Engine parts to use name remark cylinder,piston&crankshaft running and slipage GP2( separator oil supplier) running and slipage inside the crankcase Chasis part Please suppply the grease on the following parts You could use the normal butter on normal parts Please supply the lubricate or lubrication grease on the following unpointed parts in order to raise its service head stearing bearing transmission sprocket(chainsprocket)
- Page 8 anode connection cathode connection voltage regulation rectifierrectifier head aeration tube ignition hoop fuel tank switch Failure Diagnose Here we clarify the close judgement on failure diagnose with the engine . Please refer to the every instruction per the un mentioned items. unable to start or difficulty in starting ●...
- Page 9 eninge unusal after starting few minutes ● no gasoline in fuel tank ● block in fuel tube loose screw check if gasoline in the ● floater valve block carburator no gasoline fuel tank cap hole block ● fuel filter block has gasoline remove the spark plug pollution or dyed...
- Page 10 check ignition time not correct ●CDI set no good ● no good direct current correct generator adjust carburator air bolt bad adjustment ● over strong mix air (loose bolt) good after adjustment ● low mix air(tighten bolt) 2nd air in absorb in ●...
- Page 11 no spark ●spark plug no good replace new spark plug and check over strong spark weak spark, or no spark check if gap between spark plug and has gap ● spark plug cap loose high voltage loop no gap Check connection status by removing ●...
- Page 12 NAC12 Inspection & Adjustment Methods of inspection & adjustment Notice: 1. included detecting in high speed in inspections 2. “ ●”marks the executed time by requested, “○”marks the proposed time by manufactory 3.“☆”marks parts needs to be replaced in periodic time, the time points to motorcycles in common running...
- Page 13 inspection/adjustment time (inspection/adjustment/ item ) since new remark (Unit:KPa) ● ● ● air pressure of F-Wheel & R-wheel ● ● ● chap/damage of wheel remaining slot deep: F-W 0.8mm R-W ● ● ● tire slot deep & unexpected wheel damage 0.8mm ●...
- Page 14 inspection/adjustment time since new (inspection/adjustment/ item ) remark ● ● fuel leak ● link rod of carburetor status ● throttle & air valve status fuel device ● fuel filter block status ● fuel capacity ☆ every 4 years replacing fuel soft tube ●...
- Page 15 Steering Device Steering fork Uplift the front wheel, check the fork fexible or deflexion by turning it up down and left-right sides If deflexion up down side, check the bearing of the steering axle, replace it when problem If deflexion left right side, check the handle bar and the fork to avoid by twisted by the cable, wires. bearing of steering axle Braking device Braking pedal...
- Page 16 Brake disc, brake plate wear of the disc brake Check the abrasion of the disc brake and brake plate Right replace it when over limit limit slot of abrasion Attention Should replace the brake plate in set. Check the slippage wear or damaged Replace the brake liquid Should replace the brake liquid once per year limit slot of abrasion...
- Page 17 Gearing Clutch Distance of the clutch handle Should check the distance of the end clutch handle 10-20mm Distance: 10-20mm Main methods-loosen the locknut of the controller Adjust nut location plank, adjust it by turning the nut. Locknut Location plank Adjust slightly close to the clutch handle. pls refer to the right drawing.
- Page 18 How to replace the oil Should replace it until the engineis warm up. release the oil by loosening the oil-exit bolt please fill the recommened oil from the sprue tighten the bolt by using the 3.0-4.0kg.m torque oild capacity 1.9L Suggest to replace once every two years oil-exit bolt Sprocket wheel and chain...
- Page 19 Fuel device Status of the control fuel throttle cable Check its sensitive of the fuel throttle cable Turn back the grip around 2-6mm space 2-6mm Adjuster nut Adjust the distance on the carburator Tighten nut take off the cover of the carburator, adjust the nut to control the distance Adjus the distance on the control cable Loosend the fixture nut, adjust it by the adjuster...
- Page 20 Engine knock down, installation Engine knock down, installation Knock down the parts according the following ⑴⑵(3)……steps Installation please make the orders conversed。 ⑶2nd air supplement pipe(left & right) ⑹ accelerator and clutch ⑷ thermostat ⑵spark plug cable(left & right) wires ⑽...
- Page 21 Engine knock down, installation Cylinder head, cylinder, piston, valve system Maintain manual checklist request List Check item DD244 DD247 DD244 DD247 Cylinder inner diameter 44~44.01mm 44.10mm Piston outer diameter Piston pin outer diameter 12.95-13.00 Piston hole outer diameter Gap of piston ring side Gap of piston ring Thickness of piston ring 1 Thickness of piston ring 2...
- Page 22 — Engine knock down, installation carburator Loosen the clip bolt on carburetor, the carburetor can be taken off. When installation on carburetor, please make the intake towards the manifold, t hen tighten the clip bolt. Clip hook E1-1 Idle a just bolt 1.Carbu tor, assy.
- Page 23 Engine knock down, installation Magneto knock down and installation remove the left crankcase cover, take off the crank bolt, remove the flywheel( do not knock the flywheel while removing, when install the flywheel, follow the slot and the crankcase end). Please refer to drawing E2. Left crankcase cover Crankcase bolt Note:...
- Page 24 Engine knock down, installation 3、Rocker base ake off the two impact bolt on cylinder head cover, remove The cylinder head cover. Cylinder head cover impact bolt emove the tensioner bolt, take down the tension tensioner emove the 8 nuts, take off the rocker base Torque of the 7 nut is 18~22N·m Gap between valve : (cold) in va lve 0.05~0.07mm;...
- Page 25 Engine knock down, installation ote: When install the sprocket wheel and camshaft; piston is located at the end of compression stroke , please refer to drawing E10 at right side, the reticle at positive time of sprocket wheel is flat aligned with the cam platform of cylinder head.
- Page 26 Engine knock down and installation 6、cylinder body Cylinder head can is removed by removed the cylinder head, take the oriented plank out. Oriented pin E14-1 piston oriented pin and O ring nderneath Tensi onor gasket emove the piston pi ring(E15) by pincer, push out the Pisont pin, Remove the piston out.
- Page 27 Engine installation and disassemble Oil pump driven gears Oil pump Remove the hexagon nut, primary transmission gears, remove the clutch pusher tray, remove the clutch by special tool (E19-1, E 20). Before installation, check the scar and color of clutch friction. Replace it when necessary.
- Page 28 Engine installation and disassemble 9、shift gears installation and dissamble emove the gear supporting roller, gear cam in turn, take out ear shank, loose the mounting bolt, remove the right rankcase (drawing E21 , E22) Note: turning spring of gear supporting roller should be right place ;...
- Page 29 En gine lubrication system 1、Engine lubrication system chart Camshaft camshaft bearing rocker side shaft rolling bearing Side shaft set Mainshaft rolling bearing Mainshaft Oil pump Crank Crank Oil filter screen crankcase — 27 —...
- Page 30 Engine cooling system 12、engine cooling system chart Assistant water box Radiator cap (to put water) Radiator — 28 —...
- Page 31 Engine cooling system water pump breakdown chart: 1 Water pump comp 2. Water pump hull 3. Water pump cover 4. Water pump shaft 5. Fan . Retaining ring 8 7. O-ringφ36x2 8. Bearing 6200 9. Water seal A 10. Water seal B 11. il seal 21x10x5 12.
- Page 32 ENGINGE MAINTAIN Oil filter how to change Remove the right crankcase cover, loose The 3 oil pump bolt, remove the whole oil pump, Open the oil pump rubber , clean the oil filter OIL PUMP SET RIGHT CRANKCASE COVER OIL FILTER BOLT M5×20Q-ZnD —...
- Page 33 Electric device Free maintain of battery , no need to check its liquid capablity,and no need making up distilled wate, Yusa battery need to be inspected and make up liquid Take off the battery from the motorcycle and can be recharged even the liquid lid is closed. No need urgent charge for battery unless emergency happened please follow the requested time and electric current in the instruction when charging battery No need to adjust the ignition time because of the CDI fire setting.
- Page 34 remove parts in turn ·strap ·fixture bolt ·positive/negative wire ·battery Note Please disconnect the negative wire before the positive wire When installation, do it coversely positive wire strap battery negative wire charge connection method : positive side of charger connects the positive of battery negative side connects the negative of battery.
- Page 35 bobber location(upper) Check on ignition switch remove the plat handle bar and the brackets for odometer Remove plug of ignition switch , accroding to the drawing of electric layout to test fixture bolt on ignition switch if it is got through Replacement Replace it when the ignition switch does not work remove the brackets and remove the kickstand and inset parts...
- Page 36 Rear brake light onoff remove the right side cover, remove the plug of the braking onoff Try the rear brake peg, check the connection between two leads step on the rear brake peg: connect release the rear brake peg: not connect plug of rear brake onoff leads Front brake light onoff remove the connection loop of brake onoff...
-
Page 37: Cooling System
Cooling system ●failure diagnose ● water temperatur rises too high leakage (1)check if calculater or heat sensor problem (1) mechanism seal problem (2)check if radiator cover problem (2) the aging of O ring , seal not good (3)check if thermostat problem (3)the aging of soft dome water pipe damaged. - Page 38 ● Radiator ● remove of the radiator Remove the water release bolt, please eject to the clean content. Loosen the clip hoop after the coolant is ejected remove the water pipe water release bolt clip hoop water pipe remove the fan motor and inductor connection sensor plug fan motor plug...
- Page 39 Remove the upper fixture bolt and lower fixture bolt remove the radiator fixture bolt attention do not damage the cooling fin ●radiator breakdown remove the 2 bolts, take out the fan completely. fixture bolt please screw out the sensor, loosen the fan switch sensor nut fan switch sensor ●...
- Page 40 ●Check on the radiator and soft pipes, etc. check the core of radiator blocked up or not, the cooling fin is bent or not please adjust it by a screwdriver attention if the block is 20% than the total cooling area, please repair the radiator or replace it immediately.
- Page 41 ● installation of thermostat please install it conversed procedures as knock down inject the coolant( refer to chapter 3) ● heat sensor knock down take off the heat sensor from the thermostat hull heat sensor thermostat hull ● check on the heat sensor please put the heat sensor to a testing case, heat it to 125℃, then measure the heat sensor resistance at that time the heat sensor is connected.
- Page 42 Thermostat 1、 open the thermostat cover 2、take out the thermostat(see arrow) — 40 —...
- Page 43 3、 Pressure seal ( remove this rubber seal ring, put it outside of the Φ30*Φ20*1 flat washer 4、 Please put the seal washer in the hull of thermostat, mount the thermostat cover. — 41 —...
- Page 44 Front wheel, front suspension device, steering device Maintain information Notes: 1、Do not press over-load on the wheels and put anything on the wheel. Pay attention not to damage the wheel during maintaining. 2、 Pay attention not to damage the tire and rims due to no inner tube inside 3、...
- Page 45 left handle bar right handlebar loosen the mounting bolt , remove the handle bar Installation mounting bolts install the handle bar on the fork (make sure that the loop is in the slot of both fork) mounting bolt fixed is aligned with faceplate Note check if the faceplate is well connected with handlebar, make sure the tightness of the loop...
- Page 46 air valve switch on the handlebar clean the dirt or oil grease on the left grip and connect side of handlebar left grip air valve pole install the air valve operatin cable on the air valve pole align the bulgy of left bar switch with the hold on handlebar tighten the handle switch by the 2 small bolts Note First tighten the frontier bolt, then the back one...
- Page 47 Installation attention do not touch the brake disc Install the wheel axle from left side align the odometer gears with the right side of the left fork ends put the bushing on the right side, put axle on the rim tighten the wheel axle , tighten the mounting bolt from left side torque: 15-20N.m front wheel axle...
- Page 48 Installation Reversed procedure as the remove. Tighten the face plate bolt Torque 9-13N.m tighten the steering bolt torque:45-55N.m steering post remove remove the front suspention (see above steps) remove the nut and washer from the steering post loose the bolt of face plate, take the face plate off steering post bolt washer loose the steering axle bearing nut...
- Page 49 Rear wheel. Rear fork. Rear shock absorber ●failure diagnose ●rear wheel swing rear shock absorber too hard ⑴ rim out of shape over oil fluid in the cushion ⑵ loose of rear wheel bearing ⑶ poor tire noise of rear shock absorber ⑷...
- Page 50 check on the bent of wheel bearing wheel bearing bent data limit:0.2mm above, please replace asap. check damage of the rear wheel bearing turning the rear wheel, if found the bearing boose or noise, pleae replace the new one asap. axle direction check the jump of rear wheel radial...
- Page 51 Adjust the adjuster nut to make sure the proper chain length (refer to the check and adjustment chapter) adjuster nut adjuster Install the wheel axle nut Mount the rear disc brake on the mounting plate by bolt rear wheel axle nut torque:80-100N.m bolt torque:18-25N.m rear wheel axle nut rear brake pump mounting bolt...
- Page 52 ●rear fork installation rear fork axle oil seals install the rear fork on the chasis , tighten the nuts according the above steps in drawing tighten nut, regulated torque: 80-100N.m Install the rear fork and rear shock absorber ( see above steps) —...
-
Page 53: Braking System
Braking system 1、 Forbidden to mix dust or water when supplying the brake liquid 2、 Do not use the different brand brake liquid to avoid the chemical change. 3、 Please use the DOT3 brake liquid 4、No use of the extracted brake liquid 5. - Page 54 extraction valve remove the cover of extraction valve, lay the pump flatly install the clear plastic pipe into the extraction valve loose the brake pump extraction valve, handle the brake bar repeatly handling until all liquid has been out from the extraction valve Note do not make it dirty on the disc brake and brake plate replace the brake plate and clean the dirt on the disc brake if neccessory...
- Page 55 brake oil pump remove Note 1、 Do not damage the paint,plastic, rubber by brake liquid 2、 Wrap the connection point of soft tube by cotton to avoid the brake liquid out. brake soft tube bolt bolt 1、 Extract the brake liquid 2、...
Need help?
Do you have a question about the NAC12 and is the answer not in the manual?
Questions and answers