Table of Contents

Subscribe to Our Youtube Channel
Related Manuals for Abus PPDF16000


Summary of Contents for Abus PPDF16000
- Page 1 PPDF16000/PPDF18000 PPDF14520/PPDF14520W You can find important information and FAQs about this and other products online at: www.abus.com Version 1.1 English translation of the original German instruction manual. Retain for future reference.
- Page 2 ABUS Security-Center GmbH is not liable or responsible for direct or indirect damage resulting from the equipment, performance and use of this product. No guarantee is made for the contents of this...
-
Page 3: Table Of Contents
Description of hardware ........................5 2.1. PPDF16000 – Monitor ......................5 2.2. PPDF18000 – Recorder ......................6 2.3. PPDF16000 – Camera/PPDF18000 – Camera/PPDF14520/PPDF14520W ......7 Description of hardware functions ....................8 3.1. LED behaviour ......................... 8 3.2. Audio transmission ........................8 3.3. -
Page 4: Scope Of Delivery
English 1. Scope of delivery PPDF16000 PPDF14520 7" monitor Wireless outdoor camera Power supply unit, 5 V DC/3 A (EU, UK) Power supply unit, 5 V DC/1.5 A (EU, UK) Power supply unit, 5 V DC/1.5 A (EU, UK) Antenna ... -
Page 5: Description Of Hardware
English 2. Description of hardware 2.1. PPDF16000 – Monitor Link LED Power LED On/Off switch Antenna connection (RP-SMA) USB interface Loudspeaker Stand LAN interface Reset button MicroSD card slot (max. 128 GB) Power supply (5 V DC/3 A) -
Page 6: Ppdf18000 - Recorder
English 2.2. PPDF18000 – Recorder LAN interface HDMI interface Antenna connection (RP-SMA) On/Off switch MicroSD card slot (max. 128 GB) Reset button USB interfaces LAN interface Power supply (12 V DC/2 A) -
Page 7: Ppdf16000 - Camera/Ppdf18000 - Camera/Ppdf14520/Ppdf14520W
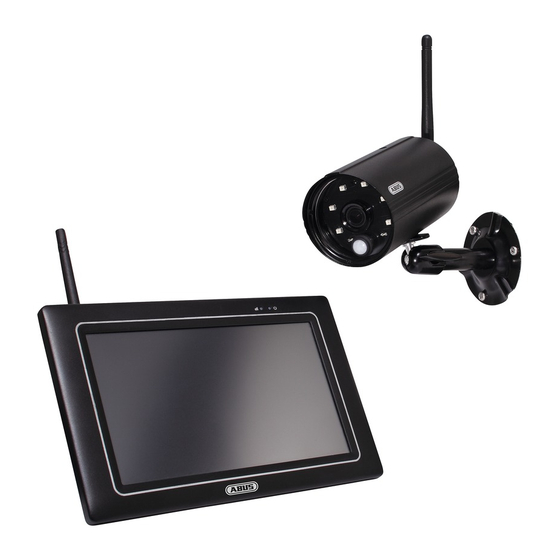
English 2.3. PPDF16000 – Camera/PPDF18000 – Camera/PPDF14520/PPDF14520W IR LEDs Lens Link LED PIR sensor Mount Power LED Stand Antenna connection (RP-SMA) Pairing button Power supply (5 V DC/1.5 A) -
Page 8: Description Of Hardware Functions
PPDF18000 – Recorder Status Description Lights blue Recorder connected to power Power LED Recorder has no power supply PPDF16000 – Camera/PPDF18000 – Camera/PPDF14520/PPDF14520W Status Description Lights up Camera connected to power Power LED Camera has no power supply Camera connected to monitor... -
Page 9: Mounting/Installation
The camera must be disconnected from the power supply during installation. 4.1. PPDF16000 – Monitor Unfold the stand and lock it in place by pushing it upwards. If you want to access the device externally, connect your router to the monitor with a network cable. Then connect the 5 V DC/3 A power supply unit provided. -
Page 10: Ppdf16000 - Camera/Ppdf18000 - Camera/Ppdf14520/Ppdf14520W
English 4.3. PPDF16000 – Camera/PPDF18000 – Camera/PPDF14520/PPDF14520W Position the mount where you intend to install the camera. Mark up and drill the required holes. Next, use the screw anchors and screws provided to fasten the mount in place. Next, install the camera on the mount by screwing the camera clockwise on to the thread. As soon as the camera is fully screwed into position, lock the camera further into place by tightening the wing nuts from underneath. -
Page 11: Pair Camera
English 4.4. Pair camera The camera included in the PPDF16000 set or PPDF18000 set is already paired with the monitor and does not need to be paired again. If you would like to pair a second camera, proceed as follows: 1. -
Page 12: Local User Interface
English 7. Local user interface 7.1. Operation PPDF16000 The monitor can be operated using touch input. General operation Please note that when using the touch display, it can take the monitor up to approx. half a second to process inputs. -
Page 13: Live Indicators
Camera channel 4 Network display Network connected, UPnP active on the router Network connected, UPnP not active on the router Not connected to a network Battery display (only PPDF16000) Battery charged Battery 66% Battery 33% Battery empty Battery is charged... - Page 14 If the connection does not improve, we recommend our TVAC17520 signal amplification kit: https://www.abus.com/product/TVAC17520 You can hide this display from the system settings Timestamp display Display of the current system time.
-
Page 15: Live Menu List
English 7.4. Live menu list Expand menu list Collapse menu list Main menu Quad display Smart quad display Enable manual recording of one channel Disable recording of one channel Enable manual recording for all channels Disable recording of all channels Mute volume Low volume Medium volume... -
Page 16: Main Menu
English 7.5. Main menu Back Please note that you can leave individual menu items using the bottom right return button. Changes are saved automatically. Camera settings Pair camera Enable/disable camera Image resolution Image quality Recording settings ... -
Page 17: Camera Settings
English 7.6. Camera settings Select channel Select the desired camera channel Pair new camera After pressing the button again, a window with a countdown will appear. During the countdown, press the pairing button on the camera for five seconds. If the connection was successful, a new window will appear confirming the process. -
Page 18: Recording Settings
English 7.7. Recording settings Recording schedule Here you can select a schedule for a single camera or for all cameras. You can choose five different time periods for each schedule. Use the symbols to change the respective tiles. Select the first tile to set the recording type. Motion detection Recording starts if motion is detected during the defined time period. - Page 19 English Motion detection sensitivity Here you can select the motion detection sensitivity. Motion is detected by the PIR sensor. PIR and motion detection (low) Low-sensitivity motion detection via the PIR sensor and detection software. PIR and motion detection (medium) Medium-sensitivity motion detection via the PIR sensor and detection software.
-
Page 20: Event List
English 7.8. Event list Camera channel Select the desired camera channel. Only those recordings that correspond to the selection will be displayed. Display recordings from camera 1 Display recordings from camera 2 Display recordings from camera 3 Display recordings from camera 4 Display recordings from all cameras Day selection Select the day of the recording. - Page 21 English Arrow buttons Navigate the list using the up and down arrow keys. Select event Select the time period for the recordings. Then select an event. Click the camera symbol to play back the event. Recordings from camera 1 Recordings from camera 2 Recordings from camera 3 Recordings from camera 4 Recordings from all cameras...
-
Page 22: Playback
English 7.9. Playback While playing back a channel, the current live images from the other channels are shown to you at the same time. You can enter and exit full screen mode by clicking on playback. Playback menu list Expand menu list Collapse menu list End playback Pause playback... -
Page 23: System Settings
English 7.10. System settings Date and time Here you can select the date and time using the arrow buttons. Reset settings/language Here you can select the system language. The system will then revert to its factory settings. To easily perform a factory reset, select the same language and exit the menu. -
Page 24: Storage Settings
English Energy saving mode Here you can configure the settings for energy-saving mode. Energy saving mode after five minutes Energy saving mode after ten minutes Screen always on The screen switches off in energy-saving mode. It is switched back on either by manual touch input or when motion is detected. - Page 25 English Format storage medium Select the storage medium that you want to format. Format external USB hard drive Format SD card During formatting, all existing data on the storage medium is deleted. Network settings To connect to the internet and access the recorder via the app, connect the recorder to your router using the network cable.
-
Page 26: Abus Onelook - External Operation
Make sure to check whether your router supports the UPnP function and enable it if it does. 8.2. Download app Download the “ABUS OneLook” app from the Google Play Store or Apple App Store before accessing for the first time. 8.3. -
Page 27: Device List
English 8.4. Device list Select the “+” symbol to add a device. Edit device Select the “i” symbol to edit an existing device. Delete device Swipe the device to the left to show the delete button. Press the delete button to delete the device. -
Page 28: Live View
English 8.6. Live view Settings Opens the settings. Please note that when accessing the settings via the app, the device will not locally display live images until the settings have been exited via the app. Push notification Opens the push notification menu. Event list Opens the event list. -
Page 29: Settings
English 8.7. Settings You have the same options in the settings on the app as in the settings on the device itself. Please refer to the settings in the description in point 7. Pair camera Enable/disable camera Camera settings ... -
Page 30: Push Notification Settings
English 8.8. Push notification settings Register smartphone/tablet Open the push notification menu in live view mode. Enable push notifications and enter a name for your smartphone/tablet. A name must be entered to register the smartphone/tablet. Use a separate name for each smartphone/tablet. Press “Done”...
Need help?
Do you have a question about the PPDF16000 and is the answer not in the manual?
Questions and answers