Advertisement
Table of Contents
- 1 Important Safety Precautions and Warnings
- 2 Package Contents
- 3 Installation
- 4 Step 3. Install the Mounting Brackets
- 5 Step 6. Connect Power Wiring
- 6 Step 7. Connect Control Wiring
- 7 Open Limit Adjustments
- 8 Closed Limit Adjustments
- 9 Cleaning the Screen
- 10 Troubleshooting
- 11 Specifications
- 12 Year Limited Warranty
- 13 Contact Technical Support
- Download this manual
Advertisement
Table of Contents

Related Manuals for Dragonfly DFRM-TAB-100-MW


Summary of Contents for Dragonfly DFRM-TAB-100-MW
- Page 1 I N STALL AT ION MA N UA L Recessed In-Ceiling Motorized Projection Screen...
-
Page 2: Important Safety Precautions And Warnings
Before unpacking the projection screen, read the entire manual to become familiar with the steps involved for installation and operation. Dragonfly is not responsible for any damage or injury that occurs from incorrect installation or operation. -
Page 3: Package Contents
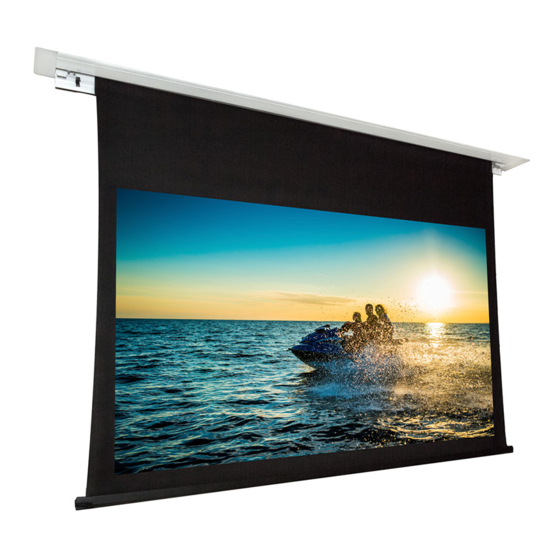
DFRM Installation Manual 1. Introduction Thank you for purchasing a Dragonfly™ Motorized Projection Screen. Designed to be easy to operate, reliable, and hidden away when not in use, this screen is guaranteed to provide years of maintenance-free operation and enjoyment. -
Page 4: Installation
7.25" NTT-130" 129.30" 7.25" Height Clearance (C) Dimensions measured from bottom of ceiling surface to top of screen housing including height of mounting bracket and hardware. Z Bracket Down/Flat Bracket Z Bracket Up 7.0" 7.5" Pg. 4 © 2016 Dragonfly... -
Page 5: Step 3. Install The Mounting Brackets
DFRM Installation Manual Step 3. Install the Mounting Brackets The mounting brackets are secured using hardware that slots into the rails on top of the housing. Slide the bolts into the rail, position the brackets over the bolts, and tighten the nuts onto the bolts. Z Bracket Installation Point the brackets DOWN for threaded rod/suspended mounting or UP for direct ceiling mounting. - Page 6 Use 2 pieces of threaded rod per side. Threaded Rod Suspension with Z Brackets Ceiling suspension hardware is not included for the flat brackets. 9.3” Pg. 6 © 2016 Dragonfly...
- Page 7 DFRM Installation Manual Step 5. Hang the Screen Housing Hang the screen from the threaded rod one side at a time. Have assistants hold the screen in position on the rods, then thread a washer and a nut onto the rod. Use the nuts at the bottom of each rod to adjust the final height.
-
Page 8: Step 6. Connect Power Wiring
1. Position and mount the attached power junction box. Do not kink the flexible conduit during installation. 2. Open the junction box and connect the branch wiring circuit conductors using approved wire nuts or connectors. Color Purpose Black To 120V AC Line White Neutral Green Ground Pg. 8 © 2016 Dragonfly... -
Page 9: Step 7. Connect Control Wiring
6P6C RJ11/12 connector. Contact Closure/Relay Control The Dragonfly motorized screen may also be controlled via contact closure or relay control. Momentarily short the COMMON wire to the UP, DOWN, or STOP wire for the desired operation. -
Page 10: Open Limit Adjustments
Allowing the screen to travel too far into the housing will cause the bottom bar to travel too far into the housing. If this occurs, remove the screen from the housing and unwrap the bottom bar enough to hang from the opening again. Pg. 10 © 2016 Dragonfly... - Page 11 DFRM Installation Manual Step 9. Install the Trim Pieces Install the end caps after the screen has been installed and leveled. Step 10. Install the Fixed Panel 1. Begin with the screen completely retracted so that the hinged door is closed. 2.
-
Page 12: Cleaning The Screen
To clean the screen material, use warm soapy water and a soft cotton cloth only. Never use chemicals or abrasives to avoid damaging the surface of the material, which affect the viewing quality of your screen. Pg. 12 © 2016 Dragonfly... -
Page 13: Troubleshooting
DFRM Installation Manual 6. Troubleshooting Dragonfly screens are designed to function trouble-free for years of enjoyment. Most problems occur due to simple issues. If you have trouble, check the installation while reviewing all instructions. Some of the most common issues and solutions are also listed below. - Page 14 87.17" 95.88" 104.57" 113.31" 87.17" 95.87" 104.57" 113.31" 3.94" 3.94" 3.94" 3.94" 1.97" 1.97" 1.97" 1.97" 102.52" 111.23" 119.92" 128.66" 93.86" 102.56" 111.26" 120.00" *TAB model shown; dimension pattern is the same for both models. Pg. 14 © 2016 Dragonfly...
-
Page 15: Specifications
OFF = 5 minutes 10. 2 Year Limited Warranty Dragonfly Motorized and Tab-Tension Motorized Projection Screens have a 2-Year Limited Warranty. This warranty includes parts and labor repairs on all components found to be defective in material or workmanship under normal conditions of use. This warranty shall not apply to products which have been abused, modified or disassembled. - Page 16 © 2016 Dragonfly 170227-1006...
Need help?
Do you have a question about the DFRM-TAB-100-MW and is the answer not in the manual?
Questions and answers