
Subscribe to Our Youtube Channel
Related Manuals for Alfa Laval SBV


Summary of Contents for Alfa Laval SBV
- Page 1 Instruction Manual SBV Sanitary Ball Valve TD 451-013 ESE01782-EN7 2016-10 Original manual www.sks-online.com www.sks-webshop.com...
- Page 2 www.sks-online.com www.sks-webshop.com...
-
Page 3: Table Of Contents
................. 6. Technical data ..................6.1. Technical data ..................7. Parts list/service kits ................. 7.1. SBV Sanitary Ball Valve ................7.2. SBV Sanitary Ball Valve for Inch tube ............7.3. SBV Sanitary Ball Valve for DIN tube ............www.sks-online.com www.sks-webshop.com... -
Page 4: Ec Declaration Of Conformity
1 EC Declaration of conformity Revision of Declaration of Conformity 2013-12-03 The Designated Company Alfa Laval Kolding A/S Company Name Albuen 31, DK-6000 Kolding, Denmark Address +45 79 32 22 00 Phone No. hereby declare that Valve Designation Type is in conformity with the following directive with amendments:... -
Page 5: Safety
- Never stick your fingers through the valve ports if the valve is supplied with compressed air. - Always use Alfa Laval genuine spare parts. The warranty of Alfa Laval products is dependent on the use of Alfa Laval genuine spare parts. -
Page 6: Installation
Check the delivery: CAUTION 1. Complete valve. 2. Delivery note. Alfa Laval cannot be held responsible for incorrect unpacking. Step 2 1. Clean the valve for possible packing materials. 2. Inspect the valve for visible transport damage. 3. Avoid damaging air and pipe connections. -
Page 7: Welding
3 Installation Study the instructions carefully. 3.3 Welding Step 1 1. Dismantle the flanges in accordance with the instructions in section 4 Operation. Remove seal rings and O-rings. 2, Weld the flanges into the pipe lines. Keep distance B between flanges. 3. -
Page 8: Indication And Control Equipment (Optional Extras)
3 Installation Study the instructions carefully. 3.4 Indication and control equipment (optional extras) CAUTION! The indication and control equipment must be electrically installed by authorized personnel only. - Inductive proximity switches: (See the instructions on the unit). - ThinkTop®: (See the separate instruction manual). Manual valves: Manual valves with optional handle for inductive proximity switches are designed for the mounting of one or two M12 feedback sensors for open... -
Page 9: Recycling Information
- At end of use, the equipment shall be recycled according to relevant, local regulations. Beside the equipment itself, any hazardous residues from the process liquid must be considered and death with in a proper manner. When in doubt, or in the absence of local regulations, please contact the local Alfa Laval sales company. www.sks-online.com... -
Page 10: Operation
Step 1 Always read the technical data thoroughly. (see chapter 6 Technical data) CAUTION Alfa Laval cannot be held responsible for incorrect operation. Step 2 Never touch the valve or the pipelines when processing hot liquids or when sterilising. Burning... -
Page 11: Fault Finding
4 Operation Pay attention to possible break-down. Study the instructions carefully. NC = Normally closed. NO = Normally open. 4.2 Fault finding NOTE Study the maintenance instructions carefully before replacing worn parts - see section 5.1 General maintenance Repair Problem Cause/result Internal leakage Worn valve seat... -
Page 12: Recommended Cleaning
4 Operation The valve is designed for cleaning in place (CIP). CIP = Cleaning In Place. Study the instructions carefully and pay special attention to the warnings! NaOH = Caustic Soda. = Nitric acid. 4.3 Recommended cleaning Step 1 Caustic danger! Always handle lye and acid with great care. - Page 13 4 Operation The valve is designed for cleaning in place (CIP). CIP = Cleaning In Place. Study the instructions carefully and pay special attention to the warnings! NaOH = Caustic Soda. = Nitric acid. To secure optimum cleaning of the cavity between valve seats and ball during the cleaning cycle, please follow the recommendations below In-line cleaning: Manual valves:...
-
Page 14: Maintenance
5 Maintenance Maintain the valve and the actuator carefully. Study the instructions carefully and pay special attention to the warnings! Always keep service kits in stock. Always use Alfa Laval genuine spare parts. 5.1 General maintenance Step 1 NOTE All scrap must be stored/discharged in accordance with current rules/directives. -
Page 15: Replacement Of Product Wetted Seals
5 Maintenance Study the instructions carefully. The items refer to the parts list and service kits section - see section 7 Parts list/service kits. 5.2 Replacement of product wetted seals Step 1 1. Study the instructions carefully. The items refer to the parts list and service kits section. Service kit: 2 pcs. valve seat (5), 2 pcs. -
Page 16: Replacement Of All Seals
5 Maintenance Study the instructions carefully. The items refer to the parts list and service kits section. 5.3 Replacement of all seals Disassembly of valve: Step 1 Release all compressed air (actuated valves only). Step 2 1. Loosen and remove flange screws (8) and remove valve from pipe line (be careful not to drop the ball if the valve is in closed position.) 2. - Page 17 5 Maintenance Study the instructions carefully. The items refer to the parts list and service kits section. Step 5 Reassembly of valve: Place the new sliding ring (9) on stem (4) and mount stem unit in valve body (1) Step 6 Insert new gasket unit (10), (11) and (12) in valve body.
- Page 18 5 Maintenance Study the instructions carefully. The items refer to the parts list and service kits section. Step 7a Actuated valves 1. Mount bonnet (19) on valve body (1) with screws (16) 2. Align bonnet (19) with the two pins (15). Step 7b Manual valves 1.
- Page 19 5 Maintenance Study the instructions carefully. The items refer to the parts list and service kits section. Step 9 Actuated valves: Actuated valves 1. Mount coupling (17) and actuator (20) on bonnet (19) with screws (18) 2. Align position indicators on actuator and stem. Manual valves 1.
-
Page 20: Technical Data
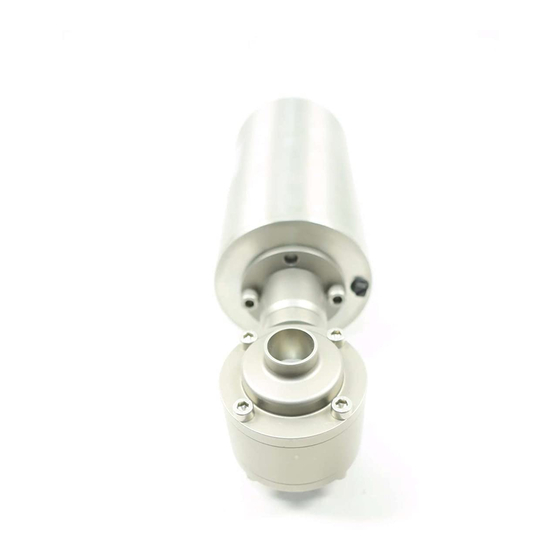
A special selected PTFE material grade secures long lifetime of the product wetted seals. Reliable valve stem sealing is achieved by the use of spring loaded and self adjusting seal rings. SBV is operated by a pneumatic actuator or manually operated by means of a handle with lockable positions. The valve is assembled with screws for easy inspection and maintenance. -
Page 21: Parts List/Service Kits
7 Parts list/service kits Always use Alfa Laval genuine spare parts. The warranty of Alfa Laval products is dependent on the use of Alfa Laval genuine spare parts. 7.1 SBV Sanitary Ball Valve www.sks-online.com www.sks-webshop.com... -
Page 22: Sbv Sanitary Ball Valve For Inch Tube
7 Parts list/service kits Always use Alfa Laval genuine spare parts. The warranty of Alfa Laval products is dependent on the use of Alfa Laval genuine spare parts. 7.2 SBV Sanitary Ball Valve for Inch tube TD451-036_3 www.sks-online.com www.sks-webshop.com... - Page 23 7 Parts list/service kits Always use Alfa Laval genuine spare parts. The warranty of Alfa Laval products is dependent on the use of Alfa Laval genuine spare parts. Parts list Pos. Denomination Valve body Flange Ball Stem ♦ Valve seat ...
- Page 24 7 Parts list/service kits Always use Alfa Laval genuine spare parts. The warranty of Alfa Laval products is dependent on the use of Alfa Laval genuine spare parts. Service kits Denomination DN25 DN38 DN51 DN63.5 DN76.1 DN101.6 Service kits for product wetted parts ...
- Page 25 www.sks-online.com www.sks-webshop.com...
-
Page 26: Sbv Sanitary Ball Valve For Din Tube
7 Parts list/service kits Always use Alfa Laval genuine spare parts. The warranty of Alfa Laval products is dependent on the use of Alfa Laval genuine spare parts. 7.3 SBV Sanitary Ball Valve for DIN tube TD451-036_3 www.sks-online.com www.sks-webshop.com... - Page 27 7 Parts list/service kits Always use Alfa Laval genuine spare parts. The warranty of Alfa Laval products is dependent on the use of Alfa Laval genuine spare parts. Parts list Pos. Denomination Valve body Flange Ball Stem ♦ Valve seat ...
- Page 28 7 Parts list/service kits Always use Alfa Laval genuine spare parts. The warranty of Alfa Laval products is dependent on the use of Alfa Laval genuine spare parts. Service kits Denomination DN25 DN40 DN50 DN65 DN80 DN100 Service kits for product wetted parts ...
- Page 29 www.sks-online.com www.sks-webshop.com...
- Page 30 © Alfa Laval Corporate AB This document and its contents is owned by Alfa Laval Corporate AB and protected by laws governing intellectual property and thereto related rights. It is the responsibility of the user of this document to comply with all applicable intellectual property laws. Without limiting any rights related to this document, no part of this document may be copied, reproduced or transmitted in any form or by any means (electronic, mechanical, photocopying, recording, or otherwise), or for any purpose, without the expressed permission of Alfa Laval Corporate AB.
Need help?
Do you have a question about the SBV and is the answer not in the manual?
Questions and answers